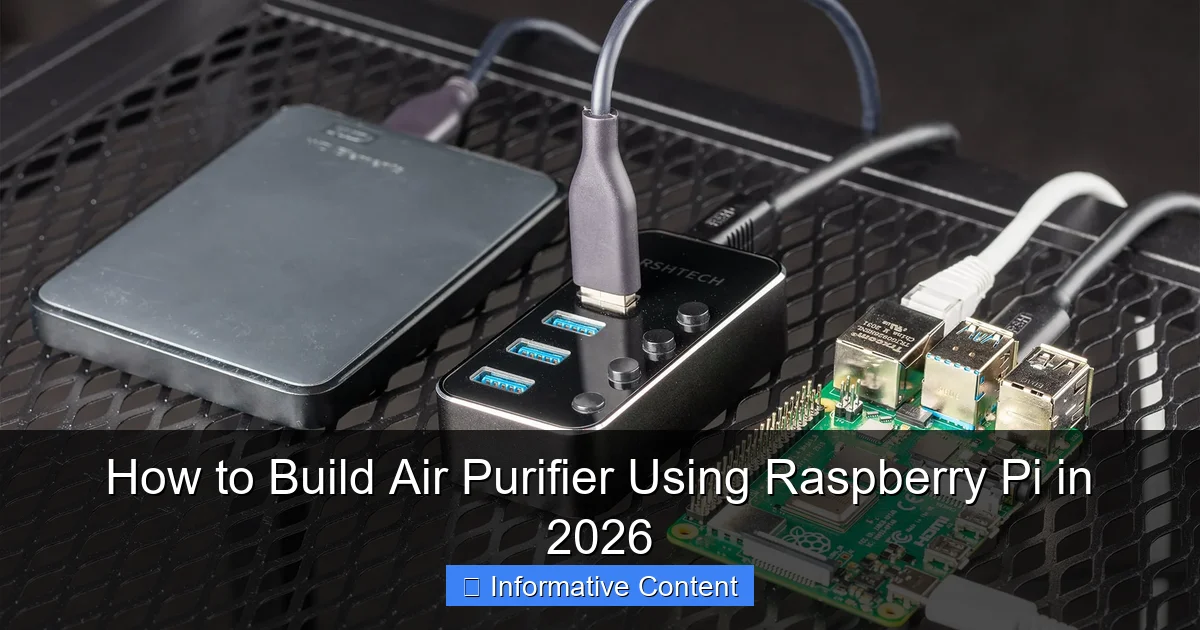
Featured image for how to build air purifier using raspberry pi
Image source: raspberrypi.com
Transform your Raspberry Pi into a smart air purifier in 2026 with this innovative DIY project that combines real-time air quality monitoring and automated filtration. Using sensors, a fan, and custom code, you can build a cost-effective, customizable purifier that alerts you to pollutants and purifies the air efficiently. Perfect for tech enthusiasts and eco-conscious makers, this guide walks you through every step—from hardware assembly to software setup—for a cleaner, smarter home.
Key Takeaways
- Choose a HEPA filter: Ensures effective removal of airborne particles for cleaner air.
- Use Raspberry Pi 5: Offers optimal processing power and GPIO connectivity for sensors.
- Integrate air quality sensors: Monitor PM2.5, VOCs, and CO2 in real-time via I2C interface.
- Automate fan control: Program speed adjustments based on live air quality data.
- Install open-source software: Leverage Python scripts and Home Assistant for seamless operation.
- Enclose components securely: Use 3D-printed or acrylic casing for safety and durability.
📑 Table of Contents
How to Build Air Purifier Using Raspberry Pi in 2026
Imagine walking into your home after a long day, taking a deep breath, and actually feeling the difference in the air. No stuffiness, no lingering odors, and definitely no invisible particles tickling your throat. That’s the dream, right? But what if I told you that instead of dropping $200–$500 on a commercial air purifier, you could build your own smart, customizable, and highly effective air purifier using a Raspberry Pi—for a fraction of the cost?
It might sound like something out of a sci-fi movie, but in 2026, building an air purifier with a Raspberry Pi isn’t just possible—it’s practical, fun, and surprisingly accessible. Whether you’re a tech enthusiast, a DIY home improver, or just someone who cares about clean air, this project blends electronics, programming, and environmental awareness into one rewarding build. And the best part? You’re not just filtering air—you’re learning how it works, monitoring air quality in real time, and even automating responses based on pollution levels.
In this guide, I’ll walk you through every step of building your own Raspberry Pi-powered air purifier. From choosing the right components to writing the code that brings it all to life, we’ll cover it all. No prior experience? No problem. I’ll keep things simple, conversational, and packed with real-world tips I’ve learned from building my own version last year. By the end, you’ll have a fully functional, intelligent air purifier that not only cleans your air but also gives you insights into your indoor environment.
Why Build Your Own Air Purifier with Raspberry Pi?
Let’s be honest—commercial air purifiers are great. They’re quiet, efficient, and often come with sleek designs. But they’re also expensive, limited in customization, and usually don’t tell you what they’re cleaning or how well they’re doing it. That’s where the Raspberry Pi comes in. By building your own air purifier, you gain full control over the system, real-time data monitoring, and the ability to adapt it to your specific needs.

Visual guide about how to build air purifier using raspberry pi
Image source: projectsfactory.in
Cost-Effective and Customizable
One of the biggest advantages of a DIY Raspberry Pi air purifier is cost. A high-end commercial unit can run you upwards of $400, especially if you want smart features like app control or air quality tracking. In contrast, the total cost of building your own system typically ranges from $80 to $150, depending on the components you choose. That includes the Raspberry Pi, sensors, fan, filters, and housing.
But beyond saving money, you get unmatched customization. Want to add a display that shows PM2.5 levels? Done. Need it to turn on automatically when pollution spikes? Easy. Want to integrate it with your smart home system so it syncs with your lights or thermostat? Totally possible. With a Raspberry Pi, you’re not limited by what the manufacturer decided to include—you decide what your air purifier can do.
Real-Time Air Quality Monitoring
Most store-bought purifiers give you a simple “on” or “off” indicator, maybe a color-coded light for air quality. But what if you could see exactly how many particles are in the air right now? Or track trends over time? With a Raspberry Pi and the right sensors, you can.
For example, using a PMS5003 or SDS011 particulate matter sensor, your purifier can measure PM2.5 and PM10 levels—tiny particles linked to respiratory issues. The Pi can log this data, display it on a screen, or even send alerts to your phone when levels get too high. This kind of insight is invaluable, especially if you live in an area with wildfire smoke, high pollen counts, or urban pollution.
Learning and Sustainability Benefits
Building your own air purifier isn’t just about the end product—it’s also a fantastic learning experience. You’ll pick up skills in electronics, Python programming, sensor integration, and even basic mechanical design. It’s a hands-on way to understand how air filtration works, from fan mechanics to filter efficiency.
Plus, there’s an environmental angle. Instead of buying a new device every few years, you can upgrade individual components—swap out a sensor, improve the code, or add a better filter. This reduces e-waste and promotes a more sustainable approach to tech. And if something breaks? You’ll know how to fix it, instead of tossing the whole unit.
Essential Components for Your Raspberry Pi Air Purifier
Before we dive into the build, let’s talk about the parts you’ll need. Don’t worry—you don’t need to be an engineer to gather these. Most components are widely available online, and I’ll suggest specific models that work well together.
Raspberry Pi: The Brain of the Operation
The Raspberry Pi is the central controller of your air purifier. It reads sensor data, controls the fan speed, logs information, and can even host a web interface for remote monitoring. For this project, I recommend the Raspberry Pi 4 Model B (2GB or 4GB). It has enough processing power, built-in Wi-Fi, and multiple USB ports for connecting sensors and peripherals.
While older models like the Pi 3B+ will work, the Pi 4 offers better performance, especially if you plan to run a web server or process data in real time. Make sure to get a reliable power supply (at least 3A) and a microSD card (32GB or larger) with Raspberry Pi OS installed.
Air Quality Sensors: Detecting Pollutants
To monitor air quality, you’ll need at least one sensor. Here are the most common and effective options:
- PMS5003: Measures PM1.0, PM2.5, and PM10 particles. Great for detecting smoke, dust, and pollen. Connects via UART and is relatively easy to interface with the Pi.
- SDS011: A laser-based sensor that’s highly accurate for PM2.5 and PM10. Slightly bulkier and uses more power, but excellent for long-term monitoring.
- BME680: Measures temperature, humidity, pressure, and volatile organic compounds (VOCs). Useful for detecting odors and general air quality changes.
For most builds, I suggest starting with the PMS5003. It’s affordable (around $25), compact, and provides detailed particulate data. If you want broader sensing, pair it with the BME680 for a more complete picture.
Fan and Filter System: The Lungs of the Purifier
The fan pulls air through the filter, so choosing the right one is crucial. Look for a 12V DC brushless fan with a high airflow rating (measured in CFM—cubic feet per minute). A 120mm or 140mm case fan works well and is easy to mount. Brands like Noctua or Arctic offer quiet, efficient options.
For the filter, a HEPA filter is essential. True HEPA filters capture 99.97% of particles 0.3 microns in size, including dust, mold, bacteria, and smoke. You can buy pre-cut filters or cut your own from a larger sheet. Pair it with an activated carbon filter if you want to reduce odors and VOCs.
Power Supply and Control Circuitry
Since the fan runs on 12V and the Pi on 5V, you’ll need a way to power both. A 12V DC power adapter (2A or higher) can power the fan directly. Use a buck converter to step down the voltage to 5V for the Pi, or use a separate 5V supply.
To control the fan speed based on air quality, you’ll need a MOSFET transistor or a relay module. This allows the Pi to send a signal (via GPIO pins) to adjust fan speed dynamically. For example, when PM2.5 levels rise, the Pi can increase fan speed automatically.
Optional Add-Ons
Want to take your build to the next level? Consider these extras:
- OLED or LCD display: Shows real-time air quality data.
- Buzzer or LED alerts: Notifies you when pollution is high.
- Enclosure: A 3D-printed or wooden case to house everything neatly.
- Wi-Fi dongle: Only needed if using an older Pi model without built-in Wi-Fi.
Here’s a quick reference table of the core components and approximate costs:
| Component | Recommended Model | Approximate Cost |
|---|---|---|
| Raspberry Pi | Pi 4 Model B (4GB) | $55 |
| Air Quality Sensor | PMS5003 | $25 |
| Fan | 120mm 12V DC Fan | $15 |
| HEPA Filter | Pre-cut or DIY | $10–$20 |
| Power Supply | 12V 2A Adapter | $10 |
| MOSFET/Relay | IRFZ44N or 5V Relay Module | $5 |
| Total | $120–$140 |
Step-by-Step Assembly Guide
Now that you have your parts, let’s put everything together. Don’t worry—this isn’t rocket science. I’ll walk you through it step by step, with tips to avoid common pitfalls.
Step 1: Prepare the Raspberry Pi
Start by setting up your Raspberry Pi. Download the latest version of Raspberry Pi OS (formerly Raspbian) from the official website. Use Raspberry Pi Imager to flash it onto your microSD card. Insert the card, connect a keyboard, mouse, and monitor, and power it on.
Once it boots, connect to Wi-Fi and update the system:
sudo apt update && sudo apt upgrade -y
Enable the serial interface (needed for the PMS5003 sensor) by running sudo raspi-config, navigating to Interface Options, and enabling Serial Port. Reboot when prompted.
Step 2: Connect the Air Quality Sensor
The PMS5003 uses a UART connection. Connect it to the Pi as follows:
- PMS5003 VCC → Pi 5V (Pin 2)
- PMS5003 GND → Pi GND (Pin 6)
- PMS5003 TX → Pi RX (GPIO 15, Pin 10)
- PMS5003 RX → Pi TX (GPIO 14, Pin 8)
Be careful with the wiring—reversing TX and RX will prevent communication. Use jumper wires and a breadboard if you’re testing before final assembly.
Step 3: Wire the Fan and Control Circuit
Connect the 12V fan to the power supply. Use the MOSFET to control speed:
- Fan positive → MOSFET drain
- Fan negative → Power supply ground
- MOSFET source → Power supply ground
- MOSFET gate → Pi GPIO pin (e.g., GPIO 18)
The Pi sends a PWM (Pulse Width Modulation) signal to the MOSFET gate, which adjusts how much power reaches the fan. This lets you vary speed based on air quality.
Step 4: Build the Enclosure
You can use a cardboard box, a plastic storage container, or a 3D-printed case. The key is to create a sealed chamber where air flows through the filter, not around it.
Cut an intake hole on one side (where the fan pulls air in) and an exhaust hole on the opposite side. Mount the HEPA filter between the intake and the fan. Use foam tape or rubber gaskets to seal gaps and prevent air leaks.
Mount the Pi, sensor, and wiring inside the enclosure. Make sure the sensor is exposed to airflow but protected from dust. Drill small holes for power and data cables.
Step 5: Test the System
Before sealing everything up, power on the Pi and test each component:
- Check if the sensor is sending data (use a Python script to read serial output).
- Verify the fan turns on and responds to GPIO signals.
- Ensure the Pi boots and connects to Wi-Fi.
If everything works, secure all components with screws or hot glue. Label wires for future troubleshooting.
Programming the Raspberry Pi for Smart Air Purification
Now for the fun part—coding! The Raspberry Pi will read sensor data, decide how fast to run the fan, and optionally log or display the results. I’ll show you a simple Python script to get started.
Reading Sensor Data with Python
First, install the necessary libraries:
sudo apt install python3-pip
pip3 install pyserial
Here’s a basic script to read data from the PMS5003:
import serial
import time

# Configure serial connection
ser = serial.Serial('/dev/serial0', 9600, timeout=2)

def read_pms5003():
    while True:
        data = ser.read(32)
        if data[0] == 0x42 and data[1] == 0x4d:
            pm25 = (data[10] << 8) + data[11]
            pm10 = (data[12] << 8) + data[13]
            print(f"PM2.5: {pm25} µg/m³, PM10: {pm10} µg/m³")
        time.sleep(2)

if __name__ == "__main__":
    read_pms5003()
This script reads particulate data every 2 seconds and prints it to the console. You can expand it to log data to a file or send it to a web dashboard.
Controlling Fan Speed Based on Air Quality
Use PWM to control the fan. Add this to your script:
import RPi.GPIO as GPIO

FAN_PIN = 18
GPIO.setmode(GPIO.BCM)
GPIO.setup(FAN_PIN, GPIO.OUT)
pwm = GPIO.PWM(FAN_PIN, 1000)  # 1kHz frequency
pwm.start(0)

def set_fan_speed(pm25):
    if pm25 < 12:
        speed = 30  # Low pollution
    elif pm25 < 35:
        speed = 60  # Moderate
    else:
        speed = 100  # High pollution
    pwm.ChangeDutyCycle(speed)
Now, your fan automatically adjusts based on PM2.5 levels. You can fine-tune the thresholds based on your environment.
Optional: Web Dashboard and Alerts
Want to check your air quality from your phone? Set up a simple web server using Flask:
from flask import Flask, jsonify

app = Flask(__name__)

@app.route('/airquality')
def air_quality():
    return jsonify({"pm25": pm25, "pm10": pm10})

if __name__ == "__main__":
    app.run(host='0.0.0.0', port=5000)
Run this script, and you can access your air quality data at http://[your-pi-ip]:5000/airquality. Add a frontend with HTML/CSS for a full dashboard.
Tips for Optimization and Maintenance
Your air purifier is running—great! But to keep it effective and reliable, follow these tips.
Calibrate Your Sensors
Over time, sensors can drift. Compare your readings with a known source (like a government air quality website) and adjust if needed. Some sensors allow software calibration—check the datasheet.
Replace Filters Regularly
HEPA filters clog over time, reducing efficiency. Check them every 3–6 months. If airflow feels weak or the fan runs constantly, it’s time to replace the filter.
Keep the System Clean
Dust can accumulate inside the enclosure, affecting sensor accuracy and fan performance. Open it up every few months and gently clean with compressed air.
Monitor Power Usage
The Pi and fan together draw about 3–5 watts. If you’re running it 24/7, that’s roughly 0.1 kWh per day—less than a light bulb. Still, consider using a smart plug to turn it off when not needed.
Backup Your Code
Store your Python scripts on GitHub or a cloud drive. If your SD card fails (it happens!), you won’t lose your work.
Conclusion
Building an air purifier with a Raspberry Pi in 2026 isn’t just a cool tech project—it’s a practical way to take control of your indoor air quality. You get a device that’s cheaper, smarter, and more adaptable than most commercial options. Plus, you learn valuable skills and gain real-time insights into your environment.
From choosing the right components to writing the code that makes it all work, this guide has walked you through every step. Whether you’re filtering out wildfire smoke, pet dander, or city pollution, your DIY purifier can be tailored to your needs. And as sensor technology improves and Raspberry Pi models get even more powerful, the possibilities will only grow.
So why wait? Grab your Pi, gather your parts, and start building. Your lungs—and your curiosity—will thank you.
Frequently Asked Questions
How to build an air purifier using Raspberry Pi for home use?
You can build a smart air purifier using a Raspberry Pi by integrating it with sensors like PMS5003 for particle detection and a fan control module. Connect the Pi to a relay-controlled fan and use Python scripts to automate purification based on real-time air quality data.
What components do I need to build a Raspberry Pi air purifier?
Essential components include a Raspberry Pi (4B or newer), a particulate matter sensor (e.g., SDS011), a DC fan, a relay module, a HEPA filter, and a power supply. Optional additions include an OLED screen for local display or a Wi-Fi module for remote monitoring.
Can I monitor air quality remotely with a Raspberry Pi air purifier?
Yes, by connecting your Raspberry Pi to the internet, you can use platforms like MQTT or Node-RED to stream air quality data to a cloud dashboard. This lets you track PM2.5, PM10, and other metrics from your smartphone or laptop.
Is it cost-effective to build an air purifier using Raspberry Pi?
Building your own Raspberry Pi air purifier can be more affordable than commercial models, especially if you already own the Pi. Costs typically range from $80–$150, depending on sensor and filter quality, while offering customizable smart features.
How do I program the Raspberry Pi to control air purifier fan speed?
Use Python with the RPi.GPIO library to control the relay module based on sensor readings. For example, set higher fan speeds when PM2.5 levels exceed 35 µg/m³ and lower speeds when air quality improves.
Can I integrate my Raspberry Pi air purifier with home automation systems?
Absolutely. With integrations like Home Assistant or IFTTT, your air purifier can trigger alerts, turn on other smart devices, or adjust settings based on air quality. This makes it a seamless part of your 2026 smart home ecosystem.