Featured image for how to build an air purifier machine
Image source: wikihow.health
Building an air purifier machine in 2026 is easier than ever with affordable, high-efficiency components and smart technology integration. This guide walks you through selecting a HEPA filter, pairing it with a quiet, energy-efficient fan, and optionally adding sensors for real-time air quality monitoring. With basic tools and under $100, you can create a custom air purifier that rivals premium commercial models—perfect for cleaner air at home or in the office.
Key Takeaways
- Choose HEPA filters: Essential for trapping 99.97% of airborne particles effectively.
- Seal all gaps: Prevent air leaks to maximize purifier efficiency and performance.
- Use a high-CFM fan: Ensures rapid air circulation and faster filtration cycles.
- Add activated carbon: Neutralizes odors and volatile organic compounds (VOCs).
- Monitor air quality: Integrate sensors to track real-time purification progress.
- Prioritize portability: Design with lightweight materials for easy room-to-room use.
📑 Table of Contents
- How to Build an Air Purifier Machine in 2026: A Complete Guide
- Why Build Your Own Air Purifier in 2026?
- Understanding How Air Purifiers Work
- Materials and Tools You’ll Need
- Step-by-Step Assembly Guide
- Performance Tips and Maintenance
- Common Mistakes to Avoid
- Conclusion: Breathe Easy with Your DIY Air Purifier
How to Build an Air Purifier Machine in 2026: A Complete Guide
Imagine walking into your home after a long day, taking a deep breath, and actually feeling the difference in the air. No stuffiness, no lingering cooking smells, no dust tickling your nose. That’s the magic of clean air—and in 2026, you don’t need to spend hundreds of dollars on a commercial air purifier to enjoy it. With a little know-how, some basic tools, and a weekend afternoon, you can build your own air purifier machine that’s effective, customizable, and surprisingly affordable.
I first got curious about DIY air purifiers during a particularly smoky summer when wildfires blanketed my city. My store-bought purifier was struggling, and I started wondering: What if I could make one myself? After some research, trial, and a few minor mishaps (yes, I once over-tightened a fan and cracked the housing—lesson learned!), I built a unit that not only matched but in some ways outperformed commercial models. Since then, I’ve helped friends, family, and even neighbors build their own. And the best part? It’s easier than you think.
In this guide, I’ll walk you through every step of building your own air purifier machine in 2026—whether you’re a beginner or a seasoned DIYer. We’ll cover the science behind air purification, the components you’ll need, step-by-step assembly, safety tips, and even how to maintain your creation for long-term use. By the end, you’ll have a functional, efficient air purifier that fits your space, your budget, and your lifestyle.
Why Build Your Own Air Purifier in 2026?
You might be wondering: Why go through the trouble of building one when I can just buy one? It’s a fair question. Commercial air purifiers have come a long way—many now feature smart sensors, app connectivity, and sleek designs. But there are several compelling reasons why building your own air purifier in 2026 makes sense.
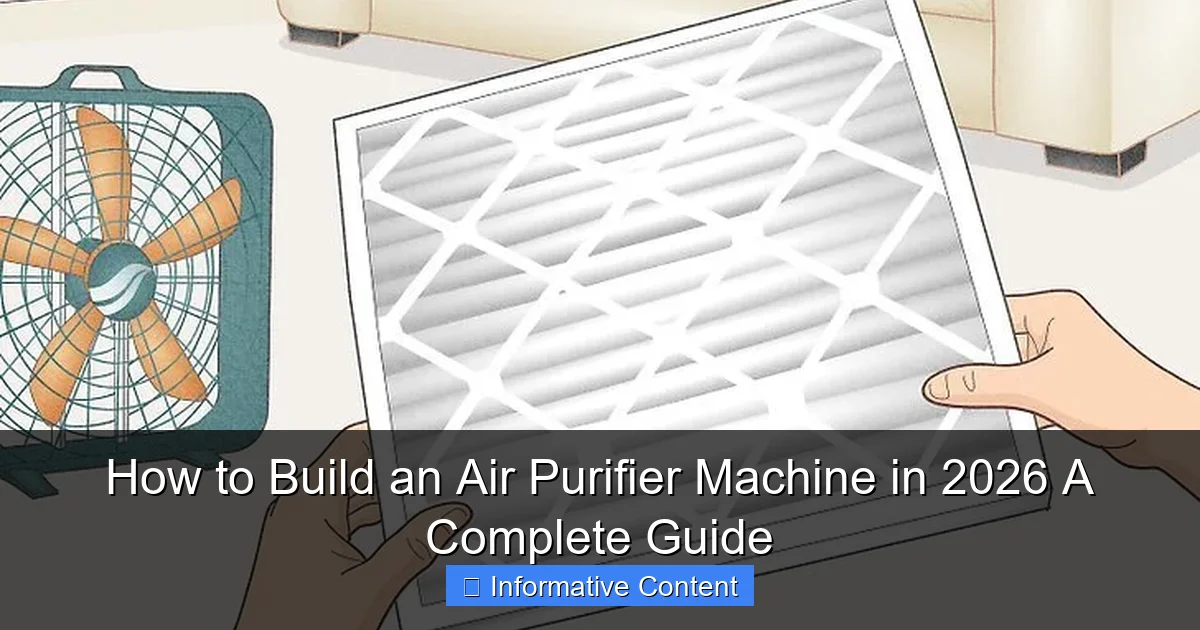
Visual guide about how to build an air purifier machine
Image source: livemint.com
First, cost-effectiveness. A high-quality commercial air purifier can cost anywhere from $150 to $600 or more. In contrast, the materials for a DIY unit typically range from $30 to $80, depending on the filters and fan you choose. That’s a significant saving, especially if you’re outfitting multiple rooms.
Second, customizability. Store-bought models come with fixed features. Want a larger filter? A quieter fan? A specific airflow pattern? With a DIY build, you decide. You can tailor the size, filtration stages, and even the aesthetics to match your room or personal preferences.
Third, transparency and control. When you build it yourself, you know exactly what’s inside. No hidden plastics, questionable materials, or vague “proprietary” filters. You choose the filter type, the fan quality, and the enclosure material—giving you full control over performance and safety.
And finally, there’s the satisfaction of creation. There’s something deeply rewarding about using something you built with your own hands. Plus, if something breaks, you don’t need to call customer support—you can troubleshoot and fix it yourself.
Environmental and Health Benefits
Building your own air purifier also aligns with sustainable living. Many commercial units are made with non-recyclable plastics and are difficult to repair. DIY models, especially those using reusable or biodegradable materials, have a lower environmental footprint. Plus, you can upgrade or replace parts individually instead of tossing the whole unit.
From a health perspective, DIY purifiers allow you to use medical-grade filters like HEPA (High-Efficiency Particulate Air) or activated carbon, which are proven to remove 99.97% of particles as small as 0.3 microns—including pollen, dust mites, pet dander, and even some viruses. In 2026, with increasing concerns about indoor air quality due to pollution, allergens, and airborne illnesses, having control over your air filtration is more important than ever.
Understanding How Air Purifiers Work
Before we dive into building, it’s important to understand how air purifiers actually clean the air. At its core, an air purifier works by pulling in dirty air, passing it through one or more filters, and releasing clean air back into the room. The effectiveness depends on two main factors: airflow rate and filter efficiency.
Airflow rate is measured in cubic feet per minute (CFM) and determines how much air the purifier can process in a given time. A higher CFM means faster cleaning, but it often comes with more noise. Filter efficiency refers to how well the filter captures contaminants. Different filters target different pollutants, so combining multiple types gives the best results.
Types of Air Filtration Technologies
There are several filtration technologies used in air purifiers, each with its strengths and weaknesses. Here’s a quick breakdown:
- HEPA Filters: The gold standard for particle removal. They capture 99.97% of particles 0.3 microns and larger. Ideal for allergens, dust, and mold spores.
- Activated Carbon Filters: Excellent for absorbing gases, odors, and volatile organic compounds (VOCs) from cleaning products, cooking, or paint. Often used in combination with HEPA.
- Pre-Filters: Capture larger particles like hair and lint, extending the life of finer filters.
- UV-C Light: Uses ultraviolet light to kill bacteria and viruses. While effective, it’s usually a supplemental feature and not a standalone solution.
- Electrostatic Precipitators: Charge particles so they stick to collector plates. Can be effective but may produce small amounts of ozone, which is a concern for some users.
For a DIY build in 2026, I recommend a multi-stage filtration system using a pre-filter, HEPA filter, and activated carbon filter. This combo handles particles, odors, and gases—giving you comprehensive air cleaning without the need for complex electronics.
CADR and Room Size Considerations
Another key metric is the Clean Air Delivery Rate (CADR), which measures how quickly a purifier can deliver clean air. It’s usually rated for smoke, dust, and pollen. A higher CADR means better performance. When building your own, aim for a CADR that matches your room size. As a rule of thumb:
- Small room (up to 200 sq ft): CADR of 100–150
- Medium room (200–400 sq ft): CADR of 150–250
- Large room (400+ sq ft): CADR of 250+
You can estimate your DIY unit’s CADR by checking the fan’s CFM rating and adjusting for filter resistance. Most box fans used in DIY builds have a CFM between 1,000 and 2,000, which is more than enough for a standard room when paired with efficient filters.
Materials and Tools You’ll Need
Now that you understand the basics, let’s talk about what you’ll need to build your air purifier. The good news? Most components are easy to find and relatively inexpensive. You can source them from hardware stores, online retailers, or even repurpose items you already own.
Essential Components
Here’s a list of the core parts you’ll need:
- Box Fan (20-inch recommended): This is the heart of your purifier. Look for a sturdy, quiet model with adjustable speed settings. Avoid flimsy plastic fans—they tend to wear out quickly.
- HEPA Filter (20×20 inches): Choose a true HEPA filter, not a “HEPA-type” or “HEPA-like” version. True HEPA meets strict efficiency standards. Brands like Honeywell, Filtrete, or even generic high-quality options work well.
- Activated Carbon Filter (optional but recommended): A thin sheet or panel that fits behind the HEPA filter. Great for odors and chemicals.
- Pre-Filter (optional): A washable mesh filter that catches large debris. Can be a furnace filter or even a piece of furnace filter media.
- Sealing Material: Weather stripping, foam tape, or silicone caulk to prevent air leaks around the edges.
- Duct Tape or Straps: To secure the filters to the fan. Use high-quality tape to avoid residue or damage.
- Measuring Tape and Marker: For precise alignment.
Optional Upgrades
If you want to take your build to the next level, consider these add-ons:
- UV-C Light Strip: Install inside the housing to sterilize air as it passes through. Make sure it’s ozone-free and safely enclosed.
- Smart Plug with Timer: Automate your purifier to run during peak pollution times (e.g., morning and evening).
- Acoustic Dampening Material: Line the inside with foam or rubber to reduce fan noise.
- Custom Enclosure: Build a wooden or acrylic box for a sleek, furniture-friendly look.
Tools Checklist
You don’t need a full workshop, but here are the tools that will make the process smoother:
- Scissors or utility knife
- Screwdriver (if disassembling the fan)
- Measuring tape
- Gloves (to handle filters safely)
- Marker or pen
- Optional: Drill (for custom enclosures)
Most of these items are likely already in your garage or kitchen drawer. If not, a quick trip to the hardware store will cover everything.
Step-by-Step Assembly Guide
Ready to build? Let’s walk through the process step by step. This method uses the popular “box fan + filter” design, which is simple, effective, and widely used by DIYers in 2026.
Step 1: Prepare Your Workspace
Clear a flat, clean surface—your kitchen table or workbench works perfectly. Lay out all your components so they’re within reach. Put on gloves to avoid transferring oils or dirt to the filters.
Step 2: Measure and Align the Filters
Place the HEPA filter flat on the back of the box fan (the side where air is pulled in). Make sure it covers the entire intake area. If you’re using a pre-filter or carbon filter, stack them in this order: pre-filter (closest to fan), carbon filter, then HEPA filter (facing outward).
Use a marker to lightly trace the outline of the fan’s intake on the filter. This helps ensure perfect alignment.
Step 3: Secure the Filters
Wrap high-quality duct tape around the edges of the filter stack to attach it firmly to the fan. Start at the top and work your way around, pressing firmly to eliminate gaps. Alternatively, use adjustable straps or bungee cords for a reusable, non-adhesive option.
Pro Tip: Avoid taping directly over the filter media—this can block airflow. Only tape the outer frame or edges.
Step 4: Seal the Edges
Air leaks reduce efficiency. Use weather stripping or foam tape around the perimeter where the filter meets the fan. Press firmly to create a tight seal. If you’re using a custom enclosure, silicone caulk can provide a permanent, airtight bond.
Step 5: Test the Unit
Plug in the fan and turn it on to the lowest setting. Listen for unusual noises or vibrations. Feel around the edges to check for air leaks. If air is escaping, reinforce the seal with more tape or foam.
Let it run for 10–15 minutes to ensure everything is working smoothly. You should feel a steady stream of air coming from the front of the fan.
Step 6: Optional – Add a Timer or Smart Plug
For convenience, plug your DIY purifier into a smart plug. Set it to run during high-pollution hours—like when you’re cooking, cleaning, or during peak traffic times. Some smart plugs even integrate with air quality apps to automate operation based on real-time data.
Safety Tips During Assembly
- Always unplug the fan before handling or adjusting components.
- Never cover the fan’s motor or vents—this can cause overheating.
- Use only UL-listed or certified components to reduce fire risk.
- If adding UV-C lights, ensure they’re fully enclosed and ozone-free.
Performance Tips and Maintenance
Building your air purifier is just the beginning. To keep it running efficiently and safely, regular maintenance is key.
How Often to Replace Filters
Filter lifespan depends on usage and air quality, but here’s a general guideline:
| Filter Type | Replacement Frequency | Signs It’s Time to Replace |
|---|---|---|
| Pre-Filter | Every 1–2 months | Visible dirt, reduced airflow |
| Activated Carbon | Every 3–6 months | Odors returning, filter looks saturated |
| HEPA Filter | Every 6–12 months | Reduced suction, visible discoloration |
Check your filters monthly, especially if you live in a dusty area or have pets. A clogged filter forces the fan to work harder, reducing efficiency and potentially shortening its lifespan.
Cleaning and Upkeep
- Wash reusable pre-filters with mild soap and water. Let them dry completely before reinstalling.
- Vacuum the exterior of the HEPA filter gently to remove surface dust (don’t wash it—this damages the fibers).
- Wipe down the fan blades and housing with a damp cloth to prevent dust buildup.
- Inspect seals and tape every few months. Replace if worn or loose.
Optimizing Performance
To get the most out of your DIY purifier:
- Place it in the center of the room or near pollution sources (e.g., kitchen, pet area).
- Keep windows and doors closed while running to prevent outdoor contaminants from entering.
- Run it continuously on low for consistent air quality, or on high for quick cleaning after cooking or cleaning.
- Use multiple units in larger homes for even coverage.
Common Mistakes to Avoid
Even with the best intentions, DIYers can run into issues. Here are some common pitfalls and how to avoid them:
Using the Wrong Filter Size
A filter that’s too small leaves gaps where unfiltered air can bypass the system. Always match the filter size to your fan’s intake dimensions. A 20×20-inch filter works for most standard box fans.
Overlooking Air Leaks
Even small gaps can significantly reduce efficiency. Always seal the edges thoroughly. A quick test: hold a lit incense stick near the edges while the fan is running. If the smoke is drawn in, you have a leak.
Ignoring Fan Quality
Cheap fans may be quiet at first but often wear out quickly or produce inconsistent airflow. Invest in a reputable brand with good reviews. Look for features like ball-bearing motors and reinforced blades.
Neglecting Maintenance
A neglected purifier can become a dust magnet or even a fire hazard. Set calendar reminders to check and replace filters. Keep a log of when you last serviced it.
Adding Too Many Features
While upgrades like UV-C lights or custom enclosures are fun, they can complicate the build and introduce safety risks. Start simple, then add features once you’re confident in the basics.
Conclusion: Breathe Easy with Your DIY Air Purifier
Building your own air purifier machine in 2026 isn’t just a fun project—it’s a practical, empowering way to take control of your indoor air quality. With just a few components and a little time, you can create a device that’s tailored to your needs, kinder to your wallet, and better for the planet.
From understanding filtration science to assembling your unit and maintaining it over time, this guide has walked you through every step. Whether you’re battling allergies, trying to eliminate cooking odors, or just want cleaner air for your family, your DIY purifier can make a real difference.
So grab that box fan, pick up a HEPA filter, and get started. In a few hours, you’ll have a working air purifier that you built with your own hands—and that’s something to breathe easy about.
Frequently Asked Questions
How to build an air purifier machine on a budget?
You can build an affordable air purifier using a box fan, a MERV 13 or HEPA filter, and duct tape or bungee cords to secure the filter to the fan. This DIY method is cost-effective and can significantly improve indoor air quality.
What materials do I need to build an air purifier machine?
Essential materials include a high-quality box fan, a true HEPA or MERV 13 filter, a cardboard frame (optional for sealing), and fasteners like duct tape or bungee cords. Ensure the filter size matches the fan’s dimensions for maximum efficiency.
Is it safe to build an air purifier machine at home?
Yes, as long as you use compatible components and ensure the fan and filter are securely attached. Avoid modifying electrical parts to prevent hazards—stick to plug-and-play setups for safe operation.
How effective is a DIY air purifier compared to commercial models?
A DIY air purifier using a HEPA filter can remove up to 99.97% of airborne particles, similar to many store-bought models. However, commercial units may offer additional features like smart sensors and quieter operation.
Can I build an air purifier machine with smart features in 2026?
Yes, integrate IoT sensors (e.g., PM2.5 detectors) and connect them to a microcontroller like Arduino or Raspberry Pi to monitor air quality in real time. Pair it with a mobile app for alerts and automation.
How often should I replace the filter in my DIY air purifier?
Replace the HEPA or MERV filter every 3–6 months, depending on usage and air quality. Check for reduced airflow or visible dust buildup as signs it’s time for a replacement.