Featured image for how to change clorox air purifier filter
Image source: cdn11.bigcommerce.com
Changing your Clorox air purifier filter in 2026 is quick and simple—just power off the unit, remove the old filter, and insert the new one for fresher, cleaner air. Follow the model-specific instructions to ensure a perfect fit and optimal performance, typically involving a side or front panel release. Regular filter replacements every 6–12 months maintain peak efficiency and extend your purifier’s lifespan.
Key Takeaways
- Turn off and unplug the purifier before replacing the filter for safety.
- Locate the filter compartment by checking the back or bottom panel of the unit.
- Remove the old filter carefully to avoid spreading trapped particles.
- Insert the new Clorox filter with the airflow arrow pointing inward.
- Secure the compartment and reset the filter indicator if your model has one.
- Replace filters every 6–12 months for optimal air purification performance.
📑 Table of Contents
- How to Change Clorox Air Purifier Filter in 2026
- Why Changing Your Clorox Air Purifier Filter Matters
- Step-by-Step Guide to Changing Your Clorox Air Purifier Filter
- Choosing the Right Replacement Filter for Your Clorox Air Purifier
- Maintenance Tips to Extend Filter Life
- Common Mistakes to Avoid When Changing the Filter
- Clorox Air Purifier Filter Replacement Schedule
- Final Thoughts: Breathe Easy with a Fresh Filter
How to Change Clorox Air Purifier Filter in 2026
Let’s be honest—most of us buy air purifiers with the best of intentions. We want cleaner air, fewer allergens, and a home that smells fresh. But then life gets busy. Laundry piles up, kids track in dirt, and suddenly, that Clorox air purifier humming quietly in the corner becomes background noise. We forget about it… until we notice the air doesn’t feel as crisp, or worse, the unit starts making odd noises.
Sound familiar? You’re not alone. In fact, one of the most common reasons air purifiers underperform is because the filter hasn’t been changed on time. And while Clorox air purifiers are designed to be user-friendly, many people aren’t sure how—or when—to replace the filter. That’s where this guide comes in. Whether you’ve had your Clorox air purifier for a few months or a few years, knowing how to change the filter properly can make a huge difference in air quality, energy efficiency, and even the lifespan of your device.
In this post, I’ll walk you through everything you need to know about changing your Clorox air purifier filter in 2026—step by step, with real-life tips, troubleshooting advice, and even a handy maintenance schedule. No jargon, no fluff—just practical, actionable info to keep your home breathing easy.
Why Changing Your Clorox Air Purifier Filter Matters
Think of your air purifier’s filter like the lungs of your home. Just as our lungs filter out pollutants and keep us healthy, the filter traps dust, pollen, pet dander, smoke, and other airborne particles. Over time, that filter gets clogged. When it’s full, it can’t do its job—and worse, it can actually start pushing dirty air back into your room.

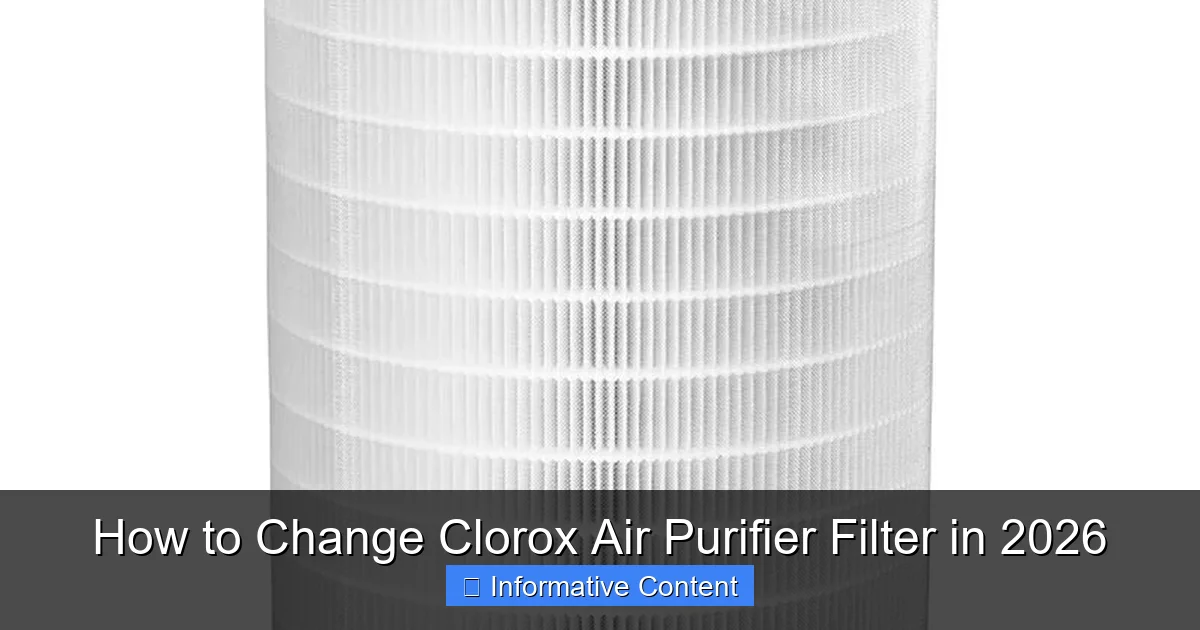
Visual guide about how to change clorox air purifier filter
Image source: cdn11.bigcommerce.com
How a Clogged Filter Affects Performance
A dirty filter reduces airflow, which means your purifier has to work harder to circulate air. This not only increases energy consumption but also puts extra strain on the motor. I learned this the hard way when my Clorox purifier started making a low, groaning noise. At first, I thought it was broken. Turns out, the filter was so packed with dust that the fan was struggling to push air through. Once I replaced it, the noise stopped, and the room felt noticeably fresher within an hour.
Beyond performance, a neglected filter can become a breeding ground for mold and bacteria—especially in humid environments. If you’ve noticed a musty smell coming from your purifier, that’s a red flag. It’s not just about clean air anymore; it’s about preventing contamination.
Health Benefits of a Fresh Filter
For people with allergies, asthma, or respiratory sensitivities, a clean filter is non-negotiable. According to the EPA, indoor air can be 2 to 5 times more polluted than outdoor air. A high-quality HEPA filter—like the ones used in Clorox models—can capture 99.97% of particles as small as 0.3 microns. That includes common allergens like pollen, mold spores, and even some bacteria.
I have a friend with severe pet allergies who swears by her Clorox air purifier. She changes the filter every 3 months like clockwork. “It’s the difference between sneezing all night and sleeping through peacefully,” she told me. While results vary, consistent filter changes are one of the simplest ways to support better indoor air quality.
When to Replace Your Filter
Clorox recommends replacing the filter every 6 to 12 months, depending on usage and air quality. But that’s just a guideline. If you live in a dusty area, have pets, or smoke indoors, you may need to change it more often—every 3 to 4 months. On the flip side, if you live in a clean, low-pollution environment and use the purifier sparingly, you might stretch it to 12 months.
Most Clorox models have a filter replacement indicator light that turns on when it’s time. Don’t ignore it! That little light is your best friend. If your model doesn’t have one, mark your calendar or set a phone reminder. Pro tip: Take a photo of the filter when it’s new, then compare it every few months. If it looks gray or clogged, it’s time.
Step-by-Step Guide to Changing Your Clorox Air Purifier Filter
Now for the main event: actually changing the filter. Don’t worry—it’s easier than changing a lightbulb. I’ve done it dozens of times across different Clorox models, and the process is remarkably consistent. Here’s how to do it safely and correctly.
Step 1: Turn Off and Unplug the Unit
Before you do anything, make sure the air purifier is turned off and unplugged from the wall. This is a basic safety step, but it’s easy to skip when you’re in a hurry. I once forgot to unplug mine and got a small shock when I touched the motor housing. Not fun. Better safe than sorry.
Step 2: Locate the Filter Compartment
Most Clorox air purifiers have a front or side panel that opens to reveal the filter. Look for a latch, button, or sliding cover. On the Clorox AP-100 model, for example, there’s a small button on the front that you press to release the cover. On the AP-150, it’s a sliding panel on the side. Check your user manual if you’re unsure—most are available online for free.
Pro tip: If the cover feels stiff, don’t force it. Some models require you to gently wiggle it or press a hidden release. Forcing it can break the plastic clips.
Step 3: Remove the Old Filter
Once the compartment is open, you’ll see the filter—usually a rectangular HEPA filter wrapped in plastic or cardboard. Carefully pull it out. It might be heavier than you expect, especially if it’s full of dust.
Here’s a tip I learned from a repair technician: always handle the filter by the edges. Oils from your fingers can degrade the material over time. Also, avoid shaking it—you don’t want to release trapped particles back into the air.
Step 4: Clean the Interior (Optional but Recommended)
While the filter is out, take a quick look inside the compartment. You might see dust buildup on the fan blades or walls. Use a dry microfiber cloth or a soft brush to gently wipe it away. Never use water or cleaning sprays—moisture can damage the motor.
I keep a small handheld vacuum with a brush attachment just for this. It’s overkill, maybe, but it only takes 30 seconds and keeps the unit running smoothly.
Step 5: Install the New Filter
Take your new Clorox filter out of the packaging. Make sure it’s the correct model—Clorox filters are not one-size-fits-all. Check the label on the old filter or your user manual to confirm the part number.
Insert the new filter into the compartment, making sure it sits flat and secure. Most filters have arrows or labels indicating the correct orientation. The arrow should point toward the fan or inward. If you’re unsure, look for a diagram in the manual.
Once it’s in, close the compartment and make sure it clicks or locks into place. A loose cover can cause air leaks, reducing efficiency.
Step 6: Reset the Filter Indicator (If Applicable)
If your model has a filter replacement light, you’ll need to reset it. On most Clorox purifiers, this involves holding down the “Filter” or “Reset” button for 3 to 5 seconds until the light turns off or changes color. Refer to your manual for exact instructions.
Don’t skip this step! The light won’t reset on its own, and you’ll keep getting false alerts.
Step 7: Plug In and Test
Plug the unit back in and turn it on. Listen for smooth operation—no rattling or unusual noises. Run it on the highest setting for a few minutes to ensure proper airflow. If everything sounds good, you’re all set!
Choosing the Right Replacement Filter for Your Clorox Air Purifier
Not all filters are created equal. Using the wrong one can reduce performance, damage your unit, or even void the warranty. Here’s how to make sure you’re getting the right replacement.
Check Your Model Number
The first step is identifying your exact Clorox air purifier model. Look for a label on the back or bottom of the unit. Common models include the AP-100, AP-150, AP-200, and AP-300. Each uses a different filter size and type.
For example, the AP-100 uses the Clorox Filter A (model CF-A100), while the AP-150 uses Filter B (CF-B150). Mixing them up won’t work—they’re not interchangeable.
Buy Genuine Clorox Filters
I know third-party filters are cheaper, but I strongly recommend sticking with genuine Clorox replacements. I tried a generic filter once to save $10. It fit, but the airflow was weaker, and the filter started fraying after two months. Clorox filters are engineered to exact specifications, ensuring optimal performance and longevity.
Plus, genuine filters often come with a satisfaction guarantee. If something goes wrong, you can contact customer support for a replacement.
Where to Buy
You can buy Clorox air purifier filters directly from the Clorox website, Amazon, Walmart, or Target. I usually check Amazon first for fast shipping and customer reviews. Just make sure the seller is authorized—counterfeit filters are more common than you’d think.
Pro tip: Sign up for Amazon’s “Subscribe & Save” to get a discount and automatic deliveries every 6 months. It’s one less thing to remember.
Filter Types: HEPA vs. Carbon
Most Clorox air purifiers use a combination HEPA and carbon filter. The HEPA layer captures particles, while the carbon layer absorbs odors and gases—like cooking smells or smoke.
If you have pets or live in a smelly kitchen, the carbon layer is essential. Some models offer enhanced carbon filters for heavy odor control. Check the product description to see if an upgraded filter is available for your model.
Maintenance Tips to Extend Filter Life
Changing the filter is important, but so is regular maintenance. A little care goes a long way in keeping your Clorox air purifier running efficiently between replacements.
Clean the Pre-Filter Monthly
Many Clorox models have a washable pre-filter that captures large particles like hair and dust. This extends the life of the main HEPA filter. Remove it monthly and rinse it under cool water. Let it air dry completely before reinstalling.
I keep a spare pre-filter on hand so I can swap them while one dries. It’s a small investment that saves time and hassle.
Vacuum the Exterior
Dust builds up on the vents and exterior surfaces, which can restrict airflow. Use a soft brush attachment on your vacuum to clean the intake and outlet grilles weekly. Wipe the outside with a damp cloth—just avoid getting water near the controls.
Keep the Unit Elevated
Place your air purifier on a stable, elevated surface—like a table or shelf—rather than on the floor. This improves air circulation and reduces the amount of dust it pulls in from carpet or rugs.
I learned this after moving my purifier from the floor to a bookshelf. Within a week, I noticed less dust buildup on the filter.
Avoid High-Humidity Areas
Don’t place your air purifier in bathrooms, laundry rooms, or near windows where condensation forms. Moisture can damage the filter and promote mold growth. If you must use it in a humid area, consider a dehumidifier to balance the environment.
Run It Consistently
For best results, run your air purifier 24/7 on a low or medium setting. Constant operation keeps air circulating and prevents stagnation. If you’re concerned about energy use, look for models with Energy Star certification—they’re designed to be efficient.
Common Mistakes to Avoid When Changing the Filter
Even simple tasks can go wrong if you’re not careful. Here are a few common pitfalls I’ve seen—and made myself.
Reusing the Old Filter
Some people try to clean and reuse HEPA filters. Don’t do it. HEPA filters are designed for single use. Washing or vacuuming them damages the delicate fibers and reduces efficiency. It’s like trying to reuse a coffee filter—it just doesn’t work.
Installing the Filter Backward
I’ve done this twice. The filter looks the same on both sides, but the airflow direction matters. If installed backward, air can’t pass through properly, and the unit may overheat. Always check for arrows or labels.
Forgetting to Reset the Indicator
This one’s easy to overlook, but it’s frustrating. You change the filter, but the light stays on. Now you’re second-guessing whether you did it right. Take the extra 5 seconds to reset it.
Using the Wrong Filter Size
Buying the wrong filter is a waste of money and time. Double-check the model number before ordering. If you’re unsure, take a photo of the old filter and compare it to the new one side by side.
Ignoring Unusual Noises or Smells
If your purifier starts making noise or emitting a strange odor after a filter change, don’t ignore it. It could mean the filter isn’t seated properly, or there’s another issue. Turn it off, check the installation, and contact Clorox support if needed.
Clorox Air Purifier Filter Replacement Schedule
To help you stay on track, here’s a simple maintenance schedule based on usage and environment. Adjust as needed for your situation.
| Usage Level | Environment | Recommended Replacement Interval |
|---|---|---|
| Low (few hours/day) | Clean, no pets, low pollution | 12 months |
| Moderate (8–12 hours/day) | Moderate dust, 1 pet, city air | 6–9 months |
| High (24/7) | Heavy dust, multiple pets, smoking, allergies | 3–4 months |
This table is a starting point. Monitor your filter regularly and adjust based on how it looks and how your purifier performs.
Final Thoughts: Breathe Easy with a Fresh Filter
Changing your Clorox air purifier filter might seem like a small task, but it has a big impact. It’s one of the simplest, most effective ways to maintain clean indoor air, protect your health, and keep your device running smoothly for years.
I used to treat filter changes like a chore—something to do when I remembered. Now, I see it as part of my home care routine, like changing furnace filters or cleaning the fridge coils. It’s not glamorous, but it matters.
So, if you’ve been putting it off, now’s the time. Grab a new filter, follow the steps in this guide, and give your Clorox air purifier the refresh it deserves. Your lungs—and your home—will thank you.
And remember: in 2026 and beyond, a little maintenance goes a long way. Stay consistent, stay informed, and keep breathing easy.
Frequently Asked Questions
How do I know when to change the Clorox air purifier filter?
Most Clorox air purifiers have a filter replacement indicator light that turns on when it’s time to change the filter, typically every 6 to 12 months depending on usage. You may also notice reduced airflow or odors returning if the filter is overdue for a change.
Where can I buy a replacement filter for my Clorox air purifier?
You can purchase genuine Clorox air purifier filters online through the official Clorox website, Amazon, or major retailers like Walmart and Target. Always check your model number to ensure compatibility before buying.
How often should I replace the Clorox air purifier filter in 2026?
In 2026, it’s recommended to replace your Clorox air purifier filter every 6 to 12 months, or sooner if you have pets, allergies, or high indoor pollution. The built-in filter life monitor can help track usage and alert you when a change is needed.
Can I clean and reuse the Clorox air purifier filter instead of replacing it?
No, Clorox air purifier filters are not designed to be cleaned or reused. Attempting to wash or vacuum the filter can damage it and reduce its effectiveness, so always replace it with a new one when indicated.
How do I change the Clorox air purifier filter step by step?
First, turn off and unplug the purifier, then open the front or side panel to access the filter compartment. Remove the old filter, insert the new one with the arrow pointing toward the unit, and securely close the panel before plugging it back in.
What happens if I don’t change the Clorox air purifier filter on time?
Failing to change the filter can lead to reduced air purification performance, increased energy use, and potential strain on the motor. Over time, a clogged filter may also allow pollutants to recirculate into your home.