
Featured image for how to change filter on idylis air purifier
Image source: cdn.shopify.com
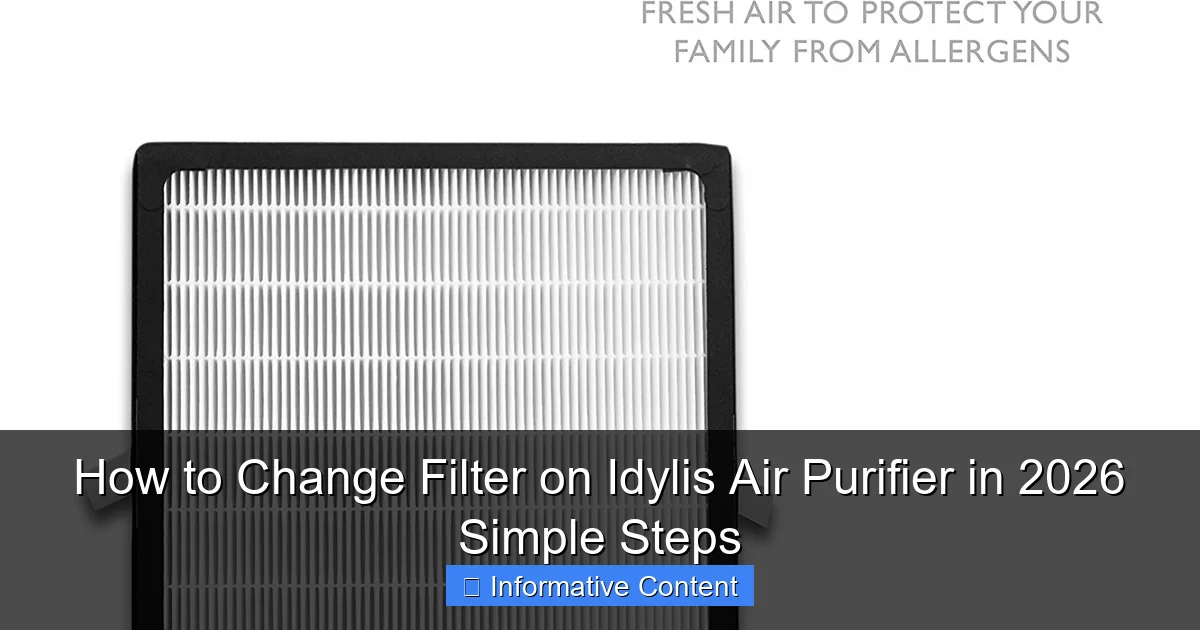
Changing the filter on your Idylis air purifier in 2026 is quick and easy—just power off the unit, remove the front panel, and slide out the old filter. Insert the new filter with the airflow arrow pointing inward, then reattach the panel to ensure optimal performance. Regular filter changes every 6–12 months keep your air clean and your purifier running efficiently.
Key Takeaways
- Power off first: Always unplug the purifier before filter replacement.
- Locate the latch: Find the side panel latch to access the filter.
- Remove old filter: Pull the used filter straight out with care.
- Insert new filter: Align arrows and slide in until it clicks.
- Reset indicator: Hold power button 5 seconds to reset filter timer.
- Check seal: Ensure the panel seals tightly to avoid air leaks.
📑 Table of Contents
- How to Change Filter on Idylis Air Purifier in 2026: Simple Steps
- Why Changing Your Idylis Air Purifier Filter Matters
- Identifying Your Idylis Air Purifier Model
- Step-by-Step Guide to Changing the Filter
- Choosing the Right Replacement Filter
- Troubleshooting Common Filter Issues
- Maintenance Tips to Extend Filter Life
- Conclusion
How to Change Filter on Idylis Air Purifier in 2026: Simple Steps
Let’s be honest—no one buys an air purifier because they’re excited about maintenance. You get one because you want cleaner air, fewer allergens, and peace of mind, especially if you’ve got pets, kids, or seasonal allergies. But here’s the thing: even the best air purifier, like the Idylis models, won’t work well if you ignore the filter. It’s like driving your car without ever changing the oil—eventually, things start to sputter.
I remember the first time I bought my Idylis air purifier. I was thrilled. It looked sleek, promised to remove 99.97% of airborne particles, and even had a smart sensor that lit up when the air quality dipped. For the first few months, it ran like a dream. Then one day, I noticed it wasn’t pulling dust out of the air like it used to. The fan seemed louder, and my allergies flared up again. That’s when it hit me: I hadn’t changed the filter. Not once. I felt a little silly, honestly—like I’d forgotten the most basic part of owning this thing.
But don’t worry, you’re not alone. Many people skip filter changes because they either don’t know how, don’t remember when to do it, or assume the purifier will just keep working forever. The good news? Changing the filter on an Idylis air purifier is actually one of the easiest maintenance tasks you’ll ever do. In this guide, I’ll walk you through everything you need to know—step by step—so you can keep your air clean, your purifier running efficiently, and your lungs happy in 2026 and beyond.
Why Changing Your Idylis Air Purifier Filter Matters
Before we dive into the “how,” let’s talk about the “why.” Why does changing the filter matter so much? Think of your air purifier like a vacuum cleaner for your entire room. The filter is the heart of the system—it traps dust, pollen, pet dander, mold spores, and even some bacteria and viruses. Over time, that filter gets clogged. It’s doing its job, but it’s also getting full. When that happens, the purifier has to work harder to pull air through, which can lead to louder noise, reduced airflow, and even higher energy bills.
Visual guide about how to change filter on idylis air purifier
Image source: cdn.shopify.com
What Happens When You Don’t Change the Filter?
If you ignore the filter for too long, several things can go wrong:
- Reduced Air Cleaning Efficiency: A clogged filter can’t trap new particles effectively. That means dust and allergens stay in the air longer, defeating the whole purpose of having a purifier.
- Increased Energy Use: The motor has to work harder to push air through a dirty filter, which uses more electricity.
- Shorter Lifespan for the Unit: Constant strain on the motor can lead to premature wear and tear.
- Unpleasant Odors: Some Idylis models include a carbon filter for odor control. If that gets saturated, you might start noticing lingering smells from cooking, pets, or smoke.
I learned this the hard way. After three months of not changing the filter, my Idylis started making a weird grinding noise. I panicked, thinking I’d broken it. Turns out, the motor was just struggling because the filter was packed with dust. Once I replaced it, the noise stopped, and the airflow improved dramatically. Lesson learned: don’t wait until something goes wrong.
How Often Should You Change the Filter?
Most Idylis air purifiers come with a filter replacement indicator—usually a light on the control panel that turns yellow or red when it’s time for a change. But if yours doesn’t have one, or if you’re unsure, here’s a general rule of thumb:
- Standard Use (8–12 hours per day): Replace the filter every 6 to 8 months.
- Heavy Use (24/7 or in high-pollution areas): Replace every 3 to 4 months.
- Light Use (a few hours a day): You might get away with 9 to 12 months, but check it regularly.
Keep in mind, these are estimates. If you have pets that shed a lot, live near a busy road, or suffer from allergies, you’ll likely need to change the filter more often. I have two cats and live in a city, so I change mine every 4 months—even if the indicator hasn’t lit up yet. It’s better to be safe than sorry.
Identifying Your Idylis Air Purifier Model
Not all Idylis air purifiers are the same. While the basic filter replacement process is similar across models, the exact steps can vary slightly depending on the design. That’s why it’s important to know your model before you start. You don’t want to force a panel open or remove the wrong part and risk damaging your unit.
Common Idylis Air Purifier Models
As of 2026, some of the most popular Idylis models include:
- Idylis IAP-10-2: A compact unit ideal for small to medium rooms. Features a 3-stage filtration system.
- Idylis IAP-15-2: Mid-sized purifier with higher CADR (Clean Air Delivery Rate) for larger spaces.
- Idylis IAP-20-2: High-capacity model designed for large rooms or open-concept living areas.
- Idylis IAP-10-2W: Wall-mountable version of the IAP-10-2, great for saving floor space.
Most of these models use a similar filter setup: a pre-filter, a HEPA filter, and sometimes a carbon filter. But the way you access them can differ. For example, the IAP-10-2 has a front panel that swings open, while the IAP-20-2 has a side latch. Knowing your model helps you avoid confusion.
How to Find Your Model Number
If you’re not sure which model you have, don’t worry—it’s easy to find. Here’s where to look:
- On the unit itself: Check the back or bottom of the purifier. There’s usually a sticker with the model number, serial number, and manufacturing date.
- On the original box: If you still have the packaging, the model number is printed on the side.
- In the user manual: The first page typically lists the model and specifications.
- On the Idylis website: If you registered your product, you can log in and view your model details.
Once you’ve identified your model, you can look up the specific filter type it uses. This is important because using the wrong filter can reduce performance or even damage the unit. For example, the IAP-10-2 uses a filter labeled “IAP-10-F,” while the IAP-20-2 uses “IAP-20-F.” They’re not interchangeable.
Step-by-Step Guide to Changing the Filter
Now for the main event: how to actually change the filter on your Idylis air purifier. Don’t stress—it’s simpler than changing a lightbulb. I’ll walk you through it like we’re standing in your living room together, purifier in hand.
Step 1: Turn Off and Unplug the Unit
Safety first. Always turn off the air purifier and unplug it from the wall before you start. This prevents any accidental starts while you’re handling the filter. I learned this the hard way when I once reached into a unit that was still plugged in—thankfully, it didn’t turn on, but it gave me a good scare.
Step 2: Locate the Filter Access Panel
Most Idylis models have a front or side panel that opens to reveal the filter compartment. Look for a latch, button, or sliding mechanism. On the IAP-10-2, for example, there’s a small button on the top right that you press to release the front panel. On the IAP-20-2, it’s a side latch near the handle.
If you’re not sure where it is, check the user manual or look for a small icon of a filter or arrow pointing to the panel. Some models even have a “Filter” label printed right on the cover.
Step 3: Remove the Old Filter
Once the panel is open, you’ll see the filter inside. It’s usually a rectangular cartridge that slides out easily. Gently pull it straight out—don’t twist or force it. If it’s stuck, check for any clips or tabs holding it in place.
Take a moment to inspect the old filter. If it’s dark gray or black, that’s normal—it’s full of trapped particles. But if it’s torn, crumbling, or smells musty, it’s definitely time for a replacement. I once found mold growing on my filter because I waited too long. Gross, right? Don’t let that happen to you.
Step 4: Clean the Pre-Filter (If Applicable)
Some Idylis models have a washable pre-filter that sits in front of the main HEPA filter. This catches larger particles like hair and dust, helping the HEPA filter last longer. If your model has one, remove it and rinse it under cool water. Let it air dry completely before putting it back. Never put a wet filter into the unit—it can cause mold or damage the motor.
I clean my pre-filter every month, even if I’m not changing the main filter. It’s a quick 5-minute task that makes a big difference in performance.
Step 5: Install the New Filter
Take your new filter out of the packaging. Make sure it’s the correct model for your unit—double-check the label. Then, slide it into the compartment in the same direction the old one came out. Most filters have an arrow or label indicating airflow direction (usually pointing toward the back of the unit).
Push it in gently until it’s seated properly. You shouldn’t have to force it. If it doesn’t fit easily, double-check the model number. Using the wrong filter can block airflow and reduce efficiency.
Step 6: Close the Panel and Plug In
Once the new filter is in, close the access panel and make sure it clicks or locks into place. Then, plug the unit back in and turn it on. You should notice improved airflow right away. Some models will reset the filter indicator light automatically, while others may require you to press and hold a button for a few seconds.
Pro tip: Mark the date on the filter or set a calendar reminder for your next change. I use a piece of tape and write the month and year right on the filter frame. That way, I never forget.
Choosing the Right Replacement Filter
Not all filters are created equal. Using a low-quality or incompatible filter can reduce your purifier’s effectiveness and even void the warranty. So how do you choose the right one?
OEM vs. Third-Party Filters
You’ve got two main options: OEM (Original Equipment Manufacturer) filters made by Idylis, or third-party alternatives from other brands. Here’s the breakdown:
- OEM Filters: These are made by Idylis specifically for your model. They’re guaranteed to fit and perform as intended. The downside? They’re usually more expensive.
- Third-Party Filters: These are often cheaper and widely available online. Some are high quality, but others may not meet the same standards. Look for filters that specify they’re compatible with your model and meet HEPA standards.
I’ve tried both. OEM filters work perfectly, but I’ve also found a few reputable third-party brands that offer great performance at a lower price. Just make sure they’re certified and have good reviews.
Filter Types and Features
Idylis filters typically include:
- HEPA Filter: Captures 99.97% of particles as small as 0.3 microns, including pollen, dust, and smoke.
- Carbon Filter: Absorbs odors and volatile organic compounds (VOCs) from cooking, pets, and cleaning products.
- Pre-Filter: Traps large particles and is often washable.
Some models also offer upgraded filters, like those with antimicrobial coatings or enhanced carbon layers for stronger odor control. If you live with smokers or have strong cooking smells, these might be worth the extra cost.
Troubleshooting Common Filter Issues
Even with the best care, things can go wrong. Here are a few common issues and how to fix them.
Filter Indicator Light Won’t Turn Off
After replacing the filter, the indicator light might stay on. This usually means the unit hasn’t registered the new filter. Try resetting it by pressing and holding the “Filter” or “Reset” button for 3–5 seconds. If that doesn’t work, unplug the unit for 10 minutes, then plug it back in.
Reduced Airflow After Filter Change
If your purifier seems weaker after a filter change, double-check that the new filter is installed correctly. Make sure the airflow arrow is pointing the right way and that the panel is fully closed. Also, ensure the pre-filter (if you have one) is clean and dry.
Unusual Noises
A new filter shouldn’t cause noise, but if you hear rattling or grinding, the filter might not be seated properly. Turn off the unit, open the panel, and reinsert the filter. If the noise persists, contact Idylis customer support.
Maintenance Tips to Extend Filter Life
Changing the filter is important, but regular maintenance can help it last longer and work better.
- Vacuum the exterior weekly: Dust buildup on the vents can reduce airflow.
- Clean the pre-filter monthly: Rinse it under water and let it dry completely.
- Keep the room clean: Regular dusting and vacuuming reduce the load on your purifier.
- Avoid placing near heat sources: High temperatures can damage the filter material.
I also recommend running the purifier on a lower setting when possible. High speeds pull in more particles, which can clog the filter faster. Use the highest setting only when needed—like after cooking or during allergy season.
Conclusion
Changing the filter on your Idylis air purifier isn’t just a chore—it’s a simple act of self-care. Clean air means better sleep, fewer allergies, and a healthier home. And the best part? It takes less than five minutes once you know how.
By following these steps—turning off the unit, accessing the filter, replacing it correctly, and maintaining it regularly—you’ll keep your Idylis running like new for years to come. Whether you’re using an IAP-10-2 in your bedroom or an IAP-20-2 in your living room, the process is straightforward and worth the effort.
So don’t wait until your allergies flare up or the fan starts whining. Set a reminder, grab a new filter, and give your air purifier the care it deserves. Your lungs—and your peace of mind—will thank you.
Frequently Asked Questions
How do I know when to change the filter on my Idylis air purifier?
Most Idylis air purifiers have a filter replacement indicator light that turns on when it’s time to change the filter. You should also check the filter every 6–12 months depending on usage and air quality.
What type of filter does the Idylis air purifier use?
The Idylis air purifier typically uses a combination HEPA and activated carbon filter designed to capture dust, allergens, odors, and pollutants. Always use a genuine Idylis replacement filter for optimal performance.
How do I access the filter compartment on my Idylis air purifier?
Turn off and unplug the unit, then locate the filter cover—usually on the back or side. Press the release tabs or remove the screws to open the compartment and access the old filter.
Can I clean and reuse the Idylis air purifier filter?
No, the HEPA and carbon filters in Idylis air purifiers are not washable or reusable. Attempting to clean them can damage the filter and reduce air purification efficiency.
How often should I replace the filter in my Idylis air purifier?
For most models, replace the filter every 6 to 12 months. If you have pets, smoke, or live in a high-pollution area, consider changing it more frequently to maintain air quality.
Where can I buy a replacement filter for my Idylis air purifier?
You can purchase genuine Idylis replacement filters directly from the manufacturer’s website, Amazon, or authorized retailers. Be sure to match the model number for compatibility.