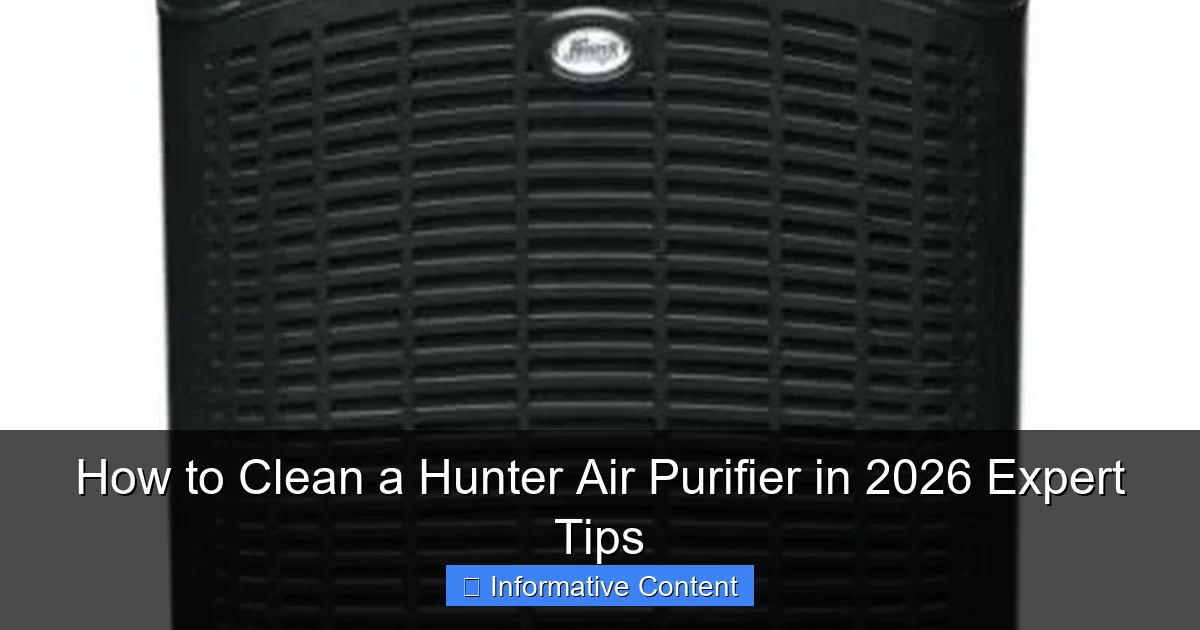
Featured image for how to clean a hunter air purifier
Image source: airpurifiers.club
Keeping your Hunter air purifier clean is essential for peak performance and long-term efficiency. Follow expert-recommended steps—like turning off and unplugging the unit, gently vacuuming the exterior, and washing or replacing filters as needed—to ensure optimal air quality in 2026. Regular maintenance not only extends the lifespan of your purifier but also maximizes its ability to capture dust, allergens, and pollutants effectively.
Key Takeaways
- Turn off and unplug the purifier before cleaning for safety.
- Remove and rinse the pre-filter monthly with mild soap and water.
- Vacuum the interior gently to remove dust and debris buildup.
- Wipe the exterior with a damp cloth and avoid harsh chemicals.
- Replace HEPA filters every 6–12 months for optimal performance.
- Clean air vents regularly to maintain proper airflow and efficiency.
📑 Table of Contents
- How to Clean a Hunter Air Purifier in 2026: Expert Tips
- Why Cleaning Your Hunter Air Purifier Matters
- What You’ll Need to Clean Your Hunter Air Purifier
- Step-by-Step Guide to Cleaning Your Hunter Air Purifier
- Maintenance Schedule for Long-Term Performance
- Common Mistakes to Avoid When Cleaning
- Final Thoughts: Breathe Easy with a Clean Hunter Air Purifier
How to Clean a Hunter Air Purifier in 2026: Expert Tips
Let’s be honest—air purifiers are one of those appliances we love to forget about. They hum quietly in the corner, doing their job day in and day out, filtering out dust, pollen, pet dander, and even those sneaky cooking odors. But just like your coffee maker or vacuum, your Hunter air purifier needs regular care to keep performing at its best. I learned this the hard way a few years back when my unit started making a weird rattling noise and the air in my bedroom felt… well, not so fresh anymore. A quick peek inside revealed a filter caked with grime and dust buildup around the fan blades. Yikes.
That experience taught me an important lesson: cleaning your Hunter air purifier isn’t just about maintenance—it’s about maximizing its lifespan, improving indoor air quality, and saving money on energy and replacement parts. In 2026, with more of us spending time indoors and becoming increasingly aware of air quality, keeping your purifier in top shape is more important than ever. Whether you’ve owned your Hunter for a few months or a few years, this guide will walk you through everything you need to know to clean it safely, effectively, and without voiding your warranty. Think of it as your friendly, no-nonsense checklist for breathing easier—literally.
Why Cleaning Your Hunter Air Purifier Matters
You might be wondering, “Do I really need to clean my air purifier that often?” The short answer: yes. While the primary job of your Hunter air purifier is to clean the air, it can’t do that efficiently if it’s clogged with dust, hair, or mold. Over time, dirt accumulates on filters, fan blades, and internal components, reducing airflow and forcing the motor to work harder. This not only increases energy consumption but can also lead to overheating or premature wear.
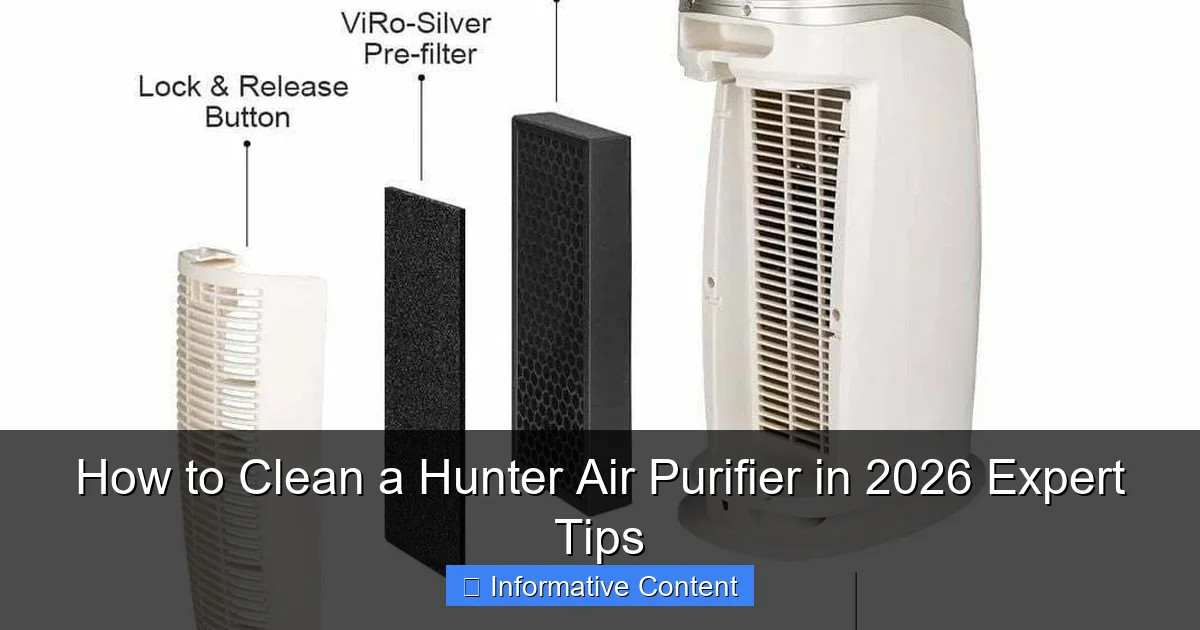
Visual guide about how to clean a hunter air purifier
Image source: airpurifiergalore.com
According to a 2025 study by the Indoor Air Quality Association, air purifiers that aren’t cleaned regularly can lose up to 40% of their efficiency within six months. That means you’re paying for clean air but not actually getting it. Plus, dirty filters and components can become breeding grounds for bacteria and mold—ironically, making your indoor air worse instead of better. Cleaning your unit isn’t just about performance; it’s about health.
Signs Your Hunter Air Purifier Needs Cleaning
- Reduced airflow: If you notice the fan isn’t pushing air as strongly as it used to, it’s likely due to dust buildup.
- Unusual noises: Rattling, grinding, or high-pitched whining can indicate debris in the fan or motor.
- Odors: A musty or burnt smell often means mold or overheating components.
- Visible dust: If you can see dust or hair around the intake vents or on the exterior, it’s time for a deep clean.
- Filter indicator light: Many Hunter models have a filter change light—don’t ignore it!
Even if you don’t notice these signs, a good rule of thumb is to clean your unit every 3–6 months, depending on usage and environment. Pet owners, allergy sufferers, or people living in dusty areas may need to clean more frequently.
What You’ll Need to Clean Your Hunter Air Purifier
Before you start, gather your cleaning supplies. You don’t need anything fancy—just a few household items and a little patience. Here’s what I keep in my cleaning kit:
- A soft microfiber cloth
- Mild dish soap or all-purpose cleaner
- A vacuum cleaner with a brush attachment
- A soft-bristled brush (like an old toothbrush)
- Compressed air (optional, for hard-to-reach areas)
- White vinegar (for odor removal and disinfecting)
- Replacement filters (if needed—check your model’s recommendations)
Pro tip: Always unplug your Hunter air purifier before cleaning. Safety first! Also, avoid using harsh chemicals, bleach, or abrasive sponges—they can damage plastic parts or leave harmful residues.
Model-Specific Considerations
Hunter makes several air purifier models, including the Hunter HEPAtech, Hunter Plus, and Hunter Professional series. While the basic cleaning steps are similar, some models have removable pre-filters, washable components, or unique designs. Always check your user manual for model-specific instructions. If you’ve lost yours, you can usually download a copy from Hunter’s official website using your model number (found on the back or bottom of the unit).
For example, the Hunter HEPAtech 300 has a washable pre-filter that can be rinsed under water, while the Hunter Plus 500 uses a permanent HEPA filter that should never be washed. Knowing your model’s features will save you time and prevent accidental damage.
Step-by-Step Guide to Cleaning Your Hunter Air Purifier
Now that you’re prepped, let’s get into the nitty-gritty. Cleaning your Hunter air purifier is easier than you think—especially if you break it down into manageable steps. I’ll walk you through the process as if we’re doing it together, one step at a time.
Step 1: Unplug and Prepare the Unit
Start by turning off and unplugging your air purifier. Move it to a well-lit, flat surface—like a table or countertop—where you have room to work. If your model has a carrying handle, use it to lift the unit safely. Avoid placing it on carpet, as dust and debris can get kicked up during cleaning.
Next, remove the front grille or cover. Most Hunter models have a snap-on grille that lifts off with gentle pressure. If yours has screws, use a screwdriver to remove them and set them aside in a small container so you don’t lose them.
Step 2: Remove and Clean the Pre-Filter
The pre-filter is the first line of defense, capturing large particles like hair and dust. On many Hunter models, this is a washable foam or mesh filter located behind the front grille.
Take out the pre-filter and gently tap it over a trash can to remove loose debris. Then, rinse it under lukewarm water. Avoid hot water, as it can warp the material. If it’s particularly dirty, add a drop of mild dish soap and gently scrub with a soft brush. Rinse thoroughly and let it air dry completely—this can take a few hours. Never reinstall a wet filter, as moisture can promote mold growth.
For models without a washable pre-filter, use a vacuum with a brush attachment to remove dust. If the filter looks damaged or overly clogged, it’s time to replace it.
Step 3: Clean the HEPA Filter (If Applicable)
Here’s where things get important: never wash a HEPA filter unless the manufacturer explicitly says it’s washable. Most Hunter HEPA filters are not washable and should only be vacuumed lightly to remove surface dust.
Use your vacuum’s brush attachment to gently clean both sides of the HEPA filter. Focus on the intake side (the side that faces the room). Avoid pressing too hard—HEPA filters are delicate and can tear easily. If the filter is more than 6–12 months old (or as recommended by Hunter), it’s best to replace it entirely. A clogged HEPA filter won’t capture fine particles like smoke or allergens, defeating the purpose of your purifier.
Pro tip: Mark the installation date on your filter with a permanent marker so you know when it’s due for a change.
Step 4: Clean the Fan Blades and Interior
This is often the most overlooked step—but one of the most important. Dust and hair can accumulate around the fan blades and motor housing, reducing efficiency and causing noise.
Use a soft brush or toothbrush to gently dislodge debris from the fan blades. Be careful not to bend or damage the blades. For tight spaces, a can of compressed air works wonders—just hold the can upright and spray in short bursts.
Next, wipe down the interior walls and motor housing with a slightly damp microfiber cloth. Avoid getting water near electrical components. If you notice any sticky residue, a cloth dampened with a 50/50 mix of water and white vinegar can help break it down.
For stubborn grime, wrap the cloth around a flat tool (like a butter knife) to reach narrow gaps. Always dry the area thoroughly before reassembling.
Step 5: Clean the Exterior and Vents
Don’t forget the outside! Dust and fingerprints can build up on the plastic casing and vents, affecting both appearance and airflow.
Wipe down the entire exterior with a damp microfiber cloth. For greasy spots or sticky residues, use a mild cleaner or vinegar solution. Avoid spraying liquid directly onto the unit—dampen the cloth instead.
Use a toothbrush or cotton swab to clean the intake and exhaust vents. These areas often collect dust and can restrict airflow if blocked. Make sure all vents are clear before reassembling.
Step 6: Reassemble and Test
Once everything is clean and dry, it’s time to put your Hunter air purifier back together. Reinstall the HEPA filter (if removed), then the pre-filter, and finally the front grille. Make sure all parts are securely in place.
Plug the unit back in and turn it on. Listen for smooth operation—no rattling or unusual noises. Check that the fan is running at all speed settings and that air is flowing freely from the vents.
If everything looks and sounds good, you’re done! Your Hunter air purifier is now clean, efficient, and ready to keep your air fresh.
Maintenance Schedule for Long-Term Performance
Cleaning your Hunter air purifier isn’t a one-and-done task. To keep it running smoothly, follow a regular maintenance schedule. Here’s a simple guide based on typical usage:
| Task | Frequency | Notes |
|---|---|---|
| Vacuum pre-filter | Every 2–4 weeks | More often if you have pets or live in a dusty area |
| Wash pre-filter (if washable) | Every 1–3 months | Let dry completely before reinstalling |
| Vacuum HEPA filter | Every 3–6 months | Do not wash unless specified |
| Replace HEPA filter | Every 6–12 months | Check manufacturer recommendations |
| Clean fan and interior | Every 6 months | Use brush and compressed air |
| Wipe exterior and vents | Monthly | Use damp cloth and mild cleaner |
Sticking to this schedule will help prevent buildup, extend the life of your filters, and ensure consistent performance. I keep a calendar reminder on my phone so I never forget—set it and forget it!
Seasonal Cleaning Tips
Your cleaning routine might need adjustments depending on the season. For example:
- Spring: Pollen levels are high—clean your pre-filter weekly and check the HEPA filter monthly.
- Summer: Increased use of AC and fans can stir up dust—wipe vents more frequently.
- Fall: Leaves and outdoor debris can enter your home—vacuum the exterior and pre-filter often.
- Winter: Indoor air tends to be drier and dustier—deep clean the unit before heavy use.
Also, if you’ve recently renovated, had pets groomed, or hosted guests with allergies, consider doing a quick clean to remove excess particles.
Common Mistakes to Avoid When Cleaning
Even with the best intentions, it’s easy to make mistakes when cleaning your Hunter air purifier. I’ve made a few myself—like accidentally soaking a HEPA filter or using a wet cloth near the motor. Here are the most common pitfalls and how to avoid them:
- Using water on non-washable filters: Always check your manual. Washing a HEPA filter can ruin it.
- Forgetting to unplug the unit: This is a safety hazard. Always disconnect power before cleaning.
- Reinstalling a wet filter: Moisture can lead to mold and damage internal components.
- Using harsh chemicals: Bleach, ammonia, or strong cleaners can degrade plastic and leave toxic residues.
- Skipping the fan cleaning: Dust on fan blades reduces efficiency and can cause noise.
- Over-tightening screws: This can crack the plastic housing. Hand-tight is usually enough.
If you’re ever unsure, consult your user manual or contact Hunter customer support. It’s better to ask than to risk damaging your unit.
What to Do If Something Goes Wrong
Accidents happen. If you accidentally damage a part or notice your purifier isn’t working after cleaning, don’t panic. First, double-check that all components are properly installed. Make sure the filter is seated correctly and the grille is securely attached.
If the unit still doesn’t work, check the power cord and outlet. Try plugging it into a different outlet to rule out electrical issues. If the problem persists, contact Hunter’s customer service. Many issues can be resolved with a simple replacement part or troubleshooting guide.
And remember: regular cleaning prevents most problems before they start. A little effort now saves a lot of hassle later.
Final Thoughts: Breathe Easy with a Clean Hunter Air Purifier
Cleaning your Hunter air purifier might not be the most exciting chore, but it’s one of the most impactful things you can do for your home’s air quality. Think of it as a small investment in your health and comfort. A clean purifier runs more efficiently, lasts longer, and does a better job of removing allergens, odors, and pollutants from your indoor air.
In 2026, with rising concerns about air pollution, wildfire smoke, and respiratory health, having a well-maintained air purifier is more valuable than ever. By following the steps in this guide—cleaning filters, wiping down surfaces, and sticking to a maintenance schedule—you’ll ensure your Hunter unit keeps performing at its best for years to come.
So the next time you walk into a room and take a deep breath of fresh, clean air, you’ll know it’s not just the purifier doing the work—it’s you. You took the time to care for it, and that makes all the difference. Now go enjoy that crisp, clean air—you’ve earned it.
Frequently Asked Questions
How do I clean a Hunter air purifier filter?
To clean a Hunter air purifier filter, first turn off and unplug the unit. Remove the filter and gently vacuum or rinse it with cool water if it’s washable—avoid using soap or harsh chemicals.
How often should I clean my Hunter air purifier?
You should clean your Hunter air purifier every 2–3 months, or more frequently if you have pets or live in a dusty environment. Regular cleaning ensures optimal performance and air quality.
Can I wash the pre-filter on my Hunter air purifier?
Yes, the pre-filter on most Hunter air purifiers is washable. Simply remove it, rinse under lukewarm water, and let it air dry completely before reinserting.
What’s the best way to clean the exterior of a Hunter air purifier?
Wipe the exterior with a soft, damp cloth and mild detergent. Avoid spraying liquids directly on the unit and never submerge any part of the air purifier in water.
Do I need to replace the filter after cleaning my Hunter air purifier?
Yes, even with regular cleaning, Hunter air purifier filters should be replaced every 6–12 months depending on usage. Cleaning extends life but doesn’t eliminate the need for eventual replacement.
How do I maintain my Hunter air purifier for long-term use?
Maintain your Hunter air purifier by cleaning the pre-filter monthly, replacing the HEPA filter as recommended, and keeping the unit in a dust-free area. Proper care ensures efficient air purification and longer lifespan.