Featured image for how to clean air purifier filter
Image source: materialsix.com
Regularly cleaning your air purifier filter is essential to maintain peak performance and extend its lifespan. Follow manufacturer guidelines to safely remove, vacuum, and gently rinse (if washable) the filter, ensuring it’s completely dry before reinstalling. Never use harsh chemicals or submerge non-washable filters—this can damage the material and reduce air purification efficiency.
“`html
How to Clean Air Purifier Filter in 2026 for Best Performance
Key Takeaways
- Turn off and unplug the purifier before cleaning for safety.
- Vacuum the pre-filter monthly to remove dust and debris.
- Rinse reusable filters with cool water; avoid soap or heat.
- Let filters dry completely before reinstalling to prevent mold.
- Replace non-washable filters every 6–12 months as recommended.
- Check manufacturer guidelines for model-specific cleaning instructions.
- Clean the unit’s exterior regularly to maintain optimal airflow.
Why This Matters / Understanding the Problem
Let’s be real—your air purifier works hard. Every day, it sucks in dust, pet dander, pollen, smoke, and even invisible pollutants, trapping them so you can breathe easier. But here’s the catch: if you don’t clean or maintain that filter regularly, it becomes less effective… and sometimes even starts blowing dirty air back into your room.
I learned this the hard way last winter. My allergies flared up like crazy, even though my purifier was running nonstop. Turns out, the filter was clogged with months of buildup. Once I cleaned it properly, the difference was night and day—cleaner air, quieter operation, and way fewer sneezes. That’s when I realized: knowing how to clean air purifier filter in 2026 for best performance isn’t just helpful—it’s essential.
In 2026, air quality challenges are more complex than ever. Wildfire smoke, urban pollution, and indoor allergens are on the rise. Your air purifier is your first line of defense—but only if it’s working at peak efficiency. A dirty filter doesn’t just reduce airflow; it can strain the motor, increase energy use, and even shorten the lifespan of your device.
So whether you’ve got a HEPA filter, activated carbon, or a washable pre-filter, this guide will walk you through exactly how to clean air purifier filter in 2026 for best performance—step by step, with real-world tips that actually work.
What You Need
Before we dive in, let’s gather the basics. You don’t need fancy tools—just a few household items and a little time. Here’s what I always keep on hand:
Visual guide about how to clean air purifier filter
Image source: berriman-usa.com
- Soft-bristle brush (an old toothbrush works great)
- Vacuum cleaner with a brush attachment
- Mild dish soap (unscented and gentle)
- Clean, lukewarm water
- Microfiber cloth
- Compressed air can (optional, for tight spaces)
- Gloves (if you’re sensitive to dust or chemicals)
And of course, your air purifier manual! Every model is a little different, so checking the manufacturer’s guidelines is key. Some filters are washable, others are not—and mixing those up can ruin your unit.
Pro tip: Set a calendar reminder every 2–4 weeks (depending on usage) to check your filter. If you have pets, live in a dusty area, or suffer from allergies, you might need to clean it more often.
Step-by-Step Guide to How to Clean Air Purifier Filter in 2026 for Best Performance
Step 1: Turn Off and Unplug Your Air Purifier
Safety first! Always power down and unplug your unit before touching the filter. I made the mistake once of trying to remove a filter while the purifier was still on—let’s just say the sudden suction wasn’t fun.
This step isn’t just about avoiding shocks. It also gives the internal components time to cool down and prevents accidental activation while you’re handling delicate parts.
Once it’s off, give it a minute. Then locate the filter compartment—usually on the side, back, or bottom of the unit. Most models have a latch or sliding panel that’s easy to open.
Step 2: Remove the Filter Carefully
Gently pull out the filter. Take note of how it’s positioned—some filters have arrows indicating airflow direction. Snap a quick photo with your phone if you’re unsure. You’ll thank yourself later when reassembling.
Now, inspect the filter. Is it visibly dirty? Covered in fuzz, hair, or dust? That’s normal—especially if you’ve been running it daily. But if it’s blackened, smells musty, or feels slimy, it might be time for a replacement, not just a cleaning.
Here’s a quick rule of thumb: Washable pre-filters (often the first layer) can usually be cleaned. HEPA filters are typically not washable—but many can be vacuumed. Carbon filters absorb odors and gases, so they’re usually replaced, not cleaned.
Check your manual to confirm which type you have. When in doubt, assume it’s not washable unless specified.
Step 3: Vacuum the Filter (For Non-Washable Filters)
If your filter isn’t meant to get wet, start with a vacuum. Use the brush attachment on low suction to gently remove surface dust and debris.
I like to do this outside or over a trash can to avoid spreading dust indoors. Hold the filter at an angle and work from top to bottom, following the direction of the fibers. Don’t press too hard—you don’t want to damage the delicate mesh.
For tight corners or pleated HEPA filters, a can of compressed air can help blast out trapped particles. Just keep the can upright and use short bursts to avoid moisture buildup.
After vacuuming, give the filter a few minutes to air out. This helps loosen any remaining particles and ensures it’s dry before reinstalling.
Step 4: Wash Washable Filters (If Applicable)
If your filter is labeled as washable—usually the pre-filter or foam layer—this is where the real cleaning happens.
Rinse it under lukewarm water. Avoid hot water—it can warp or shrink the material. Use your hands to gently rub away dirt, or softly scrub with a soft-bristle brush. Never use harsh detergents, bleach, or scrubbing pads. They can break down the filter fibers and reduce efficiency.
A drop of mild dish soap is fine if there’s stubborn grime, but rinse thoroughly. Any leftover soap residue can release odors when the purifier runs.
Once clean, shake off excess water and let it air dry completely—ideally for 24 hours. Never reinstall a damp filter. Moisture can promote mold growth and damage the unit.
I learned this the hard way too. I once put a slightly damp filter back in, thinking it would dry during operation. Spoiler: it didn’t. The next morning, my purifier smelled like a wet basement. Lesson learned.
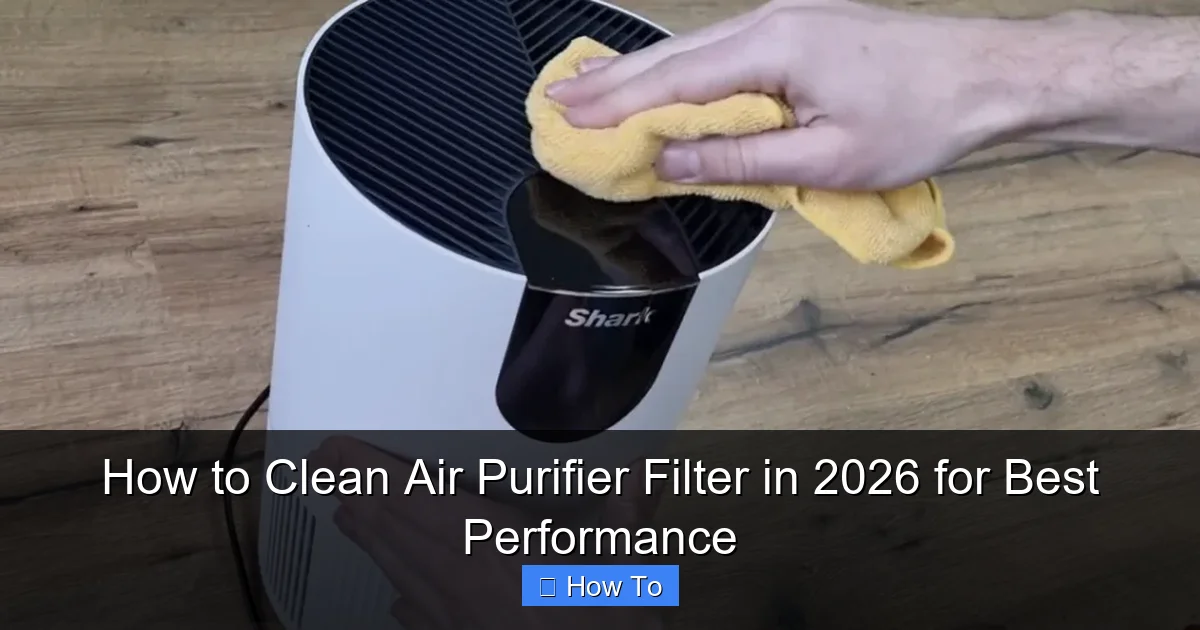
Step 5: Clean the Filter Housing and Fan Blades
While the filter dries, take the opportunity to clean the inside of your purifier. Dust loves to settle in the filter compartment and around the fan blades.
Use your vacuum’s brush attachment to suck up loose debris. For tighter spots, wipe with a microfiber cloth slightly dampened with water. Avoid spraying liquid directly into the unit.
If you notice buildup on the fan blades, use a cotton swab or soft brush to gently remove it. A clean fan spins more efficiently, which improves airflow and reduces noise.
This step is often overlooked, but it makes a big difference in overall performance. Think of it like cleaning the engine of a car—it keeps everything running smoothly.
Step 6: Reinstall the Filter and Test the Unit
Once everything is dry and clean, it’s time to put it all back together.
Make sure the filter is seated correctly—no gaps or bends. Reattach the cover securely. Plug in the purifier and turn it on.
Listen for unusual noises. If it’s running quietly and you feel strong airflow, you’re good to go. Run it on high for 10–15 minutes to circulate fresh air and ensure everything is working properly.
Some smart purifiers have filter life indicators. If yours does, reset the timer according to the manual. This helps you track when the next cleaning or replacement is due.
Pro Tips & Common Mistakes to Avoid
Over the years, I’ve made my share of mistakes—and learned a lot from them. Here’s what I wish I knew sooner:
Pro Tip: Clean your pre-filter every 2–4 weeks, even if the main filter doesn’t need it. It catches the big stuff—pet hair, dust bunnies, lint—so your HEPA filter lasts longer.
Warning: Never soak a HEPA filter. Even if it looks washable, most HEPA materials aren’t designed for water. Soaking can collapse the fibers and ruin filtration efficiency.
Common Mistake: Forgetting to clean the exterior. Dust builds up on vents and grilles, blocking airflow. Wipe the outside with a dry or slightly damp cloth weekly.
Pro Insight: If your purifier has a carbon filter, don’t try to clean it. Carbon works by adsorption—once it’s saturated with odors and chemicals, it can’t be refreshed with water or vacuuming. Replace it every 3–6 months, depending on use.
Real Talk: Don’t wait for the “filter change” light to come on. In high-pollution areas or homes with pets, filters can clog faster than expected. Regular checks prevent performance drops.
Also, consider your environment. If you live near construction, have smokers in the house, or use candles and incense frequently, your filter will get dirty faster. Adjust your cleaning schedule accordingly.
FAQs About How to Clean Air Purifier Filter in 2026 for Best Performance
Q: How often should I clean my air purifier filter?
A: It depends! For washable pre-filters, every 2–4 weeks is ideal. HEPA filters can usually go 3–6 months before replacement, but vacuum them monthly if possible. If you have pets or allergies, lean toward the shorter end of that range.
Q: Can I clean a HEPA filter with water?
A: Generally, no. Most HEPA filters are made of delicate glass fibers that can tear or collapse when wet. Vacuuming is the safest method. Only wash HEPA filters if the manufacturer explicitly says it’s okay—and even then, use caution.
Q: My filter smells bad after cleaning. What’s wrong?
A: That’s usually a sign of mold or bacteria growth—often from reinstalling a damp filter. Always let filters dry completely before use. If the smell persists, the filter may be too far gone and need replacing.
Q: Can I use a hairdryer to speed up drying?
A: I wouldn’t recommend it. High heat can warp or damage filter materials. Air drying at room temperature is safest. Just be patient—it’s worth the wait.
Q: Do I need to clean the inside of the purifier?
A: Yes! Dust and debris accumulate in the housing and around the fan. Cleaning these areas improves airflow and prevents recirculation of dirty air. Do it every time you clean the filter.
Q: What if my purifier doesn’t have a washable filter?
A: That’s common with HEPA and carbon filters. In that case, focus on vacuuming the surface and replacing it on schedule. Some models have reusable pre-filters—clean those regularly to extend the life of the main filter.
Q: Will cleaning my filter save money?
A: Absolutely. A clean filter helps your purifier run more efficiently, using less energy. It also reduces wear on the motor, potentially extending the life of your unit. Plus, you’ll delay the cost of replacements.
Final Thoughts
Learning how to clean air purifier filter in 2026 for best performance isn’t just about maintenance—it’s about breathing easier, sleeping better, and protecting your investment.
A clean filter means cleaner air, quieter operation, and longer device life. It’s one of the simplest things you can do to improve your indoor environment, especially in a world where air quality is increasingly unpredictable.
So grab your vacuum, check your manual, and give your purifier the TLC it deserves. Set a reminder, make it a habit, and enjoy the peace of mind that comes with knowing your air is as fresh as it can be.
And remember: a little effort now prevents big problems later. Your lungs—and your purifier—will thank you.
“`