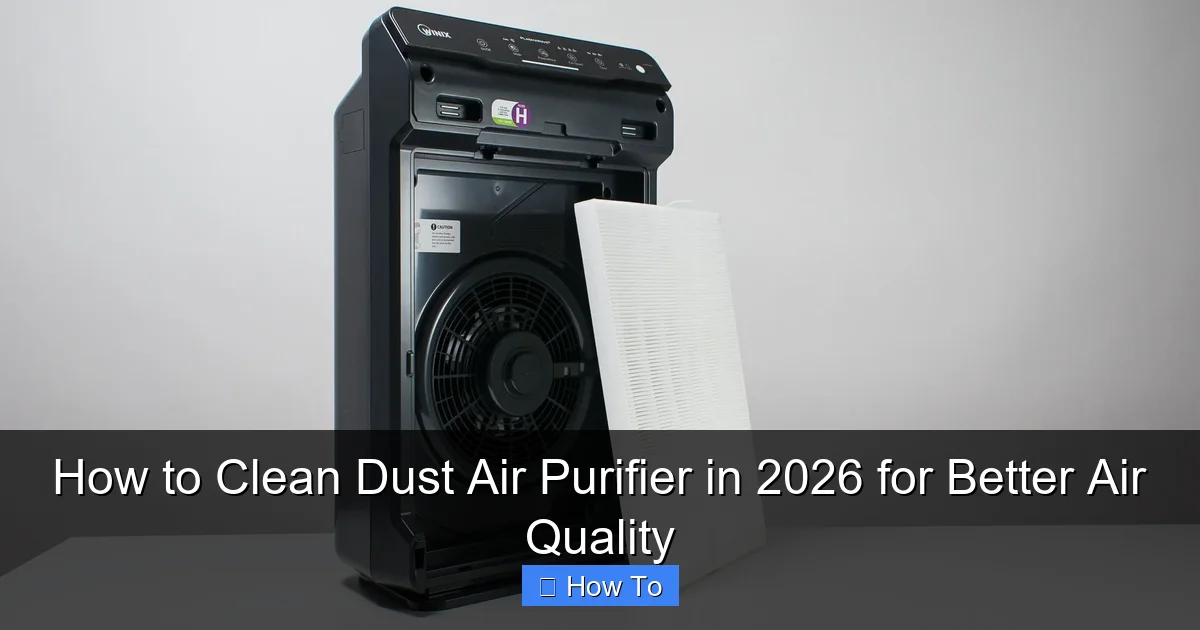
Featured image for how to clean dust air purifier
Image source: consumeranalysis.com
Regularly cleaning your dust air purifier is essential to maintain peak performance and improve indoor air quality in 2026. Follow manufacturer guidelines to safely remove and wash filters, wipe down internal components, and clear dust buildup from sensors and vents—ensuring maximum airflow and filtration efficiency. Neglecting maintenance reduces effectiveness and can recirculate trapped pollutants back into your space.
How to Clean Dust Air Purifier in 2026 for Better Air Quality
Key Takeaways
- Unplug the purifier before cleaning to ensure safety and prevent damage.
- Wipe the exterior with a microfiber cloth to remove dust and grime.
- Wash or replace filters monthly for optimal air quality and efficiency.
- Vacuum internal components gently to clear dust buildup without harming parts.
- Check manufacturer guidelines for filter care to avoid voiding warranties.
- Clean pre-filters weekly to extend the life of primary filters.
- Inspect for mold in damp areas and clean with vinegar if needed.
Why This Matters / Understanding the Problem
Let’s be honest—most of us treat our air purifiers like that one drawer in the kitchen: we know it’s there, we use it, but we never really look inside.
But here’s the thing: a dusty, clogged air purifier doesn’t clean your air. It recirculates it. And that’s the opposite of what we want.
Over time, dust, pet dander, hair, and even mold spores build up inside the filters and fan. The purifier works harder, uses more energy, and delivers weaker performance. I learned this the hard way when my allergy symptoms spiked last winter—only to realize my purifier’s pre-filter was packed with dust like a vacuum bag.
That’s when I discovered the real secret: cleaning your air purifier regularly is just as important as running it.
And in 2026, with rising indoor air pollution and more smart purifiers on the market, knowing how to clean dust air purifier in 2026 for better air quality isn’t just a nice-to-have—it’s essential for your health and wallet.
Dirty purifiers can:
- Reduce airflow by up to 50%
- Increase energy consumption
- Spread trapped allergens back into the room
- Shorten the lifespan of expensive HEPA filters
But don’t worry. Cleaning your air purifier isn’t complicated. With a few simple steps and the right tools, you can restore peak performance in under 30 minutes. And once you do it once, it’ll feel like second nature.
What You Need
Before we dive in, let’s gather your cleaning kit. Nothing fancy—just a few household items you likely already have.
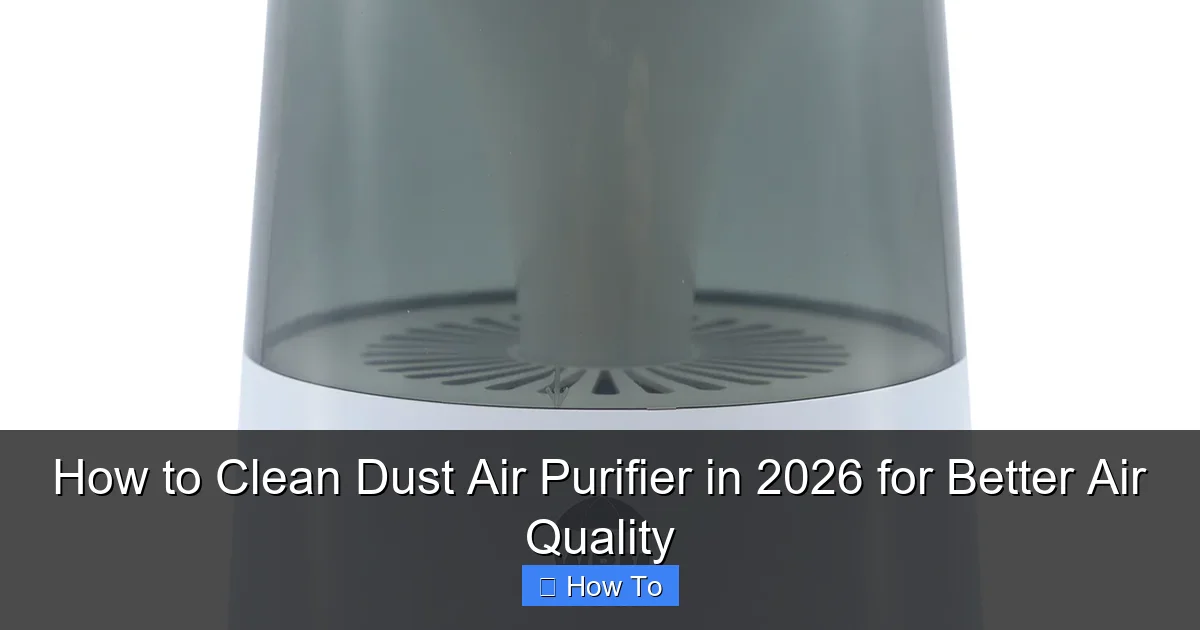
Visual guide about how to clean dust air purifier
Image source: assets.wfcdn.com
- Vacuum cleaner with a brush attachment (a handheld vacuum works great)
- Microfiber cloths (soft and lint-free)
- Compressed air canister (for tight spaces and fan blades)
- Mild dish soap (no harsh chemicals or bleach)
- Warm water (not hot—never soak HEPA filters)
- Soft-bristle brush (like an old toothbrush or paintbrush)
- Bucket or sink (for washing washable filters)
- Replacement filters (if your HEPA or carbon filter is due—check your model’s schedule)
- Gloves (optional, but great if you’re sensitive to dust or pet hair)
Pro tip: Always unplug your air purifier before cleaning. Even if it’s off, a loose plug could cause a shock or damage internal components. Safety first, always.
Also, check your user manual. Some brands (like Dyson, Coway, or Blueair) have specific cleaning instructions or smart alerts. But even if yours doesn’t, the steps below work for most models—from budget-friendly units to high-end smart purifiers.
Step-by-Step Guide to How to Clean Dust Air Purifier in 2026 for Better Air Quality
Step 1: Turn Off and Unplug the Unit
Start simple: power down your air purifier and unplug it from the wall. I know it sounds obvious, but I’ve seen people skip this and risk damaging the motor or getting a shock.
Even if your purifier has a “clean filter” light or app notification, don’t trust it to shut off completely. A loose connection could still send power to the fan or sensors.
Once it’s unplugged, move it to a well-lit, clean area—like a kitchen counter or table. This makes it easier to see dust buildup and work without rushing.
Warning: Never clean a plugged-in purifier. Not worth the risk, even for a quick wipe.
Step 2: Remove and Inspect the Outer Cover
Most air purifiers have a front or top panel that snaps or slides off. Look for clips, latches, or a simple twist-to-unlock mechanism.
For example, my Winix 5500-2 has a front grill that lifts off with a gentle pull. The Dyson Purifier Humidify+Cool uses a magnetic cover. Yours might be different—so again, check the manual if you’re unsure.
Once removed, inspect the inside. You’ll likely see dust on the cover, around the intake vents, and on the pre-filter. That’s normal. But if it looks like a dust bunny convention, it’s definitely time for a deep clean.
Wipe the cover with a dry microfiber cloth. If it’s grimy, dampen the cloth slightly with water—but never soak it. Then set it aside to dry completely before reassembling.
This step is key to how to clean dust air purifier in 2026 for better air quality—because the outer cover is the first line of defense against large particles.
Step 3: Remove and Clean the Pre-Filter (Washable or Vacuumable)
The pre-filter is usually the first thing air hits. It catches hair, lint, and big dust chunks. And guess what? Most are reusable!
Pull it out gently. If it’s a mesh or foam type, you can clean it in two ways:
- Vacuum it: Use the brush attachment to suck up dust. This is fast and safe for delicate filters.
- Wash it: For stubborn grime, rinse under warm water with a drop of dish soap. Scrub lightly with a soft brush. Then air-dry completely (24 hours is best).
Never put a wet pre-filter back in—it can mold and damage the HEPA filter.
One time, I washed my pre-filter and left it in the sun to dry. Bad idea. The UV faded the mesh and weakened it. Now I dry mine indoors, away from direct sunlight.
Also, check if your pre-filter has a directional arrow (like “Airflow →”). Always reinstall it the same way. Reversing it can block airflow.
Step 4: Vacuum the Interior and Fan Blades
Now we’re getting into the guts of the machine. Use your vacuum’s brush attachment to gently clean:
- The intake vents
- The fan blades (if accessible)
- The housing around the HEPA filter
- Any crevices where dust collects
If you can’t reach the fan with the vacuum, use compressed air. Hold the can upright and spray in short bursts. This blasts dust off blades and motor housing without damaging parts.
I once used a high-pressure air can on a purifier’s fan and bent a blade. Oops. Now I use low-pressure bursts—about 2 seconds at a time—and keep the nozzle 6–8 inches away.
This step is crucial for how to clean dust air purifier in 2026 for better air quality because a dusty fan reduces efficiency and increases noise.
Pro tip: If your purifier has a removable fan housing (common in models like Honeywell or Levoit), take it out for a deeper clean. Just don’t force anything.
Step 5: Handle the HEPA Filter (Don’t Wash It!)
HEPA filters are the stars of the show—they trap 99.97% of particles as small as 0.3 microns. But they’re also delicate and should never be washed.
Instead, gently vacuum the surface with the brush attachment. Focus on the pleats, where dust hides. Use light suction—too much can rip the filter media.
If your HEPA looks gray or clogged, it’s time to replace it. Most last 6–12 months, depending on usage and air quality.
Here’s a quick test: hold the filter up to a bright light. If you can’t see light through the pleats, it’s spent.
One mistake I made early on: I thought “cleaning” a HEPA meant rinsing it. Nope. Water ruins the electrostatic charge that helps it trap particles. Once wet, it’s trash.
Also, never use compressed air on a HEPA filter. It can blow holes in the fibers. Stick to vacuuming only.
Step 6: Clean or Replace the Carbon Filter (If Applicable)
Many purifiers have a carbon filter behind the HEPA. It removes odors, VOCs, and gases. But it doesn’t trap dust—so it usually doesn’t need cleaning.
However, if it’s a washable carbon filter (rare, but some brands like Winix offer them), you can rinse it gently under water. Let it dry fully before reuse.
Most carbon filters are not washable. They’re made of activated carbon pellets in a mesh pouch. Over time, they lose effectiveness and need replacement—usually every 3–6 months in high-pollution areas.
How do you know when to replace it? Watch for:
- Persistent cooking or pet odors
- A musty smell from the purifier
- Reduced air freshness
If your purifier has a smart sensor (like in 2026 models from Blueair or IQAir), it might alert you when the carbon is depleted.
Step 7: Wipe Down the Exterior and Base
While the filters dry, clean the outside of the unit. Use a microfiber cloth dampened with water and a drop of dish soap.
Wipe the body, base, and control panel. Avoid spraying liquid directly on the purifier—dampen the cloth instead.
For touchscreens or smart displays, use a screen-safe cleaner. I like the Whoosh! screen cleaner or just a slightly damp cloth with distilled water.
Pay attention to the base, where dust and pet hair often collect. A quick vacuum or wipe can prevent buildup that blocks airflow.
Step 8: Reassemble and Reset (If Needed)
Once everything is dry (especially the pre-filter and carbon filter), put it all back together in reverse order:
- Insert the carbon filter (if used)
- Place the HEPA filter
- Add the clean pre-filter
- Reattach the outer cover
- Plug it back in
Some smart purifiers have a “filter reset” button or app command. After cleaning or replacing filters, reset the timer so your unit accurately tracks filter life.
For example, my Coway Airmega has a “Filter Reset” button on the back. Press and hold for 3 seconds after installing a new filter. This syncs the sensor and stops the “replace filter” alert.
Don’t skip this step. Otherwise, you’ll get false alerts or miss real ones.
Step 9: Run a Test Cycle
Turn your purifier back on and set it to medium or high speed. Listen for:
- Unusual noises (grinding, rattling)
- Weak airflow
- Strange smells
If everything sounds smooth and the airflow is strong, you’re good to go. If not, double-check that all filters are seated properly and the cover is fully closed.
Let it run for 1–2 hours. You might notice a fresh, clean scent—that’s the purifier working at peak efficiency.
And that’s it! You’ve just mastered how to clean dust air purifier in 2026 for better air quality—the simple, effective way.
Pro Tips & Common Mistakes to Avoid
After cleaning a dozen purifiers (and making a few oopses), here are the real-world insights that aren’t in the manuals.
Pro tip #1: Clean the pre-filter every 2–4 weeks. It’s the easiest part, but it makes the biggest difference. A clean pre-filter protects your HEPA and extends its life by 30–50%. I do this on the first Sunday of every month—no excuses.
Pro tip #2: Label your filters. Use a permanent marker to write the install date on the frame. This helps you track replacement schedules, especially if you have multiple units.
Pro tip #3: Use a filter cover or sleeve. Some brands sell mesh sleeves that go over the pre-filter. They catch hair and lint, making cleaning easier. I use them for my cat-loving friends—lifesavers.
Common mistake: Using harsh cleaners. Ammonia, bleach, or strong sprays can degrade filter materials and damage sensors. Stick to mild soap and water—or just vacuuming.
Common mistake: Forgetting the fan. Dust on fan blades slows down airflow and strains the motor. Clean it every deep clean (every 3–6 months). It’s a small step with big impact.
Common mistake: Rushing the dry time. Putting a damp filter back in is a recipe for mold and bad smells. Always let filters air-dry for at least 4–6 hours—24 is safer.
Common mistake: Ignoring the manual. Every purifier is different. Some have sealed HEPA units, others have removable fans. Don’t assume—read the manual or check the brand’s website.
And here’s a bonus tip: if you have pets or live in a dusty area, consider how to clean dust air purifier in 2026 for better air quality on a tighter schedule. I clean mine every 2 months instead of 3 because my dog sheds like it’s his job.
FAQs About How to Clean Dust Air Purifier in 2026 for Better Air Quality
Let’s tackle the questions I get asked most—straight, simple, and from real experience.
Q: Can I wash a HEPA filter?
No. Never. Washing destroys the fine fibers and electrostatic charge. Vacuum it gently instead. Replace it when it’s discolored or airflow drops.
Q: How often should I clean my air purifier?
Clean the pre-filter every 2–4 weeks. Do a full deep clean (including interior and fan) every 3–6 months. If you have allergies, pets, or live in a dusty area, go for the shorter end of that range.
Q: My purifier smells musty after cleaning. What’s wrong?
That’s usually a sign of trapped moisture. Make sure all filters are 100% dry before reinserting. If the smell persists, the carbon filter might be saturated or mold could be growing inside. Replace the carbon filter and run the purifier with the windows open for a day.
Q: Can I use compressed air on the HEPA filter?
No. Compressed air can blow holes in the filter media. Use a vacuum with a soft brush attachment—low suction, gentle strokes.
Q: My smart purifier says “clean filter” but it looks fine. Is it broken?
Not necessarily. Smart sensors track airflow and usage, not just visible dirt. Even a slightly clogged pre-filter can trigger the alert. Clean the pre-filter and reset the sensor. If the light stays on, check the HEPA and carbon filters.
Q: Are washable HEPA filters worth it?
Rare, but some brands (like IQAir or Airpura) offer them. They’re more expensive upfront but save money over time. Just be extra careful when cleaning—follow the manual exactly.
Q: Does cleaning my purifier really improve air quality?
Absolutely. A clean purifier delivers up to 50% more airflow and removes more particles. I noticed fewer allergy attacks within a week of my first deep clean. It’s like giving your purifier a second wind.
Final Thoughts
Cleaning your air purifier isn’t just about maintenance—it’s about breathing easier, saving money, and getting the most from your investment.
When you know how to clean dust air purifier in 2026 for better air quality, you’re not just cleaning a machine. You’re taking control of your indoor air, your health, and your home environment.
Start small: clean the pre-filter this week. Then schedule a full clean every 3 months. Set a phone reminder or add it to your calendar. Make it a habit, like changing your toothbrush.
And remember—your purifier is only as good as its cleanest filter. A $300 smart purifier won’t outperform a $100 model if it’s clogged with dust.
So unplug, open up, and give your purifier the care it deserves. Your lungs will thank you.
And next time someone asks, “How do you keep your air so fresh?”—you can say, “Easy. I clean my purifier like my life depends on it. Because, honestly, it kind of does.”
Now go breathe easy. You’ve earned it.