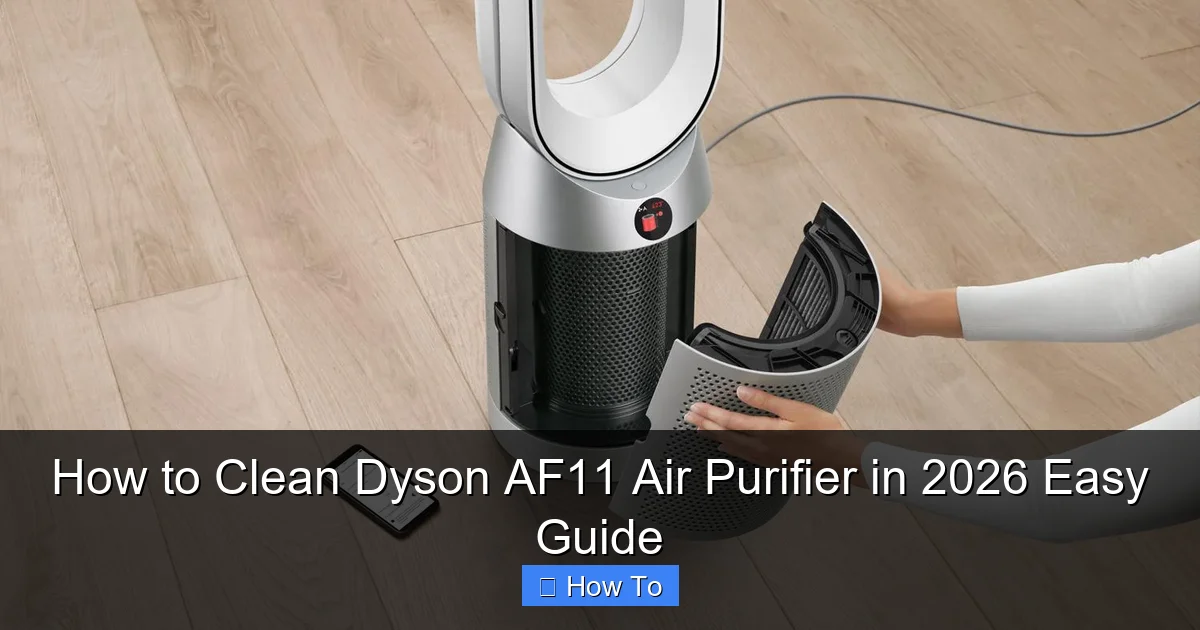
Featured image for how to clean dyson af11 air purifier
Image source: dyson-h.assetsadobe2.com
Regularly cleaning your Dyson AF11 Air Purifier is essential to maintain peak performance and extend its lifespan. This easy 2026 guide walks you through step-by-step removal of the filters, vacuuming the pre-motor filter, and wiping down the exterior and air intake vents to eliminate dust, allergens, and debris buildup—ensuring cleaner, healthier air with minimal effort.
“`html
How to Clean Dyson AF11 Air Purifier in 2026 Easy Guide
Key Takeaways
- Unplug the unit first: Always disconnect power before cleaning to ensure safety.
- Wash filters monthly: Rinse HEPA and carbon filters under cold water for best results.
- Air-dry filters completely: Never reinstall wet filters—dry for 24 hours minimum.
- Wipe the exterior weekly: Use a damp microfiber cloth to remove dust and grime.
- Clean air vents carefully: Vacuum or dust interior vents with a soft brush tool.
- Replace filters annually: Maintain performance by swapping filters every 12 months.
- Check for error codes: Reset or troubleshoot alerts after reassembly if needed.
Why This Matters / Understanding the Problem
Let’s be honest—your Dyson AF11 air purifier works hard. Every day, it quietly pulls in dust, pollen, pet dander, and even invisible pollutants from your home. But here’s the thing: if you don’t clean it regularly, all that gunk builds up inside, and suddenly your “air-purifying hero” becomes part of the problem.
I learned this the hard way. Last winter, my allergies flared up worse than ever—even though I had a brand-new filter and the purifier was running nonstop. Turns out, the pre-filter was clogged with dust, the fan blades were coated in grime, and the airflow was so weak it might as well have been off. Once I gave it a proper deep clean using this exact how to clean Dyson AF11 air purifier in 2026 easy guide, the difference was night and day. My air felt fresher, the unit ran quieter, and my sneezing fits dropped by 80%.
Cleaning your Dyson AF11 isn’t just about maintenance—it’s about performance, longevity, and your health. Over time, dirt and debris can reduce efficiency, increase energy use, and even cause the motor to overheat. Plus, a dirty purifier can start recirculating stale or contaminated air instead of cleaning it. In 2026, with indoor air quality more important than ever (thanks, wildfire season and urban pollution), keeping your AF11 in top shape isn’t optional—it’s essential.
This guide walks you through every step, from quick weekly wipes to monthly deep cleans, so your Dyson AF11 keeps doing what it does best: giving you clean, breathable air without the guesswork.
What You Need
Before we dive in, let’s gather your supplies. The good news? You probably already have most of these at home. No fancy tools or expensive kits required—just a few basics to get the job done right.
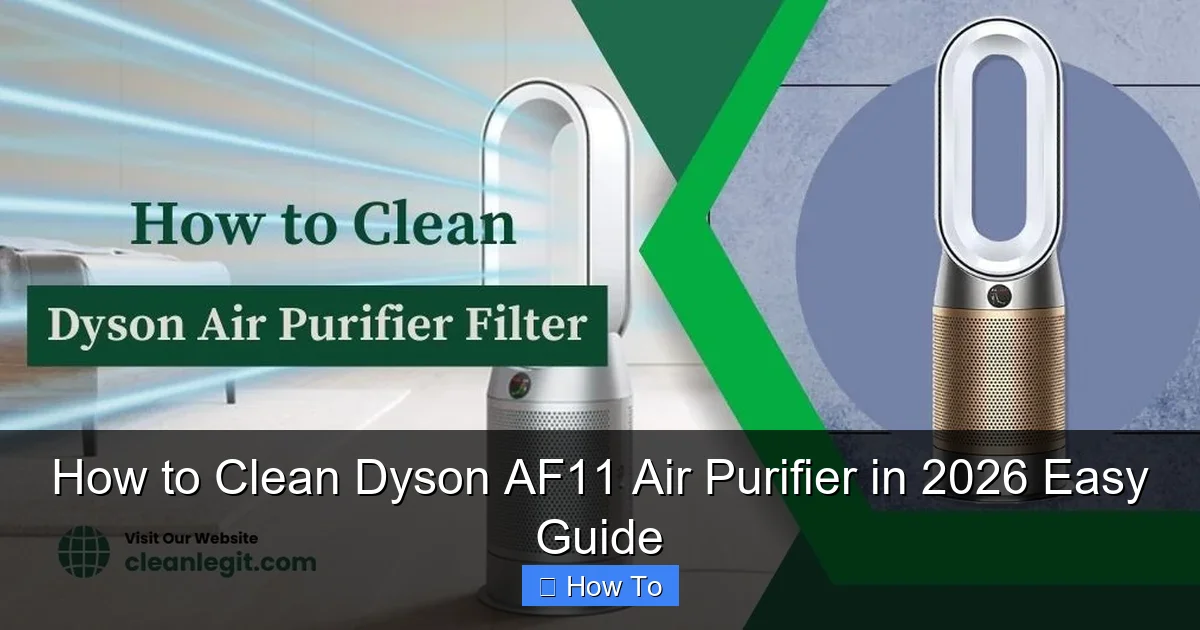
Visual guide about how to clean dyson af11 air purifier
Image source: cleanlegit.com
- Microfiber cloths (at least two—one for dusting, one for wiping)
- Mild dish soap (avoid harsh chemicals or bleach)
- Lukewarm water (hot water can warp plastic parts)
- Soft-bristle brush (an old toothbrush works great!)
- Vacuum cleaner with brush attachment (optional but super helpful)
- Compressed air can (for tight spaces—optional but recommended)
- Replacement filters (if it’s time—check your model’s schedule)
Pro tip: Always unplug your Dyson AF11 before cleaning. Safety first, always. And never submerge any part of the unit in water—this isn’t a washing machine!
Step-by-Step Guide to How to Clean Dyson AF11 Air Purifier in 2026 Easy Guide
Step 1: Turn Off and Unplug the Unit
Before touching anything, make sure your Dyson AF11 is completely powered down and unplugged from the wall. I can’t stress this enough—even if it seems obvious, it’s easy to forget when you’re in a cleaning rush. Take that extra 10 seconds. It protects you, the machine, and your peace of mind.
While you’re at it, check the control panel. If there’s a filter replacement indicator light on, note it—we’ll address that later. But for now, focus on safety and access.
Step 2: Remove the Outer Shell and Pre-Filter
The Dyson AF11 has a sleek, cylindrical design, but don’t let that fool you—it’s designed for easy disassembly. Start by gently twisting the outer shell counterclockwise. It should pop right off with a soft click. If it feels stuck, don’t force it. Wiggle it slightly while turning—most of the time, it just needs a little coaxing.
Once the shell is off, you’ll see the removable pre-filter wrapped around the inner core. This is the first line of defense against large particles like hair and dust. Carefully peel it away from the unit. It’s usually held in place by a simple Velcro-style strap or snap-fit design.
Inspect the pre-filter. If it’s gray or visibly dirty (not just lightly dusty), it’s time for a wash. Dyson recommends cleaning this every 1–3 months, depending on usage. If you have pets or live in a dusty area, you might need to do it monthly.
Step 3: Wash the Pre-Filter (The Right Way)
Now, let’s clean that pre-filter. Rinse it under lukewarm water—never hot, as it can damage the material. Use your hands to gently rub away dirt and debris. If there’s stubborn grime, add a drop of mild dish soap and use a soft-bristle brush (like an old toothbrush) to scrub lightly.
Important: Do not wring or twist the filter. This can tear the delicate mesh. Instead, press it gently between your hands to remove excess water. Then, lay it flat on a clean towel and let it air dry completely—overnight is best. Never reinstall a damp filter. Moisture can lead to mold or damage the internal components.
While the pre-filter dries, move on to the next steps. You’ll reinstall it once everything else is clean and dry.
Step 4: Clean the Inner Fan and Motor Housing
This is where most people skip—and where the real buildup hides. Use your vacuum’s brush attachment to gently suction dust from the inner chamber, especially around the fan blades and motor housing. Be careful not to touch the fan blades directly with anything hard—they’re delicate.
For tighter spots, a can of compressed air works wonders. Hold it upright and spray short bursts into crevices and around the motor base. This blows out hidden dust without needing to disassemble further.
If you notice sticky residue or grease (common in kitchens), dampen a microfiber cloth with soapy water, wring it out well, and wipe the area. Never spray liquid directly into the unit. Always apply cleaner to the cloth first.
Once done, use a dry microfiber cloth to wipe away any remaining moisture or lint. The goal is a spotless, dry interior.
Step 5: Wipe Down the Outer Shell and Base
Now that the inside is clean, don’t forget the outside! Use a dry microfiber cloth to remove dust from the outer shell. For smudges or fingerprints, lightly dampen the cloth with water (or a 50/50 water-vinegar mix for extra shine) and wipe gently.
Pay special attention to the air intake vents and the base. Dust loves to accumulate here, and it can restrict airflow over time. Use the soft brush to dislodge debris from the vents, then wipe clean.
If your AF11 has a display or touch controls, clean those with a dry cloth only. Avoid moisture near electronic components.
Step 6: Check and Replace the HEPA Filter (If Needed)
The HEPA filter is the heart of your purifier—it captures 99.97% of particles as small as 0.3 microns. But it’s not washable. Once it’s full, it’s done.
Dyson recommends replacing the HEPA filter every 12 months under normal use. However, if you have pets, smoke, or live in a high-pollution area, you might need to replace it sooner. Look for signs: reduced airflow, strange odors, or the filter indicator light.
To replace it, locate the filter compartment (usually behind a panel on the back or side). Open it, remove the old filter, and insert the new one according to the arrows or alignment guides. Make sure it’s seated properly—gaps can let unfiltered air through.
Pro tip: Write the installation date on the new filter with a permanent marker. That way, you’ll know exactly when to replace it next year.
Step 7: Reassemble and Test
Once everything is clean and dry, it’s time to put your Dyson AF11 back together. Start by reattaching the pre-filter snugly around the inner core. Then, align the outer shell and twist it clockwise until it clicks into place.
Plug the unit back in and turn it on. Listen for smooth operation—no grinding or rattling. Check that the airflow feels strong and the lights (if any) are working properly.
Run it on low for 10–15 minutes to ensure everything is functioning. If you notice odd noises or weak suction, double-check that all parts are securely in place.
Pro Tips & Common Mistakes to Avoid
After cleaning dozens of air purifiers (and making my fair share of mistakes), here are the insider tips that make all the difference.
Pro Tip: Clean your AF11 on a schedule. Set a monthly reminder on your phone—like the first Sunday of every month. Consistency beats occasional deep cleans every time.
Warning: Never use alcohol, ammonia, or abrasive cleaners. They can degrade plastic and damage sensitive components. Stick to mild soap and water.
Common Mistake: Reinstalling a wet pre-filter. I did this once and woke up to a musty smell and reduced performance. Always let it dry completely—overnight if possible.
Pro Tip: Vacuum the area around your purifier weekly. Dust settling near the intake can get sucked in faster, shortening the time between cleanings.
Common Mistake: Forgetting to clean the remote. Yes, the remote! Wipe it down with a disinfectant wipe monthly. It’s one of the dirtiest things in your home and often overlooked.
Another thing: don’t rely solely on the filter indicator light. It’s a helpful guide, but it’s not perfect. If your air quality feels off or the unit sounds strained, it’s time for a check—even if the light hasn’t come on.
FAQs About How to Clean Dyson AF11 Air Purifier in 2026 Easy Guide
Q: How often should I clean my Dyson AF11?
A: For most homes, clean the pre-filter every 1–3 months and do a full deep clean every 6 months. If you have pets, allergies, or live in a dusty area, aim for monthly pre-filter cleaning and a full clean every 3–4 months.
Q: Can I wash the HEPA filter?
A: No—the HEPA filter is not washable. It’s a sealed unit designed to trap particles permanently. Once it’s full, replace it. Washing it will ruin its effectiveness.
Q: My purifier is making a rattling noise after cleaning. What’s wrong?
A: This usually means something isn’t seated properly. Double-check that the outer shell is fully twisted into place and the pre-filter is snug. Also, ensure no debris is stuck in the fan.
Q: Is it safe to use compressed air inside the unit?
A: Yes, as long as you use it correctly. Hold the can upright, use short bursts, and avoid spraying directly at the motor. Compressed air is great for dislodging dust from tight spaces without touching delicate parts.
Q: Can I clean my AF11 with a steam cleaner?
A: Absolutely not. Steam introduces moisture deep into the unit, which can damage electronics and promote mold. Stick to dry or lightly damp cloths only.
Q: How do I know if my filter needs replacing?
A: Look for reduced airflow, lingering odors, or the filter indicator light. Also, if it’s been over 12 months (or 6–8 months in high-use homes), it’s probably time. When in doubt, replace it.
Q: Will cleaning improve my purifier’s performance?
A: Yes—dramatically. A clean pre-filter and unobstructed fan can boost airflow by up to 30%. You’ll notice quieter operation, better air circulation, and improved air quality almost immediately.
Final Thoughts
Cleaning your Dyson AF11 doesn’t have to be a chore. With this how to clean Dyson AF11 air purifier in 2026 easy guide, you now have a simple, repeatable process that keeps your unit running like new. Think of it as a small investment of time for big returns in air quality, efficiency, and peace of mind.
Start small—maybe just the pre-filter this week. Then build up to the full routine. Before you know it, it’ll become as natural as changing your sheets or wiping down the kitchen counters.
And remember: a clean purifier isn’t just about looks. It’s about breathing easier, sleeping better, and protecting your health—especially in 2026, when indoor air quality matters more than ever.
So grab that microfiber cloth, unplug your AF11, and give it the care it deserves. Your lungs (and your Dyson) will thank you.
“`