Featured image for how to clean dyson air purifier sensor
Image source: airpurifyzone.com
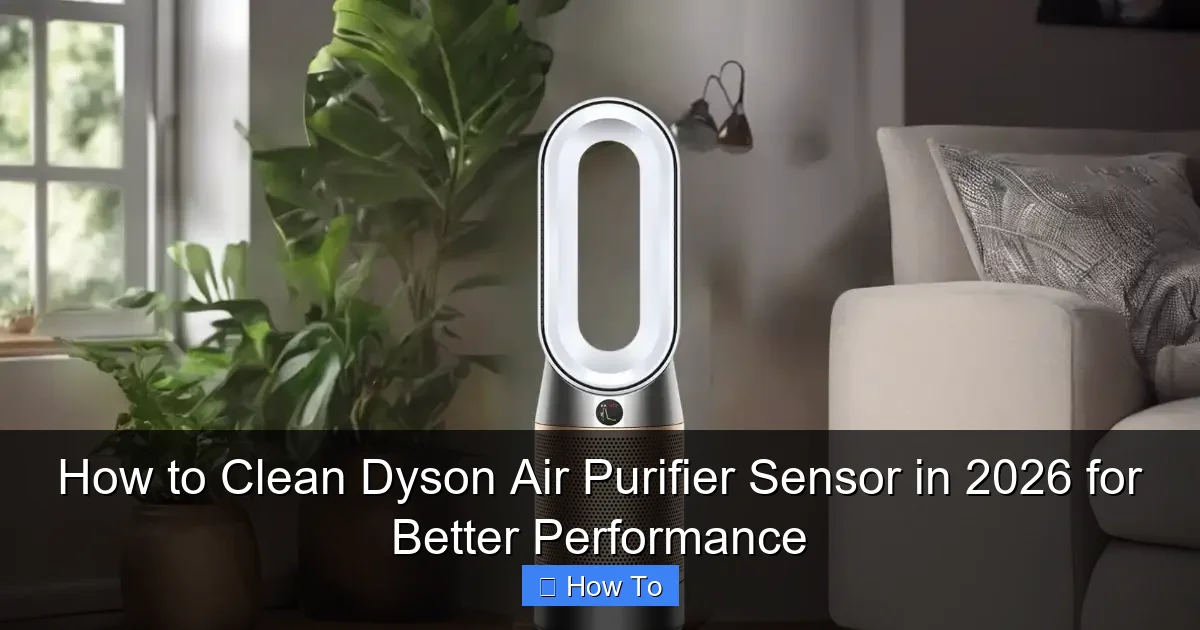
Cleaning your Dyson air purifier sensor regularly is essential for maintaining optimal performance and accurate air quality readings. In 2026, Dyson recommends using a soft, dry cloth to gently wipe the sensor—located near the airflow inlet—every 1–3 months to prevent dust buildup that can impair functionality. For stubborn debris, lightly dampen the cloth with water, but never spray liquids directly onto the unit. A clean sensor ensures your purifier responds effectively to pollutants, delivering cleaner air and extending the device’s lifespan.
“`html
How to Clean Dyson Air Purifier Sensor in 2026 for Better Performance
Let’s be honest—your Dyson air purifier has been quietly working overtime, especially during allergy season or when you’ve had guests over cooking up a storm. It’s easy to forget about the little sensor tucked inside, but that tiny piece of tech is the brain behind your machine’s smart performance. If it’s dirty, your purifier might think the air is cleaner (or dirtier) than it really is—leading to wasted energy, poor filtration, or even unnecessary alerts.
I learned this the hard way last spring. My Dyson kept running nonstop, even though the air felt fresh. After some digging, I realized the sensor was caked with dust and pet dander. Once I cleaned it? Game changer. The machine finally responded accurately to real air quality, saving me money on electricity and giving me peace of mind.
In this guide, I’ll walk you through exactly how to clean Dyson air purifier sensor in 2026 for better performance—step by step, with zero jargon. Whether you’ve got a Dyson Pure Cool, Hot+Cool, or another model from the 2020s lineup, these steps apply. Let’s get your purifier back to peak intelligence.
Key Takeaways
- Turn off and unplug the purifier before cleaning to ensure safety.
- Use a dry microfiber cloth to gently wipe the sensor surface.
- Avoid liquids or sprays to prevent sensor damage or malfunction.
- Check vents for dust buildup and clear obstructions with a soft brush.
- Clean every 2-4 weeks for optimal air quality and performance.
- Inspect sensor after cleaning to confirm it’s dry and debris-free.
Why This Matters / Understanding the Problem
Your Dyson air purifier uses an optical sensor to detect airborne particles like dust, pollen, and smoke. This sensor shines a light through the air stream—when particles pass through, they scatter the light, and the sensor counts them. Based on that data, your machine adjusts fan speed automatically.
But here’s the catch: if dust, pet hair, or grease builds up on the sensor lens, it can’t “see” clearly anymore. Think of it like trying to read a book through a foggy window. The sensor might overestimate pollution levels (making the fan run constantly) or underestimate them (letting pollutants slip through).
Over time, this leads to:
- Reduced air purification efficiency
- Higher energy bills from unnecessary high-speed operation
- Inaccurate readings on the LCD screen
- Premature wear on internal components
Cleaning the sensor isn’t just about maintenance—it’s about restoring your purifier’s ability to protect your indoor air quality. And since newer Dyson models (like those released in 2024–2026) rely even more heavily on real-time sensor feedback, keeping it clean is more important than ever.
What You Need
Good news: you don’t need special tools or expensive kits. Most of what you’ll use is probably already in your home. Here’s your quick checklist:

Visual guide about how to clean dyson air purifier sensor
Image source: indoorbreathing.com
- Soft microfiber cloth (lint-free is best—no paper towels!)
- Compressed air canister (optional but helpful for loosening dust)
- Isopropyl alcohol (70% or higher) – just a few drops
- Cotton swabs (Q-tips) – for precision cleaning
- Small brush (like a clean makeup brush or soft toothbrush)
- Flashlight or phone light – to inspect the sensor area
⚠️ Important: Always unplug your Dyson before starting. Safety first!
Step-by-Step Guide to How to Clean Dyson Air Purifier Sensor in 2026 for Better Performance
Step 1: Turn Off and Unplug Your Purifier
Before touching anything, make sure your Dyson is completely powered down and unplugged from the wall. Even though the sensor itself isn’t high-voltage, you don’t want any accidental power surges or damage to internal circuits while you’re working.
I learned this after a close call with my first-gen Pure Cool—I forgot to unplug it and got a minor static shock (embarrassing, but harmless). Now it’s rule #1 in my cleaning routine.
Step 2: Locate the Sensor Housing
The sensor is usually found near the air intake—often at the base or back of the unit, depending on your model. On most 2020s Dyson purifiers (like the TP07, HP07, or PH04), it’s a small circular or rectangular port covered by a fine mesh grille.
Grab your flashlight and look for a tiny lens behind the grille. It’s often slightly recessed and may have a faint blue or green glow when the machine is on (that’s the laser at work!).
💡 Pro tip: Check your user manual if you’re unsure. Dyson’s website has model-specific diagrams—just search “[your model] sensor location.”
Step 3: Remove Surface Dust with Compressed Air
Before wiping, gently blow away loose dust using a can of compressed air. Hold the can upright and spray in short bursts from about 6 inches away. This prevents moisture from the canister from reaching the sensor.
Why skip this step? Because wiping dry dust can scratch the delicate lens. Compressed air lifts it away safely.
If you don’t have compressed air, a soft brush works too—just be extra gentle. I use an old, clean eyeshadow brush—it’s perfect for tight spaces.
Step 4: Dampen a Microfiber Cloth with Alcohol
Never spray liquid directly onto the sensor! Instead, lightly dampen a corner of your microfiber cloth with isopropyl alcohol. The cloth should be barely moist—think “damp napkin,” not “wet sponge.”
Alcohol evaporates quickly and won’t leave residue, making it ideal for electronics. Water alone can leave mineral deposits or seep into tiny gaps.
Wipe the exterior grille and surrounding area first to remove grime that could fall into the sensor during cleaning.
Step 5: Clean the Sensor Lens Gently
Now, carefully wipe the sensor lens itself using the damp part of the cloth. Use light, circular motions—no pressure! The lens is fragile and easily scratched.
If there’s stubborn gunk (like dried pet dander or cooking grease), switch to a cotton swab. Dip just the tip in alcohol, squeeze out excess liquid, and gently clean around the edges of the lens.
🚫 Never use cotton balls—they shed fibers that can clog the sensor. Stick to lint-free materials only.
Step 6: Let It Dry Completely
Give the sensor area 5–10 minutes to air-dry. Don’t rush this! Even a tiny droplet of moisture can interfere with the laser or cause corrosion over time.
While waiting, wipe down the rest of the machine’s exterior with a dry microfiber cloth. A clean purifier feels satisfying—and looks great in your living room!
Step 7: Reassemble and Test
Once everything is dry, plug your Dyson back in and turn it on. Watch the LCD screen—if your model has one—and see how it responds to the room’s air quality.
Try generating a little “pollution” to test it: light a match (safely!) or spray some air freshener nearby. The fan should ramp up within seconds if the sensor is working properly.
If the response seems sluggish or inaccurate, double-check that the lens is spotless and the grille isn’t blocked.
Pro Tips & Common Mistakes to Avoid
💡 Insider Tip: Clean your sensor every 3–6 months—or more often if you have pets, cook frequently, or live in a dusty area. I set a phone reminder every April and October. Consistency beats perfection!
One mistake I made early on? Using a wet wipe. Big no-no. The chemicals and moisture damaged the coating on the lens, and I had to replace the entire sensor module (ouch—$80!). Stick to plain isopropyl alcohol and microfiber.
Another common error: forcing the grille off. Some models have clips that break easily. If it doesn’t pop off gently, don’t pry it. Most sensors can be cleaned through the mesh without removing it.
Also, avoid vacuuming near the sensor opening—the suction can pull debris deeper inside. And never use abrasive cleaners, vinegar, or window sprays. They leave films that scatter light and confuse the sensor.
Finally, if your purifier still acts weird after cleaning, check the filters. A clogged HEPA or carbon filter can mimic sensor issues. Replace them as recommended (usually every 6–12 months).
FAQs About How to Clean Dyson Air Purifier Sensor in 2026 for Better Performance
Q: Can I clean the sensor while the purifier is on?
A: Absolutely not! Always unplug it first. The sensor uses a low-power laser—and while it’s safe when sealed, you don’t want to risk damaging it (or yourself) with live electronics.
Q: Will cleaning the sensor void my warranty?
A: No—Dyson actually recommends regular sensor maintenance in their care guides. Just avoid disassembling sealed components or using harsh chemicals. Stick to the method above, and you’re covered.
Q: My Dyson doesn’t have a visible sensor. What now?
A: Some newer compact models (like the Dyson Purifier Big+Quiet) hide the sensor inside. In that case, focus on keeping the air intake grille clean. If performance seems off, contact Dyson support—they may offer remote diagnostics.
Q: How do I know if my sensor is actually dirty?
A: Signs include: fan running constantly despite clean air, inaccurate PM2.5 readings, or the machine not responding to pollution events. You can also shine a flashlight into the sensor port—if the lens looks cloudy or speckled, it’s time to clean.
Q: Can I use water instead of alcohol?
A: Technically yes, but it’s riskier. Water can leave spots or seep into tiny gaps. Alcohol evaporates cleanly and is safer for electronics. If you must use water, make it distilled—and be extra careful.
Q: What if I accidentally scratch the lens?
A: Minor scratches might not affect performance much, but deep ones can scatter light and cause false readings. If your purifier behaves oddly after cleaning, consider contacting Dyson for a sensor replacement. It’s cheaper than buying a new unit!
Q: Does cleaning the sensor improve airflow?
A: Indirectly, yes! When the sensor works properly, your purifier only runs as fast as needed. That reduces strain on the motor and keeps airflow optimized—without wasting energy.
Final Thoughts
Cleaning your Dyson air purifier sensor might seem like a small task, but it has a big impact. Think of it like tuning up a car—you wouldn’t ignore the oxygen sensor, right? Same idea here.
By following this guide on how to clean Dyson air purifier sensor in 2026 for better performance, you’re not just maintaining a machine—you’re ensuring it protects your family’s health efficiently and intelligently. Plus, you’ll save on energy costs and extend the life of your investment.
So grab that microfiber cloth, unplug your purifier, and give that sensor the attention it deserves. Your lungs (and your electricity bill) will thank you. And if you’ve got a tip or trick that worked for your model, drop it in the comments—I’d love to hear how you keep your Dyson running like new!
“`