
Featured image for how to clean honeywell air purifier user manual
Image source: view.publitas.com
Keeping your Honeywell air purifier in peak condition starts with proper cleaning, and the 2026 user manual guide makes it simple and effective. Follow the step-by-step instructions to safely clean filters, vents, and internal components, ensuring optimal performance and longer lifespan. Regular maintenance not only improves air quality but also prevents costly repairs—don’t skip this essential routine.
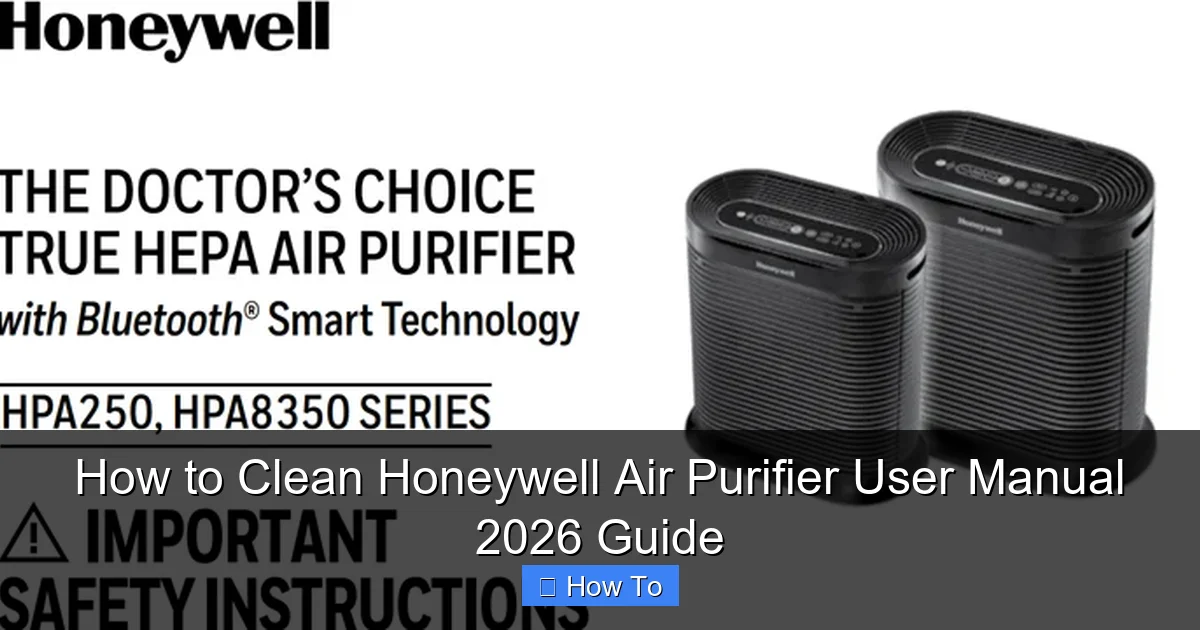
How to Clean Honeywell Air Purifier User Manual 2026 Guide
Key Takeaways
- Always unplug the air purifier before cleaning for safety.
- Wipe the exterior with a damp cloth and mild detergent.
- Replace filters every 6–12 months to maintain efficiency.
- Vacuum pre-filters monthly to reduce dust buildup.
- Check indicator lights for filter replacement alerts.
- Use soft tools to avoid damaging internal components.
- Follow manual instructions specific to your model for best results.
Why This Matters / Understanding the Problem
Let’s be honest—air purifiers are like the silent heroes of your home. They quietly work to keep the air clean, filtering out dust, allergens, pet dander, and even cooking odors. But here’s the thing: if you don’t clean your Honeywell air purifier regularly, it stops working as well. I learned this the hard way when my allergies flared up, even though my purifier was running 24/7. A quick inspection revealed a filter caked in dust and a pre-filter so clogged it looked like a lint trap.
The How to Clean Honeywell Air Purifier User Manual 2026 Guide isn’t just about maintenance—it’s about performance. A clean purifier means better air quality, lower energy use, and fewer replacements. Honeywell models (like the HPA300, HPA200, and newer 2026 editions) are built to last, but only if you follow the right cleaning routine.
Over time, dirt builds up in the pre-filter and primary HEPA filter, reducing airflow and efficiency. In fact, Honeywell recommends checking filters every 3–6 months, depending on usage. If you have pets, smoke indoors, or live in a dusty area, you’ll need to clean more often. The good news? Cleaning your air purifier is easier than you think—and this guide will walk you through it step by step.
What You Need
Before you start, gather these simple tools. Most are probably already in your home:
Visual guide about how to clean honeywell air purifier user manual
Image source: manualsgrid.com
- Soft microfiber cloth or duster – for wiping the exterior and internal surfaces
- Vacuum with a brush attachment – ideal for cleaning the pre-filter and grilles
- Mild dish soap and warm water – for deep cleaning the pre-filter (if washable)
- Bucket or sink – for soaking the pre-filter
- Clean towel or drying rack – to air-dry the pre-filter completely
- Replacement pre-filter (optional) – Honeywell recommends replacing the pre-filter every 3 months if heavily used
- Replacement HEPA filter (if needed) – these aren’t washable and should be replaced every 12–18 months
- Owner’s manual (or digital copy) – to identify your model and filter type
Pro tip: Keep a filter maintenance log (I use a sticky note on the back of my purifier). Note the date you last cleaned or replaced each filter. This helps you stay on schedule and avoid guesswork.
Warning: Never use harsh chemicals, abrasive sponges, or submerge the main unit in water. These can damage sensors, electronics, or the HEPA filter. Stick to mild soap and gentle wiping.
Step-by-Step Guide to How to Clean Honeywell Air Purifier User Manual 2026 Guide
Cleaning your Honeywell air purifier doesn’t take long—usually 15 to 30 minutes. The key is consistency. Whether you have a compact HPA100 or a larger HPA300, the process is similar. Let’s break it down into clear, easy steps.
Step 1: Turn Off and Unplug the Unit
Safety first. Always power down your air purifier and unplug it from the wall before cleaning. I once made the mistake of wiping the control panel while it was on—let’s just say the fan suddenly kicked into turbo mode and scared the cat.
Unplugging also prevents accidental button presses and protects internal components. If your model has a remote, set it aside. Now, place the purifier on a flat, stable surface like a table or countertop. This gives you easy access to all sides.
Step 2: Remove the Front Cover or Access Panel
Most Honeywell purifiers have a front cover that snaps or slides off. On newer 2026 models, you’ll typically press a release button or gently pry the cover open from the bottom edge. Use your fingers—no tools needed.
Once the cover is off, you’ll see the filters inside. Take a moment to inspect the area. Dust, pet hair, or even a stray cracker (true story) can get stuck behind the cover. Use your microfiber cloth to wipe down the interior surfaces and the back of the cover.
Remember: The How to Clean Honeywell Air Purifier User Manual 2026 Guide emphasizes this step because debris here can block airflow and strain the motor over time.
Step 3: Take Out the Pre-Filter
The pre-filter is the first line of defense. It catches large particles like hair and dust, protecting the expensive HEPA filter. On most Honeywell models, it’s a thin, mesh-like screen that slides out easily.
Pull it out gently. If it’s gray, fuzzy, or looks like it’s been through a sandstorm, it’s time for a deep clean or replacement. Hold it up to the light—if you can’t see through it, it’s too clogged.
For washable pre-filters (common on HPA series):
- Rinse under warm water
- Add a drop of mild dish soap and gently scrub with your fingers
- Rinse thoroughly until water runs clear
- Shake off excess water
- Let it air dry completely on a towel (this takes 1–2 hours)
Pro tip: Never wring out the pre-filter. It can tear or warp. Just let it dry flat. If you’re in a hurry, use a fan to speed things up—but never a hairdryer or heat source.
If your pre-filter is disposable (check your manual), toss it and replace it. Honeywell’s 2026 models often come with reusable pre-filters, but some older versions use paper-based ones.
Step 4: Vacuum the HEPA Filter (If Applicable)
Here’s a common misconception: HEPA filters are not washable. Water destroys the fine fibers that trap microscopic particles. So, don’t even think about rinsing it.
Instead, use your vacuum’s brush attachment to gently remove surface dust. Hold the nozzle a few inches away and work in short, overlapping strokes. Focus on both sides of the filter.
I do this every 3 months. It extends the life of the HEPA filter by up to 25%. But if the filter is discolored (yellow, brown, or black), smells musty, or feels brittle, it’s time to replace it—usually every 12–18 months.
Pro tip: When replacing the HEPA filter, write the installation date on the frame with a marker. This helps you track when it’s due for a swap.
Step 5: Clean the Interior and Fan Grille
Now that the filters are out, clean the empty chamber. Use your vacuum to remove dust from the fan blades, vents, and any crevices. A small brush or cotton swab works well for tight spots.
For stubborn grime, dampen a microfiber cloth with water (not dripping wet) and wipe down the interior. Avoid getting water near the motor or electrical components. If you see mold or mildew (rare but possible in humid climates), use a cloth with a 1:1 mix of white vinegar and water. Wipe, then dry immediately.
On newer 2026 models with smart sensors (like air quality indicators), be extra gentle. Use only a dry or slightly damp cloth. Never spray anything directly onto the unit.
Step 6: Reinstall the Filters and Cover
Once everything is dry, put it back together. Here’s the order:
- Place the clean (or new) pre-filter into the slot. Make sure it sits flat and secure.
- Insert the HEPA filter. Align the arrows or labels as shown in your manual.
- Double-check that both filters are snug and properly seated.
- Reattach the front cover. It should click or snap into place.
Take a moment to inspect the fit. If the cover doesn’t close properly, a filter may be misaligned. Fix it now—running the purifier with a loose filter can cause noise or poor performance.
Step 7: Wipe Down the Exterior
While the unit is still unplugged, clean the outside. Use a microfiber cloth to wipe the control panel, vents, and sides. A damp cloth (with a drop of soap if needed) works for sticky spots.
For stainless steel models (like some Honeywell tower purifiers), avoid abrasive cleaners. They can leave scratches. A vinegar-water mix or a dedicated stainless steel wipe is safer.
Don’t forget the base and feet. Dust and pet hair often collect here, which can affect stability.
Step 8: Plug In and Test Run
Now, plug the purifier back in. Turn it on and listen. You should hear smooth, consistent airflow. If it’s noisy or rattles, double-check that the cover and filters are secure.
Set it to the lowest speed first. Let it run for 10–15 minutes. This “break-in” period helps the filters settle. If your model has an air quality sensor, watch the indicator lights. They should stabilize within an hour.
Finally, reset the filter timer (if your model has one). On many Honeywell 2026 units, press and hold the “Filter” or “Reset” button for 3 seconds. This clears the reminder and starts a new cycle.
Pro Tips & Common Mistakes to Avoid
After years of cleaning my own purifiers—and helping friends with theirs—I’ve picked up a few tricks (and learned from my blunders).
Pro tip #1: Clean the pre-filter monthly if you have pets. I have two cats, and I noticed a huge difference when I started doing this. Less hair in the air, fewer allergy symptoms, and the purifier runs quieter.
Pro tip #2: Use a filter subscription. Honeywell offers auto-replenishment for filters. It’s convenient, saves money, and ensures you never run out. I set mine to deliver every 3 months for the pre-filter and every 12 months for the HEPA.
Pro tip #3: Keep your purifier away from walls and furniture. At least 6–12 inches of clearance on all sides improves airflow and efficiency. I once had mine tucked into a corner—big mistake. It sounded like a jet engine and cleaned half as well.
Common mistake #1: Skipping the pre-filter. I used to think, “Why clean the cheap one? The HEPA does all the work.” But the pre-filter is crucial. It protects the HEPA from large particles, so it lasts longer. A clogged pre-filter forces the HEPA to work harder—shortening its life.
Common mistake #2: Using compressed air. It seems like a quick fix, but high-pressure air can damage the delicate HEPA fibers. Stick to vacuuming or gentle brushing.
Common mistake #3: Not drying the pre-filter completely. I once reinstalled a damp pre-filter and got a musty smell after a few days. It took a week to air out. Always let it dry for at least 2 hours—longer in humid climates.
Pro tip #4: Check for recalls. Honeywell occasionally issues updates for specific models. Visit their website or sign up for email alerts. In 2025, they recalled a batch of HPA200 units due to a faulty sensor. Being informed saved me from potential issues.
Also, consider your environment. If you live near a construction site, in a dusty desert, or have a smoker in the house, clean every 2 months. For average homes with no pets or allergies, every 3–4 months is fine.
FAQs About How to Clean Honeywell Air Purifier User Manual 2026 Guide
Let’s tackle the questions I hear most—from my friends, family, and even online groups.
Q: How often should I clean my Honeywell air purifier?
For most homes, clean the pre-filter every 3 months and the entire unit every 6 months. But if you have pets, smoke, or live in a dusty area, do it every 1–2 months. The How to Clean Honeywell Air Purifier User Manual 2026 Guide recommends checking filters monthly and replacing the pre-filter every 3 months under heavy use.
Q: Can I wash the HEPA filter?
No. Never wash or wet the HEPA filter. Water ruins the fine fibers that trap allergens and particles. Instead, vacuum it gently every 3 months and replace it every 12–18 months. Some newer models have a “washable” HEPA—double-check your manual. Even then, only rinse with water, no soap.
Q: My purifier is making a loud noise after cleaning. What’s wrong?
First, unplug it. Check that the front cover is securely closed and the filters are properly seated. A loose cover or misaligned filter can cause vibrations. Also, make sure the pre-filter isn’t folded or bunched up. If the noise persists, the fan may be dirty. Clean it with a vacuum or cotton swab—but never use water.
Q: Where can I find the filter model number?
Look on the filter itself—it’s usually printed on the frame. Or check your user manual. For 2026 models, the filter type is often listed on the back of the unit or in the app (if it’s a smart model). If you can’t find it, take a photo and contact Honeywell support. They’re usually helpful.
Q: Is it safe to use vinegar or bleach to clean the unit?
Vinegar (diluted 1:1 with water) is safe for removing mold or mineral deposits, but use it sparingly and never near electrical parts. Bleach is a no-go. It can corrode metal parts and release harmful fumes when mixed with other cleaners. Stick to mild soap, water, or a vinegar-water mix for stubborn spots.
Q: My air quality light stays red even after cleaning. Why?
The sensor may need time to recalibrate. Let the purifier run for 1–2 hours. If it’s still red, the HEPA filter might be old or damaged. Replace it. Also, check for strong odors (like cooking or perfume) that can temporarily trigger the sensor. Avoid placing the purifier near stoves or vents.
Q: Can I use a generic filter instead of a Honeywell-branded one?
Technically, yes—but I don’t recommend it. Generic filters often don’t seal properly, reducing efficiency. They may also lack the same filtration standards. Honeywell’s filters are designed specifically for their airflow and sensor systems. Using a cheap knockoff could void your warranty or damage the unit. Stick with genuine parts.
Final Thoughts
Cleaning your Honeywell air purifier isn’t just a chore—it’s an investment in your health. A well-maintained purifier delivers cleaner air, lasts longer, and saves you money on replacements. The How to Clean Honeywell Air Purifier User Manual 2026 Guide makes it simple: unplug, remove filters, clean gently, dry thoroughly, and reassemble.
Remember, consistency is key. Set a reminder on your phone or calendar. I use my phone’s “Recurring Reminder” feature every 3 months. It takes 20 minutes, tops, and the payoff is worth it—fewer sneezes, better sleep, and a quieter home.
Don’t wait until your purifier is struggling. Start today. Grab your cloth, vacuum, and a few minutes of time. Your lungs (and your cat) will thank you.
And if you’re ever unsure, consult your manual or reach out to Honeywell support. They’ve got your back. After all, a clean purifier is a happy purifier—and a happy home starts with clean air.