Featured image for how to disassemble a honeywell air purifier
Image source: m.media-amazon.com
Disassembling a Honeywell air purifier in 2026 is simpler than ever with this step-by-step guide designed for safety and efficiency. Whether you’re cleaning filters, troubleshooting issues, or performing maintenance, following the correct disassembly process ensures optimal performance and longevity of your device. With clear instructions and minimal tools required, even beginners can confidently take apart and reassemble their air purifier without damaging internal components.
“`html
How to Disassemble a Honeywell Air Purifier in 2026: Easy Guide
Key Takeaways
- Unplug the unit before starting any disassembly for safety.
- Remove the front panel by gently pulling it away from the base.
- Slide out the filter carefully to avoid damaging internal components.
- Use a screwdriver to detach screws securing the outer housing.
- Label parts during removal to simplify reassembly later.
- Clean components thoroughly while the unit is open for maintenance.
- Reassemble in reverse order to ensure proper function and safety.
Why This Matters / Understanding the Problem
Let’s be honest—your Honeywell air purifier has been quietly doing its job for months, maybe even years. It’s humming away, filtering dust, pollen, and pet dander, and you barely notice it… until it starts making weird noises or the airflow feels weaker. That’s usually your cue: it’s time for a deep clean or filter replacement. But here’s the thing—most people don’t realize that to truly maintain your unit, you need to know how to disassemble a Honeywell air purifier in 2026 easy guide style—step by step, without breaking anything.
I learned this the hard way. Last winter, my Honeywell HPA300 started sounding like a lawnmower. I assumed the filter was just dirty, so I popped it out, gave it a quick vacuum, and put it back. Big mistake. The real issue was dust caked inside the fan housing—something I couldn’t reach without taking the whole thing apart. After a few frustrating YouTube videos and one cracked plastic clip, I finally got it right. That’s when I realized: there’s a smarter, gentler way to do this.
Whether you’re dealing with reduced performance, strange smells, or just routine maintenance, knowing how to safely take apart your Honeywell air purifier can save you money, extend the life of your device, and keep your indoor air truly clean. And yes, even in 2026, these machines still need hands-on care—no app can clean the internal fan blades!
What You Need
Before we dive in, let’s gather the right tools. You don’t need a full toolbox—just a few basics that are probably already in your drawer. Here’s what I always keep on hand:
Visual guide about how to disassemble a honeywell air purifier
Image source: m.media-amazon.com
- Phillips-head screwdriver (size #2 is usually perfect)
- Soft microfiber cloth (for wiping down surfaces without scratching)
- Compressed air can (great for blowing dust out of tight spaces)
- Small bowl or tray (to hold screws so you don’t lose them)
- Optional: flashlight (Honeywell units can have dimly lit interiors)
- Optional: gloves (if you’re sensitive to dust or have pets)
Pro tip: Unplug the unit before you start. I can’t stress this enough—even if it’s off, there’s still a chance of accidental startup or static discharge. Safety first, always.
Step-by-Step Guide to How to Disassemble a Honeywell Air Purifier in 2026 Easy Guide
Step 1: Power Down and Prepare Your Workspace
Start by unplugging your Honeywell air purifier from the wall outlet. Then, move it to a clean, flat surface—like a kitchen table or workbench—with good lighting. I like to lay down an old towel to protect both the unit and the surface underneath. Trust me, you don’t want to scratch that sleek white finish.

Visual guide about how to disassemble a honeywell air purifier
Image source: thefixitlab.com
While you’re at it, check your model number (usually on a sticker near the power cord). Honeywell makes dozens of purifiers—HPA100, HPA200, HPA300, and newer smart models like the HPA5350. The disassembly steps are similar, but knowing your exact model helps if you need to look up a manual later.
Step 2: Remove the Front Grille or Cover
Most Honeywell air purifiers have a front grille that snaps or screws into place. On older models like the HPA100 series, it’s usually held by plastic clips. Gently press the sides or top edge (look for small indentations) and pull outward. Don’t force it—if it doesn’t budge, check for hidden screws near the bottom.
Newer models, especially those with digital displays, often use a combination of clips and screws. Use your Phillips-head screwdriver to remove any visible screws along the bottom or sides. Once those are out, the grille should lift off easily. Set it aside—you’ll clean it separately in a bit.
Step 3: Take Out the Pre-Filter and HEPA Filter
With the front cover off, you’ll see the pre-filter—a thin, washable mesh layer that catches large particles like pet hair. Simply lift it out. Give it a good rinse under cool water, let it air dry completely, and set it aside.
Next, locate the main HEPA filter. It’s usually a thick, pleated cartridge behind the pre-filter. Most Honeywell models have a latch or tab you press to release it. Slide the filter straight out—don’t twist or yank. If it’s been a while since replacement, expect some dust buildup. That’s normal! Just avoid touching the filter media directly; oils from your fingers can reduce efficiency.
Step 4: Access the Internal Components
Now comes the part where many people get stuck: getting inside the unit. Look around the edges of the main housing for screws—typically 4 to 6 of them, often hidden under rubber feet or labels. Peel back any stickers carefully (use a hairdryer on low heat if they’re stubborn) to reveal screw heads.
Once all screws are removed, gently separate the two halves of the housing. Start from the bottom and work your way up, using your fingers to pry apart the plastic seams. If it feels stuck, double-check for missed screws. Never use a knife or metal tool—you’ll crack the casing.
Inside, you’ll see the fan assembly, motor, and possibly a carbon filter (on some models). Take a moment to observe how everything is connected before moving anything. Snap a quick photo with your phone—it’ll help when reassembling.
Step 5: Clean the Fan Blades and Motor Housing
This is where the magic happens. Over time, dust accumulates on the fan blades, slowing airflow and causing noise. Use your compressed air can to blow out loose debris. Hold the can upright and spray in short bursts—don’t tilt it, or you’ll release liquid propellant.
For stubborn grime, wrap a microfiber cloth around a butter knife or plastic spatula and gently wipe each blade. Avoid spraying water or cleaner directly onto the motor—it’s not sealed and can short-circuit. If you must dampen the cloth, make it barely moist.
While you’re in there, wipe down the interior walls and motor housing with a dry cloth. You’ll be surprised how much dust hides in corners!
Step 6: Reassemble Your Honeywell Air Purifier
Reverse the disassembly steps—but go slow. Start by placing the two housing halves back together, aligning the clips and screw holes. Press firmly but evenly until you hear soft clicks.
Reinsert all screws, tightening them just enough to secure the case—don’t over-tighten, or you’ll strip the plastic threads. Then, slide the HEPA filter back in (make sure it’s facing the right direction—arrows on the frame should point inward). Snap the pre-filter into place, and finally, reattach the front grille.
Plug the unit back in and run a test cycle on the lowest setting. Listen for unusual noises. If everything sounds smooth, you’re golden!
Pro Tips & Common Mistakes to Avoid
Having done this more times than I’d like to admit, here are my hard-earned insights:
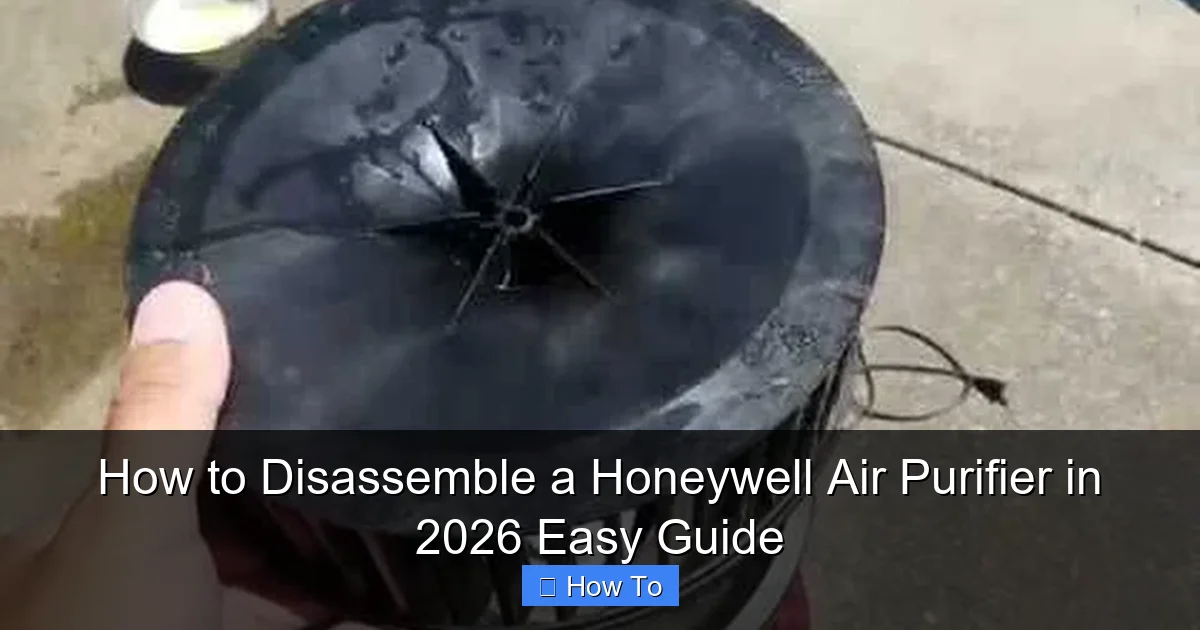
Visual guide about how to disassemble a honeywell air purifier
Image source: i.ytimg.com
Pro Tip: Label your screws as you remove them. Use sticky notes or a small diagram. Different screws go in different places—mixing them up can misalign parts or leave gaps that let dust in.
Warning: Never submerge any part of the unit in water—even the fan assembly. Moisture near the motor is a fire hazard and voids your warranty.
Common Mistake: Forcing plastic clips. Honeywell uses high-quality but brittle plastic. If a clip breaks, you might need a replacement part (check Honeywell’s official site). Always wiggle gently, don’t pull straight out.
Also, don’t skip cleaning the exterior vents! Use a vacuum brush attachment or a dry toothbrush to clear dust from the intake and outlet grilles. It makes a bigger difference than you think.
One last thing: if your model has a UV-C light (like some HPA5000 series), avoid looking directly at it when powered on—even briefly. And never touch the bulb with bare hands; oils can cause hot spots and shorten its life.
FAQs About How to Disassemble a Honeywell Air Purifier in 2026 Easy Guide
Q: How often should I disassemble my Honeywell air purifier?
A: For most homes, once every 3–6 months is plenty. If you have pets, allergies, or live in a dusty area, aim for every 2–3 months. Regular filter changes (every 6–12 months) don’t require full disassembly—just swap the HEPA filter.
Q: Can I use soap and water to clean the fan blades?
A: Not recommended. Water can seep into the motor bearings and cause corrosion. Stick to dry methods: compressed air, microfiber cloths, or slightly damp (not wet) wipes. Always ensure everything is bone-dry before reassembly.
Q: What if I lose a screw or break a clip?
A: Don’t panic! Honeywell sells replacement parts online, including grilles, clips, and screws. Search your model number + “replacement parts” on their support site. If all else fails, contact customer service—they’re surprisingly helpful.
Q: Will disassembling void my warranty?
A: Generally, no—as long as you don’t damage the unit. Honeywell expects users to perform basic maintenance. Just avoid modifying internal wiring or removing warranty seals (if present). Keep your receipt handy just in case.
Q: My model has a carbon filter—do I need to remove it during disassembly?
A: Only if it’s clogged or expired (usually every 3–6 months). Most carbon filters sit behind the HEPA filter and can be lifted out without tools. Replace it if it smells musty or looks saturated with debris.
Q: Can I vacuum inside the unit instead of taking it apart?
A: You can try, but it’s not as effective. Vacuum nozzles can’t reach curved fan blades or tight motor housings. Full disassembly gives you 360-degree access—worth the extra 15 minutes.
Q: Are there any Honeywell models that shouldn’t be disassembled at home?
A: Most consumer models are designed for user maintenance. However, if your unit has a sealed motor compartment (rare) or proprietary fasteners (like Torx screws), it’s best to consult the manual or call support first. When in doubt, don’t force it.
Final Thoughts
Learning how to disassemble a Honeywell air purifier in 2026 easy guide isn’t just about fixing problems—it’s about taking control of your air quality. These machines are built to last, but they need a little TLC to perform at their best. By following these steps, you’ll keep your purifier running quietly, efficiently, and safely for years to come.
Remember: patience is key. Rushing leads to broken clips, lost screws, and frustration. Take your time, keep your workspace tidy, and celebrate the small win when your purifier hums back to life like new. And if you ever feel unsure? Grab that model number, check Honeywell’s official support page, or snap a photo and ask in a home maintenance forum. You’re not alone in this!
Now go breathe easy—you’ve earned it.
“`