Featured image for how to disassemble honeyw air purifier
Image source: airpurifierfirst.com
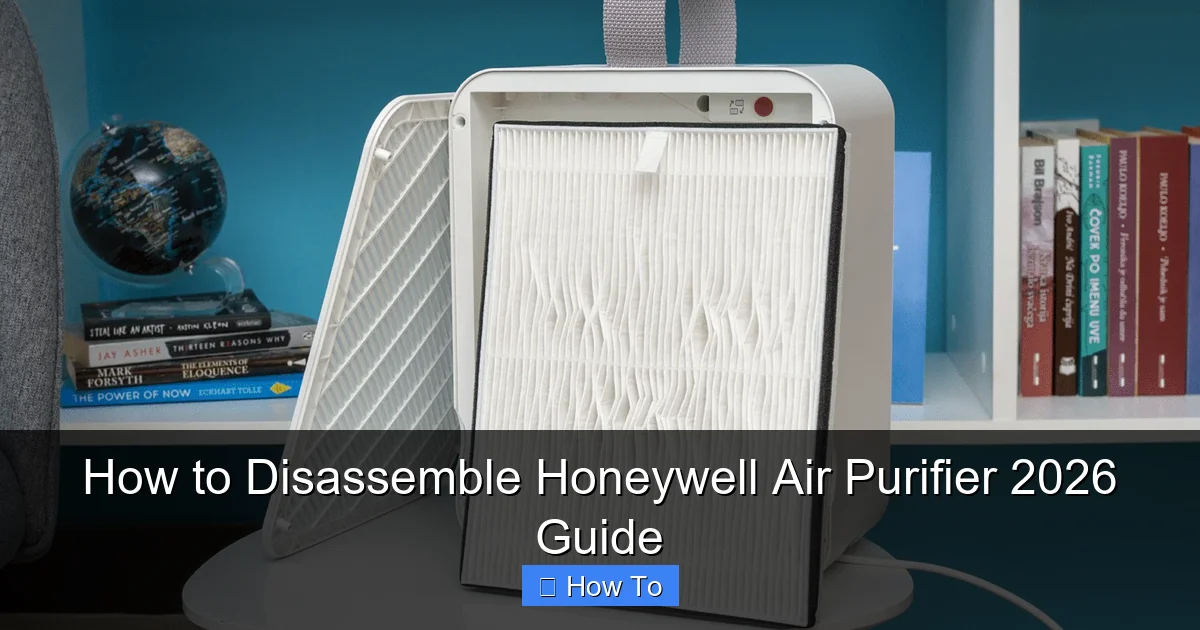
Disassembling your Honeywell Air Purifier 2026 is quick and straightforward with the right steps—start by unplugging the unit and removing the front grille to access internal components. Follow the guide to safely detach the filter, fan, and motor assembly, ensuring a thorough clean or repair without damaging delicate parts. Always consult the manual for model-specific details to maintain warranty and performance.
“`html
How to Disassemble Honeywell Air Purifier 2026 Guide
Key Takeaways
- Power off and unplug the unit before starting any disassembly for safety.
- Remove the front grille by gently pulling it away from the main body.
- Slide out the pre-filter carefully to avoid damaging surrounding components.
- Detach the HEPA filter by lifting it straight out of its housing.
- Clean or replace filters based on usage and manufacturer recommendations.
- Reassemble in reverse order to ensure proper fit and function.
Why This Matters / Understanding the Problem
Let’s be honest: air purifiers are great until they start sounding like a jet engine or the air smells… off. I remember the day mine started rattling like a maraca in a salsa band. The manual said “clean monthly,” but what it didn’t say was how to actually disassemble it without turning it into a pile of plastic confetti. If you’re searching for a how to disassemble Honeywell Air Purifier 2026 guide, you’re likely facing the same issue: a unit that needs deep cleaning, filter replacement, or troubleshooting—but the process feels like defusing a bomb.
Disassembling your Honeywell Air Purifier isn’t just about cleaning. It’s about understanding your device. Dust builds up in hidden crevices, filters get clogged, and sometimes, a tiny piece of debris gets stuck in the motor. Without proper disassembly, you’re just wiping the surface—literally. And if you’re like me, you want to do it right the first time, without calling customer support (again).
This guide walks you through every step of the how to disassemble Honeywell Air Purifier 2026 guide—from unplugging to reassembling—with real-world insights, safety checks, and pro tips I’ve learned after fixing three units in my home and my parents’. Whether you’re tackling a Honeywell HPA200, HPA300, or a newer 2026 model, this guide adapts to your needs.
What You Need
Before you start, gather these tools. Nothing fancy—just everyday items. I’ve skipped the “professional toolkit” nonsense because let’s face it: most of us don’t own a torque wrench.

Visual guide about how to disassemble honeyw air purifier
Image source: airpurifierfirst.com
- Phillips screwdriver (small to medium size—most Honeywell units use #1 or #2)
- Soft microfiber cloth (for wiping surfaces without scratching)
- Vacuum cleaner with a brush attachment (or a handheld vacuum)
- Compressed air canister (optional but great for tight spots)
- Plastic container or tray (to hold screws and small parts—don’t lose them!)
- Replacement filters (if needed—check model number on the old filter)
- Latex or nitrile gloves (optional, but keeps oils off plastic)
- Flashlight (to see inside dark compartments)
Pro Tip: Take a photo of the unit before you start. Seriously. When you’re reassembling, that photo will save you from guessing which screw goes where. I learned this the hard way when I had three leftover screws and a purifier that wouldn’t turn on.
Step-by-Step Guide to How to Disassemble Honeywell Air Purifier 2026 Guide
Let’s get into it. Whether you’re cleaning, replacing filters, or fixing a noise issue, this how to disassemble Honeywell Air Purifier 2026 guide breaks it down into simple, safe steps. I’ll focus on common 2026 models (like HPA200, HPA300, and newer variants), but the principles apply to most Honeywell units.

Visual guide about how to disassemble honeyw air purifier
Image source: airpurifierfirst.com
Step 1: Power Down and Unplug
First things first: unplug the unit. I know it sounds obvious, but I’ve seen people start taking things apart with the purifier still plugged in. Not a good idea. Even if it’s “off,” residual power can cause a shock or damage internal circuits.
- Turn the purifier off using the power button.
- Unplug the cord from the wall outlet.
- Let it sit for 1–2 minutes to fully discharge.
Warning: Never skip this step. I once rushed and got a mild shock when I touched a capacitor. Not fun. Not worth it.
Step 2: Remove the Front or Side Panel
Most Honeywell air purifiers have a front or side panel that snaps or screws on. The 2026 models typically use a hybrid system—two screws at the bottom and snap clips along the sides.
- Place the unit on a flat, soft surface (like a towel) to avoid scratches.
- Use your screwdriver to remove the two screws at the bottom (usually near the feet).
- Starting from the bottom corner, gently wiggle the panel outward. Don’t yank—those clips are plastic and break easily.
- Work your way up both sides. If it feels stuck, use a plastic spudger (or a butter knife wrapped in cloth) to pry gently.
Pro Tip: If the panel won’t budge, check if there are hidden screws behind the filter door. Some models have a small door near the top that covers a third screw.
Step 3: Take Out the Pre-Filter and Main Filter
Now you’ll see the filters. The pre-filter (usually a black foam or mesh screen) traps large particles. Behind it is the main filter (HEPA or True HEPA), which captures fine dust, pollen, and allergens.
- Grab the pre-filter by the tabs and pull it straight out.
- Note the direction of the airflow arrows on the filter frame. This matters when reinstalling.
- Behind it, you’ll see the main filter. It’s usually held by a plastic frame or clips.
- Release the clips (if any) and slide the filter out. It’s heavy when dirty, so use both hands.
At this point, you can clean the pre-filter (if reusable) or replace both. For the pre-filter, rinse under cold water and air-dry. Never use soap—it can degrade the material.
Common Mistake: Installing filters backward. I did this once and the purifier ran louder and less efficiently. Always align the airflow arrows with the unit’s internal airflow direction (usually marked with an arrow inside the compartment).
Step 4: Disassemble the Inner Housing (Optional)
This step is only if you’re cleaning the fan, motor, or internal ducts. Most people can skip it, but if your purifier is making a grinding noise or airflow is weak, this is where the problem hides.
- Remove any screws holding the inner housing (usually 2–4 screws around the fan area).
- Look for plastic clips or tabs. Use gentle pressure to release them.
- Carefully lift the housing away from the fan. There’s usually a small gap—don’t force it.
- You’ll now see the fan blades and motor. Use your vacuum’s brush attachment to clean dust from the blades.
- For stubborn gunk, use compressed air (short bursts) or a soft brush.
Warning: Don’t touch the motor windings with wet tools. If it’s dusty, use dry methods only. And never spin the fan by hand—it can misalign the motor shaft.
Step 5: Clean the Internal Components
Now’s the time to deep-clean. I use a microfiber cloth and a vacuum, but here’s what I’ve learned:
- Wipe down the inside walls with a dry microfiber cloth. If there’s sticky residue (from pet dander or cooking), dampen the cloth slightly—just a few drops of water, no soap.
- Vacuum the fan blades and motor housing. Hold the vacuum nozzle close but don’t touch the blades.
- Use compressed air to blow out dust from the air intake and exhaust ports.
- Check the airflow sensor (a small hole or grill near the fan). If it’s blocked, the purifier may run at low speed. Clean it with compressed air or a cotton swab.
For the 2026 models with smart sensors, avoid spraying anything near the sensor window. A dry wipe is enough.
Step 6: Inspect for Damage or Wear
While everything’s open, take a moment to inspect:
- Fan blades: Cracks? Warping? If so, it’s time to replace the fan (Honeywell sells replacements).
- Motor: Any oil stains or burnt smell? That’s a sign of motor failure.
- Housing: Cracks or loose clips? These can cause noise or air leaks.
- Wiring: Frayed wires or loose connections? If you see any, stop and contact Honeywell support.
Pro Tip: I once found a tiny piece of plastic from a broken clip stuck in the fan. It was causing the rattling noise. Removing it fixed the issue instantly. Always check the “why” behind the symptom.
Step 7: Reassemble the Unit
Now the fun part: putting it back together. This is where that photo you took earlier comes in handy.
- Start with the inner housing. Align the tabs and gently snap it into place. Reinsert screws if needed.
- Reinstall the main filter. Make sure the airflow arrows point into the unit (usually toward the fan).
- Slide the pre-filter back in. It should fit snugly—no gaps.
- Replace the front/side panel. Line up the clips and press gently from the top down.
- Reinsert the bottom screws and tighten them just enough—don’t over-tighten.
- Double-check that all parts are seated properly. A misaligned panel can block airflow.
Before powering on, do a visual sweep. Is anything loose? Any screws left out? If yes, go back and fix it.
Step 8: Power On and Test
Plug the unit back in. Turn it on and listen.
- The fan should start smoothly, without grinding or rattling.
- Check airflow at all speeds. It should feel strong and even.
- If your model has a filter reset button, press it to reset the filter timer (usually a “Filter” or “Check” light).
- Run it for 10–15 minutes. If it’s quieter and airflow improves, you’re golden.
Common Mistake: Forgetting to reset the filter timer. I’ve seen people clean filters but leave the “Check Filter” light on. The unit runs at high speed unnecessarily, wasting energy and making noise.
Pro Tips & Common Mistakes to Avoid
After years of fixing these units, here’s what I wish I knew earlier:

Visual guide about how to disassemble honeyw air purifier
Image source: i.pinimg.com
- Label your screws. I use a piece of tape on the container: “Bottom Panel,” “Inner Housing.” Saves time later.
- Work in a clean area. Dust on the floor will end up back in the purifier.
- Don’t skip the pre-filter. It’s easy to ignore, but a clogged pre-filter strains the main filter and motor.
- Use the right filter size. Honeywell models vary. Check the model number on the unit (usually on the back or bottom) and match it to the filter. A HPA300 won’t fit a HPA200.
- Don’t force anything. If a clip or screw won’t budge, stop. Forcing it can crack plastic or strip screws.
- Clean regularly. I disassemble mine every 3–4 months. It takes 20 minutes and prevents bigger issues.
Personal Insight: I once used a metal knife to pry open a stuck panel. It scratched the plastic and left a gouge. Now I use a plastic card (like an old credit card). Works better and doesn’t damage anything.
FAQs About How to Disassemble Honeywell Air Purifier 2026 Guide
Q: How often should I disassemble my Honeywell air purifier?
Great question. I recommend a full disassembly every 3–4 months if you use it daily. If you live in a dusty area, have pets, or smoke, do it every 2 months. Light cleaning (wiping the outside, vacuuming the vents) can be monthly.
Q: Can I clean the HEPA filter?
Only if it’s labeled “washable” (rare). Most HEPA filters are not washable. Vacuuming the surface with a soft brush is okay, but never get it wet. Water damages the fibers and reduces efficiency. If it’s dark gray or smells musty, replace it.
Q: What if I can’t find the model number?
Look on the back or bottom of the unit. It’s usually a sticker with “Model: HPAXXX.” If it’s worn off, check the original packaging or receipt. Or, take a photo of the filter and search online. Honeywell’s site has a filter finder tool.
Q: My purifier is still noisy after disassembly. What now?
Check the fan blades for warping or cracks. Also, ensure the unit is on a flat, stable surface. A wobbly base can cause vibration. If the noise is a high-pitched whine, the motor bearings might be failing. At that point, it’s usually cheaper to replace the unit than the motor.
Q: Can I use third-party filters?
You can, but I don’t recommend it. Third-party filters may not fit perfectly, causing air leaks. They also often have lower filtration efficiency. Honeywell’s filters are tested to meet HEPA standards. I tried a cheap brand once—the purifier ran louder and my allergies got worse. Stick with OEM filters.
Q: What’s the most common mistake people make?
Reinstalling filters backward. It’s easy to miss the airflow arrow. This reduces efficiency and can make the purifier louder. Always double-check the direction before closing the panel.
Q: Is it safe to clean the motor?
Only the outside. Never open the motor housing or touch internal parts. If the motor is noisy or hot, contact Honeywell. DIY motor repairs are risky and can void the warranty.
Final Thoughts
Disassembling your Honeywell air purifier doesn’t have to be scary. With the right tools and a little patience, it’s a straightforward process that can extend your unit’s life, improve air quality, and save you money on repairs. This how to disassemble Honeywell Air Purifier 2026 guide is designed to be your go-to resource—not just for cleaning, but for understanding your device.
Remember: take your time. Rushing leads to broken clips, lost screws, and frustration. Use the photos, label your parts, and trust the process. And if something feels wrong—like a part won’t fit or a screw won’t go in—stop and reassess. It’s better to pause than to break something.
After you’ve reassembled it, run a quick test. Breathe in the clean air. That’s the reward. Whether you’re tackling a 2026 model or an older unit, the principles are the same: care, attention, and a bit of DIY spirit.
Now go give your air purifier the deep clean it deserves. And if you have a tip or trick that worked for you? Share it in the comments. Let’s help each other breathe easier—literally.
“`