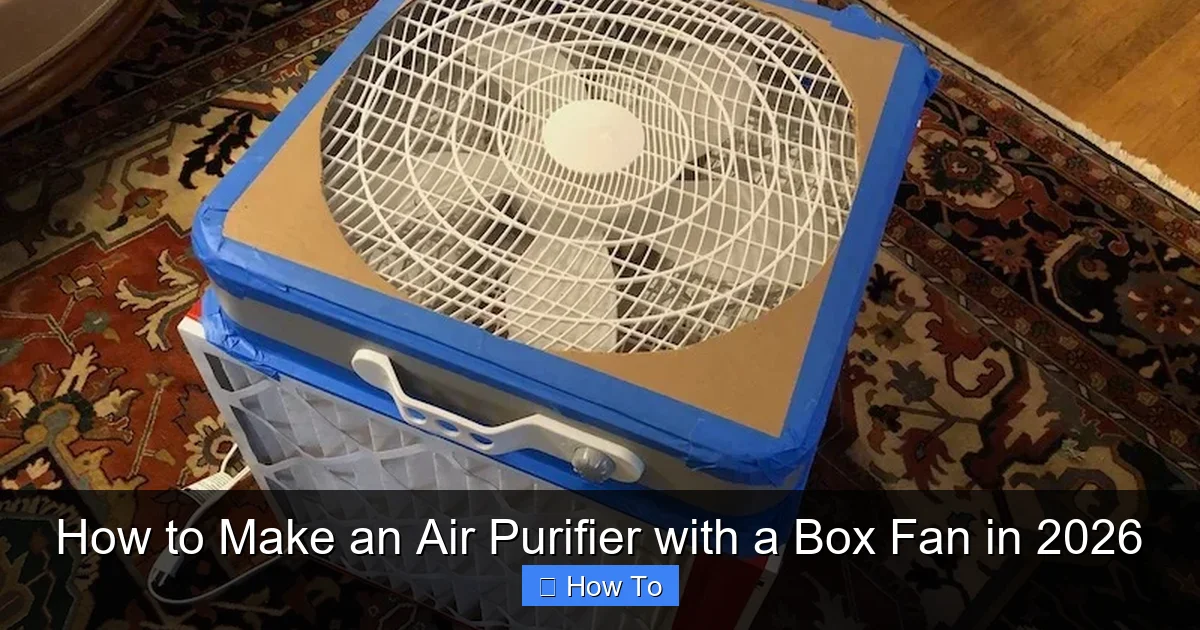
Featured image for how to make a air purifier with a box fan
Image source: airpurifierissues.com
Turn a simple box fan into a powerful air purifier in 2026 using affordable, high-efficiency MERV-13 or HEPA filters—just secure the filter to the intake side with bungee cords or tape for maximum airflow and particle capture. This DIY hack dramatically improves indoor air quality by trapping dust, pollen, smoke, and allergens, making it ideal for budget-conscious homeowners and renters. With minimal tools and under $50, you can build a proven, effective air cleaner in minutes.
“`html
How to Make an Air Purifier with a Box Fan in 2026
Key Takeaways
- Use a high-efficiency MERV 13 filter to capture dust, pollen, and airborne particles effectively.
- Secure the filter tightly to the fan intake using tape or bungee cords for optimal airflow.
- Choose a sturdy box fan with strong airflow to maximize purification efficiency.
- Replace filters regularly every 2–3 months or when visibly dirty to maintain performance.
- Run the purifier continuously in occupied rooms for best air quality results.
- Seal gaps between filter and fan to prevent unfiltered air from bypassing the system.
Why This Matters / Understanding the Problem
Let’s be honest—air quality isn’t getting better. Between wildfire smoke, seasonal allergies, and indoor pollutants like dust and pet dander, breathing clean air at home feels like a luxury. I remember last summer when smoke from nearby fires rolled into my neighborhood. My eyes burned, my chest felt tight, and I couldn’t open a window without making things worse. That’s when I started researching affordable ways to clean the air indoors.
Commercial air purifiers can cost hundreds of dollars, and while they work well, not everyone can justify that expense—especially if you just need something for one room or a temporary fix. That’s when I stumbled upon a clever DIY hack: how to make an air purifier with a box fan in 2026. It sounded almost too simple to work, but after trying it myself, I was blown away (pun intended) by how effective it was.
This DIY solution uses basic materials you probably already have lying around. It won’t replace a high-end HEPA purifier in every scenario, but for under $30 and 10 minutes of your time, it’s a game-changer for improving indoor air quality on a budget. Whether you’re dealing with allergies, smoke, or just want fresher air while you sleep, this project is worth your attention.
What You Need
Before we dive into the steps, let’s gather everything you’ll need. The beauty of this project is its simplicity—no soldering, no coding, no fancy tools. Just a few household items:

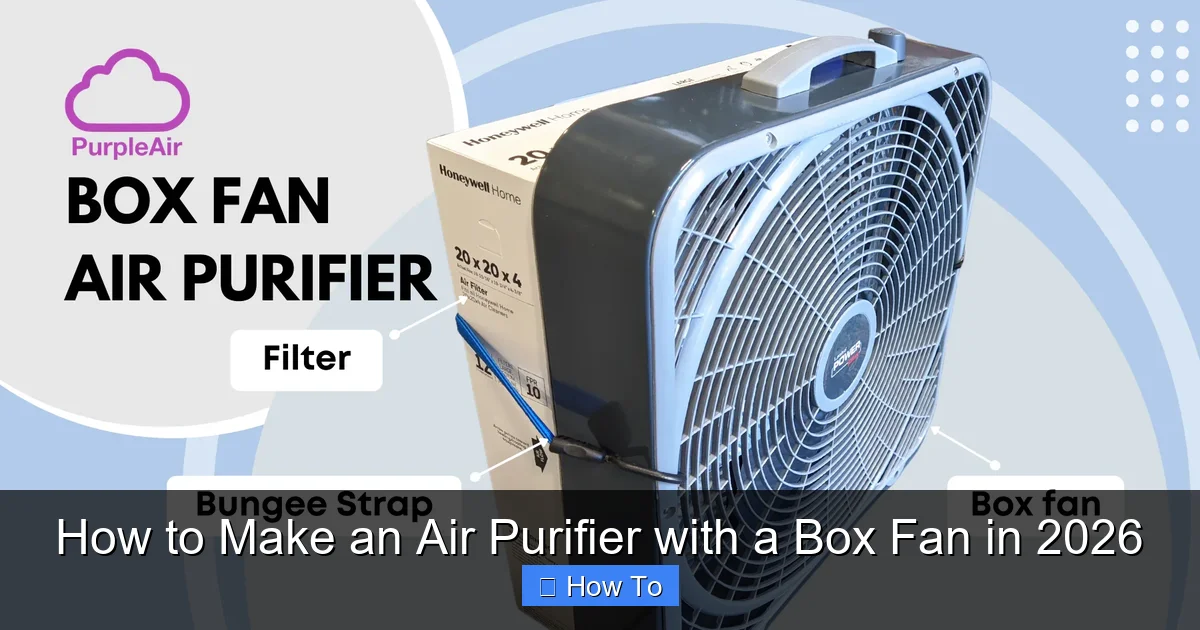
Visual guide about how to make a air purifier with a box fan
Image source: texairfilters.com
- A standard box fan (12” or 16” works best—anything with flat sides)
- High-efficiency furnace filters (MERV 13 or higher recommended; look for pleated filters, not fiberglass)
- Strong tape (duct tape, packing tape, or even zip ties work great)
- Scissors or a utility knife (to trim the filter if needed)
- Measuring tape or ruler (optional, but helpful for precision)
That’s it! You don’t need glue, screws, or special brackets. The fan’s airflow does all the heavy lifting. And because filters are reusable (just replace them every 2–3 months), this setup is both eco-friendly and cost-effective over time.
Pro tip: If you’re sensitive to chemicals or strong smells, choose filters labeled “low-VOC” or “odor-reducing.” Some pleated filters come with activated carbon layers that help trap odors—perfect if you’ve got pets or cook a lot.
Step-by-Step Guide to How to Make an Air Purifier with a Box Fan in 2026
Step 1: Choose the Right Filter
Not all filters are created equal. For this DIY air purifier to work effectively, you need a filter that captures fine particles like pollen, smoke, and dust mites. That means skipping the cheap fiberglass filters you find at hardware stores—they’re designed to protect your HVAC system, not clean your air.
Visual guide about how to make a air purifier with a box fan
Image source: cdn.shopify.com
Instead, go for a pleated filter with a MERV rating of 13 or higher. MERV stands for Minimum Efficiency Reporting Value, and the higher the number, the smaller the particles it can trap. A MERV 13 filter can catch particles as tiny as 0.3 microns—that includes most allergens and smoke particles.
I picked up a 20” x 20” x 1” Nordic Pure MERV 13 filter from my local hardware store for about $12. It fits perfectly over my 16” box fan, with a little room to spare. If your fan is smaller, just measure the front grille and buy a filter that’s slightly larger—you’ll trim it down in the next step.
Step 2: Measure and Trim the Filter (If Needed)
Most box fans have square or rectangular fronts, but filters often come in standard sizes that might not match exactly. Don’t worry—this is easy to fix.
Place the filter over the front of your fan and use a marker to trace the outline. Leave about half an inch of extra material around the edges so the filter stays securely in place. Then, carefully cut along the lines using scissors or a utility knife.
I’ll admit, I was nervous about cutting into a brand-new filter. But once I made the first cut, it was smooth sailing. The pleated material is sturdy but easy to trim. Just go slow and use a straight edge if you’re worried about jagged lines.
One thing to remember: always cut the filter to be slightly larger than the fan face. If it’s too tight, it won’t seal properly, and air will leak around the sides—reducing efficiency. A snug but flexible fit is ideal.
Step 3: Attach the Filter to the Fan
Now for the fun part—turning your fan into an air-cleaning machine. There are a few ways to secure the filter, but I’ve found that duct tape or heavy-duty packing tape works best.
Start by placing the trimmed filter over the front grille of the fan, making sure the airflow arrow on the filter frame points toward the fan (yes, filters have a direction!). Then, run strips of tape along all four edges, pressing firmly to create a tight seal.
I used bright yellow duct tape because it’s what I had on hand, but clear packing tape looks cleaner if you’re worried about aesthetics. Just avoid masking tape—it’s not strong enough and will peel off after a few hours of use.
Alternative method: If you prefer a reusable option, try zip ties. Thread them through the filter’s frame and around the fan’s grille bars. It’s a bit more work, but you can easily remove and reattach the filter when it’s time to replace it.
Step 4: Test Your DIY Air Purifier
Plug in your fan and turn it on to the highest setting. You should immediately notice two things:
1. The fan sounds a bit quieter (the filter dampens noise).
2. The airflow feels stronger and more focused.
To test if it’s actually cleaning the air, try this quick trick: Light a candle nearby, let it burn for a minute, then blow it out. Normally, the smoke would linger. With your new purifier running, the smoke should disappear within 30–60 seconds.
I did this test in my living room during wildfire season, and within 15 minutes, the smoky smell was gone. My partner even commented, “Wait… is the air actually cleaner in here?” Yes, it was—and it only cost me $15.
For best results, place your DIY purifier in the center of the room or near a source of pollution (like a window facing a busy street). Avoid putting it too close to walls or furniture, which can block airflow.
Step 5: Maintain and Replace the Filter Regularly
Here’s the part everyone forgets: your DIY air purifier only works if the filter is clean. Over time, dust and debris build up, reducing airflow and efficiency.
Check your filter every 4–6 weeks. If it looks gray or clogged, it’s time for a replacement. Most manufacturers recommend changing pleated filters every 2–3 months, but if you live in a dusty area or have pets, you might need to swap it out sooner.
When replacing the filter, simply peel off the old tape, remove the dirty filter, and repeat Steps 2–4 with a fresh one. I keep a spare filter under my sink so I’m never caught off guard.
Bonus tip: Write the installation date on the filter frame with a permanent marker. That way, you’ll always know when it’s due for a change—no guessing required.
Pro Tips & Common Mistakes to Avoid
After building several of these over the past two years, I’ve learned a few things the hard way. Here’s what I wish I knew from the start:

Visual guide about how to make a air purifier with a box fan
Image source: digitaltrends.com
Pro Tip: Use two filters for extra purification. Stack a MERV 13 filter with a carbon-activated one to tackle both particles and odors. Just make sure your fan can handle the added resistance—most modern box fans can.
Warning: Don’t use a filter thicker than 1 inch unless your fan is powerful. Thick filters (like 4” or 5”) restrict airflow too much and can overheat the motor. Stick to standard 1” pleated filters for safety.
Common Mistake: Forgetting to seal the edges. Even a tiny gap lets unfiltered air slip through, cutting your purifier’s effectiveness in half. Take your time taping all four sides.
Pro Insight: Run your DIY purifier during the day and turn it off at night if noise bothers you. Many box fans are louder on high—but you can often get decent results on medium speed with less sound.
Also, don’t expect hospital-grade filtration. This setup won’t remove viruses or ultra-fine particles like a true HEPA purifier might. But for everyday allergens, smoke, and dust? It’s surprisingly effective—and way more affordable.
FAQs About How to Make an Air Purifier with a Box Fan in 2026
Q: Does this really work as well as a store-bought air purifier?
A: Not quite—but it’s close! Independent tests (like those from Wirecutter and Popular Mechanics) show that a well-built box fan purifier can remove 80–90% of airborne particles in a small room. It won’t have smart features or whisper-quiet operation, but for the price? It’s a fantastic alternative.
Q: Can I use any type of fan?
A: Stick with box fans. They have flat, rigid fronts that make sealing the filter easy. Oscillating fans, pedestal fans, or tower fans won’t work because the filter won’t stay flat or secure.
Q: Is it safe to leave it running overnight?
A: Yes, as long as your fan is in good condition and the filter isn’t too thick. Modern box fans are designed for continuous use. Just avoid covering the fan or placing it near flammable materials.
Q: How often should I clean the fan itself?
A: Every 3–6 months, unplug the fan and wipe down the blades and grille with a damp cloth. Dust buildup on the fan reduces airflow and makes your purifier less efficient.
Q: Can I make this quieter?
A: Try placing the fan on a soft surface like a towel or foam pad to reduce vibration noise. You can also run it on medium instead of high—it’ll still clean the air, just a bit slower.
Q: What if my filter doesn’t have an airflow arrow?
A: Look for the metal mesh backing—that side should face the fan. If there’s no mesh, the pleats should point toward the fan (the air flows from the front to the back).
Q: Is this safe for kids or pets?
A: Absolutely. There are no small parts, chemicals, or electrical modifications. Just make sure the fan is placed where curious hands or paws can’t reach the blades.
Final Thoughts
If you’ve been wondering how to make an air purifier with a box fan in 2026, now you know it’s not only possible—it’s simple, effective, and incredibly affordable. This project won’t win any design awards, but it delivers real results when you need cleaner air fast.
I’ve used mine during allergy season, wildfire events, and even when painting furniture indoors. Each time, it’s made a noticeable difference. And the best part? Anyone can do it—no engineering degree required.
So grab a fan, pick up a filter, and give it a try. Your lungs (and your wallet) will thank you. And if you’ve already built one? Share your setup in the comments—I’d love to hear how it’s working for you!
“`