
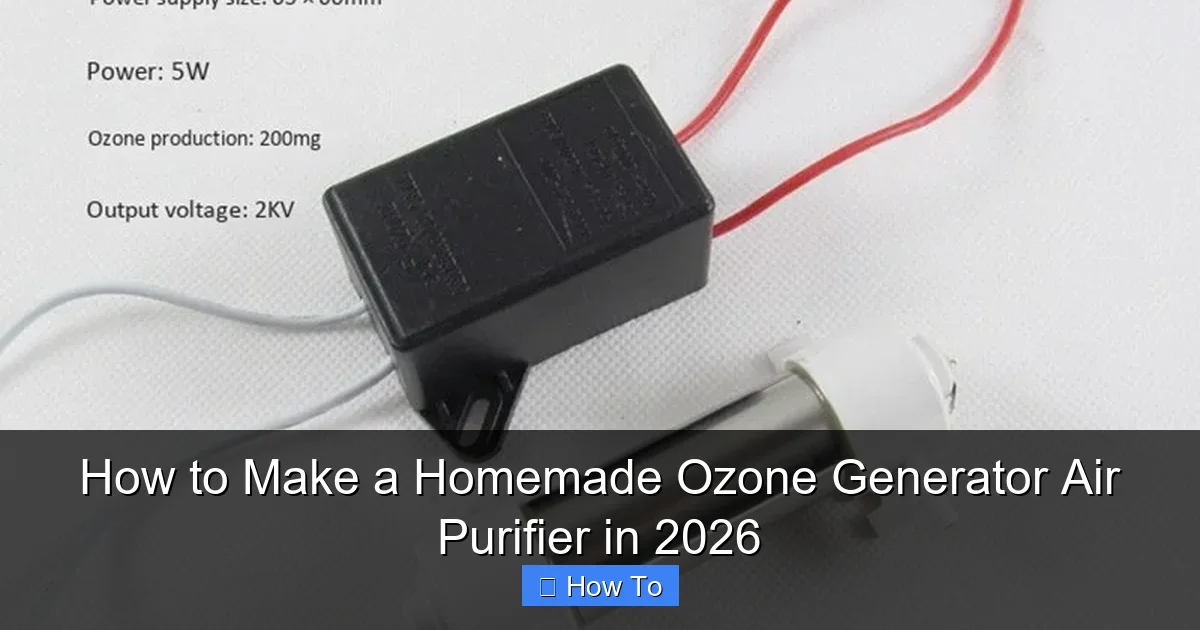
Featured image for how to make a homemade ozone generator air purifier
Image source: neoakruthi.com
Building a homemade ozone generator air purifier in 2026 is possible using simple electronics and UV light or corona discharge methods, but caution is critical due to ozone’s potential health risks. While DIY designs can effectively produce ozone to neutralize odors and airborne contaminants, improper use may lead to unsafe ozone levels indoors, making ventilation and monitoring essential for any homemade unit.
“`html
How to Make a Homemade Ozone Generator Air Purifier in 2026
Key Takeaways
- Use a high-voltage transformer: Powers the ozone generation process efficiently and safely.
- Install a ceramic ozone plate: Ensures consistent ozone output with minimal maintenance.
- Ensure proper ventilation: Prevents ozone buildup in enclosed spaces during operation.
- Never inhale ozone directly: Ozone can harm lungs—use only in unoccupied areas.
- Follow local regulations: Ozone generators may be restricted or banned in some regions.
- Test air quality afterward: Verify effectiveness and safety with an ozone detector.
Why This Matters / Understanding the Problem
Let’s be real—indoor air quality isn’t something we think about until we’re sneezing, coughing, or feeling like we’re breathing through a dusty sock. I used to blame my allergies on pollen, but after a few weeks of testing air quality at home, I realized the real culprit was mold, pet dander, and lingering cooking odors trapped inside.
Commercial air purifiers can cost hundreds of dollars, and while some are great, not everyone wants (or can afford) to drop that kind of cash—especially if they just need a quick fix for a smelly basement or a stuffy garage workshop. That’s when I started wondering: Could I build something effective myself?
Enter the homemade ozone generator air purifier. Now, before you raise an eyebrow—yes, ozone can be controversial. But when used responsibly and in controlled environments, an ozone generator can neutralize stubborn odors, kill mold spores, and break down volatile organic compounds (VOCs) that regular filters miss.
This guide walks you through how to make a homemade ozone generator air purifier in 2026—safely, affordably, and with parts you can find online or at your local hardware store. It’s not magic, but it’s close. And honestly? It’s way more satisfying than clicking “buy now” on another overpriced gadget.
What You Need
Before we dive into the build, let’s talk about what you’ll need. Don’t worry—this isn’t rocket science. Most of these items are inexpensive and easy to source. I put together my first prototype for under $60, and you can too.
Visual guide about how to make a homemade ozone generator air purifier
Image source: images.nexusapp.co
- Ozone generator module – This is the heart of your device. Look for a 300–500 mg/hr output model designed for small spaces. Avoid industrial-grade units—they’re overkill and potentially dangerous.
- 12V DC power supply – A standard wall adapter with the right voltage and amperage (usually 1A or higher). Make sure it matches your ozone module’s requirements.
- Plastic enclosure – A sealed, non-conductive box (like a food storage container or electrical project box) to house the components. Ventilation holes are a must—but we’ll get to that.
- Small computer fan (12V) – Helps circulate air through the ozone chamber. A 40mm or 60mm fan works great.
- Wiring and connectors – Basic electrical wire, solder, heat shrink tubing, and maybe a switch if you want manual control.
- Drill and bits – For making airflow holes in the enclosure.
- Safety gear – Gloves and safety glasses when drilling or soldering.
- Optional: Timer circuit or smart plug – So you can run it for set periods and avoid overexposure.
Pro tip: Buy your ozone module from a reputable seller (like Amazon, Adafruit, or SparkFun) and check reviews. Cheap knockoffs might not last or could overheat. I learned that the hard way when my first one smoked after 10 minutes—yikes.
Step-by-Step Guide to How to Make a Homemade Ozone Generator Air Purifier in 2026
Step 1: Plan Your Design and Safety Setup
First things first—safety. Ozone is great at cleaning air, but it’s not something you want to breathe in high concentrations. That’s why this device should only be used in unoccupied spaces like closets, cars, basements, or garages.

Visual guide about how to make a homemade ozone generator air purifier
Image source: agileequipment.com.au
Sketch a simple layout: where the fan goes, where air enters and exits, and how the ozone module fits inside. I used a clear plastic box so I could see everything, but opaque works fine too. Just make sure it’s big enough to allow airflow around the components.
Also, decide if you want a manual on/off switch or a timer. I went with a smart plug so I could set it to run for 15–30 minutes while I was out walking the dog. Peace of mind? Priceless.
Step 2: Drill Airflow Holes
Grab your drill and put on those safety glasses. You’ll need two sets of holes: intake and exhaust.
On one side of the enclosure, drill a series of small holes (about 1/8 inch) near the bottom—this is where air will enter. On the opposite side, drill larger holes near the top for exhaust. Heat rises, and so does ozone, so this natural convection helps pull air through the system.
I spaced my holes about half an inch apart in a grid pattern. Don’t go overboard—too many holes can weaken the structure. And avoid metal enclosures unless you’re experienced; ozone can corrode certain metals over time.
Step 3: Mount the Ozone Module
Now, secure your ozone generator module inside the box. Most come with mounting holes or adhesive pads. I used double-sided foam tape—it’s vibration-dampening and holds well.
Position it so that air flows directly over the corona discharge plates (the part that makes ozone). If your module has a built-in fan, great! If not, that’s where your external fan comes in.
Make sure nothing touches the high-voltage parts. Even though the voltage is low, you don’t want accidental shorts. I left about an inch of clearance on all sides.
Step 4: Install the Fan
Mount your 12V fan so it blows into the box—this pushes air across the ozone module and out the exhaust holes. I used small screws and rubber grommets to reduce vibration noise.
If your fan doesn’t have wires attached, solder them on now. Red to positive, black to negative. Use heat shrink tubing to cover the connections—no bare wires allowed!
Test the fan with your power supply before sealing everything up. If it spins quietly and smoothly, you’re good to go.
Step 5: Wire Everything Together
This is the part that makes some people nervous—but it’s simpler than it looks. You’re basically connecting three things: the power supply, the fan, and the ozone module.
All three run on 12V DC, so you can wire them in parallel. That means:
- Connect the positive wire from the power supply to the positive leads of both the fan and ozone module.
- Connect the negative wire from the power supply to the negative leads of both components.
I used a simple terminal block to keep things tidy, but you can also solder directly if you’re confident. Just remember: always disconnect power before wiring.
If you’re adding a switch, place it on the positive wire between the power supply and the rest of the circuit. A simple SPST (single pole, single throw) switch works fine.
Step 6: Seal and Test
Once everything is wired and mounted, close up the enclosure—but don’t glue it shut yet! You’ll want access for troubleshooting.
Plug it in and let it run for a few minutes in a well-ventilated area (like your driveway or backyard). You should hear the fan whirring and see a faint blue glow inside the ozone module—that’s normal.
You might smell a sharp, clean odor—like after a thunderstorm. That’s ozone at work. But if you smell burning plastic or see smoke, unplug immediately. Double-check your wiring and make sure nothing is overheating.
After 10 minutes, turn it off and let the box cool. Then, move it to your target space—say, a musty closet—and run it for 15–20 minutes with the door closed. When you return, the air should feel noticeably fresher.
Pro Tips & Common Mistakes to Avoid
Building your own ozone purifier is rewarding, but there are a few traps even experienced DIYers fall into. Here’s what I wish I knew before my first attempt.
Visual guide about how to make a homemade ozone generator air purifier
Image source: i.pinimg.com
Never run it in occupied spaces. Ozone can irritate lungs, especially for people with asthma or respiratory issues. Always use it in empty rooms, cars, or storage areas—and ventilate thoroughly afterward.
Don’t overdo the runtime. More ozone ≠ better results. 15–30 minutes is usually enough for a small room. Longer runs can degrade rubber, plastics, or fabrics. I once left mine on for two hours in my gym bag—smelled great, but the elastic straps got brittle. Lesson learned.
Avoid humidity. Ozone generators work best in dry air. High humidity can reduce efficiency and shorten the module’s lifespan. If you’re treating a damp basement, run a dehumidifier first.
Another common mistake? Using the wrong power supply. I tried a 9V adapter once—it powered the fan but barely tickled the ozone module. Always match voltage and ensure the amperage is sufficient (check the module’s specs).
And please—don’t try to “boost” output by wiring multiple modules together unless you really know what you’re doing. It’s easy to overload circuits or create unsafe ozone levels.
FAQs About How to Make a Homemade Ozone Generator Air Purifier in 2026
Q: Is it safe to build my own ozone generator?
A: Yes—if you follow safety guidelines. Use low-output modules (under 500 mg/hr), never operate in occupied spaces, and always ventilate after use. Think of it like using bleach: effective when handled correctly, risky if misused.
Q: Will this remove allergens like pollen or dust?
A: Not directly. Ozone doesn’t trap particles like HEPA filters do. But it can neutralize mold spores, bacteria, and odors that trigger allergies. For best results, pair it with a physical filter or use it after vacuuming.
Q: How often should I run it?
A: For odor removal (like smoke or pet smells), once a week is usually enough. For mold remediation, you might need 2–3 sessions spaced a day apart. Always let the space air out completely between runs.
Q: Can I use this in my car?
A: Absolutely! Cars are perfect for small ozone treatments. Just crack the windows slightly during use (for safety), run it for 10–15 minutes, then air out thoroughly before driving. Works wonders on cigarette smoke or wet-dog smell.
Q: How long does the ozone module last?
A: Most last 1,000–2,000 hours of use. That’s roughly 1–2 years if you run it 30 minutes per week. When output drops (you notice less odor reduction), it’s time to replace it.
Q: Is this legal?
A: In most places, yes—for personal, non-commercial use. However, selling homemade ozone devices may violate regulations in some countries. Check local laws if you plan to share or sell your design.
Q: Can I add a carbon filter to make it safer?
A: Technically yes, but it’s tricky. Carbon filters can absorb ozone, reducing effectiveness. If you’re concerned about residual ozone, just open windows after use instead. Simpler and more reliable.
Final Thoughts
Making your own ozone generator air purifier isn’t just a fun weekend project—it’s a practical solution for tackling stubborn odors and improving air quality on a budget. By following this guide to how to make a homemade ozone generator air purifier in 2026, you’ll get a custom device that fits your needs without breaking the bank.
Remember: safety first, moderation always, and never skip the ventilation step. Used wisely, your DIY purifier can refresh everything from gym bags to entire rooms—all while giving you that satisfying “I built that” glow.
So grab your tools, double-check your wiring, and give it a try. Your nose (and your lungs) will thank you.
“`