Transform your home into a cleaner, healthier space in 2026 with simple, all-natural air purifiers you can make in minutes using activated charcoal, houseplants, and essential oils. These DIY solutions effectively trap toxins, neutralize odors, and boost indoor air quality without harsh chemicals or costly gadgets. With just a few household items and zero technical skills, you can create a powerful, eco-friendly air purifier that works 24/7—naturally.
How to Make Natural Air Purifier at Home in 2026
Key Takeaways
- Use houseplants like spider plants or peace lilies to naturally filter toxins from indoor air.
- Place bowls of activated charcoal in corners to absorb odors and pollutants effectively.
- Diffuse essential oils such as eucalyptus or tea tree to freshen air and inhibit mold growth.
- Keep windows open daily to improve ventilation and reduce indoor pollutant buildup.
- Make a vinegar and baking soda spray to neutralize airborne odors and clean surfaces.
- Use beeswax candles instead of synthetic ones to help purify air as they burn.
Why This Matters / Understanding the Problem
Let’s be honest—air quality is something most of us take for granted until we notice a musty smell, a persistent cough, or a family member sneezing every morning. I learned this the hard way when my toddler started wheezing after moving into a newly renovated apartment. The culprit? Hidden VOCs (volatile organic compounds) from paint, furniture, and cleaning products. Even worse, I couldn’t afford a high-end HEPA air purifier for every room.
That’s when I started researching how to make natural air purifier at home in 2026. Not just as a budget hack, but as a way to reduce plastic waste, avoid unnecessary electronics, and use ingredients I already had in my kitchen. What I discovered? You don’t need fancy tech to clean your indoor air. Nature’s been doing it for millions of years.
The how to make natural air purifier at home in 2026 approach isn’t just trendy—it’s practical. With rising concerns about indoor air pollution (yes, it’s often *worse* than outdoor air), mold, pollen, and off-gassing from synthetic materials, more people are turning to plant-powered, chemical-free solutions. And the best part? You can start today with items you already own.
What You Need
Before we dive into the steps, let’s get your toolkit ready. The beauty of making a natural air purifier at home is that it’s ridiculously simple and affordable. No special skills required. Here’s what you’ll need:

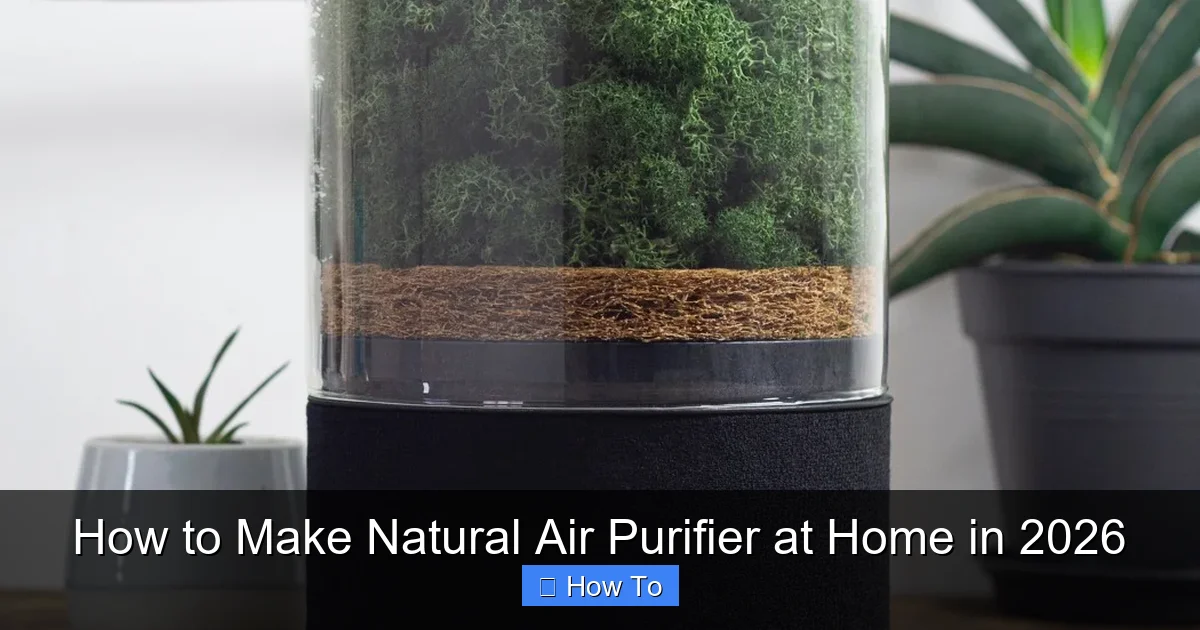
Visual guide about how to make natural air purifier at home
Image source: m.media-amazon.com
- Houseplants with air-purifying properties (e.g., peace lily, snake plant, spider plant, pothos, areca palm)
- A wide-mouthed glass or ceramic container (a mason jar, vase, or terracotta pot works great)
- Activated charcoal (available in garden stores or online—look for horticultural or aquarium grade)
- Small pebbles or lava rocks (for drainage and airflow)
- Potting soil (organic, low-peat if possible)
- Essential oils (optional but helpful)—tea tree, eucalyptus, or lemon for extra antimicrobial boost
- A small fan (optional)—to gently circulate air through the setup
- Spray bottle with water (for misting plants and charcoal)
Pro tip: You can start with just a plant in a jar with charcoal—no soil needed—for a minimalist version. But for long-term effectiveness, the full setup works best. Think of this as a mini indoor ecosystem that filters air naturally.
All of these items cost less than $30 total, and you can reuse or compost them when you’re done. That’s the real win of learning how to make natural air purifier at home in 2026: sustainability meets practicality.
Step-by-Step Guide to How to Make Natural Air Purifier at Home in 2026
Step 1: Choose Your Air-Purifying Plant
Not all plants are created equal when it comes to air cleaning. I made the mistake early on of buying a pretty orchid—only to realize it doesn’t do much for air quality. The key is to pick plants proven to absorb toxins and release oxygen.
Visual guide about how to make natural air purifier at home
Image source: i01.hsncdn.com
Here are my top picks for 2026:
- Snake Plant (Sansevieria): Thrives in low light, removes formaldehyde and benzene. I keep one in my bedroom—it’s the only plant that survives my “forget-to-water” phase.
- Peace Lily (Spathiphyllum): Great for humidity and removing ammonia, xylene, and formaldehyde. It blooms indoors—bonus points for beauty!
- Spider Plant (Chlorophytum comosum): Produces oxygen at night and removes carbon monoxide. Plus, it’s pet-friendly (unlike some others).
- Pothos (Epipremnum aureum): A fast grower that tackles mold spores and VOCs. It’s like the weed of the plant world—but in a good way.
- Areca Palm (Dypsis lutescens): Excellent for humidifying dry air and filtering out xylene and toluene. Best in bright, indirect light.
Pick 1–2 plants based on your room’s light and humidity. For example, a snake plant is perfect for a dim bathroom. A peace lily loves a steamy kitchen.
💡 Pro Insight: NASA’s Clean Air Study identified these plants as top air purifiers. But remember—plants work slowly. Think of them as long-term air quality partners, not instant fixes.
Step 2: Prep Your Container and Layer the Base
This is where the magic begins. The container acts as a mini air filtration system. The layers create airflow, prevent root rot, and boost the charcoal’s effectiveness.
Here’s how to build it:
- Layer 1 (Bottom): Add 1–2 inches of small pebbles or lava rocks. This creates drainage and allows air to flow under the roots. I use leftover aquarium rocks—free and effective.
- Layer 2: Add 1 inch of activated charcoal. This is your secret weapon. Charcoal absorbs odors, moisture, and airborne pollutants like a sponge. It also prevents bacterial growth in the soil.
- Layer 3: Add 2–3 inches of potting soil. Use a lightweight, well-draining mix. Avoid soil with synthetic fertilizers—they can off-gas and defeat the purpose.
Pro tip: Lightly mist the charcoal with water after adding it. This helps it settle and activates its adsorption power.
⚠️ Warning: Don’t skip the charcoal. I once made a purifier without it—the soil stayed soggy, the plant wilted, and the smell was… not great. Charcoal is non-negotiable for long-term success.
Step 3: Plant Your Air Cleaner
Now, it’s time to plant. If your plant came in a plastic nursery pot, gently remove it. Loosen the roots slightly—they’ve been cramped for weeks. Then:
- Place the plant in the center of the container.
- Fill in around it with more potting soil, leaving about 1 inch from the rim.
- Press the soil down lightly—don’t pack it too tight.
- Water thoroughly until it drains from the bottom.
For low-maintenance setups, you can skip soil and place the plant (in its original pot) directly on the charcoal layer. But for maximum air contact, planting directly in the layered system works better.
I prefer the direct method. My peace lily in a charcoal-jar setup has thrived for over a year, and the bathroom smells fresher—especially after my husband’s “gym sessions.”
Step 4: Add Optional Airflow (For Extra Power)
Plants naturally release oxygen and absorb CO2, but they work faster when air moves around them. That’s where a small fan comes in.
Here’s how to use it:
- Place a USB-powered mini fan (like those used for laptops) near the top of the container.
- Angle it to blow air across the leaves, not straight down.
- Run it for 1–2 hours in the morning or evening. No need to run it 24/7.
This creates a gentle breeze that helps the plant absorb more pollutants and spreads clean air into the room. I use a solar-powered fan on my kitchen windowsill—eco-friendly and silent.
💡 Pro Insight: The fan isn’t about cooling—it’s about increasing air exchange. Think of it like a natural HVAC system: plant + charcoal + airflow = better filtration.
Step 5: Boost with Essential Oils (Optional)
Want to add a fresh scent and extra antimicrobial power? A few drops of essential oil can help—but use wisely.
Here’s how:
- Add 2–3 drops of tea tree or eucalyptus oil to the water in your spray bottle.
- Mist the air above the plant (not directly on leaves—some oils can burn them).
- Or, place a drop on a cotton ball and tuck it near the base (away from roots).
I use tea tree oil in my bedroom purifier—it’s natural, fights mold, and helps me sleep. But I avoid it if my cat’s around (some oils are toxic to pets).
Remember: This is optional. The how to make natural air purifier at home in 2026 method works great without oils. They’re just a bonus.
Step 6: Maintain and Rotate for Best Results
Like any living thing, your natural air purifier needs care. Here’s how to keep it effective:
- Water weekly (or when soil feels dry 1 inch down).
- Wipe leaves monthly with a damp cloth to remove dust—clean leaves absorb more air.
- Rotate the container 90 degrees every week so all sides get light.
- Replace charcoal every 6–8 months (or if it smells musty).
- Repot every 1–2 years if the plant outgrows the container.
I keep a “plant calendar” on my phone to remind me. It takes 2 minutes a week—worth it for cleaner air.
💡 Pro Insight: If your plant starts yellowing or drooping, it might be getting too much water or not enough light. Adjust one variable at a time—don’t overcorrect.
Step 7: Place Strategically for Maximum Impact
Location matters. A natural air purifier works best when placed where air pollution is highest. Here’s where I put mine:
- Bedroom: For cleaner air during sleep (snake plant or peace lily).
- Kitchen: Near the stove to absorb cooking fumes (spider plant).
- Bathroom: To reduce mold and humidity (peace lily).
- Home office: For filtering printer toner and VOCs (pothos).
I have 4 purifiers in my 800 sq ft apartment. Each one covers about 100–150 sq ft. For larger rooms, use multiple units or a bigger plant (like an areca palm).
And yes—you can even make a window sill version using a long, shallow tray with multiple small plants and charcoal layers. Perfect for urban dwellers with limited floor space.
Pro Tips & Common Mistakes to Avoid
After testing 10+ setups over the past two years, here’s what I’ve learned—sometimes the hard way.

Visual guide about how to make natural air purifier at home
Image source: i.pinimg.com
- Don’t overwater: Over 50% of plant deaths are due to soggy soil. Let the top inch dry out before watering. I use a wooden chopstick to test moisture—no fancy tools needed.
- Skip synthetic fertilizers: They can off-gas and pollute the air you’re trying to clean. Use compost tea or worm castings instead.
- Don’t overcrowd: One plant per container is best. Too many plants = competition for light and nutrients.
- Use real charcoal, not briquettes: BBQ briquettes contain additives that can release toxins. Only use activated charcoal from a trusted source.
- Be patient: Natural systems take time. Don’t expect instant results. My bedroom purifier took 3 weeks to noticeably reduce my morning congestion.
- Pair with ventilation: Open windows when weather allows. Natural purifiers work best when combined with fresh outdoor air.
⚠️ Warning: Some plants (like pothos and peace lily) are toxic to pets if ingested. If you have cats or dogs, place purifiers on high shelves or use pet-safe plants like spider plant or areca palm.
One mistake I made? Using a metal container. The soil stayed too wet, and the roots started to rot. Stick to glass, ceramic, or terracotta—they breathe better.
Another pro tip: Label your purifiers. I wrote “Snake Plant + Charcoal” on a tiny chalkboard tag. It helps me remember care needs and impresses guests (“Oh, that’s not just decor?”).
FAQs About How to Make Natural Air Purifier at Home in 2026
Q: How effective is this compared to electric air purifiers?
Great question. Electric purifiers with HEPA filters remove particles like dust, pollen, and pet dander immediately. But they don’t tackle VOCs or humidity as well as plants. Natural purifiers work slower (days to weeks) but address a broader range of pollutants—especially gases and odors. Think of them as complementary, not replacements. For best results, use both: a HEPA purifier for quick cleaning, and a natural one for long-term air quality.
Q: Can I use this in a basement or windowless room?
Yes—but choose the right plant. Snake plants, ZZ plants, and peace lilies thrive in low light. Just make sure the room has some airflow (even a small crack in the door helps). And consider adding a fan for better circulation. I run a natural purifier in my basement home gym—it’s reduced the “locker room” smell dramatically.
Q: How often should I replace the charcoal?
Every 6–8 months, or if you notice a musty smell. Over time, charcoal gets saturated and stops absorbing pollutants. I mark the date on a sticky note when I first add it. Pro tip: Reactivate charcoal by baking it at 200°F for 1 hour—it can sometimes be reused once.
Q: Are essential oils safe to use around babies or elderly?
Be cautious. Some oils (like eucalyptus and peppermint) can irritate sensitive airways. I avoid oils in nurseries and elderly care rooms. Instead, rely on the plant and charcoal alone. If you want a scent, use a drop of lavender on a cotton ball outside the container—never near the plant.
Q: Can I make a purifier without soil?
Absolutely! Try the “charcoal jar” method: Place a small plant (in its original pot) on top of a layer of charcoal and pebbles in a container. Add water to the pebble layer—not the plant’s roots. This keeps the soil dry and boosts air contact. I use this in my bathroom—no mess, no soil, just clean air.
Q: What if my plant dies?
Don’t panic! Plants die—it happens. The key is to start small. Try one purifier first. If it thrives, expand. If it dies, learn and try again. I killed three spider plants before I got the watering right. Now I have six. It’s a journey, not a failure.
Q: Is this method backed by science?
Yes—partially. NASA’s 1989 study showed certain plants remove VOCs like formaldehyde and benzene. Newer research (including 2023 studies from the University of Technology Sydney) confirms that plant-microbe systems in soil and charcoal can break down airborne pollutants. While not as fast as electric purifiers, they’re a proven, sustainable option—especially for long-term air quality. That’s why how to make natural air purifier at home in 2026 is more than a DIY project—it’s a science-backed lifestyle upgrade.
Final Thoughts
Learning how to make natural air purifier at home in 2026 has been one of the most rewarding changes I’ve made for my health and home. It’s not just about cleaner air—it’s about reconnecting with nature, reducing waste, and taking control of my environment.
You don’t need to be a botanist or spend a fortune. Start with one plant, one jar, and a handful of charcoal. Place it where you spend the most time. Water it. Watch it grow. Breathe easier.
And remember: this isn’t a one-and-done fix. It’s a daily practice—like drinking water or opening a window. The more you care for your purifier, the better it cares for you.
So go ahead. Try it today. Your lungs (and your future self) will thank you. And if you mess up? That’s okay. I did too. The air will still be there—waiting to be cleaned, one leaf at a time.
Now, go make your first natural air purifier. Your home—and your health—deserve it.