
Featured image for how to build a diy air purifier
Image source: i.ytimg.com
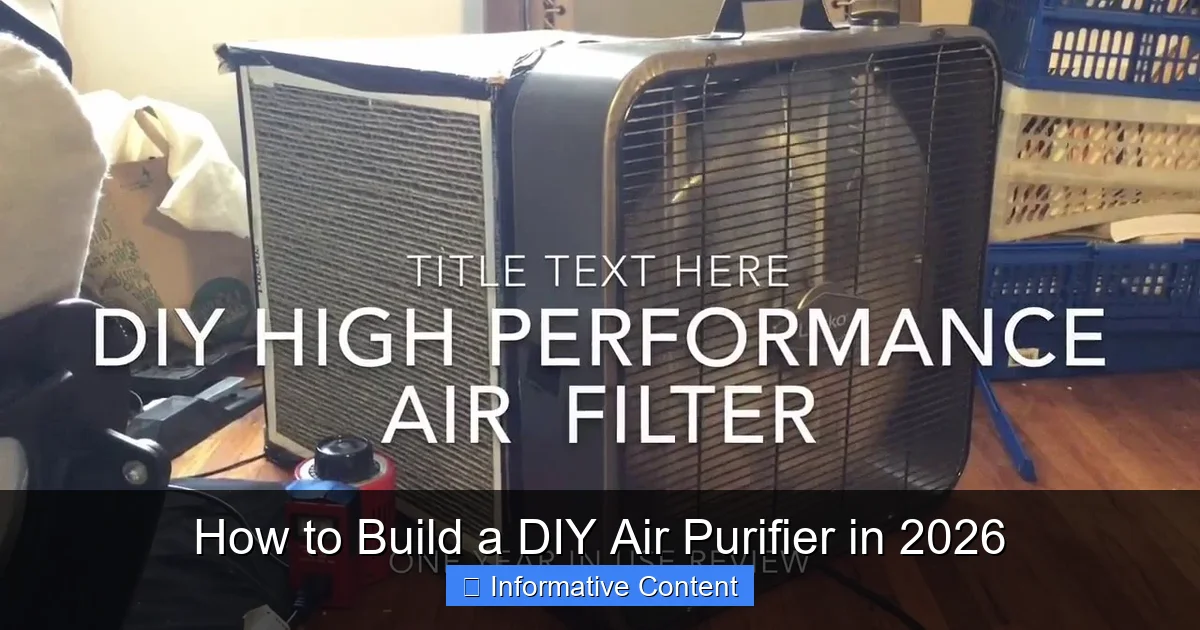
Building a DIY air purifier in 2026 is a simple, cost-effective way to improve indoor air quality using everyday materials like a box fan and HEPA filter. With rising concerns about pollutants and allergens, this quick project delivers powerful filtration without the high price tag of commercial units. Just assemble, secure, and power up—your homemade purifier is ready to clean the air in minutes.
Key Takeaways
- Choose a high-quality fan: Opt for energy-efficient models with strong airflow for better purification.
- Use MERV 13+ filters: They trap 90% of particles, including allergens and pollutants, effectively.
- Seal all gaps tightly: Prevent air leaks with foam tape for maximum filtration efficiency.
- Size matters: Match filter and fan size to room dimensions for optimal performance.
- Maintain regularly: Replace filters every 3–6 months to sustain air quality.
- Add activated carbon: Neutralize odors and VOCs by layering carbon filters.
📑 Table of Contents
- Why Build a DIY Air Purifier in 2026?
- Understanding How Air Purifiers Work (And Why DIY Can Be Just as Good)
- Step-by-Step: Building Your First DIY Air Purifier
- Upgrades and Customizations for 2026 Needs
- Maintenance: Keeping Your DIY Purifier Effective
- Common Mistakes (And How to Avoid Them)
- Final Thoughts: Clean Air, One DIY Build at a Time
Why Build a DIY Air Purifier in 2026?
Let’s be honest: we spend more time indoors than ever. Between remote work, binge-watching shows, and just trying to escape extreme weather, our homes have become our sanctuaries. But what if your sanctuary is slowly filling with invisible pollutants? Dust, pet dander, cooking fumes, pollen, and even volatile organic compounds (VOCs) from cleaning products can linger in your air—sometimes at levels five times higher than outdoors, according to the EPA. And while commercial air purifiers exist, they can cost hundreds of dollars, use proprietary filters, or just not fit your space.
That’s where a DIY air purifier comes in. I first built one during a particularly bad allergy season. My eyes were itchy, my nose wouldn’t stop running, and my $200 store-bought purifier was loud and barely making a dent. After a weekend of research and tinkering, I cobbled together a simple, effective air cleaner using a box fan and a furnace filter. The difference? Immediate. My symptoms improved within days. And the best part? It cost less than $30. In 2026, with rising energy costs and growing concerns about indoor air quality, building your own air purifier isn’t just a cool hack—it’s a practical, sustainable solution. Whether you’re battling allergies, wildfire smoke, or just want fresher air, this guide walks you through how to build a DIY air purifier that actually works.
Understanding How Air Purifiers Work (And Why DIY Can Be Just as Good)
Before we dive into the build, let’s talk about the science. Air purifiers work by pulling air through a filter that traps contaminants. The key is the filter type and airflow rate. Commercial models often use HEPA (High-Efficiency Particulate Air) filters, which capture 99.97% of particles as small as 0.3 microns—think dust, mold spores, and even some viruses. But HEPA filters are expensive and often require specific fan designs to maintain airflow.
Visual guide about how to build a diy air purifier
Image source: i.ytimg.com
The Core Principle: Fan + Filter = Air Cleaning Power
The beauty of a DIY air purifier is that it follows the same principle as expensive models: force air through a high-quality filter. The fan creates suction, drawing air through the filter. The better the filter, the cleaner the air. But here’s the catch: not all fans and filters are equal. A weak fan with a great filter will move too little air. A powerful fan with a cheap filter won’t capture much.
Think of it like a coffee filter. A strong pour-over (fan) with a thin paper filter (low-MERV) will let grounds through. But a slower pour (weaker fan) with a thick, fine filter (high-MERV/HEPA) gives you clean coffee. Your DIY purifier works the same way. The goal? Match a strong fan with a high-efficiency filter for optimal airflow and filtration.
Why DIY Beats Off-the-Shelf (Sometimes)
Commercial air purifiers have perks: sleek designs, smart sensors, auto modes. But they come with downsides:
- Cost: Premium models can run $300–$800. Filters cost $50+ each and need replacing every 6–12 months.
- Noise: Many fans are loud on high settings, making them hard to run at night.
- Filter limitations: Some brands use proprietary filters, forcing you to buy replacements from them.
- Size and fit: Not all purifiers work well in large rooms or awkward spaces.
A DIY purifier solves many of these. You control the components. You pick the filter grade. You adjust the fan speed. And when a filter clogs, you swap it out—no special tools or brand lock-in. Plus, you can scale it up or down based on your room size. I’ve built units for my 12×12 bedroom and my 30×20 living room—same design, just different fan sizes.
What You Need to Know About MERV and HEPA
Filters are rated by their MERV (Minimum Efficiency Reporting Value) or HEPA standards:
- MERV 8–11: Good for dust, pollen, pet dander. Found in standard furnace filters.
- MERV 13–16: Captures smaller particles—mold spores, smoke, bacteria. Ideal for allergy relief.
- True HEPA: 99.97% efficiency on 0.3-micron particles. Best for smoke, viruses, and ultra-fine dust.
For DIY builds, MERV 13–16 filters are the sweet spot. They’re widely available, affordable, and effective. True HEPA filters work too, but they restrict airflow more, so you’ll need a stronger fan. Avoid MERV 17+ or HEPA filters with weak fans—they’ll strain the motor and reduce efficiency.
Step-by-Step: Building Your First DIY Air Purifier
Now let’s build it. This is the classic “box fan + filter” design—simple, effective, and proven. I’ve built over a dozen of these for friends and family, and the feedback is always the same: “Why didn’t I do this sooner?”
Materials and Tools (What You’ll Need)
- Box fan: 20”x20” (for rooms up to 300 sq ft) or 24”x24” (for larger spaces). Look for metal or durable plastic. Avoid cheap plastic fans—they vibrate and break easily.
- Filter: MERV 13–16 or True HEPA. Size must match fan face (e.g., 20”x20”x1”).
- Strap ties or bungee cords: 4–6 heavy-duty rubber straps (at least 24” long). These secure the filter to the fan.
- Optional but recommended:
- Rubber washers or foam tape (to reduce vibration noise)
- Filter frame (if your fan doesn’t have a flat back)
- Measuring tape
Cost breakdown: $15–25 for a fan, $10–20 for a filter, $5 for straps. Total: $30–50. Compare that to a $150 commercial model with a $60 replacement filter.
Assembly: 15 Minutes to Cleaner Air
- Clean the fan: Wipe the blades and grill with a damp cloth. Dust buildup reduces airflow.
- Check airflow direction: Most box fans blow air out the front. For purifiers, we want air pulled in through the filter. Flip the fan so the back (intake) faces the room, and the front (exhaust) faces away. (Some fans have arrows—follow them.)
- Place the filter on the back: Position the filter so it covers the entire intake grill. The side with the wire mesh (if present) should face out—this protects the filter media.
- Secure with straps: Loop straps around the fan and filter. Crisscross them like an “X” for even pressure. Tighten until the filter is snug—no gaps. Pro tip: Add rubber washers between the strap and fan to reduce buzzing.
- Test it: Plug it in. Listen for vibration. If it’s loud, loosen straps slightly or add foam tape to the fan edges.
Example: I built one for my sister’s nursery. She used a 20” fan, MERV 13 filter, and bungee cords from her camping gear. Total time: 12 minutes. She runs it on low at night—barely audible, but she says her baby’s congestion improved in a week.
Pro Tips for Best Results
- Seal gaps: If the filter doesn’t fit flush, use foam tape or cardboard to block air leaks. Unsealed gaps let dirty air bypass the filter.
- Fan speed: Start on medium. High speed increases noise and may strain the fan. For smoke or heavy pollution, high is okay.
- Placement: Put it near the center of the room, away from walls. Air needs to circulate freely.
- Direction matters: Point the exhaust side toward the room’s center, not a wall. This helps mix clean air with room air.
Upgrades and Customizations for 2026 Needs
The basic box fan purifier works great, but in 2026, we face new air quality challenges: wildfire smoke, urban pollution, and post-pandemic concerns about airborne viruses. Time to level up.
Boosting Filtration: Multi-Stage Filters
For extreme air quality issues (smoke, heavy allergens), add a second filter. Stack a pre-filter (MERV 8–11) in front of a main filter (MERV 13–16 or HEPA). The pre-filter catches large particles (dust, hair), extending the life of the main filter.
How to do it: Use a filter frame or cut cardboard to create a “sandwich.” Secure both filters with straps. Note: This reduces airflow slightly, so use a stronger fan or run it longer.
Smart Controls and Sensors
Want data? Add an air quality monitor (like a Temtop or AirVisual Node) nearby. These measure PM2.5 (fine particles), VOCs, and CO2. Use the data to:
- Track purifier effectiveness
- Adjust fan speed based on pollution spikes
- Know when to change filters (see “Maintenance” section)
For a tech twist, pair a smart plug with your fan. Set it to turn on when PM2.5 exceeds 35 µg/m³ (the EPA’s “moderate” threshold). I use a Kasa smart plug—costs $15 and saves energy.
Noise Reduction Hacks
Box fans can be noisy. Try these fixes:
- Vibration pads: Place the fan on rubber mats or foam underlayment (from flooring stores).
- Fan speed controller: Add a rheostat (variable resistor) to adjust speed without a noisy high setting.
- DIY enclosure: Build a box with acoustic foam (like egg crate foam) around the fan. Caution: Don’t block airflow—leave 6+ inches around the fan.
Portable and Compact Designs
Need purifiers for small spaces? Try these:
- Mini purifier: Use a 12” fan and 12” filter for desks or bathrooms.
- Window adapter: Attach the purifier to a window screen. Great for apartments with no central HVAC.
- Backpack purifier: For wildfire smoke, build a battery-powered unit with a small fan and filter. I’ve seen hikers use these in smoky areas.
<
Maintenance: Keeping Your DIY Purifier Effective
A purifier is only as good as its filter. Neglect maintenance, and it’s just a fan blowing dirty air.
How Often to Change the Filter
It depends on usage and pollution levels:
- Normal use (3–4 hours/day, low pollution): Change every 3–6 months.
- High use (8+ hours/day, pets, cooking, allergies): Change every 1–2 months.
- Smoke or wildfire events: Change every 2–4 weeks. Filters clog fast in smoky conditions.
Signs it’s time to change:
- Fan sounds louder (clogged filter restricts airflow)
- Airflow feels weaker
- Visible dust or discoloration on the filter
- Allergy symptoms worsen
Cleaning the Fan and Straps
Every 2–3 months:
- Unplug the fan.
- Wipe blades and grill with a damp cloth. Use a brush for stubborn dust.
- Wash straps with soap and water. Let dry completely.
- Inspect for cracks or wear. Replace damaged straps.
Filter Disposal and Recycling
Used filters contain trapped particles. Don’t just toss them in the trash. Here’s how to dispose safely:
- Double-bag: Place the filter in a plastic bag, seal it, then put it in another bag. This contains allergens.
- Label it: Mark the bag “Used Air Filter” so waste handlers know it’s not regular trash.
- Recycling: Some HVAC companies recycle filters. Call local HVAC shops or check municipal recycling guidelines. (Note: Most municipal recycling won’t take filters—they’re contaminated.)
Data Table: Filter Lifespan and Replacement Guide
| Usage Scenario | Recommended Filter Type | Replacement Frequency | Estimated Cost per Year |
|---|---|---|---|
| Allergy relief (bedroom, 4 hrs/day) | MERV 13 | Every 3 months | $40–$60 |
| Pet owners (living room, 8 hrs/day) | MERV 14 | Every 2 months | $60–$80 |
| Wildfire smoke (24/7 during events) | True HEPA | Every 3 weeks | $100–$150 |
| General air cleaning (office, 6 hrs/day) | MERV 11 | Every 4 months | $30–$40 |
Common Mistakes (And How to Avoid Them)
I’ve seen it all. From filters falling off to fans overheating. Here’s what to watch for.
Using the Wrong Filter
Cheap filters (MERV 8 or lower) won’t catch fine particles. But too high a MERV (17+) can choke the fan. Stick to MERV 13–16 for most builds. If using HEPA, ensure your fan can handle the airflow restriction (look for high CFM ratings).
Ignoring Airflow Direction
As mentioned, fans must pull air through the filter, not blow it out the back. Double-check the airflow arrows. If the filter is on the exhaust side, it’s useless—air bypasses it.
Overloading the Fan
Stacking multiple filters or using thick HEPA filters on weak fans strains the motor. Signs of strain:
- Fan gets hot
- Speed drops
- Unusual noises
Solution: Use a stronger fan (120V, 0.5A+) or reduce filter thickness.
Neglecting Seals
Even a 1-inch gap lets 20–30% of dirty air bypass the filter. Use foam tape, cardboard, or 3D-printed shims to seal edges. I once built one for my garage workshop. The filter fit poorly, so I used weatherstripping—cleaned the air perfectly.
Forgetting to Monitor Air Quality
You can’t manage what you don’t measure. A $50 air quality monitor pays for itself by helping you:
- Know when to run the purifier
- Verify it’s working
- Avoid unnecessary filter changes
Final Thoughts: Clean Air, One DIY Build at a Time
Building a DIY air purifier isn’t just about saving money—it’s about taking control. In 2026, with climate change bringing more wildfires, urban air pollution rising, and health concerns at the forefront, having a reliable, affordable way to clean your air is priceless. The box fan + filter design works because it’s simple, scalable, and based on real science. I’ve seen it help asthma sufferers, pet owners, and families in wildfire zones.
But here’s the truth: it’s not perfect. It’s louder than a $300 purifier. It won’t auto-detect VOCs or connect to your smart home. And it requires occasional maintenance. Yet, for most people, the benefits far outweigh the drawbacks. You learn how air quality works. You customize it to your needs. And when a filter clogs, you replace it—no waiting for shipping, no proprietary parts.
So grab a fan, a filter, and a few straps. In less time than it takes to binge a Netflix episode, you’ll have cleaner air. And if you’re feeling adventurous, add a sensor, upgrade to HEPA, or build a second unit for another room. The best part? You’re not just building a purifier. You’re building peace of mind. After all, the air we breathe should be as clean as the spaces we call home. Now, go build something amazing.
Frequently Asked Questions
How to build a DIY air purifier at home?
Building a DIY air purifier is simple and cost-effective. You’ll need a box fan, a high-efficiency furnace filter (MERV 13 or higher), and duct tape or zip ties to secure the filter around the fan’s intake side.
What materials do I need for a DIY air purifier?
The essential materials include a 20×20 inch box fan, a MERV 13 or HEPA-rated air filter, and tape or zip ties. These components work together to capture dust, pollen, and other airborne particles effectively.
Is a DIY air purifier as effective as a commercial one?
While not as powerful as high-end commercial models, a well-built DIY air purifier can significantly improve indoor air quality, especially in small to medium rooms. It’s a great budget-friendly option for reducing allergens and pollutants.
How often should I replace the filter in my DIY air purifier?
Replace the filter every 3 to 6 months, depending on air quality and usage. A clogged filter reduces airflow and purification efficiency, so regular checks are important.
Can I use any type of filter for a DIY air purifier?
For best results, use a MERV 13 or higher furnace filter or a true HEPA filter if compatible with your fan size. Avoid low-MERV filters, as they won’t capture fine particles effectively.
Is it safe to run a DIY air purifier overnight?
Yes, it’s generally safe to run a DIY air purifier overnight, provided the fan is in good condition and placed on a stable surface. Ensure proper ventilation and avoid blocking the fan’s airflow.