Featured image for how to build indoor air purifier
Image source: blozem.com
Building your own indoor air purifier in 2026 is easier and more cost-effective than ever, using widely available components like a high-efficiency HEPA filter, a quiet DC fan, and a smart air quality sensor for real-time monitoring. With a few simple tools and basic wiring, you can create a customizable, eco-friendly purifier that outperforms many store-bought models while adapting to your specific air quality needs.
Key Takeaways
- Choose high-efficiency filters: Use HEPA filters to capture 99.97% of airborne particles effectively.
- Select a powerful fan: Ensure adequate airflow for consistent air circulation throughout the room.
- Seal all gaps tightly: Prevent unfiltered air leaks to maximize purification efficiency.
- Use a sealed enclosure: Build or repurpose a box to house components securely and safely.
- Monitor air quality: Pair with a sensor to track improvements and adjust settings as needed.
- Maintain regularly: Replace filters and clean components to sustain optimal performance over time.
📑 Table of Contents
- How to Build Indoor Air Purifier in 2026
- Why Build Your Own Indoor Air Purifier?
- Essential Components of a DIY Indoor Air Purifier
- Step-by-Step Guide to Building Your Indoor Air Purifier
- Maintaining Your DIY Air Purifier
- Performance Comparison: DIY vs. Commercial Air Purifiers
- Tips for Maximizing Air Quality at Home
- Final Thoughts: Is Building an Indoor Air Purifier Worth It?
How to Build Indoor Air Purifier in 2026
Imagine walking into your home after a long day, taking a deep breath, and actually feeling refreshed—like you’ve stepped into a forest after a rainstorm. That’s the kind of clean, crisp air we all crave, especially when we spend so much time indoors. But let’s be honest: between cooking fumes, pet dander, dust, and the occasional mystery smell from the basement, indoor air quality can take a serious hit. In fact, the EPA estimates that indoor air can be 2 to 5 times more polluted than outdoor air. Yikes.
Now, you might be thinking, “I’ll just buy a fancy air purifier.” And sure, commercial models can work well—but they often come with a hefty price tag, recurring filter costs, and sometimes questionable long-term reliability. What if I told you that in 2026, building your own indoor air purifier isn’t just possible—it’s practical, affordable, and surprisingly effective? Whether you’re a DIY enthusiast, a budget-conscious homeowner, or someone who just loves tinkering with gadgets, this guide will walk you through everything you need to know to build an indoor air purifier that actually works. No engineering degree required.
Why Build Your Own Indoor Air Purifier?
Before we dive into the nuts and bolts (literally), let’s talk about why you’d even want to build your own air purifier in the first place. After all, stores are full of ready-made options. But here’s the thing: commercial purifiers often prioritize marketing over performance. You might pay $200–$500 for a unit that uses a basic HEPA filter but lacks smart controls, quiet operation, or energy efficiency. And don’t get me started on replacement filters—those can cost $30–$80 every few months!
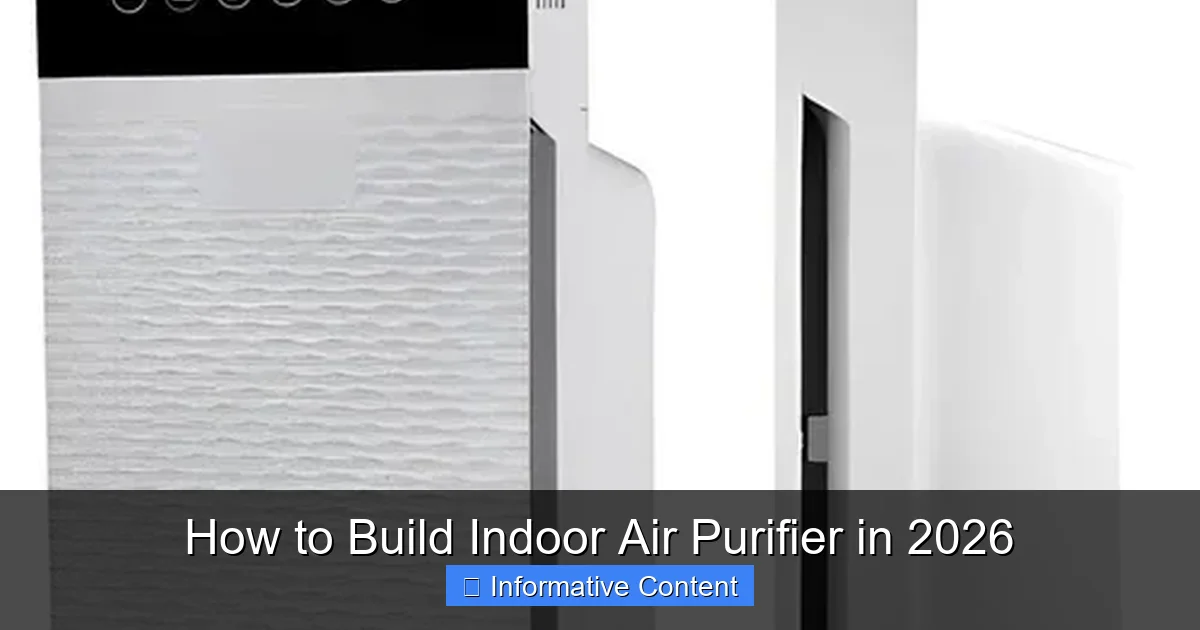
Visual guide about how to build indoor air purifier
Image source: 5.imimg.com
Building your own indoor air purifier gives you full control over the components, design, and functionality. You can tailor it to your specific needs—whether that’s tackling allergens, smoke, or odors. Plus, it’s a fun weekend project that can save you money in the long run. I built my first DIY purifier back in 2023 using a box fan and a furnace filter, and it worked so well that my allergies improved within a week. Since then, I’ve upgraded to a more advanced version with a custom housing and smart sensors. The point is: you don’t need to be a tech wizard to make something that works better than store-bought models.
Cost Savings Over Time
Let’s break it down. A high-quality commercial air purifier might cost $300 upfront, with $60 in annual filter replacements. Over five years, that’s $600. In contrast, a DIY purifier can cost as little as $50 to build, with filter replacements under $20 per year. Even if you go all-out with a custom build, you’re still likely to spend less than half the cost of a premium model. And because you control the design, you can upgrade components over time instead of replacing the entire unit.
Customization and Flexibility
Another huge advantage? Customization. Got a small bedroom? Build a compact unit. Need something for a large living room? Scale it up. Want to add a carbon filter for odor control? Easy. Prefer a quiet operation for nighttime use? Choose a low-decibel fan. With a DIY approach, you’re not stuck with one-size-fits-all solutions. You can even integrate smart features like air quality sensors, Wi-Fi connectivity, or automatic speed adjustment—features that often cost extra in commercial models.
Environmental and Educational Benefits
Building your own purifier is also a greener choice. Many commercial units end up in landfills when they break, and their plastic housings aren’t always recyclable. By building your own, you can use sustainable materials and repair or upgrade components instead of tossing the whole thing. Plus, it’s a fantastic learning experience. Whether you’re teaching your kids about air quality or just satisfying your own curiosity, the process teaches valuable skills in electronics, mechanics, and environmental science.
Essential Components of a DIY Indoor Air Purifier
Now that you’re convinced building your own purifier is worth it, let’s talk about what you’ll need. The core components are simple, but each plays a critical role in how well your purifier performs. Think of it like baking a cake—you can’t skip the flour or the eggs and expect it to turn out right.
Air Filter: The Heart of the System
The filter is the most important part of any air purifier. It’s what traps dust, pollen, pet dander, smoke, and other pollutants. For a DIY build, you’ll want to use a HEPA (High-Efficiency Particulate Air) filter. True HEPA filters capture 99.97% of particles as small as 0.3 microns—that’s smaller than most bacteria and viruses. You can find HEPA filters at hardware stores, online retailers, or even repurpose furnace filters rated MERV 13 or higher.
Pro tip: Look for filters labeled “True HEPA” or “HEPA-type” with a MERV rating of 13–16. Avoid “HEPA-like” or “HEPA-style” filters—they don’t meet the same standards. Also, check the dimensions carefully. Most box fans use 20×20-inch filters, but you can adapt other sizes with a custom frame.
Fan: Moving the Air
The fan pulls air through the filter and circulates clean air back into the room. For most DIY builds, a standard 20-inch box fan works perfectly. They’re affordable ($20–$40), widely available, and powerful enough for rooms up to 300 square feet. If you need more airflow, consider a pedestal fan or a high-CFM (cubic feet per minute) industrial fan.
When choosing a fan, pay attention to the CFM rating—the higher, the better. A fan with 200+ CFM is ideal for medium to large rooms. Also, look for models with multiple speed settings so you can adjust the noise level. Some fans even have reversible airflow, which can help with circulation.
Housing and Frame: Keeping It Together
The housing holds the filter and fan in place and ensures air flows efficiently through the filter—not around it. A poorly sealed housing can reduce effectiveness by 30% or more. You can build a frame from wood, plastic, or even repurpose a cardboard box (though that’s less durable).
For a sturdy build, I recommend using ½-inch plywood or acrylic sheets. Cut a frame that matches your filter size, then attach the fan to one side and the filter to the other. Use weather stripping or foam tape to seal the edges and prevent air leaks. If you’re feeling creative, you can design a sleek enclosure with a modern look—just make sure it doesn’t restrict airflow.
Optional Add-Ons: Boosting Performance
Want to take your purifier to the next level? Here are some optional upgrades:
- Carbon Filter: Great for absorbing odors, smoke, and VOCs (volatile organic compounds). Layer it behind the HEPA filter for maximum effect.
- Pre-Filter: A washable mesh filter that catches large particles like hair and dust, extending the life of your HEPA filter.
- UV-C Light: Kills bacteria and viruses. Use a low-wattage UV-C bulb (5–9 watts) and ensure it’s shielded to prevent exposure.
- Air Quality Sensor: Monitors PM2.5, CO2, or humidity levels. Pair it with a microcontroller like Arduino or Raspberry Pi for smart automation.
- Timer or Smart Plug: Automate operation to run during peak pollution times (e.g., cooking or cleaning).
These add-ons can significantly improve performance, but they’re not essential for a basic build. Start simple, then upgrade as needed.
Step-by-Step Guide to Building Your Indoor Air Purifier
Ready to get your hands dirty? Here’s a straightforward, beginner-friendly method to build an effective indoor air purifier in under two hours. This design uses a box fan and a HEPA filter—perfect for bedrooms, offices, or small living spaces.
Gather Your Materials
You’ll need:
- 1 × 20-inch box fan ($25–$35)
- 1 × 20x20x1-inch True HEPA filter ($30–$50)
- Measuring tape
- Scissors or utility knife
- Duct tape or zip ties
- Optional: Foam weather stripping, carbon filter, pre-filter
Step 1: Prepare the Filter
Unbox your HEPA filter and inspect it for damage. Make sure the airflow arrows point in the correct direction—usually toward the fan. If your filter has a cardboard frame, you can reinforce it with duct tape for extra durability.
Step 2: Attach the Filter to the Fan
Place the filter directly against the back of the box fan (the side where air is drawn in). The filter should cover the entire intake area. Use duct tape to secure the edges, making sure there are no gaps where air can bypass the filter. For a cleaner look, you can use zip ties to fasten the filter to the fan’s metal grille.
Pro tip: If you’re using a carbon or pre-filter, place it between the HEPA filter and the fan. This helps trap larger particles and odors before they reach the HEPA filter.
Step 3: Seal the Edges
Air leaks are the enemy of efficiency. Use foam weather stripping around the perimeter of the filter to create a tight seal. Press it firmly against the fan housing to prevent air from sneaking around the sides. This simple step can boost performance by up to 20%.
Step 4: Test and Optimize
Plug in the fan and turn it on. Feel the airflow—it should be strong and consistent. If you notice weak suction or noise, check for loose tape or gaps. You can also experiment with fan speed: higher speeds clean air faster but are noisier. For nighttime use, try the lowest setting that still provides noticeable airflow.
Optional: Add a timer or smart plug to automate operation. Set it to run for 2–3 hours after cooking or cleaning, or during allergy season.
Advanced Build: Custom Enclosure with Smart Features
If you’re ready for a more advanced project, consider building a custom enclosure with integrated sensors and controls. Here’s how:
- Design a wooden or acrylic box that fits your fan and filter.
- Install a PM2.5 sensor (like the SDS011) to monitor air quality.
- Connect the sensor to a microcontroller (Arduino or ESP32) to adjust fan speed automatically.
- Add a small OLED screen to display real-time air quality data.
- Use a relay module to control the fan via Wi-Fi or a mobile app.
This setup turns your purifier into a smart device that responds to changing conditions. It’s more complex, but the results are impressive—and totally worth it if you love tech.
Maintaining Your DIY Air Purifier
Building your purifier is just the beginning. To keep it running efficiently, regular maintenance is key. Think of it like changing the oil in your car—skip it, and performance suffers.
Filter Replacement Schedule
HEPA filters don’t last forever. Most need replacement every 6–12 months, depending on usage and air quality. If you live in a dusty area or have pets, you may need to change it more often. Signs it’s time to replace the filter include reduced airflow, increased noise, or a noticeable drop in air quality.
To check, remove the filter and hold it up to a light. If you can’t see light through it, it’s clogged. Also, inspect for tears or damage—even a small hole can let pollutants through.
Cleaning and Upkeep
While HEPA filters aren’t washable, you can clean the pre-filter (if you have one) with soap and water. Let it dry completely before reinstalling. Wipe down the fan blades and housing with a damp cloth to remove dust buildup. Avoid using harsh chemicals that could damage components.
If you added a UV-C light, clean the bulb gently with a soft cloth every few months. UV-C bulbs lose effectiveness over time, so replace them annually.
Monitoring Performance
Use an air quality monitor to track your purifier’s effectiveness. Place it in the room and compare readings before and after running the purifier. You should see a noticeable drop in PM2.5 and PM10 levels within 30–60 minutes.
If performance declines, check for air leaks, fan issues, or a dirty filter. Sometimes, simply resealing the housing can make a big difference.
Performance Comparison: DIY vs. Commercial Air Purifiers
You might be wondering: how does a DIY purifier stack up against commercial models? Let’s look at the data.
| Feature | DIY Purifier (Basic) | Commercial Purifier (Mid-Range) | Commercial Purifier (Premium) |
|---|---|---|---|
| Initial Cost | $50–$100 | $150–$300 | $400–$800 |
| Annual Filter Cost | $20–$40 | $50–$80 | $80–$120 |
| CADR (Clean Air Delivery Rate) | 150–250 CFM | 200–300 CFM | 300–400 CFM |
| Noise Level (Low Setting) | 45–55 dB | 35–45 dB | 30–40 dB |
| Energy Use | 30–50 watts | 25–40 watts | 20–35 watts |
| Customization | High | Low | Medium |
| Smart Features | Optional (DIY) | Limited | Advanced |
As you can see, a basic DIY purifier holds its own against mid-range commercial models in terms of airflow and cost. While premium units may offer quieter operation and smarter controls, they come at a much higher price. For most homes, a well-built DIY purifier provides excellent value and performance.
Tips for Maximizing Air Quality at Home
Your air purifier is a powerful tool, but it’s just one part of a healthy indoor environment. Here are some additional tips to keep your air clean year-round:
- Ventilate regularly: Open windows when weather permits to flush out stale air and reduce CO2 levels.
- Control humidity: Keep indoor humidity between 30–50% to prevent mold and dust mites. Use a dehumidifier if needed.
- Clean frequently: Vacuum with a HEPA-filter vacuum cleaner and dust with a damp cloth to reduce airborne particles.
- Avoid harsh chemicals: Use natural cleaning products to minimize VOC emissions.
- Keep pets groomed: Brush pets outdoors to reduce dander and hair indoors.
- Don’t smoke indoors: Smoke is one of the biggest contributors to indoor air pollution.
Combining these habits with your DIY air purifier creates a comprehensive approach to clean air. It’s not just about the machine—it’s about the lifestyle.
Final Thoughts: Is Building an Indoor Air Purifier Worth It?
So, is building your own indoor air purifier in 2026 worth the effort? Absolutely. Whether you’re looking to save money, reduce waste, or simply enjoy a satisfying DIY project, a homemade purifier can deliver real results. It’s not about replacing every commercial unit on the market—it’s about giving you control, flexibility, and peace of mind.
I’ve built three different models over the years, and each one has improved my home’s air quality noticeably. My allergies are better, my sleep is deeper, and I love knowing exactly what’s filtering the air I breathe. Plus, it’s a great conversation starter when guests ask, “Wait, you built that?”
If you’re ready to take the plunge, start simple. Grab a box fan and a HEPA filter, and see how it feels. You might be surprised by how much cleaner your air becomes—and how much more connected you feel to the space you call home. In a world full of disposable tech, building something that lasts (and works) is more rewarding than ever.
So go ahead—breathe easy, build smart, and enjoy the fresh air.
Frequently Asked Questions
How to build indoor air purifier at home?
You can build an indoor air purifier using a box fan, furnace filter, and duct tape. Simply attach the filter to the back of the fan to capture dust, pollen, and other airborne particles as air passes through.
What materials do I need to make a DIY air purifier?
To make a DIY air purifier, you’ll need a 20×20 inch box fan, a MERV 13 or higher furnace filter, and strong tape or bungee cords. These components work together to effectively filter indoor air without complex tools.
How effective is a homemade air purifier compared to store-bought models?
A homemade air purifier can be surprisingly effective at reducing common pollutants like dust and allergens, especially when using a high-quality filter. While it may not match advanced features of commercial units, it offers a budget-friendly alternative for basic air cleaning.
Can I build an indoor air purifier with a HEPA filter?
Yes, you can use a HEPA filter in your DIY air purifier for superior particle removal. Just ensure the filter size matches your fan and secure it tightly to prevent air from bypassing the filtration.
How often should I replace the filter in my DIY air purifier?
Replace the filter every 2–3 months, or sooner if you notice reduced airflow or visible dirt buildup. Regular replacement ensures your homemade air purifier continues to perform efficiently.
Is it safe to run a DIY air purifier all night?
Yes, it’s generally safe to run a DIY air purifier overnight if the fan is in good condition and the filter is securely attached. Always monitor for overheating and ensure proper ventilation around the unit.