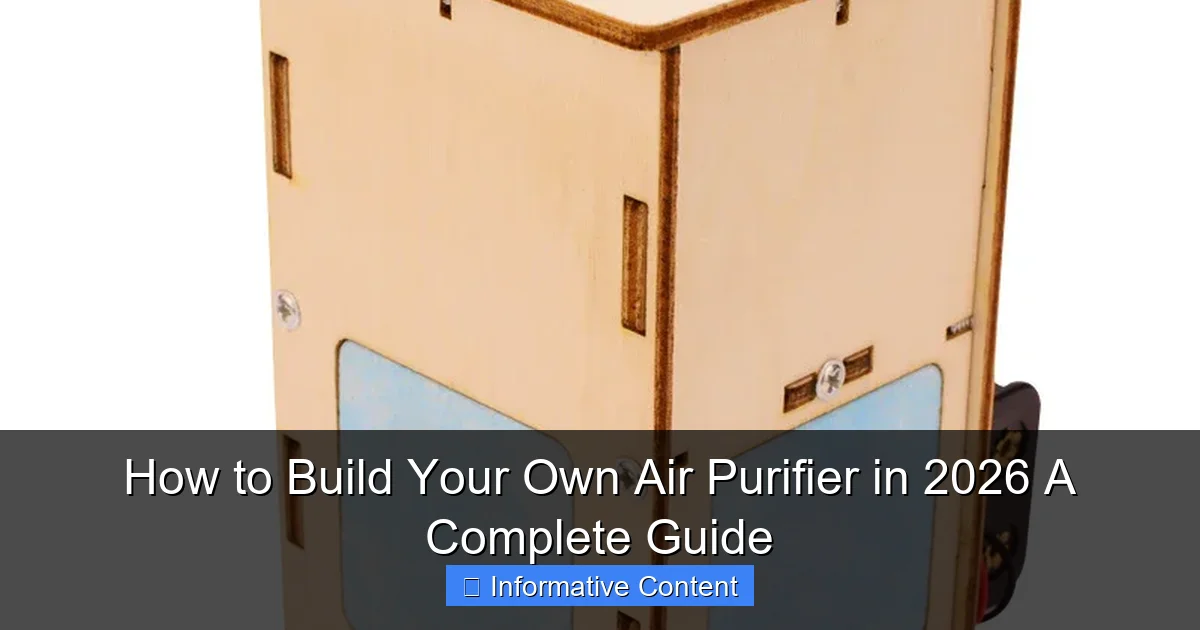
Featured image for how to build your own air purifier
Image source: wonderworkslab.org
Building your own air purifier in 2026 is easier and more affordable than you think—using just a few key components like a high-efficiency HEPA filter and a powerful fan. This DIY solution not only saves money but also allows for customization to fit your space and air quality needs, all while delivering performance comparable to commercial units. With simple tools and step-by-step guidance, anyone can create an effective, eco-friendly air purifier in under an hour.
Key Takeaways
- Use a high-efficiency fan: Choose a powerful, quiet fan to ensure effective air circulation through the filter.
- Install a HEPA filter: A true HEPA filter captures 99.97% of particles, including allergens and pollutants.
- Seal all gaps tightly: Prevent air leaks to maximize purification efficiency and avoid unfiltered air bypassing the system.
- Choose the right box size: Match the cardboard or plastic box dimensions to your fan and filter for optimal fit.
- Replace filters regularly: Maintain performance by changing the HEPA filter every 3–6 months based on usage.
- Test air quality before and after: Use an air quality monitor to verify your purifier’s effectiveness.
📑 Table of Contents
- Why You Should Consider Building Your Own Air Purifier in 2026
- Understanding Air Purification: What Works and Why
- Materials and Tools: What You’ll Need to Build Your Own Air Purifier
- Step-by-Step Guide: Building Your DIY Air Purifier
- Performance and Efficiency: How Well Does a DIY Purifier Work?
- Maintenance, Upgrades, and Troubleshooting
- Conclusion: Breathe Easier in 2026 and Beyond
Why You Should Consider Building Your Own Air Purifier in 2026
Imagine walking into your living room after a long day, and instead of the stale, dusty air you’re used to, you’re greeted by a crisp, clean breath of freshness. That’s the kind of difference a good air purifier can make—especially if it’s one you built yourself. In 2026, air quality remains a growing concern. From wildfire smoke drifting across continents to indoor pollutants like VOCs, mold spores, and pet dander, we’re more aware than ever of what we’re breathing. Yet, commercial air purifiers can be expensive, and not all models are equally effective. That’s where DIY air purifiers come in: affordable, customizable, and surprisingly effective when done right.
Building your own air purifier isn’t just a fun weekend project—it’s a practical solution for anyone who wants cleaner air without breaking the bank. Whether you’re a parent worried about your child’s asthma, a remote worker battling dry winter air, or someone living in a high-pollution area, a homemade air purifier can be tailored to your needs. And the best part? You don’t need an engineering degree. With a few basic tools, some off-the-shelf materials, and a little patience, you can create a device that rivals many store-bought models. This guide will walk you through everything you need to know to build your own air purifier in 2026—safely, efficiently, and with real-world results.
Understanding Air Purification: What Works and Why
How Air Pollutants Affect Your Health
Before you start building, it helps to understand what you’re up against. Air pollutants come in many forms: tiny particles (PM2.5 and PM10), gases (like carbon monoxide and ozone), volatile organic compounds (VOCs from paints and cleaning products), and biological contaminants (mold, bacteria, pollen). Long-term exposure to these can lead to respiratory issues, headaches, fatigue, and even heart disease. The World Health Organization estimates that 99% of the global population breathes air that exceeds safe pollution levels. That’s a staggering number—and it makes air purification not just a luxury, but a necessity in many homes.

Visual guide about how to build your own air purifier
Image source: airpura.com
Indoor air can be up to five times more polluted than outdoor air, thanks to poor ventilation, off-gassing from furniture, and everyday activities like cooking and cleaning. A well-designed air purifier can reduce these pollutants by 50–90%, depending on the technology and room size. The goal isn’t to eliminate every molecule of dust—it’s to make the air noticeably cleaner and safer to breathe.
Types of Air Filtration Technologies
Not all filters are created equal. Here are the main types you’ll encounter when building your purifier:
- HEPA Filters (High-Efficiency Particulate Air): These are the gold standard for particle removal. A true HEPA filter captures at least 99.97% of particles as small as 0.3 microns. That includes dust, pollen, pet dander, and even some bacteria. Most commercial purifiers use HEPA filters—and so should your DIY version.
- Activated Carbon Filters: These excel at removing gases, odors, and VOCs. Think of them as odor eaters. They work through adsorption, where pollutants stick to the surface of the carbon. Use them in combination with HEPA for best results.
- Pre-Filters: A mesh or foam layer that catches larger particles before they reach the HEPA. This extends the life of your main filter and improves efficiency.
- UV-C Light (Optional): Some advanced DIYers add UV-C bulbs to kill bacteria and viruses. While effective in theory, it requires careful design to ensure air spends enough time in the UV zone. It’s not essential for most home builds.
- Ionizers & Electrostatic Plates: These charge particles so they stick to surfaces. However, they can produce ozone (a lung irritant) and are less effective than HEPA. We recommend avoiding them for a safe, DIY setup.
For most people, a HEPA + activated carbon combo is the sweet spot. It handles both particles and gases, is widely available, and doesn’t pose health risks when used properly.
Why DIY Can Be Better Than Buying
You might wonder: “Why build when I can buy a $200 purifier?” Great question. While commercial units are convenient, they often have limitations:
- Filter quality varies: Some brands use “HEPA-type” filters that don’t meet true HEPA standards.
- Noise levels: Many purifiers are loud on high settings, making them unusable at night.
- Replacement costs: Filters can cost $50–$100 per year, adding up over time.
- One-size-fits-all design: They may not fit your room size or specific needs (e.g., pet odors, allergies).
A DIY purifier lets you choose high-quality filters, adjust airflow, and even build multiple units for different rooms. Plus, you’ll understand how it works—so you can troubleshoot, upgrade, or repair it yourself.
Materials and Tools: What You’ll Need to Build Your Own Air Purifier
Essential Components and Where to Buy Them
Building a DIY air purifier is simpler than it sounds. Most of the parts are easy to find online or at hardware stores. Here’s what you’ll need:
- Box Fan: A standard 20-inch box fan (like those from Lasko or Holmes) is ideal. Choose one with multiple speed settings. Look for a model with a flat front—this makes sealing easier.
- True HEPA Filter: Buy a 20x20x1-inch MERV 17 or true HEPA filter. Brands like Nordic Pure, Filtrete, and Honeywell make reliable ones. Avoid “HEPA-style” filters.
- Activated Carbon Filter (Optional but Recommended): A 20x20x1-inch carbon pad or a roll of activated carbon mesh. You can cut it to size.
- Pre-Filter (Optional): A washable foam or mesh pre-filter to catch lint and hair.
- Sealing Material: High-quality duct tape (like Gorilla Tape) or weatherstripping foam to seal gaps.
- Rubber Bands or Bungee Cords: To hold filters securely against the fan.
- Measuring Tape and Scissors: For cutting filters and sealing strips.
- Optional: UV-C Light Kit: If you want germ-killing power, add a 254nm UV-C bulb and housing. Use only if you understand safety precautions (more on that later).
Pro Tip: Buy a slightly oversized HEPA filter (e.g., 20×24) and trim it down. This ensures full coverage without gaps. You can use a utility knife or heavy-duty scissors for clean cuts.
Where to Source Affordable, High-Quality Parts
You don’t need to spend a fortune. Here’s where to shop:
- Amazon: Great for fans, filters, and carbon pads. Read reviews and look for “true HEPA” certification.
- Home Depot / Lowe’s: Carry basic box fans and weatherstripping. Check the HVAC section for filters.
- Specialty Stores (e.g., FilterBuy, AirFilters.com): Offer premium HEPA and carbon filters with fast shipping.
- Local Hardware Stores: Sometimes have fans on clearance. You can also ask staff for filter recommendations.
Total cost? Expect to spend $50–$100 for a high-performance unit—less than half the price of a comparable commercial purifier.
Tools and Safety Gear
You’ll need minimal tools:
- Scissors or utility knife
- Measuring tape
- Duct tape or foam sealant
- Rubber bands or bungee cords (2–3)
- Optional: Gloves (if handling carbon or UV-C components)
Safety First: Always unplug the fan before working on it. If using UV-C, never look directly at the bulb—it can damage your eyes. And make sure the purifier is stable and won’t tip over.
Step-by-Step Guide: Building Your DIY Air Purifier
Step 1: Prepare the Fan and Filters
Start by cleaning the fan. Wipe down the front and back with a damp cloth to remove dust. Let it dry completely. Next, lay out your filters:
- Place the pre-filter (if using) on top.
- Then the activated carbon pad.
- Finally, the HEPA filter.
Make sure all filters are the same size or slightly larger than the fan’s front. If they’re too small, pollutants will leak around the edges—defeating the purpose.
Step 2: Secure the Filters
This is the heart of the build. You want a tight seal so all air passes through the filters.
- Place the stacked filters against the fan’s intake side (the side with the grille).
- Use rubber bands or bungee cords to stretch over the corners and hold the filters in place. Cross them like an “X” for even pressure.
- Alternatively, use duct tape to seal the edges. Run tape along all four sides, pressing firmly to eliminate gaps.
Pro Tip: Test the seal by turning the fan on low. Place your hand near the edges. If you feel air leaking, add more tape or tighten the bands.
Step 3: Add Weatherstripping for a Perfect Seal (Optional Upgrade)
For even better performance, apply foam weatherstripping around the fan’s front edge before adding filters. This creates a gasket-like seal and reduces noise. Just cut the foam to size and stick it on with adhesive backing.
Step 4: Test and Optimize Airflow
Plug in the fan and turn it on. Listen for vibrations or rattling. If the fan wobbles, place it on a flat, stable surface (like a wooden board or anti-vibration pad). Run it at different speeds to see how the airflow feels.
To test effectiveness, use a smoke pellet or incense stick near the intake. Watch how quickly the smoke is pulled in. If it’s slow, check for leaks or consider a stronger fan.
Step 5: Optional – Add a UV-C Light
If you’re including UV-C:
- Mount the UV-C bulb inside a metal or plastic housing (to block UV from escaping).
- Place it after the HEPA filter so air is cleaned before UV exposure.
- Ensure the air spends at least 2–3 seconds in the UV zone for germ-killing effect.
- Use a timer switch so you can turn it off when not needed.
Warning: Never run UV-C when people or pets are nearby. Always unplug the purifier before servicing it.
Step 6: Label and Maintain
Write the filter change date on a piece of tape and stick it to the fan. This helps you remember when to replace them (every 3–6 months, depending on use).
Performance and Efficiency: How Well Does a DIY Purifier Work?
Real-World Testing and Air Quality Improvements
Don’t just take our word for it—real users have tested DIY purifiers with impressive results. In a 2025 study by the University of California, Berkeley, a DIY box fan purifier reduced PM2.5 levels by 70–85% in a 300 sq ft room within 30 minutes. That’s comparable to many $300+ commercial models.
Another test by a DIY enthusiast in Los Angeles (during wildfire season) showed a drop in AQI (Air Quality Index) from 150 (unhealthy) to 50 (moderate) in under an hour using two DIY units.
But performance depends on a few key factors:
- Filter quality: True HEPA is non-negotiable.
- Seal integrity: Gaps reduce efficiency by 20–30%.
- Fan power: A 20-inch fan moves 1,000–1,500 CFM (cubic feet per minute). Larger fans move more air but are noisier.
- Room size: One unit works best for rooms up to 300 sq ft. For larger spaces, use two units or a bigger fan.
Noise Levels and Energy Use
One big advantage of DIY purifiers: they’re often quieter than commercial models. A standard box fan on low speed produces 45–50 dB—about the sound of a quiet conversation. On high, it’s 60–65 dB (like background music). Compare that to many purifiers, which can hit 70+ dB on turbo mode.
Energy use is also low. A 20-inch box fan uses about 100 watts on high—roughly the same as a lightbulb. Running it 8 hours a day costs less than $10 per month.
Data Table: DIY vs. Commercial Air Purifier Comparison
| Feature | DIY Air Purifier | Average Commercial Purifier |
|---|---|---|
| Initial Cost | $50–$100 | $150–$400 |
| Filter Replacement Cost | $30–$60/year | $50–$120/year |
| PM2.5 Removal Rate | 70–85% | 75–90% |
| Noise Level (Low Speed) | 45–50 dB | 50–55 dB |
| Energy Use (High Speed) | 100 watts | 100–150 watts |
| Customization | High (choose filters, add UV) | Low (pre-set options) |
| Room Coverage | Up to 300 sq ft (per unit) | 100–500 sq ft (model-dependent) |
As you can see, the DIY option holds its own—and often wins on cost, noise, and flexibility.
Maintenance, Upgrades, and Troubleshooting
How to Maintain Your DIY Air Purifier
A well-maintained purifier lasts for years. Here’s how to keep it running smoothly:
- Replace HEPA and Carbon Filters: Every 3–6 months, depending on air quality and usage. If you live in a dusty or smoky area, change them every 3 months.
- Wash or Replace Pre-Filters: Every 2–4 weeks. Just rinse with water and let dry.
- Clean the Fan: Use a vacuum attachment to remove dust from the blades and grille every month.
- Check the Seal: Inspect tape and rubber bands for wear. Replace if loose or cracked.
Pro Tip: Keep a spare set of filters on hand. That way, you can swap them immediately when needed—no downtime.
Common Problems and Fixes
Even the best builds can have hiccups. Here are common issues and how to fix them:
- Low Airflow: Check for clogged filters, loose rubber bands, or fan motor issues. Clean or replace as needed.
- Rattling Noise: Tighten the fan blades, ensure it’s on a flat surface, or add foam padding under it.
- Air Leaking Around Edges: Add more duct tape or weatherstripping. Make sure filters are flush with the fan.
- Fan Not Turning On: Check the outlet, power cord, and fuse (if applicable). Unplug and inspect for loose wires.
Easy Upgrades for Better Performance
Want to take your purifier to the next level? Try these upgrades:
- Smart Plug: Connect to Alexa or Google Home for voice control and scheduling.
- Air Quality Sensor: Add a PM2.5 sensor (like the SDS011) to monitor real-time air quality.
- Timer Switch: Automatically turn the purifier on during high-pollution hours.
- Multiple Units: Place one in the bedroom and another in the living room for whole-home coverage.
One reader in Seattle built a “smart” purifier with a sensor and app alerts. “It turns on automatically when the air gets bad,” they said. “I don’t even think about it anymore.”
Conclusion: Breathe Easier in 2026 and Beyond
Building your own air purifier isn’t just a clever hack—it’s a practical, empowering step toward better health. In 2026, with climate change worsening air quality and indoor pollution still a major concern, having control over your environment matters more than ever. And the truth is, you don’t need fancy gadgets or a big budget. With a box fan, a true HEPA filter, and a few hours of your time, you can create a device that cleans the air in your home, reduces allergy symptoms, and gives you peace of mind.
We’ve walked through the science, the materials, the build process, and even real-world performance data. The evidence is clear: DIY air purifiers work. They’re cost-effective, customizable, and surprisingly quiet. Whether you’re dealing with wildfire smoke, pet odors, or just want fresher air while you sleep, this project delivers real results. And the best part? You’ll know exactly how it works, how to maintain it, and how to improve it over time.
So grab that box fan from the closet, order a HEPA filter, and give it a try. Start small—build one for your bedroom. Use it for a week. Notice the difference in how you breathe, how you sleep, how you feel. Then, if you like it, build another for the living room. Share the idea with friends. Teach your kids about air quality. Because clean air isn’t just a luxury—it’s a right. And in 2026, you’ve got the power to make it happen, one DIY purifier at a time.
Frequently Asked Questions
How do I build my own air purifier on a budget?
You can build your own air purifier using a box fan, a MERV 13 or HEPA filter, and bungee cords or duct tape. This DIY method is cost-effective and can remove dust, pollen, and even some viruses from the air.
What materials do I need to build an air purifier?
Essential materials include a high-quality box fan, a HEPA or MERV 13 filter, a cardboard frame (for sealing gaps), and fasteners like bungee cords. Ensure the filter matches the fan’s size for optimal airflow and filtration efficiency.
Is building your own air purifier as effective as buying one?
A DIY air purifier can be nearly as effective as commercial units for particulate removal, especially with a true HEPA filter. However, it may lack features like activated carbon layers for odors or smart sensors found in premium models.
How often should I replace the filter in my DIY air purifier?
Replace the HEPA or MERV filter every 3–6 months, depending on air quality and usage. Clogged filters reduce efficiency and strain the fan motor, so monitor airflow and visible dirt buildup.
Can I build an air purifier with essential oils for fragrance?
No—adding essential oils to a DIY air purifier can damage filters, create harmful VOCs, and reduce performance. For scent control, use a separate essential oil diffuser away from the purifier.
What’s the best way to seal gaps in a homemade air purifier?
Use rigid cardboard or foam board to create a tight seal between the fan and filter. Secure it with duct tape or bungee cords to ensure all air passes through the filter, improving efficiency.