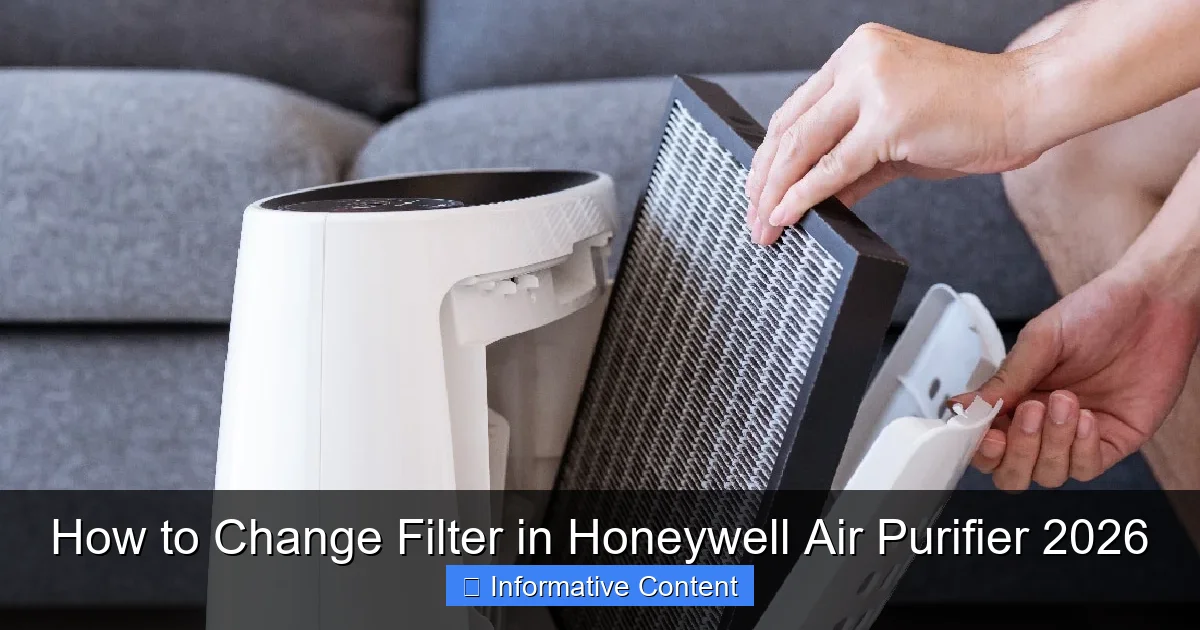
Featured image for how to change filter in honeywell air purifier
Image source: hvacseer.com
Changing the filter in your Honeywell Air Purifier 2026 is quick and essential for optimal performance—simply power off the unit, remove the back cover, and slide out the old filter. Replace it with a genuine Honeywell filter, ensuring a secure fit to maintain air quality and extend the purifier’s lifespan.
Key Takeaways
- Power off first: Always unplug the purifier before starting filter replacement.
- Open the back panel: Press tabs gently to access the used filter.
- Remove old filter: Slide out the expired filter and dispose of it properly.
- Insert new filter: Align arrows and slide in the correct Honeywell filter model.
- Reset filter indicator: Hold the filter button for 5 seconds after replacement.
- Check seal: Ensure the filter fits snugly to avoid air leakage.
📑 Table of Contents
- Why Changing Your Honeywell Air Purifier Filter Matters
- Knowing When to Change Your Honeywell Air Purifier Filter
- Step-by-Step Guide: How to Change Filter in Honeywell Air Purifier
- Choosing the Right Replacement Filter for Your Honeywell Model
- Common Mistakes to Avoid When Changing Your Filter
- Maximizing Your Air Purifier’s Lifespan and Performance
- Data Table: Honeywell Air Purifier Filter Replacement Guide
- Final Thoughts: Breathe Easy in 2026 and Beyond
Why Changing Your Honeywell Air Purifier Filter Matters
You know that fresh, clean air feeling when you walk into a well-ventilated room? That’s the magic of a properly maintained air purifier—especially if you own a Honeywell model. But here’s the thing: even the best air purifier loses its superpowers if you don’t change the filter on time. I learned this the hard way. A few years ago, I noticed my allergies creeping back, and my Honeywell air purifier, which used to hum quietly in the corner, started sounding like a jet engine. Turns out, I’d ignored the filter for months. Dust, pet dander, and who-knows-what else had turned it into a clogged sponge. Once I replaced it, the difference was night and day. The air felt lighter, my breathing improved, and the machine went back to its peaceful whisper.
Changing the filter in your Honeywell air purifier isn’t just about keeping the air clean—it’s about protecting your health, extending your device’s lifespan, and saving on energy costs. A dirty filter forces your purifier to work harder, which means higher electricity bills and more wear and tear. Plus, a clogged filter can actually recirculate trapped pollutants back into your room, defeating the whole purpose. The good news? Replacing the filter is surprisingly simple, even if you’re not exactly handy with tools. In this guide, I’ll walk you through every step, share tips to avoid common mistakes, and help you keep your air—and your sanity—fresh and clear in 2026 and beyond.
Knowing When to Change Your Honeywell Air Purifier Filter
Signs It’s Time to Replace the Filter
Your Honeywell air purifier won’t send you a text when the filter needs changing, but it’ll definitely give you clues. Here are the telltale signs:
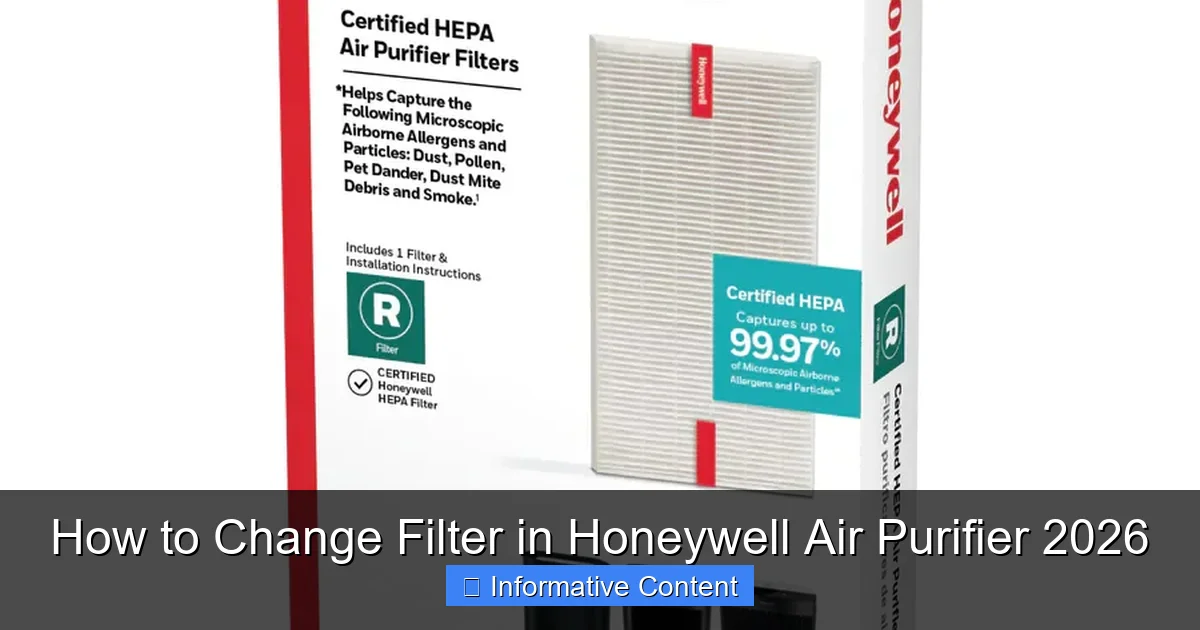
Visual guide about how to change filter in honeywell air purifier
Image source: mobileimages.lowes.com
- Reduced airflow: If the purifier sounds louder than usual or the air coming out feels weaker, the filter might be clogged.
- Bad odors: A dirty filter can trap smells (like cooking fumes or pet odors) and release them back into the air. If your room starts smelling stale, the filter is likely the culprit.
- Increased allergy symptoms: Sneezing, itchy eyes, or congestion? A failing filter means more airborne irritants.
- Visible dust or debris: Open the unit and take a peek. If the filter looks gray, fuzzy, or covered in dust, it’s time for a swap.
Pro tip: Even if you don’t notice these signs, don’t skip routine changes. Think of it like changing the oil in your car—preventative maintenance saves bigger problems later.
Honeywell’s Filter Replacement Schedule
Honeywell recommends replacing filters every 3 to 6 months, but this depends on a few factors:
- Usage: Running the purifier 24/7? You’ll need to change it more often.
- Environment: Homes with pets, smokers, or lots of dust may need replacements every 3–4 months.
- Model: Some models (like the Honeywell HPA300) have longer-lasting filters, while others (like the HPA100) may need more frequent changes.
I live in a pet-friendly apartment with two cats, so I change my filter every 3 months. My neighbor, who lives alone in a low-dust area, goes 6 months. Listen to your environment—it’ll tell you when it’s time.
Using the Filter Reset Indicator (If Your Model Has One)
Many newer Honeywell models (like the HPA250B or HPA300) have a filter reset indicator. After you replace the filter, press and hold the “Filter Reset” button for 3–5 seconds. The light will turn green, signaling your purifier is ready to work at peak efficiency.
Note: Not all models have this feature. If yours doesn’t, keep a sticky note on the unit or set a calendar reminder for the next change. Trust me—it’s easy to forget!
Step-by-Step Guide: How to Change Filter in Honeywell Air Purifier
Step 1: Power Down and Unplug the Unit
Safety first! Always turn off and unplug your Honeywell air purifier before opening it. I learned this the hard way when I accidentally hit the power button mid-filter change—my sleeve got caught in the fan. Not fun. Unplugging ensures you won’t damage the unit or hurt yourself.
Step 2: Open the Air Purifier
Most Honeywell models have a front or side panel that slides, snaps, or unlocks to reveal the filter. Here’s how to open common models:
- HPA100/HPA200/HPA300: Press the release button on the top and lift the front grille.
- HPA250B/HPA300B: Slide the latch on the side and remove the front cover.
- Honeywell Tower Models: Twist the top cap counterclockwise to unlock.
Pro tip: If the panel feels stuck, check the manual. Some models have hidden latches or require a gentle wiggle.
Step 3: Remove the Old Filter(s)
Honeywell purifiers often have two filters: a pre-filter (for large particles) and a HEPA filter (for tiny allergens). Here’s how to remove them:
- Pre-filter: Usually a mesh screen or foam layer. Pull it out gently—it might be held by clips.
- HEPA filter: Look for a cardboard frame with a handle. Pull it straight out. Don’t force it—if it sticks, check for tabs or locks.
Important: Note the direction of the airflow arrow on the HEPA filter. You’ll need to match it when installing the new one. (I once installed mine backward—it worked, but the airflow was weaker for weeks!)
Step 4: Clean the Pre-Filter (If Reusable)
Some Honeywell models (like the HPA300) come with a washable pre-filter. If yours is reusable, rinse it under warm water and let it air dry completely before reinserting. Never put a wet filter back in! A damp filter can grow mold and damage the unit.
If your pre-filter is disposable (check the packaging), toss it and replace it with a new one. Most Honeywell models use a carbon pre-filter that helps with odors.
Step 5: Install the New Filter(s)
Now for the fun part—installing the new filter! Here’s how:
- Pre-filter: Slide it back into place, making sure it sits flat and covers the entire intake.
- HEPA filter: Align the airflow arrow with the direction shown in your purifier. Push it in until it clicks or feels secure.
Pro tip: If the HEPA filter feels loose, double-check the frame. Some models have a small tab that needs to be flipped to lock it in.
Step 6: Close the Unit and Reset the Filter Light
Snap the front panel back into place. Make sure it’s fully seated—you’ll hear a click or feel it lock. If your model has a filter reset indicator, press and hold the button for 3–5 seconds until the light turns green.
Final check: Plug the unit back in and turn it on. Listen for smooth operation and feel the airflow. If it’s weak or noisy, reopen the unit and double-check the filter installation.
Choosing the Right Replacement Filter for Your Honeywell Model
Honeywell Filter Types Explained
Not all filters are created equal. Here’s what you need to know:
- HEPA Filters: Capture 99.97% of particles as small as 0.3 microns (dust, pollen, mold). Must be replaced—no cleaning!
- Carbon Pre-Filters: Absorb odors, smoke, and VOCs. Some are washable; others are disposable.
- Allergen Reducer Filters: Combine HEPA and carbon layers for extra protection.
Example: The Honeywell HRF-AP1 is a carbon pre-filter, while the HRF-R3 is a HEPA replacement for the HPA300.
OEM vs. Third-Party Filters: What’s the Difference?
You’ll find two types of replacement filters:
- OEM (Original Equipment Manufacturer): Made by Honeywell. Guaranteed fit and performance, but often pricier (e.g., $30–$50 per filter).
- Third-Party: Brands like FilterBuy or Fette offer compatible filters at lower prices (e.g., $15–$30). Some perform just as well—but quality varies.
I’ve used both. For critical areas (like my bedroom), I stick with OEM filters. For less-used rooms, I’ve had success with reputable third-party brands. Just read reviews and avoid no-name knockoffs.
Where to Buy Filters (and Save Money)
Here’s where I shop for filters:
- Honeywell’s website: Reliable, but check for sales or bundles.
- Amazon: Great for OEM and third-party filters. Subscribe & Save can cut costs by 10–15%.
- Home Depot/Lowes: Buy in-store to avoid shipping fees (and get them immediately).
Pro tip: Buy in bulk. A 2- or 3-pack often costs less per filter than buying individually. I stock up during holiday sales and keep extras in a sealed bag to prevent dust buildup.
Common Mistakes to Avoid When Changing Your Filter
Installing the Filter Backward
This is the #1 mistake I see. The airflow arrow on the HEPA filter must point toward the purifier’s fan. If it’s backward, the filter won’t work efficiently. Always double-check before closing the unit.
Skipping the Pre-Filter
Some people remove the pre-filter and forget to put it back (or skip cleaning it). Big mistake! The pre-filter catches large particles, which extends the life of your HEPA filter. Always reinstall it—even if it looks clean.
Using Damaged or Expired Filters
Inspect the new filter before installing. If the cardboard frame is crushed, the pleats are torn, or the seal is broken, don’t use it. A damaged filter won’t seal properly, letting unfiltered air pass through. Also, check the expiration date—some carbon filters lose effectiveness after 12–18 months, even if sealed.
Forgetting to Reset the Filter Light
If you skip this step, the indicator will keep flashing, reminding you to change the filter (even though you just did!). It’s not harmful, but it’s annoying. Press that reset button!
Ignoring the Manual
Every Honeywell model is slightly different. If you’re unsure about steps, consult the manual. You can download it from Honeywell’s website if you’ve lost the paper copy. It’s worth the 5 minutes of reading.
Maximizing Your Air Purifier’s Lifespan and Performance
Cleaning the Exterior and Vents
Wipe the outside of your purifier with a dry microfiber cloth every 2–4 weeks. Dust buildup can block vents and reduce airflow. For stubborn grime, use a damp cloth—but never spray water directly on the unit.
Vacuuming Around the Unit
Place your purifier at least 6 inches from walls and furniture. Dust and pet hair can accumulate near the intake, making the filter work harder. Vacuum the area weekly to keep airflow unobstructed.
Running the Purifier Efficiently
Here’s how I optimize my Honeywell purifier:
- Run it 24/7 on low during allergy season or high-pollution days.
- Use high mode for 1–2 hours after cooking or cleaning.
- Turn it off when you leave the room for more than 4 hours (saves energy).
Bonus tip: Pair your purifier with an air quality monitor (like the Airthings Wave Mini) to track real-time PM2.5 levels and adjust settings accordingly.
Storing Spare Filters Properly
Keep extra filters in a cool, dry, dust-free place. I store mine in a sealed plastic bin. Avoid damp areas (like basements) to prevent mold growth.
Data Table: Honeywell Air Purifier Filter Replacement Guide
| Model | HEPA Filter | Pre-Filter | Replacement Frequency | Reset Indicator? |
|---|---|---|---|---|
| HPA100 | HRF-R2 (2-pack) | HRF-AP1 | 3–6 months | No |
| HPA200 | HRF-R3 (3-pack) | HRF-AP1 | 3–6 months | Yes |
| HPA300 | HRF-R3 (3-pack) | HRF-AP1 (washable) | 3–6 months | Yes |
| HPA250B | HRF-R2 (2-pack) | HRF-AP1 | 3–6 months | Yes |
| Honeywell Tower (HPA020) | HRF-200 (2-pack) | None | 6 months | No |
Note: Always verify the filter model for your specific unit. Check the label inside the purifier or the manual.
Final Thoughts: Breathe Easy in 2026 and Beyond
Changing the filter in your Honeywell air purifier isn’t rocket science, but it’s one of those tasks we all tend to delay. I get it—life gets busy, and it’s easy to forget. But trust me, the payoff is huge. A clean filter means better air quality, fewer allergy flare-ups, and a purifier that lasts for years. After replacing my filter regularly, I’ve noticed I sleep better, my pets’ dander is under control, and I don’t wake up with that “stuffy nose” feeling anymore.
Here’s my final advice: Make filter changes a habit. Set a reminder on your phone, tie it to a routine (like changing your HVAC filter or cleaning your vacuum), or keep a log on the unit. And don’t stress about perfection—even if you’re a few weeks late, you’re still doing something great for your health. So go ahead, open that Honeywell purifier, swap that filter, and take a deep breath. You’ve got this. Here’s to fresh air in 2026 and beyond!
Frequently Asked Questions
How do I know when to change the filter in my Honeywell air purifier?
Most Honeywell air purifiers have a filter replacement indicator light that turns on when it’s time to change the filter. If your model doesn’t have this feature, replace the filter every 6–12 months, depending on usage and air quality.
How to change filter in Honeywell air purifier for the first time?
First, unplug the purifier and open the front or side panel (varies by model). Remove the old filter, dispose of it properly, and insert the new one with the airflow arrow pointing inward. Close the panel and reset the filter indicator if needed.
Can I wash and reuse my Honeywell air purifier filter?
No, Honeywell HEPA filters are not washable or reusable. Washing damages the fibers and reduces efficiency. Always replace with a genuine Honeywell filter for optimal performance.
Where can I buy replacement filters for my Honeywell air purifier?
You can purchase genuine replacement filters on Amazon, Home Depot, or directly from Honeywell’s website. Ensure you select the correct model number to match your air purifier.
Do all Honeywell air purifiers use the same filter type?
No, Honeywell uses different filters (HEPA, carbon, or pre-filters) depending on the model. Check your user manual or the label on your current filter to find the correct replacement.
How do I reset the filter indicator light after changing the filter?
After installing the new filter, press and hold the “Filter Reset” or “Check Filter” button for 3–5 seconds until the light turns off. Refer to your model’s manual for exact steps.