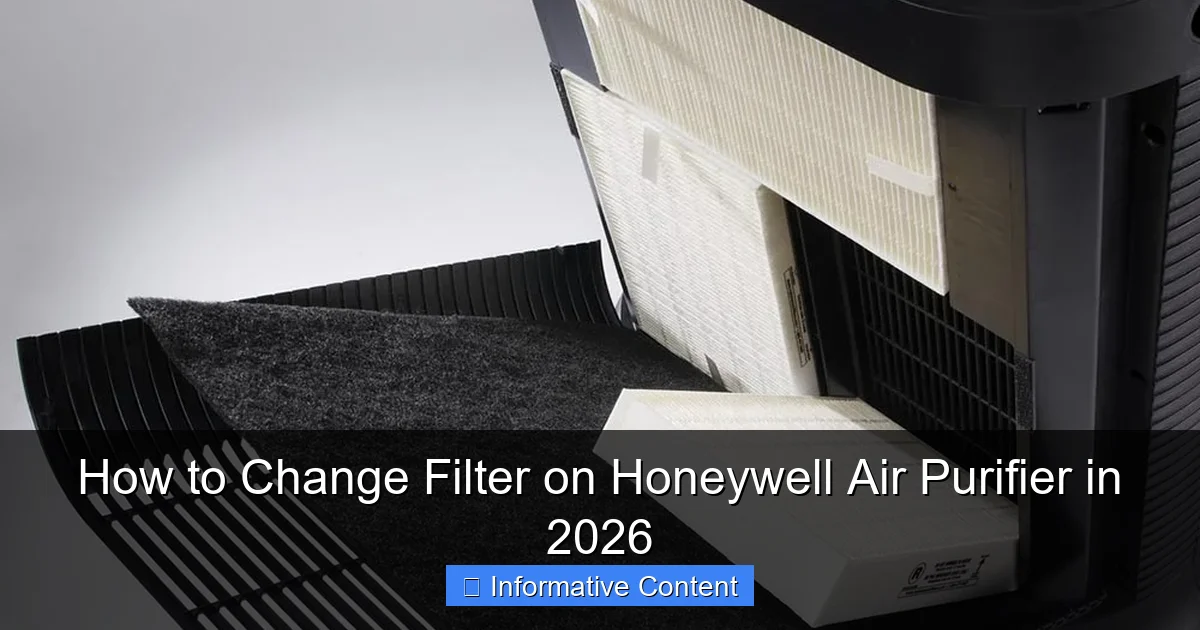
Featured image for how to change filter on honeywell air purifier
Image source: honeywellstore.com
Changing the filter on your Honeywell air purifier in 2026 is quick and essential for optimal performance—simply turn off the unit, remove the front panel, and replace the old filter with a genuine Honeywell replacement. Always check the filter indicator light or follow the recommended schedule to ensure clean, efficient air filtration. With this simple maintenance step, you’ll keep your air purifier running smoothly and your indoor air quality at its best.
Key Takeaways
- Turn off and unplug the purifier before changing the filter for safety.
- Locate the filter compartment using your model’s user manual or side panel.
- Remove the old filter carefully to avoid spreading trapped particles.
- Check filter type and replace with the correct Honeywell replacement model.
- Install the new filter with the airflow arrow pointing inward.
- Reset the filter indicator after replacement to track usage accurately.
- Replace filters regularly every 3–6 months for optimal performance.
📑 Table of Contents
- How to Change Filter on Honeywell Air Purifier in 2026
- Why Changing Your Honeywell Air Purifier Filter Matters
- Types of Honeywell Air Purifier Filters
- Step-by-Step Guide to Changing Your Honeywell Air Purifier Filter
- Tips for Choosing the Right Replacement Filter
- Maintenance Tips to Extend Filter Life
- Common Mistakes to Avoid
- Honeywell Air Purifier Filter Replacement Schedule (2026)
- Final Thoughts: Breathe Easy in 2026
How to Change Filter on Honeywell Air Purifier in 2026
Let’s be honest—air purifiers are one of those home appliances we tend to forget about… until we remember. Maybe you walked past your Honeywell air purifier and noticed it’s been running a little louder than usual. Or perhaps you caught a whiff of something musty, even though you’ve been diligent about cleaning. That’s your cue: it’s time to change the filter.
Changing the filter on your Honeywell air purifier might seem like a small task, but it’s one of the most important things you can do to keep your indoor air fresh, your machine running efficiently, and your family breathing easier. In 2026, with more people spending time at home and air quality concerns on the rise, maintaining your air purifier isn’t just a chore—it’s a health essential. Whether you’re a first-time owner or you’ve been using your Honeywell unit for years, this guide will walk you through the entire process step by step. No technical jargon, no confusion—just clear, practical advice to help you get it done right.
Why Changing Your Honeywell Air Purifier Filter Matters
Think of your air purifier’s filter like the lungs of your home. Over time, it traps dust, pollen, pet dander, smoke, and even microscopic particles like mold spores and bacteria. But just like lungs, filters get clogged. When that happens, your air purifier has to work harder, uses more energy, and becomes less effective at cleaning the air.
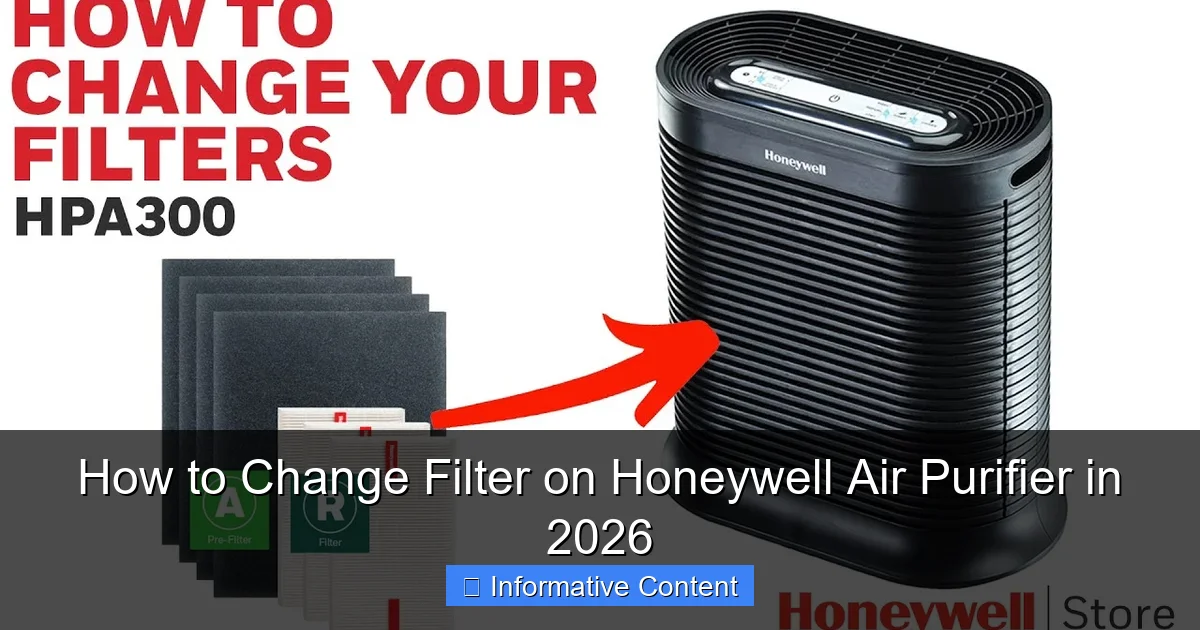
Visual guide about how to change filter on honeywell air purifier
Image source: i.ytimg.com
According to the Environmental Protection Agency (EPA), indoor air can be two to five times more polluted than outdoor air. That’s a startling statistic, especially if you live in a city or have pets or allergies. A clean filter ensures your Honeywell unit captures these pollutants efficiently. In fact, studies show that air purifiers with clean filters can remove up to 99.97% of airborne particles as small as 0.3 microns—something a clogged filter simply can’t achieve.
Signs It’s Time to Replace the Filter
You don’t need to wait for a warning light (though many newer Honeywell models have one). Here are a few telltale signs that your filter needs changing:
- Reduced airflow: If you notice the air coming out of the purifier feels weaker, it’s likely the filter is clogged.
- Unpleasant odors: A dirty filter can start to smell musty or even emit a burnt odor, especially if it’s been overworked.
- Increased allergy symptoms: If you or your family members are sneezing, coughing, or experiencing more congestion than usual, your purifier might not be doing its job.
- Visible dirt or discoloration: Open the front panel and take a look. If the filter looks gray, dusty, or dark, it’s definitely time for a change.
- Filter indicator light: Many Honeywell models, like the HPA300 or HPA100 series, come with a filter change indicator that flashes when it’s time.
Pro tip: Even if none of these signs are present, it’s wise to check your filter every 3 months. High-use environments—like homes with pets, smokers, or allergy sufferers—may need more frequent changes.
How Often Should You Change the Filter?
The general recommendation is every 3 to 6 months, but this can vary based on usage and environment. For example, if you live in a dusty area or have multiple pets, you might need to change it every 2 months. On the other hand, if you only run the purifier occasionally, you might get away with changing it every 6 to 8 months.
Honeywell’s official guidelines suggest replacing the HEPA filter every 12 months under normal conditions, but this assumes moderate use. In reality, most users will need to replace it sooner. The pre-filter (the one that catches larger particles) usually needs more frequent attention—every 3 months is a safe bet.
Types of Honeywell Air Purifier Filters
Before you dive into the replacement process, it’s important to understand the different types of filters used in Honeywell air purifiers. Not all models use the same filter setup, so knowing what you’re working with will save you time and money.
HEPA Filters
The star of the show—the HEPA (High-Efficiency Particulate Air) filter—is what makes Honeywell purifiers so effective. These filters are designed to capture 99.97% of particles as small as 0.3 microns, including pollen, dust mites, mold spores, and even some bacteria.
Most Honeywell models use a True HEPA filter, which is the gold standard. Unlike “HEPA-type” filters, which may only capture 85–90% of particles, True HEPA filters meet strict efficiency standards. When shopping for a replacement, always look for “True HEPA” to ensure you’re getting the real deal.
Pre-Filters
The pre-filter is the first line of defense. It’s usually a foam or mesh layer that traps larger particles like pet hair, lint, and dust. This helps extend the life of the HEPA filter by preventing it from getting clogged too quickly.
Pre-filters are often washable, which is a nice bonus. You can rinse them under warm water, let them dry completely, and reuse them. However, if the pre-filter is torn or heavily soiled, it’s best to replace it. Some Honeywell models come with a carbon pre-filter, which also helps reduce odors from cooking, pets, or smoke.
Carbon Filters
Carbon (or activated carbon) filters are excellent for absorbing odors and volatile organic compounds (VOCs). While they don’t capture particles like HEPA filters, they’re great for eliminating smells from cooking, pets, or household chemicals.
Not all Honeywell models include a carbon filter, but many do—especially those designed for odor control. If your model has one, it’s usually located behind the pre-filter or integrated into a multi-stage filter cartridge.
Combination Filters
Some Honeywell air purifiers use a combination filter that includes both HEPA and carbon layers in a single unit. These are convenient because you only need to replace one filter instead of two or three. Models like the Honeywell HPA300WT use a 3-in-1 filter that combines a pre-filter, HEPA filter, and carbon layer.
While combination filters simplify maintenance, they can be more expensive than individual filters. However, they’re often worth it for the convenience and consistent performance.
Step-by-Step Guide to Changing Your Honeywell Air Purifier Filter
Now for the main event—how to actually change the filter. Don’t worry, it’s easier than it sounds. Most Honeywell air purifiers are designed with user-friendly access, so you won’t need any tools or technical skills. Let’s walk through the process step by step.
Step 1: Turn Off and Unplug the Unit
Safety first! Always turn off your air purifier and unplug it from the wall before opening it. This prevents any accidental starts and protects you from electrical hazards. Even though the unit isn’t running, there’s still a small risk if you touch internal components while it’s plugged in.
Step 2: Locate the Filter Access Panel
Most Honeywell models have a front panel that swings open or slides off. Look for a latch or button near the top or bottom of the unit. On models like the HPA100, you’ll find a small button on the front that releases the cover when pressed. On others, like the HPA300, the front grille simply lifts off when you pull it gently.
If you’re not sure how to open your model, check the user manual or look for a small icon near the panel that indicates how to release it. Some newer models even have a magnetic latch that makes opening and closing a breeze.
Step 3: Remove the Old Filter
Once the panel is open, you’ll see the filter(s) inside. Depending on your model, you may have one, two, or three filters stacked together. Carefully pull them out one by one, starting with the outermost layer (usually the pre-filter).
Take note of how the filters are arranged—this will help you reinstall the new ones correctly. Some filters have arrows or labels indicating airflow direction. Make sure to remember which way they face.
If your pre-filter is washable, rinse it under warm water and let it air dry completely before reusing. If it’s damaged or too dirty, replace it with a new one.
Step 4: Install the New Filter
Now it’s time to put in the new filter. Start with the pre-filter (if applicable), then add the HEPA filter, and finally the carbon filter (if your model uses one). Make sure each filter is seated properly and fits snugly in its compartment.
Pay attention to the airflow direction. Most filters have an arrow on the side that should point toward the inside of the unit (toward the fan). Installing the filter backward can reduce efficiency and even damage the motor over time.
If you’re using a combination filter, simply slide it into place as a single unit. These are designed to fit only one way, so you shouldn’t have any trouble.
Step 5: Close the Panel and Reset the Filter Indicator
Once the new filter is in place, close the front panel securely. Make sure it clicks or locks into position. Then, plug the unit back in and turn it on.
If your Honeywell model has a filter change indicator light, you’ll need to reset it. This is usually done by holding down the “Filter” or “Reset” button for 3–5 seconds until the light turns off or changes color. Refer to your user manual for specific instructions, as the process varies by model.
Pro tip: Keep the old filter for a day or two before throwing it away. This gives you a visual reminder of how much dirt it collected—and a great excuse to feel proud of your maintenance efforts!
Tips for Choosing the Right Replacement Filter
Buying a replacement filter might seem straightforward, but there are a few things to keep in mind to ensure you get the right one and the best value.
Check Your Model Number
The most important step is to know your Honeywell model number. This is usually found on a label on the back or bottom of the unit. Common models include the HPA100, HPA200, HPA300, and HPA500 series. Each model uses a specific filter type, so using the wrong one can lead to poor performance or even damage.
For example, the Honeywell HPA300 uses a 3-in-1 filter (part number HRF-R3), while the HPA100 uses a 2-in-1 filter (HRF-A1). Always double-check compatibility before purchasing.
Buy Genuine vs. Generic Filters
You’ll find both genuine Honeywell filters and third-party alternatives online. Genuine filters are designed specifically for your model and often come with a warranty. They’re usually more expensive but offer better fit and performance.
Generic filters can be cheaper and sometimes just as effective—especially if they’re from a reputable brand. However, be cautious. Some generic filters may not fit properly or may not meet True HEPA standards. Read reviews and look for certifications like AHAM or CADR ratings to ensure quality.
Consider Subscription Services
Honeywell offers a filter subscription service that delivers new filters to your door every 3, 6, or 12 months. This is a convenient option if you tend to forget maintenance tasks. You’ll get reminders, automatic shipments, and sometimes a discount on bulk purchases.
Third-party retailers like Amazon also offer subscription options. Just make sure you’re signing up for the correct filter type and frequency.
Look for Multi-Pack Deals
If you plan to use your air purifier for several years, consider buying filters in bulk. Multi-packs (like 2 or 3 filters) often cost less per unit and save you from last-minute shopping trips. Just store them in a cool, dry place to prevent damage.
Maintenance Tips to Extend Filter Life
Changing the filter is important, but so is regular maintenance. A little care goes a long way in keeping your Honeywell air purifier running smoothly and your filters lasting longer.
Clean the Exterior and Vents
Dust and debris can build up on the outside of your unit, especially around the intake and output vents. Use a soft, dry cloth to wipe down the surface weekly. For tougher grime, lightly dampen the cloth with water—never spray liquid directly on the unit.
Vacuum the vents gently with a brush attachment to remove dust buildup. This helps maintain airflow and reduces strain on the motor.
Wash or Replace the Pre-Filter Regularly
As mentioned earlier, the pre-filter takes the brunt of the dirt. Washing it every 2–4 weeks (depending on use) can significantly extend the life of your HEPA filter. Just rinse it under warm water, let it dry completely, and reinstall.
If your model doesn’t have a washable pre-filter, replace it every 3 months or sooner if it looks dirty.
Run the Purifier Consistently
Running your air purifier regularly—ideally 8–12 hours a day—helps maintain air quality and prevents the filter from getting clogged too quickly. Use the “Auto” mode if your model has one, which adjusts fan speed based on air quality.
Avoid turning the unit on and off frequently, as this can cause the motor to wear out faster.
Monitor Air Quality
If you live in an area with high pollution, pollen, or smoke, consider using an air quality monitor. These devices measure particulate matter (PM2.5) and can help you decide when to run the purifier at higher speeds or change the filter sooner.
Common Mistakes to Avoid
Even with the best intentions, it’s easy to make mistakes when changing your filter. Here are a few common pitfalls and how to avoid them.
- Forgetting to unplug the unit: Always unplug before opening. It’s a simple step that prevents accidents.
- Installing the filter backward: Check the airflow arrow. Installing it backward reduces efficiency and can damage the motor.
- Using the wrong filter type: Double-check your model number and filter compatibility. Using the wrong filter can void your warranty.
- Not resetting the filter indicator: If your model has a light, reset it after changing the filter. Otherwise, you might miss the next change.
- Ignoring the pre-filter: Don’t skip cleaning or replacing the pre-filter. It protects the HEPA filter and improves performance.
Honeywell Air Purifier Filter Replacement Schedule (2026)
To help you stay on track, here’s a quick reference table for common Honeywell models and their recommended filter replacement schedules.
| Model | Filter Type | Pre-Filter | HEPA Filter | Carbon Filter |
|---|---|---|---|---|
| HPA100 | 2-in-1 (Pre + HEPA) | Every 3 months (washable) | Every 12 months | N/A |
| HPA200 | 3-in-1 (Pre + HEPA + Carbon) | Every 3 months (washable) | Every 12 months | Every 6–12 months |
| HPA300 | 3-in-1 (Pre + HEPA + Carbon) | Every 3 months (washable) | Every 12 months | Every 6–12 months |
| HPA500 | 3-in-1 (Pre + HEPA + Carbon) | Every 3 months (washable) | Every 12 months | Every 6–12 months |
Note: These are general guidelines. Adjust based on usage, pets, smoking, and air quality.
Final Thoughts: Breathe Easy in 2026
Changing the filter on your Honeywell air purifier might not be the most exciting task on your to-do list, but it’s one of the most impactful. A clean filter means cleaner air, better performance, and a healthier home. In 2026, as we continue to prioritize indoor air quality, this simple maintenance step can make a big difference in your daily life.
Remember, your air purifier is only as good as its filter. By staying consistent with replacements and following the tips in this guide, you’ll get the most out of your Honeywell unit for years to come. So the next time you walk past your purifier, give it a little nod of appreciation—and maybe check that filter while you’re at it.
Your lungs (and your family) will thank you.
Frequently Asked Questions
How do I know when to change the filter on my Honeywell air purifier?
Most Honeywell air purifiers have a filter replacement indicator light that turns on when it’s time to change the filter. You should also check the filter every 3–6 months depending on usage and air quality.
What type of filter does my Honeywell air purifier use?
Honeywell air purifiers typically use a combination HEPA and carbon filter, often labeled as a “True HEPA” or “HEPA-type” filter. Check your model’s manual or the existing filter for the exact replacement part number.
How to change filter on Honeywell air purifier step by step?
First, turn off and unplug the unit, then open the front or side panel to access the filter compartment. Remove the old filter, insert the new one ensuring it’s properly aligned, and close the panel securely.
Can I clean and reuse the Honeywell air purifier filter?
No, Honeywell HEPA filters are not washable or reusable—they must be replaced when dirty. However, some models have a washable pre-filter that can be cleaned to extend the life of the main filter.
Where can I buy a replacement filter for my Honeywell air purifier?
You can purchase genuine Honeywell replacement filters online through Amazon, the official Honeywell website, or at major retailers like Walmart and Home Depot. Always verify compatibility with your model number.
How often should I replace the filter in my Honeywell air purifier?
For optimal performance, replace the HEPA filter every 12 months and the carbon pre-filter every 3 months under normal use. High pollution or pet dander may require more frequent changes.