
Featured image for how to change honeywell car air purifier filter
Image source: carplus.in
Changing your Honeywell car air purifier filter in 2026 is quick and easy—just power off the device, remove the old filter, and insert the new one. Ensure the replacement filter matches your model (check the manual or packaging) for optimal air quality and performance. Complete the process in under 5 minutes to keep your cabin air fresh and allergen-free.
Key Takeaways
- Power off first: Always disconnect the purifier before filter changes to ensure safety.
- Check filter type: Match your model to the correct Honeywell replacement filter.
- Open the compartment: Locate and gently remove the filter cover or housing.
- Dispose responsibly: Seal old filters in plastic to contain trapped pollutants.
- Align new filter: Insert with airflow arrows facing the correct direction.
- Reset if needed: Some models require a filter reset after installation.
- Clean regularly: Wipe the purifier interior to maintain performance post-change.
📑 Table of Contents
- Why Your Car’s Air Quality Matters More Than You Think
- Signs It’s Time to Change Your Honeywell Car Air Purifier Filter
- Choosing the Right Replacement Filter for Your Honeywell Model
- Step-by-Step: How to Change the Honeywell Car Air Purifier Filter
- Pro Tips to Extend Filter Life and Maximize Performance
- Honeywell Car Air Purifier Filter Replacement Guide (2026 Models)
- Final Thoughts: Breathe Easy, Drive Better
Why Your Car’s Air Quality Matters More Than You Think
Let’s be honest—most of us spend more time in our cars than we’d like to admit. Whether it’s the daily commute, weekend road trips, or school drop-offs, your vehicle is essentially a second home. But have you ever stopped to think about the air you’re breathing inside it? Unlike your living room or office, your car is a confined space where pollutants like dust, pollen, exhaust fumes, pet dander, and even cigarette smoke can accumulate quickly. And if you’re relying on a Honeywell car air purifier to keep things fresh, you’re already ahead of the game. But here’s the catch: no air purifier works effectively without a clean, functioning filter.
I learned this the hard way last winter. I noticed a musty smell in my car, and my allergies were acting up every time I drove. At first, I blamed the cold weather or leftover fast food wrappers. Then I remembered—my Honeywell car air purifier had been running nonstop for over a year. When I finally opened it, the filter was black, caked with dust, and clearly past its prime. That moment was a wake-up call. I realized that even the best air purifier is only as good as the filter inside it. So, if you’re wondering how to change your Honeywell car air purifier filter in 2026, you’re in the right place. This guide walks you through every step, from spotting the signs of a clogged filter to installing a fresh one—no tools, no stress, just clean air.
Signs It’s Time to Change Your Honeywell Car Air Purifier Filter
1. Reduced Airflow or Weak Fan Performance
If your purifier used to hum along smoothly but now sounds strained or the airflow feels weak, it’s likely the filter is clogged. Think of it like a straw—when it’s clean, you can sip easily. But if it’s filled with gunk, you have to suck harder. A dirty filter creates resistance, making the motor work harder and reducing efficiency. I noticed this with mine—the fan would spin, but I couldn’t feel much air coming out. A simple filter swap fixed it in minutes.
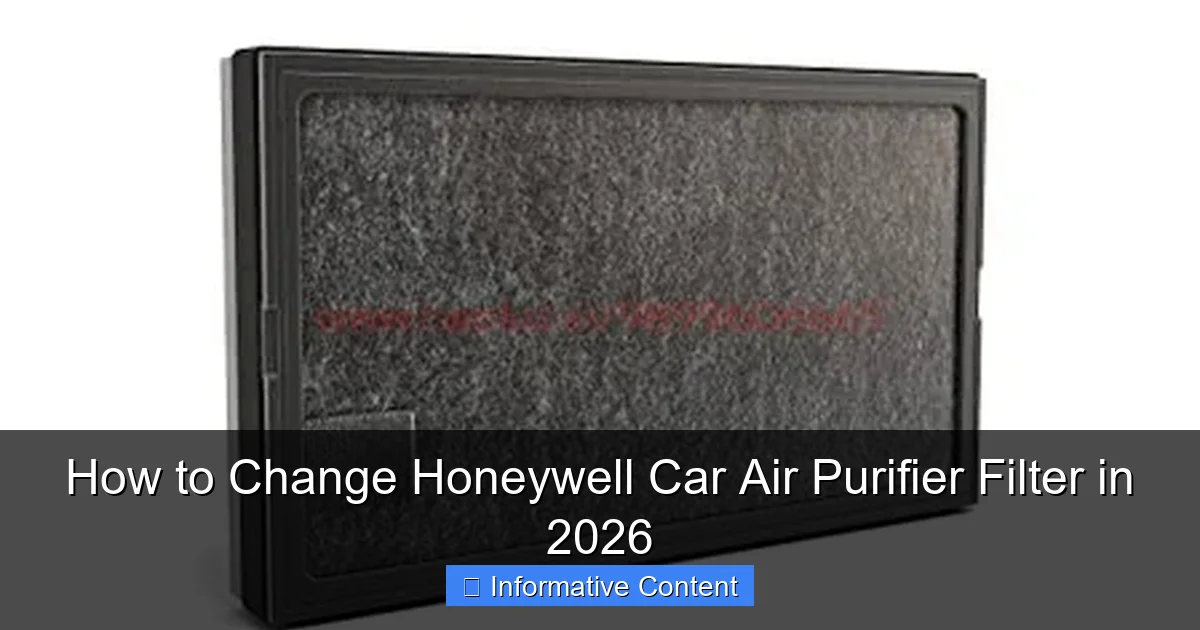
Visual guide about how to change honeywell car air purifier filter
Image source: carplus.in
2. Unpleasant Odors That Won’t Go Away
One of the main jobs of a Honeywell car air purifier is to neutralize odors. If you start noticing lingering smells—like wet dog, fast food, or exhaust—despite the purifier running, the filter may have reached its saturation point. Activated carbon filters, in particular, have a limited capacity to absorb odors. Once they’re full, they stop working. I once had a gym bag left in my trunk for a week, and even after removing it, the odor persisted until I changed the filter. Fresh carbon = fresh air.
3. Allergy or Asthma Symptoms Flare Up While Driving
If you or a passenger start sneezing, coughing, or feeling congested during or after drives, it could be due to airborne irritants the purifier is no longer filtering. Pollen, mold spores, and dust mites can pass through a worn-out filter. A friend of mine with seasonal allergies kept blaming her car’s HVAC system until she realized her Honeywell purifier filter hadn’t been changed in 18 months. After replacing it, her symptoms dropped dramatically.
4. Visible Dust or Debris on the Filter
This one’s obvious—but easy to overlook. Every few months, open the purifier and take a look. If the filter is gray, black, or has visible clumps of dust, it’s time for a change. Don’t wait for it to fall apart. I once waited too long, and the filter actually crumbled when I touched it. Not a fun mess to clean up.
5. The “Check Filter” Indicator Light (On Models That Have One)
Some newer Honeywell car purifiers, like the HPA100 or HPA200 series, come with a filter replacement indicator. When it lights up, it’s not a suggestion—it’s a reminder. But even if your model doesn’t have one, a good rule of thumb is to change the filter every 6 to 12 months, depending on usage. If you drive in heavy traffic, live in a dusty area, or have pets, lean toward the shorter end of that range.
Choosing the Right Replacement Filter for Your Honeywell Model
Know Your Model Number (It Matters!)
Not all Honeywell car air purifier filters are interchangeable. Using the wrong one can reduce performance or even damage the unit. First, find your model number. It’s usually printed on the back, bottom, or side of the purifier. Common models include:
- Honeywell HPA100
- Honeywell HPA200
- Honeywell HPA300
- Honeywell HHT-011 (compact car model)
- Honeywell HHT-081 (with ionizer)
Once you have the model number, search for “Honeywell [model number] replacement filter.” For example, the HPA100 uses the Honeywell HRF-R3 true HEPA filter and the Honeywell HRF-AP1 pre-filter (or combo packs like HRF-R3 + HRF-AP1).
HEPA vs. Pre-Filter: What’s the Difference?
Most Honeywell car purifiers use a two-filter system:
- True HEPA Filter (Main Filter): Captures 99.97% of particles as small as 0.3 microns—like pollen, mold, and bacteria. This is the core of your purifier’s effectiveness. Never skip this one.
- Pre-Filter (or Carbon Pre-Filter): Catches larger particles (dust, pet hair) and absorbs odors. It also protects the HEPA filter, extending its life. Replace this every 3–6 months, depending on use.
I always buy a combo pack with both. It’s cheaper than replacing them separately and ensures you’re not caught off guard. Plus, changing both at once keeps the system balanced.
OEM vs. Third-Party Filters: Is It Worth the Risk?
You’ll see cheaper “compatible” filters online. While some third-party brands claim to be “just as good,” I’ve had mixed results. One brand I tried had a slightly smaller surface area, which reduced airflow. Another didn’t fit snugly, letting unfiltered air slip around the edges. Stick with genuine Honeywell filters for the best performance and warranty protection. Yes, they cost more, but you’re paying for reliability and peace of mind.
Where to Buy (And Avoid Scams)
Buy from trusted retailers: Amazon (sold and shipped by Honeywell or authorized sellers), Honeywell’s official website, or local electronics stores like Best Buy. Avoid third-party sellers with low ratings or prices that seem too good to be true. I once got a “genuine” filter that was clearly a knockoff—the packaging was flimsy, and the filter material felt cheap. Save yourself the hassle and buy from a reputable source.
Step-by-Step: How to Change the Honeywell Car Air Purifier Filter
What You’ll Need (Spoiler: Nothing Fancy)
- Your new Honeywell filter(s)
- A clean, flat workspace (like your kitchen table or garage)
- A soft cloth or paper towel (optional, for cleaning)
- A trash bag (to dispose of the old filter)
No tools required—this is a no-screw, no-fuss process. Let’s get started.
Step 1: Turn Off and Unplug the Purifier
Safety first. Even though most car purifiers run on low voltage (via USB or cigarette lighter), always power it down before opening. Unplug it from your car’s outlet or USB port. If it has a battery, remove it or ensure it’s off.
Step 2: Remove the Front or Side Cover
Most Honeywell models have a magnetic or snap-on front grille. Gently pull it off—no force needed. On the HPA100, it’s the front panel with the honeycomb design. On the HHT-011, it’s the side cover. If it’s stuck, wiggle it slightly. I’ve never needed more than a light tug.
Step 3: Take Out the Old Filters
You’ll see the pre-filter (usually a gray mesh or foam) on top, and the HEPA filter (white, pleated paper) underneath. Remove them in that order. The pre-filter often has a tab or handle—grab it and pull straight out. For the HEPA filter, lift it carefully by the edges. Avoid touching the pleated surface—oils from your skin can reduce effectiveness.
Step 4: Inspect the Interior (Quick Clean)
While the filters are out, take a peek inside. Use a dry cloth or soft brush to wipe away any dust or debris on the fan blades or housing. Don’t use water or cleaner—just dust. A quick wipe keeps the motor running smoothly and prevents new filters from getting dirty too fast.
Step 5: Insert the New Filters
Now, reverse the process. Place the new pre-filter in first (if your model uses one). Make sure it sits flat and covers the entire intake. Then, slide in the new HEPA filter. It should fit snugly—no gaps. Some models have arrows indicating airflow direction. Match them to the arrow inside the purifier. If you’re unsure, the text on the filter should be right-side up when installed.
Step 6: Reattach the Cover
Snap or magnetically reattach the front or side cover. Give it a gentle press to ensure it’s secure. If it’s loose, air might bypass the filters—defeating the whole purpose.
Step 7: Reset the Filter Indicator (If Applicable)
On models with a filter change light (like the HPA100), press and hold the “Filter Reset” button for 5–10 seconds until the light turns off. This resets the timer for your next change. If your model doesn’t have this, just make a note in your phone or calendar.
Step 8: Plug It In and Test
Reconnect the purifier to your car’s power source. Turn it on and listen for the fan. Feel the airflow from the vents. If it’s strong and consistent, you’re good to go. If not, double-check that the filters are seated properly.
Pro Tips to Extend Filter Life and Maximize Performance
1. Use the Right Fan Speed
Higher fan speeds clean the air faster but also push more particles into the filter. If you’re in light traffic or a clean area, use medium or low speed. Save high speed for heavy pollution (like rush hour or smog days). This reduces wear on the filter and saves energy.
2. Keep Your Car Clean
A tidy car means fewer particles for the purifier to catch. Vacuum regularly, wipe down surfaces, and avoid eating in the car. I keep a mini vacuum in my trunk for quick cleanups. It’s amazing how much dust and crumbs contribute to filter buildup.
3. Avoid Extreme Temperatures
Don’t leave your purifier in direct sunlight or freezing temps for long. Heat can warp plastic parts, and cold can make filters brittle. If your car gets hot, unplug the purifier when not in use. Same for winter—store it inside if you’re not driving for days.
4. Replace Filters Before They’re Completely Clogged
Don’t wait until the filter is black and falling apart. Replacing it every 6–12 months (or sooner with heavy use) keeps performance high and prevents strain on the motor. Think of it like changing your car’s oil—preventative maintenance saves bigger issues later.
5. Use a Pre-Filter for Pets or Smokers
If you have pets or smoke, consider upgrading to a high-capacity carbon pre-filter. These have more activated carbon to handle strong odors. I switched to one after adopting my dog, and the difference was night and day—no more “wet dog” smell after a walk.
Honeywell Car Air Purifier Filter Replacement Guide (2026 Models)
Filter Compatibility and Replacement Schedule
Below is a quick-reference table for popular Honeywell car air purifier models. Use this to find your filter type and recommended change frequency.
| Model | HEPA Filter | Pre-Filter | HEPA Change (Months) | Pre-Filter Change (Months) | Notes |
|---|---|---|---|---|---|
| HPA100 | HRF-R3 | HRF-AP1 | 12 | 6 | Has filter reset button |
| HPA200 | HRF-R3 | HRF-AP1 | 12 | 6 | Higher airflow; change pre-filter every 4–5 months in heavy traffic |
| HPA300 | HRF-R3 (x2) | HRF-AP1 | 12 | 6 | Uses two HEPA filters for larger cars |
| HHT-011 | HRF-H1 | HRF-H2 (carbon) | 6–8 | 3–4 | Compact; ideal for small cars; pre-filter has odor control |
| HHT-081 | HRF-H1 | HRF-H2 (with ionizer) | 6–8 | 3–4 | Includes ionizer; change pre-filter more often if ionizer is used daily |
Tip: Write the replacement date on the filter with a permanent marker. That way, you’ll never forget when it’s due.
Final Thoughts: Breathe Easy, Drive Better
Changing your Honeywell car air purifier filter isn’t just a maintenance task—it’s an act of self-care. Clean air means fewer allergies, better focus, and a more pleasant driving experience. And honestly, it takes less than 10 minutes. I’ve made it a habit to change mine every six months, right after my oil change. It’s a small ritual that pays off every time I step into my car.
Remember, your purifier is only as good as its filter. A fresh filter means better performance, longer motor life, and peace of mind. Whether you’re driving through city smog, spring pollen, or just want a fresher cabin, a clean filter makes all the difference. So don’t wait—grab your replacement, follow these steps, and enjoy the crisp, clean air your car deserves. In 2026 and beyond, your lungs will thank you.
Frequently Asked Questions
How do I change the Honeywell car air purifier filter in 2026?
To change the Honeywell car air purifier filter in 2026, first power off and unplug the device. Open the filter compartment (usually a side panel), remove the old filter, insert the new one aligning with airflow arrows, and secure the cover.
How often should I replace my Honeywell car air purifier filter?
Honeywell recommends replacing the filter every 6–12 months, depending on usage and air quality. If you drive frequently or in polluted areas, check and replace it more often for optimal performance.
What type of filter fits my Honeywell car air purifier?
Use Honeywell’s genuine replacement filters (check your model number, like HPA100 or HPA200). These are HEPA-certified and designed to trap 99.97% of airborne particles. Third-party filters may reduce efficiency.
Can I clean and reuse the Honeywell car air purifier filter?
No, HEPA filters cannot be cleaned or reused. Vacuuming or washing damages the fibers. Always install a new filter to maintain air purification quality and device longevity.
Where is the filter located in my Honeywell car air purifier?
The filter compartment is typically on the side or back of the unit—look for a sliding or snap-on panel. Refer to your 2026 model’s manual for exact location and access instructions.
Is changing the Honeywell car air purifier filter difficult?
No, it’s a simple 5-minute process. No tools are needed—just open the compartment, swap the old filter for a new one, and reassemble. Follow the manual for model-specific guidance.