Featured image for how to change philips air purifier filter
Image source: images.philips.com
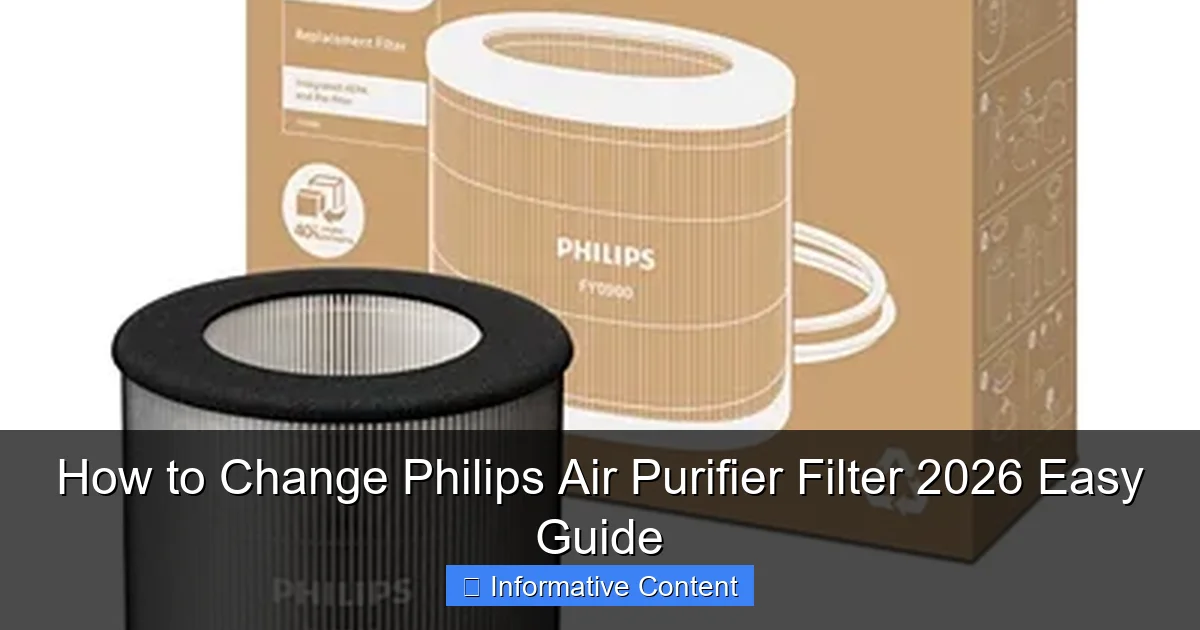
Changing your Philips Air Purifier Filter 2026 is quick and simple—just power off the unit, remove the back cover, and slide out the old filter. Insert the new filter, ensure it’s properly aligned, and snap the cover back in place for cleaner air in minutes. Regular filter changes maximize performance and extend your purifier’s lifespan.
Key Takeaways
- Power off first: Always unplug the purifier before starting filter changes.
- Check filter type: Confirm your model uses a 2026 filter to avoid errors.
- Remove old filter: Slide out the old filter carefully to prevent debris spill.
- Install new filter: Align arrows on the filter with the purifier’s housing.
- Reset indicator: Press and hold the reset button after installation.
- Dispose responsibly: Seal used filters in plastic before trashing for safety.
📑 Table of Contents
- How to Change Philips Air Purifier Filter 2026 Easy Guide
- Why Replacing Your Philips Air Purifier Filter Matters
- How to Know Which Filter Your Philips Air Purifier Needs
- Step-by-Step Guide: How to Change Your Philips Air Purifier Filter
- Tips for Maintaining Your Philips Air Purifier
- Common Mistakes to Avoid When Changing the Filter
- Philips Air Purifier Filter Replacement Schedule (2026)
- Final Thoughts: Keep Your Air Clean and Your Purifier Happy
How to Change Philips Air Purifier Filter 2026 Easy Guide
Let’s be honest—indoor air quality isn’t something most of us think about until we start sneezing, coughing, or noticing a funky smell lingering in our homes. I remember the first time I realized my air purifier wasn’t working as well as it used to. My allergies were acting up, and my Philips air purifier, which had been running quietly in the corner for months, suddenly seemed less effective. That’s when I discovered the culprit: a clogged filter.
Changing the filter wasn’t as intimidating as I thought it would be—once I figured out the steps. But I wish I’d had a clear, step-by-step guide back then. That’s exactly what I’m here to share with you today. Whether you’re a first-time air purifier owner or just need a refresher, this guide will walk you through how to change your Philips air purifier filter in 2026—no tech degree required. We’ll cover everything from knowing when it’s time for a replacement to safely installing the new filter, plus tips to keep your purifier running smoothly for years.
Why Replacing Your Philips Air Purifier Filter Matters
Think of your air purifier’s filter like the lungs of your home. Over time, it traps dust, pollen, pet dander, smoke, and even microscopic pollutants. But just like lungs can get overloaded, filters get clogged. When that happens, your purifier has to work harder to pull air through, which reduces efficiency and can even shorten the lifespan of the unit.

Visual guide about how to change philips air purifier filter
Image source: m.media-amazon.com
According to Philips, most of their air purifiers are designed with a filter replacement indicator that alerts you when it’s time for a change—usually every 6 to 12 months, depending on usage and air quality. But don’t rely solely on the light. If you notice reduced airflow, a musty odor, or increased allergy symptoms, it’s likely time to swap out the old filter, even if the indicator hasn’t lit up yet.
Signs Your Filter Needs Replacing
- Reduced airflow: If you can’t feel much air coming out of the vents, the filter might be blocked.
- Unpleasant smells: A dirty filter can start to emit a stale or musty odor, especially if it’s been exposed to moisture or cooking fumes.
- Increased dust buildup: If you’re noticing more dust on surfaces despite regular cleaning, your purifier may not be capturing particles effectively.
- Allergy flare-ups: If you or your family members are sneezing or coughing more than usual, the filter might no longer be trapping allergens properly.
- Filter replacement light: Many Philips models have a built-in indicator that flashes or turns red when it’s time to change the filter.
What Happens If You Don’t Change the Filter?
Ignoring a dirty filter doesn’t just reduce air quality—it can also damage your purifier. A clogged filter forces the motor to work overtime, which can lead to overheating and premature wear. In extreme cases, it could even cause the unit to shut down entirely. Plus, a saturated filter can start to release trapped pollutants back into the air, defeating the entire purpose of having an air purifier in the first place.
How to Know Which Filter Your Philips Air Purifier Needs
Not all Philips air purifiers use the same filter, so it’s important to identify the correct model before buying a replacement. Using the wrong filter can reduce performance or even damage your unit. Here’s how to find the right one.
Check Your User Manual
The easiest way to determine your filter type is to consult the user manual that came with your air purifier. Look for a section labeled “Filter Replacement” or “Maintenance.” It will list the exact filter model number, such as AC4140/30 or FY2422/30. If you’ve misplaced the manual, don’t worry—most Philips manuals are available for free download on the Philips official website.
Look for the Model Number on the Unit
Your air purifier’s model number is usually printed on a label on the back or bottom of the device. Once you have that, you can search for it online or enter it into the Philips support page to find compatible filters. For example, a Philips AC2887/20 uses the FY2422/30 NanoProtect HEPA filter.
Understand the Filter Types
Philips air purifiers typically use one or more of the following filter types, often in combination:
- Pre-filter: Captures large particles like hair and dust. Usually washable and reusable.
- Activated Carbon Filter: Absorbs odors, gases, and volatile organic compounds (VOCs) from cooking, pets, or cleaning products.
- HEPA Filter (NanoProtect): Removes 99.97% of particles as small as 0.3 microns, including pollen, mold spores, and bacteria.
Some models, like the Philips Series 3000, use a combined filter (e.g., FY3420/30), which integrates the pre-filter, carbon layer, and HEPA into one unit. Others, like the Series 2000, may have separate filters that need to be replaced individually.
Where to Buy Genuine Philips Filters
Always opt for genuine Philips filters. While third-party alternatives may be cheaper, they often don’t fit properly or meet the same performance standards. You can purchase authentic filters from:
- The official Philips website
- Authorized retailers like Amazon, Best Buy, or Home Depot
- Local appliance stores that carry Philips products
Pro tip: Sign up for Philips’ filter subscription service if available in your region. It delivers fresh filters automatically based on your usage, so you never forget to replace them.
Step-by-Step Guide: How to Change Your Philips Air Purifier Filter
Now for the main event—changing your Philips air purifier filter. The process is straightforward, but it varies slightly depending on your model. Below is a general guide that works for most Philips air purifiers, including popular models like the AC2887, AC3256, and AC4236.
Step 1: Turn Off and Unplug the Unit
Safety first! Always turn off your air purifier and unplug it from the power outlet before handling the filter. This prevents accidental startup and protects you from electrical hazards.
Step 2: Locate the Filter Compartment
Most Philips air purifiers have a front or side panel that opens to reveal the filter. Look for a latch, button, or sliding mechanism. On some models, like the AC2887, you simply pull the front grille toward you. On others, like the AC3256, you may need to press a release button on the side.
If you’re unsure, refer to your user manual or look for a small icon near the panel indicating how to open it.
Step 3: Remove the Old Filter
Once the compartment is open, gently pull out the old filter. If your model has multiple filters (e.g., a pre-filter and a HEPA filter), remove them one at a time. Take note of how they’re positioned—this will help when installing the new ones.
For combined filters, you’ll typically see a single cartridge. For separate filters, the pre-filter is usually on the outside, followed by the carbon filter, then the HEPA filter.
Step 4: Clean the Pre-Filter (If Applicable)
If your model has a washable pre-filter, now’s the time to clean it. Rinse it under lukewarm water until all dust and debris are gone. Let it air dry completely before reinserting—never reinstall a damp filter, as it can promote mold growth.
Note: Not all pre-filters are washable. Check your manual to confirm.
Step 5: Install the New Filter
Take your new filter out of the packaging. Remove any plastic wrapping or protective covers. Make sure the arrow on the filter (indicating airflow direction) points toward the inside of the unit.
Slide the new filter into place, following the same orientation as the old one. If you have multiple filters, install them in the correct order: pre-filter first, then carbon, then HEPA.
Push the filter gently until it’s fully seated. You should feel it click or lock into place.
Step 6: Close the Compartment and Reset the Filter Indicator
Once the new filter is installed, close the compartment securely. Make sure the latch or panel is fully closed to prevent air leaks.
Now, reset the filter replacement indicator. On most Philips models, you can do this by:
- Pressing and holding the “Filter” or “Reset” button for 3–5 seconds
- Using the Philips Air+ app (if your model is connected)
- Following the on-screen prompt after turning the unit back on
The indicator light should turn green or stop flashing, confirming the reset was successful.
Step 7: Plug In and Test
Plug your air purifier back in and turn it on. Set it to a low or medium speed and listen for normal operation. You should feel a steady stream of air coming from the vents. If everything sounds and feels right, you’re all set!
Tips for Maintaining Your Philips Air Purifier
Changing the filter is just one part of keeping your air purifier in top shape. Regular maintenance ensures optimal performance and extends the life of your device.
Clean the Exterior and Vents Weekly
Dust and pet hair can accumulate on the outer surfaces and air intake vents. Use a soft, dry cloth or a microfiber duster to wipe down the unit weekly. For tougher grime, lightly dampen the cloth with water—never spray liquid directly onto the purifier.
Vacuum the Interior (If Accessible)
Some Philips models allow you to vacuum the inside of the filter compartment to remove loose dust. Use a soft brush attachment on your vacuum cleaner, and be gentle to avoid damaging internal components.
Monitor Air Quality and Usage
If you live in a high-pollution area, have pets, or cook frequently, your filter may need replacing more often than the standard 6–12 months. Keep an eye on the filter indicator and adjust your replacement schedule accordingly.
Use the Right Settings
Run your purifier on auto mode when possible. Many Philips models have built-in sensors that adjust fan speed based on real-time air quality. This helps conserve energy and prolong filter life.
Store Spare Filters Properly
If you buy filters in bulk, store them in a cool, dry place away from direct sunlight. Keep them in their original packaging until use to prevent dust and moisture from degrading the material.
Common Mistakes to Avoid When Changing the Filter
Even simple tasks can go wrong if you’re not careful. Here are some common pitfalls and how to avoid them.
Using the Wrong Filter
Always double-check the filter model number before purchasing. A filter that’s even slightly the wrong size won’t seal properly, allowing unfiltered air to bypass the system.
Forgetting to Reset the Filter Indicator
It’s easy to skip this step, but failing to reset the indicator means you won’t get an accurate reminder next time. Make it part of your routine.
Reinstalling a Wet Pre-Filter
Never put a damp pre-filter back into the unit. Moisture can lead to mold, which defeats the purpose of clean air. Always let it dry completely.
Forcing the Filter into Place
If the filter doesn’t slide in easily, don’t force it. Check the orientation and make sure you’re inserting the correct filter. Forcing it can damage both the filter and the purifier.
Ignoring the Carbon Filter
Some users only replace the HEPA filter and forget the carbon layer. But the carbon filter is essential for odor control. Replace it according to the manufacturer’s schedule—usually every 6 months.
Philips Air Purifier Filter Replacement Schedule (2026)
Below is a quick-reference table for common Philips air purifier models and their recommended filter replacement intervals. Always consult your user manual for the most accurate information.
| Philips Model | Filter Type | Replacement Interval | Filter Model Number |
|---|---|---|---|
| AC2887/20 | HEPA + Carbon | Every 12 months | FY2422/30 |
| AC3256/20 | Combined NanoProtect | Every 12 months | FY3420/30 |
| AC4236/20 | HEPA + Carbon + Pre-filter | HEPA: 12 months Carbon: 6 months |
FY2422/30 (HEPA) FY2420/30 (Carbon) |
| AC4140/30 | Combined Filter | Every 12 months | AC4140/30 |
| Series 1000 (AC1214) | HEPA + Carbon | Every 12 months | FY1413/30 |
Note: Intervals may vary based on air quality, usage, and environmental factors.
Final Thoughts: Keep Your Air Clean and Your Purifier Happy
Changing your Philips air purifier filter might seem like a small task, but it has a big impact on your indoor air quality and the longevity of your device. By following this guide, you’ll ensure your purifier continues to deliver fresh, clean air year after year.
Remember, a clean filter means better performance, lower energy bills, and fewer allergy symptoms. It’s a simple habit that pays off in comfort and health. So the next time you see that filter light flash, don’t ignore it—treat it as a friendly reminder to give your purifier the care it deserves.
And if you’re ever unsure, don’t hesitate to reach out to Philips customer support or consult your user manual. Your lungs—and your family—will thank you.
Frequently Asked Questions
How do I know when to change my Philips air purifier filter?
Most Philips air purifiers have a filter replacement indicator light that turns on when it’s time to change the filter. Typically, this happens every 6–12 months depending on usage and air quality. Regularly checking the indicator helps maintain optimal performance.
What type of filter does my Philips air purifier need?
Philips air purifiers use specific filters like the FY2422, FY3422, or FY1422, depending on the model. Always check your user manual or the label inside the purifier to ensure you buy the correct replacement. Using the right filter ensures maximum air cleaning efficiency.
How to change Philips air purifier filter without tools?
Most Philips models are designed for tool-free filter changes—simply open the front cover, remove the old filter, and insert the new one. Align the arrows on the filter with the housing for a secure fit. This quick process takes less than 5 minutes.
Can I reuse or clean the Philips air purifier filter?
No, the HEPA and carbon filters in Philips purifiers are not washable or reusable. Attempting to clean them can damage the fibers and reduce efficiency. Always replace them with a new, genuine Philips filter for best results.
Where is the filter located in a Philips air purifier?
The filter is usually housed behind the front grille or panel, which easily pops open for access. Look for a small tab or release button on the side or bottom of the unit. Refer to your model’s manual for exact location details.
Does changing the Philips air purifier filter improve performance?
Yes, a fresh filter restores the purifier’s ability to remove dust, allergens, and odors effectively. A clogged or old filter reduces airflow and cleaning efficiency. Regular filter changes ensure you breathe cleaner air year-round.