Featured image for how to change the filter in a honeywell air purifier
Image source: m.media-amazon.com
Changing the filter in your Honeywell Air Purifier 2026 is quick and essential for maintaining peak air quality. Simply power off the unit, remove the front grill, take out the old filter, and insert the new one—ensuring it’s properly aligned and sealed. For optimal performance, replace the filter every 6–12 months depending on usage and air conditions.
Key Takeaways
- Turn off and unplug the air purifier before starting any maintenance.
- Locate the filter compartment by removing the front or side panel as indicated in the manual.
- Remove the old filter carefully to avoid spreading trapped particles into the air.
- Check the filter type and replace it with a genuine Honeywell 2026 filter for optimal performance.
- Reinstall the new filter with the airflow direction arrows pointing correctly.
- Reset the filter indicator if your model has one to track future replacement needs.
- Replace filters every 3–6 months or sooner in high-pollution environments.
📑 Table of Contents
- Why Changing Your Honeywell Air Purifier Filter Matters
- Understanding Your Honeywell Air Purifier Filter System
- Step-by-Step Guide to Changing the Filter in a Honeywell Air Purifier
- Choosing the Right Replacement Filter for Your Honeywell Model
- Maintenance Tips to Extend Filter Life and Improve Performance
- Troubleshooting Common Filter Change Issues
- Final Thoughts: Breathe Easy with Regular Filter Changes
Why Changing Your Honeywell Air Purifier Filter Matters
Let’s be honest—most of us don’t think about our air purifiers until something feels off. Maybe you notice the air in your bedroom doesn’t feel as fresh, or your allergies seem worse than usual. That’s often a sign that your Honeywell air purifier isn’t working at full strength. And more often than not, the culprit is a clogged or overdue filter.
Air purifiers are like the unsung heroes of indoor air quality. They quietly hum away, capturing dust, pollen, pet dander, smoke, and even microscopic pollutants. But just like a vacuum cleaner or a coffee machine, they need regular maintenance to keep performing well. The filter is the heart of your Honeywell air purifier—it’s what traps all the gunk so you can breathe cleaner air. If it’s dirty or expired, your purifier is basically just moving stale air around, doing little to improve your environment.
I learned this the hard way. A few years ago, I ignored the filter light on my Honeywell model for months. I figured, “It’s still running, so it must be fine.” But one day, I opened it up and was shocked by how dark and packed the filter had become. It looked like it had been filtering a construction site, not a cozy living room. After replacing it, the difference was immediate—the air felt lighter, my morning sneezes decreased, and the unit itself ran more quietly. That’s when I realized: changing the filter isn’t just a chore. It’s a simple, impactful step toward healthier living.
Understanding Your Honeywell Air Purifier Filter System
Types of Filters Used in Honeywell Air Purifiers
Honeywell air purifiers typically use a multi-stage filtration system designed to tackle different types of airborne contaminants. The most common setup includes three main components: a pre-filter, a True HEPA filter, and an activated carbon filter. Each plays a unique role in cleaning your air.
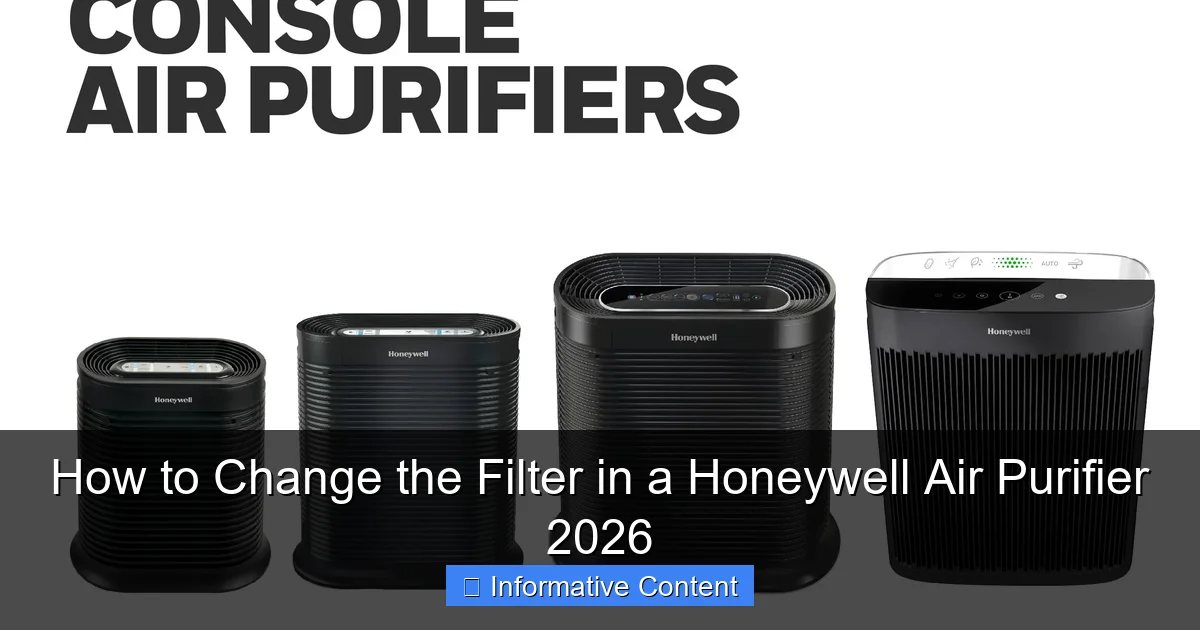
Visual guide about how to change the filter in a honeywell air purifier
Image source: i5.walmartimages.com
The pre-filter is the first line of defense. It’s usually a washable mesh or foam layer that captures larger particles like hair, lint, and visible dust. This helps extend the life of the more expensive HEPA filter. Some models even have a washable carbon pre-filter that also helps with odors.
The True HEPA filter is the star of the show. It’s capable of removing 99.97% of particles as small as 0.3 microns—that includes pollen, mold spores, bacteria, and even some viruses. This is the filter you’ll replace most frequently, and it’s essential for anyone with allergies or respiratory concerns.
Finally, the activated carbon filter (sometimes combined with the pre-filter) absorbs odors, smoke, and volatile organic compounds (VOCs) from cleaning products, cooking, or pets. While it doesn’t trap particles, it’s crucial for improving overall air freshness.
How Filters Work Together
Think of your Honeywell air purifier like a team of specialists. The pre-filter grabs the big stuff, the HEPA filter handles the microscopic threats, and the carbon filter neutralizes smells. When all three are working together, you get the cleanest, freshest air possible.
For example, if you have a cat, the pre-filter catches the fur and dander. The HEPA filter traps the tiny allergens that remain airborne. And the carbon filter helps eliminate that “pet smell” that can linger in carpets and furniture. Without regular filter changes, this team starts to falter. The pre-filter clogs, the HEPA filter gets overwhelmed, and the carbon loses its ability to absorb odors.
Signs It’s Time to Replace the Filter
Honeywell models often come with a filter change indicator light—usually yellow or red—that alerts you when it’s time for a replacement. But don’t rely solely on the light. Here are a few real-world signs that your filter needs attention:
- Reduced airflow: If the purifier sounds louder or you notice less air coming out of the vents, the filter might be clogged.
- Increased allergy symptoms: More sneezing, itchy eyes, or congestion indoors can mean the filter isn’t capturing allergens effectively.
- Persistent odors: If cooking smells or pet odors linger longer than usual, the carbon filter may be saturated.
- Visible dirt or discoloration: When you open the unit, a gray or black filter is a clear sign it’s time for a change.
I once waited too long to replace my filter during pollen season. Within a week, my sinuses were acting up, and I couldn’t figure out why. After checking the purifier, I saw the HEPA filter was completely gray. Replacing it made a world of difference—within hours, my breathing improved.
Step-by-Step Guide to Changing the Filter in a Honeywell Air Purifier
Preparation: Gather Your Tools and Supplies
Before you start, make sure you have everything you need. You’ll want to minimize downtime and avoid scrambling mid-process. Here’s what to gather:
- A replacement filter (make sure it’s the correct model for your Honeywell unit)
- A clean, flat workspace (like a table or countertop)
- A soft cloth or duster (to clean the interior)
- Optional: gloves (if you’re sensitive to dust)
Pro tip: Always buy filters from reputable sources. Counterfeit or low-quality filters won’t perform as well and may even damage your unit. Honeywell’s official website or authorized retailers like Amazon, Home Depot, or Best Buy are safe bets.
Step 1: Turn Off and Unplug the Unit
Safety first! Always turn off your Honeywell air purifier and unplug it from the wall before opening it. This prevents accidental activation and protects you from electrical hazards. Even though the unit is small, it’s better to be cautious.
I made the mistake of changing a filter while the unit was still plugged in once. The purifier kicked on mid-process, and I nearly dropped the new filter. Lesson learned: unplug it every time.
Step 2: Locate and Open the Filter Access Panel
Most Honeywell air purifiers have a front or side panel that swings open or slides off. Look for a latch, button, or recessed handle. On models like the Honeywell HPA300 or HPA100, the front grille usually lifts up or pulls forward.
Some newer models have a magnetic cover, while older ones may use clips or screws. If you’re unsure, check your user manual—Honeywell provides clear diagrams for each model. Don’t force it. If it doesn’t open easily, you might be missing a hidden latch.
Step 3: Remove the Old Filter(s)
Once the panel is open, you’ll see the filter(s) inside. Carefully slide them out. Most Honeywell units have a pre-filter on the outside, followed by the HEPA and carbon filters.
Take note of how the filters are positioned—especially the HEPA filter, which often has an arrow indicating airflow direction. This ensures you install the new one correctly. I like to take a quick photo with my phone before removing anything. It’s a simple trick that saves confusion later.
If the pre-filter is washable, rinse it under cool water and let it air dry completely before reusing. Never put a wet filter back into the unit—it can promote mold growth.
Step 4: Clean the Interior (Optional but Recommended)
While the filters are out, take a moment to wipe down the inside of the purifier. Use a dry or slightly damp cloth to remove dust from the fan blades, vents, and housing. Avoid using water near electrical components.
This small step can improve airflow and efficiency. I’ve found that even a thin layer of dust on the fan can reduce performance over time. A quick wipe every few months keeps things running smoothly.
Step 5: Install the New Filter(s)
Now it’s time to put in the new filter. Start with the HEPA filter—make sure the arrow points toward the unit (in the direction of airflow). Then add the carbon filter (if separate), followed by the pre-filter.
Gently slide each filter into place. Don’t force it. If it doesn’t fit easily, double-check the model number. Using the wrong filter can cause gaps that let unfiltered air bypass the system.
Once everything is in, close the access panel securely. Make sure it clicks or locks into place. A loose panel can cause the unit to malfunction or trigger error lights.
Step 6: Reset the Filter Indicator (If Applicable)
Many Honeywell models have a filter reset button. After replacing the filter, press and hold this button for 3–5 seconds to reset the indicator light. This tells the unit to start a new monitoring cycle.
If you skip this step, the light might stay on even though you’ve changed the filter. It’s a small detail, but it keeps your maintenance routine on track.
Step 7: Plug In and Test
Finally, plug the unit back in and turn it on. Listen for smooth operation and check that air is flowing properly from the vents. If everything sounds and feels right, you’re good to go!
I like to run my purifier on high for the first hour after a filter change. It helps “break in” the new filter and clears any residual dust from the installation process.
Choosing the Right Replacement Filter for Your Honeywell Model
How to Identify Your Model Number
Using the correct filter is critical. Honeywell makes dozens of air purifier models, and filters aren’t always interchangeable. To find your model number, check:
- The bottom or back of the unit
- The original packaging or user manual
- The Honeywell website’s product support page
Common models include the HPA100, HPA200, HPA300, and the newer HPA5200 series. Each has specific filter requirements. For example, the HPA300 uses the Honeywell FC100A1037 HEPA filter, while the HPA100 uses the FC80R10047.
Original vs. Compatible Filters: What’s the Difference?
You’ll find two main types of replacement filters: original Honeywell filters and third-party compatible ones. Original filters are made by Honeywell and guaranteed to meet performance standards. They’re usually more expensive but offer peace of mind.
Compatible filters are made by other brands but designed to fit Honeywell units. Many are high quality and cost less. However, some may not seal properly or lack the same filtration efficiency. I’ve used both types and found that reputable third-party brands (like Filtrete or EnviroCare) work well, but I always check reviews and certifications.
Where to Buy Replacement Filters
You can purchase filters from several sources:
- Honeywell’s official website: Best for authenticity and warranty support.
- Amazon: Convenient, often with fast shipping and customer reviews.
- Home improvement stores: Like Home Depot or Lowe’s—great for in-person inspection.
- Local appliance stores: May carry Honeywell products or can order them.
I usually buy in bulk when filters are on sale. It saves money and ensures I always have a spare on hand. Just make sure to store them in a cool, dry place to prevent degradation.
Maintenance Tips to Extend Filter Life and Improve Performance
How Often Should You Change the Filter?
The general rule is to replace the HEPA filter every 6 to 12 months, depending on usage and air quality. If you live in a dusty area, have pets, or suffer from allergies, you may need to change it every 6 months. The pre-filter should be cleaned every 1–2 months, and the carbon filter every 3–6 months.
Here’s a quick reference table to help you stay on track:
| Filter Type | Recommended Replacement Frequency | Notes |
|---|---|---|
| Pre-Filter (Washable) | Every 1–2 months (clean), replace if damaged | Rinse under water, air dry completely |
| True HEPA Filter | Every 6–12 months | Replace sooner in high-pollution environments |
| Activated Carbon Filter | Every 3–6 months | Replace when odors return |
Keep a calendar reminder or use a filter tracking app to stay consistent. I set a reminder on my phone every six months—it’s a small habit that makes a big difference.
Daily and Weekly Care Tips
Beyond filter changes, a little regular care goes a long way:
- Vacuum the exterior: Use a soft brush attachment to remove dust from the vents and housing.
- Keep the area clear: Don’t place the purifier near curtains, furniture, or walls that block airflow.
- Run it consistently: For best results, run your purifier 24/7 on low or auto mode.
- Avoid extreme temperatures: Don’t place it near heaters, air conditioners, or in direct sunlight.
I also recommend placing your purifier in a central location, like a living room or bedroom, where you spend the most time. Moving it from room to room can reduce its effectiveness.
What to Avoid
A few common mistakes can shorten your filter’s life or damage your unit:
- Using water on non-washable filters: Only the pre-filter should be rinsed.
- Overloading the unit: Don’t run it in a room with heavy smoke or chemical fumes without proper ventilation.
- Ignoring error lights: If the filter indicator stays on after replacement, check for proper installation.
One time, I accidentally spilled coffee near my purifier. I wiped it up quickly, but the smell lingered for days. I learned that liquids and strong chemicals can overwhelm the carbon filter fast. Now I’m extra careful around my unit.
Troubleshooting Common Filter Change Issues
Filter Doesn’t Fit Properly
If your new filter feels loose or won’t slide in, double-check the model number. Even a small difference can cause fit issues. Also, ensure the filter isn’t upside down—the airflow arrow should point inward.
If it still doesn’t fit, contact Honeywell support. They can confirm compatibility or send a replacement if the filter is defective.
Filter Light Won’t Turn Off After Replacement
This usually means the filter reset button wasn’t pressed correctly. Try holding it down for 5–10 seconds. If that doesn’t work, unplug the unit for 30 seconds, then plug it back in and reset again.
In rare cases, the sensor itself may be faulty. If the light persists, consider reaching out to customer service.
Unusual Noises After Filter Change
If your purifier makes grinding or rattling sounds after a filter change, the filter may not be seated correctly. Turn off the unit, reopen the panel, and reseat the filter. Also, check for loose parts or debris inside.
I once heard a faint buzzing noise after installing a new filter. It turned out a small piece of packaging had gotten stuck near the fan. A quick inspection fixed it.
Reduced Airflow or Weak Performance
If the unit seems weaker than before, the filter might be installed backward, or the pre-filter could be clogged. Also, check that the access panel is fully closed. A gap can disrupt airflow.
If performance doesn’t improve, the fan motor might need cleaning or the filter could be defective. In that case, consider a replacement or professional inspection.
Final Thoughts: Breathe Easy with Regular Filter Changes
Changing the filter in your Honeywell air purifier might seem like a small task, but it’s one of the most important things you can do for your health and home. Clean air isn’t just a luxury—it’s a necessity, especially if you live with allergies, asthma, or pets. And with Honeywell’s reliable design, maintaining your unit is straightforward and affordable.
From understanding your filter system to following the step-by-step replacement process, this guide covers everything you need to keep your purifier running like new. Remember, a clean filter means cleaner air, better sleep, and fewer sniffles. It’s a simple habit that pays off in big ways.
So the next time you see that filter light flash, don’t ignore it. Take five minutes, swap in a fresh filter, and enjoy the difference. Your lungs—and your peace of mind—will thank you.
Frequently Asked Questions
How do I know when to change the filter in my Honeywell air purifier?
Most Honeywell air purifiers have a filter replacement indicator light that alerts you when it’s time to change the filter. Typically, the pre-filter should be replaced every 3 months, while the HEPA filter lasts 12 months under normal use.
What type of filter does my Honeywell air purifier need?
Honeywell models use specific HEPA and pre-filters designed for compatibility—check your user manual or the label inside the purifier for the exact filter number. Using genuine Honeywell replacement filters ensures optimal performance and longevity.
How to change the filter in a Honeywell air purifier safely?
First, unplug the unit and open the front grill or side panel to access the filters. Remove the old filters, vacuum the interior if needed, then insert the new filters in the correct orientation as marked.
Can I clean my Honeywell air purifier filter instead of replacing it?
The pre-filter can often be vacuumed or rinsed (if labeled washable), but the HEPA filter cannot be cleaned and must be replaced. Reusing a clogged HEPA filter reduces efficiency and may damage the unit.
How long does it take to change the filter in a Honeywell air purifier?
The process usually takes 5–10 minutes once you’re familiar with your model. Always follow the steps in your manual to ensure proper installation and avoid gaps that reduce air filtration.
Where can I buy replacement filters for my Honeywell air purifier?
You can purchase genuine Honeywell air purifier filters online (Amazon, Home Depot, Honeywell’s website) or at local appliance stores. Verify the model-specific filter number to ensure compatibility before buying.