
Featured image for how to change the filter on a honeywell air purifier
Image source: m.media-amazon.com
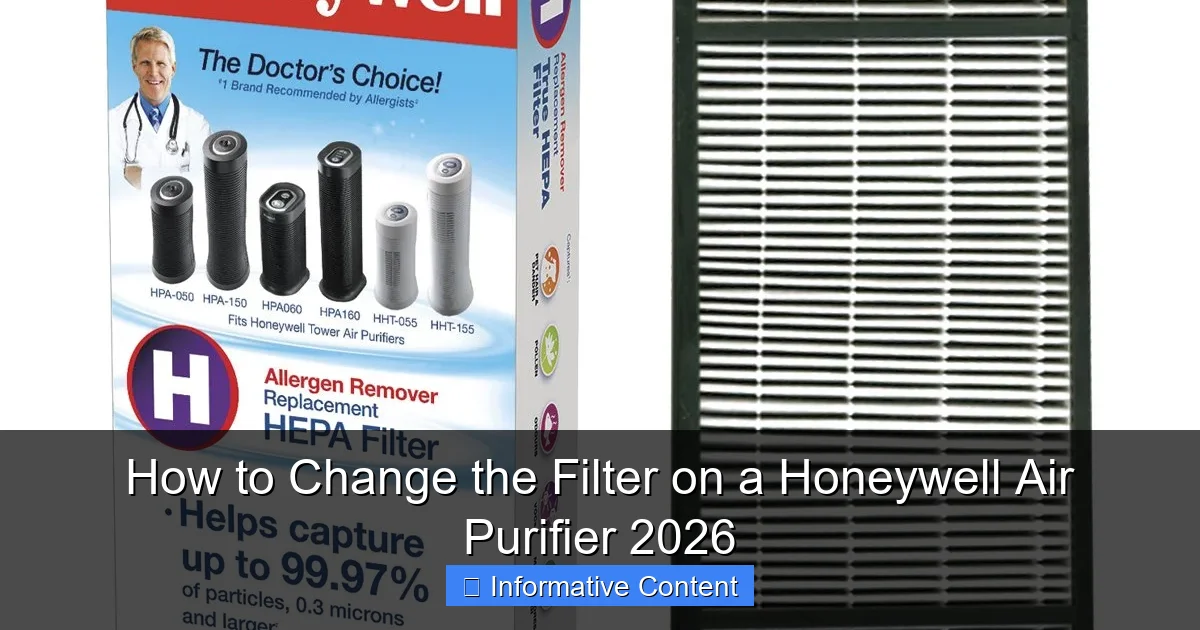
Changing the filter on your Honeywell Air Purifier 2026 is quick and easy—just power off, remove the back panel, and slide out the old filter. Replace it with a genuine Honeywell HEPA or carbon filter for optimal air quality and performance, then reassemble and restart the unit to enjoy cleaner air in minutes.
Key Takeaways
- Turn off and unplug the air purifier before replacing the filter for safety.
- Locate the filter compartment by opening the front or side panel, depending on your model.
- Remove the old filter carefully to avoid spreading trapped particles into the air.
- Check filter type and install the correct Honeywell replacement (e.g., HEPA or carbon).
- Ensure proper alignment when inserting the new filter to maintain optimal performance.
- Reset the filter indicator if your model has one to track future replacement times.
- Replace every 3–12 months depending on usage and air quality for best results.
📑 Table of Contents
- Why Filter Maintenance Matters for Your Honeywell Air Purifier
- Know Your Honeywell Model: Filters Vary by Design
- Step-by-Step Guide to Changing the Filter
- Choosing the Right Replacement Filters
- Common Mistakes and How to Avoid Them
- Performance Check: Is Your Purifier Working?
- Data Table: Honeywell Filter Replacement Guide
- Final Thoughts: A Small Task, Big Impact
Why Filter Maintenance Matters for Your Honeywell Air Purifier
Imagine this: you’ve just spent a few hundred dollars on a Honeywell air purifier, excited to finally breathe cleaner air at home. You set it up, press the power button, and… it’s working. But a few months later, you notice the air doesn’t feel as crisp, and the unit sounds a bit noisier than before. Chances are, it’s time to change the filter. I’ve been there—once, I ignored the filter light for *way* too long, only to realize my purifier was basically just moving stale air around. Not exactly the fresh air I paid for.
Changing the filter on your Honeywell air purifier isn’t just about maintaining peak performance—it’s about your health. A clogged filter can’t trap allergens, dust, smoke, or pet dander effectively. In fact, according to the EPA, indoor air can be up to five times more polluted than outdoor air, and a dirty filter makes that worse. But here’s the good news: replacing the filter is simple, affordable, and takes less time than brewing your morning coffee. In this guide, I’ll walk you through the process step by step, with tips I’ve learned from years of owning (and occasionally forgetting to maintain) my own Honeywell unit.
Know Your Honeywell Model: Filters Vary by Design
Identify Your Model Number
Not all Honeywell air purifiers are created equal, and neither are their filters. Before you even think about buying a replacement, you need to know your model number. It’s usually printed on a label on the back, bottom, or side of the unit. For example, common models include the HPA100, HPA200, HPA300, and the HPA5300. Each uses a slightly different filter configuration, so getting this right is key.
Visual guide about how to change the filter on a honeywell air purifier
Image source: images-na.ssl-images-amazon.com
Pro tip: Snap a photo of the label with your phone. That way, you can reference it later when ordering filters online or at a store. I once ordered the wrong filter because I misread “HPA250” as “HPA200”—lesson learned!
Understand Filter Types: Pre-Filter, HEPA, and Carbon
Most Honeywell purifiers use a multi-stage filtration system. Here’s what each does:
- Pre-filter: Catches large particles like pet hair and dust. Often washable or replaceable. This is your first line of defense.
- True HEPA filter: Removes 99.97% of particles as small as 0.3 microns (think pollen, mold spores, and fine dust). This is the heavy hitter.
- Activated carbon filter: Absorbs odors, gases, and volatile organic compounds (VOCs) like cooking smells or paint fumes. Some models combine this with the pre-filter.
For example, the HPA300 uses a pre-filter, a True HEPA filter, and a separate carbon filter. But the HPA100 combines the carbon layer into the HEPA filter, so you replace both at once. Knowing your model’s setup helps you buy the right parts—and avoid unnecessary replacements.
Check Filter Replacement Frequency
Honeywell recommends replacing the HEPA filter every 12 months under normal use. But “normal” is subjective. If you:
- Live in a high-pollution area
- Have pets or allergies
- Run the purifier 24/7
…you might need to replace it every 6–8 months. The pre-filter should be checked monthly and washed or replaced every 3 months. Carbon filters (if separate) typically last 6–12 months, depending on odor exposure. I once lived near a construction site and had to replace my carbon filter every 4 months—yikes!
Step-by-Step Guide to Changing the Filter
Step 1: Power Off and Unplug
Before you touch anything, turn off the purifier and unplug it from the wall. This isn’t just about safety—it prevents the unit from running while you’re handling the filter, which could draw dust into the motor. I learned this the hard way when my HPA200 kept beeping mid-replacement because I forgot to unplug it. Annoying? Yes. Fixable? Also yes.
Step 2: Open the Air Purifier
Most Honeywell models have a front or side panel that opens like a door. Look for:
- HPA100/HPA200: A front grille with a small latch or button on the top or side. Press it gently to release the grille.
- HPA300/HPA5300: A side panel with a handle. Pull the handle outward to open.
Pro tip: Open the panel slowly. Some models have a spring-loaded latch that can snap shut if you let go too quickly. I’ve seen more than one person get a finger pinched—not fun.
Step 3: Remove the Old Filters
Here’s where things get interesting, because the order depends on your model:
- For HPA100/HPA200: Remove the pre-filter first (it’s usually a mesh or foam layer). Then pull out the HEPA/carbon combo filter. Note the orientation—there’s usually an arrow indicating airflow direction.
- For HPA300: Pull out the pre-filter (top or front), then the True HEPA filter (middle), and finally the carbon filter (bottom). Some users report the carbon filter sticks—wiggle it gently to free it.
Tip: Take a photo of the old filter arrangement before removing anything. This helps you remember the order when inserting the new ones. I once put my HPA300’s carbon filter in backward and spent a week wondering why it smelled like old gym socks.
Step 4: Clean the Pre-Filter (If Washable)
Many Honeywell pre-filters are washable. If yours is:
- Rinse it under warm water. No soap needed—just water.
- Gently squeeze out excess water (don’t wring it).
- Let it air dry completely (2–4 hours). Never put a damp pre-filter back in—it can grow mold.
If the pre-filter is damaged or too dirty to clean, replace it. Honeywell sells pre-filter replacements, or you can cut a piece of mesh from a hardware store to fit (I’ve done this in a pinch).
Step 5: Install the New Filters
Now for the fun part:
- Pre-filter: Insert it first (if your model uses a separate one). Make sure it sits flat against the frame.
- True HEPA filter: Align the airflow arrow (on the filter) with the airflow arrow inside the purifier. Push it in gently—don’t force it.
- Carbon filter: If separate, place it in the designated slot. Again, check the airflow direction.
Pro tip: If the HEPA filter feels tight, double-check the model number. Using a filter from a different series (e.g., HPA100 in an HPA200) might fit but won’t seal properly, letting unfiltered air sneak through.
Step 6: Close the Panel and Reset the Filter Indicator
Snap the front or side panel back into place. You should hear a click or feel it seat securely. Now, reset the filter change indicator:
- HPA100/HPA200: Hold the “Filter Reset” button for 3–5 seconds until the light turns green.
- HPA300/HPA5300: Press the “Filter Reset” button once. The light will blink and then turn off.
Note: Some newer models (like the HPA5300) have a “Filter Life” display that shows a percentage. Reset it via the control panel menu. If the light doesn’t reset, unplug the unit for 10 seconds and try again.
Choosing the Right Replacement Filters
OEM vs. Third-Party: Pros and Cons
Honeywell sells original equipment manufacturer (OEM) filters, but third-party options are cheaper. Here’s the trade-off:
- OEM filters: Guaranteed to fit, perform as tested, and maintain warranty. But they cost 20–30% more.
- Third-party filters: Often 40–60% cheaper. But quality varies. Some use subpar HEPA material or weak carbon layers.
I tried a third-party HEPA filter once—it fit perfectly, but after a month, my purifier’s CADR (clean air delivery rate) dropped noticeably. Switched back to OEM, and performance returned. Your call, but I’d recommend OEM for the HEPA filter (it’s the core of the system) and third-party for pre-filters or carbon if you’re on a budget.
Where to Buy Filters
You have options:
- Honeywell’s website: Full selection, but shipping can be slow.
- Amazon: Fast delivery, but watch for counterfeit filters (check seller reviews).
- Local appliance stores: Great for immediate needs, but prices are often higher.
Pro tip: Buy filters in bulk (e.g., a 2- or 3-pack). It’s usually cheaper per filter, and you’ll have spares when life gets busy. I keep a spare set in my closet—no last-minute panic when the filter light turns red.
Filter Maintenance Hacks
Extend your filter’s life with these tricks:
- Vacuum the pre-filter monthly: Use a brush attachment to remove dust without washing.
- Keep the purifier away from dust sources: Don’t place it near a litter box, kitchen stove, or pet bed.
- Use a standalone carbon filter for odors: Place it near the purifier to offload some odor absorption from the main filter.
Common Mistakes and How to Avoid Them
Installing Filters Backward
This is the #1 mistake I see. The HEPA filter has an arrow indicating airflow direction (usually pointing into the unit). If you install it backward, air bypasses the filter entirely. Check the arrow against the one inside the purifier. When in doubt, look at the old filter before removing it.
Ignoring the Pre-Filter
The pre-filter is the unsung hero. A clogged pre-filter forces the HEPA filter to catch large particles, shortening its life. Clean or replace it every 3 months, even if it looks okay. I once skipped this for a year—my HEPA filter lasted only 8 months instead of 12.
Forgetting to Reset the Indicator
The filter light won’t turn off automatically. If you skip the reset, you’ll get false alerts. Set a reminder on your phone: “Reset Honeywell filter” after each replacement. I use a recurring calendar alert—saves me every time.
Using the Wrong Filter Type
Honeywell has “Allergen” and “Smoke” versions of some HEPA filters. The “Smoke” version has extra carbon for odors. If you’re in a smoky area or have pets, this is worth it. But for general use, the standard HEPA filter is fine. Don’t pay extra for features you don’t need.
Performance Check: Is Your Purifier Working?
Signs of a Well-Maintained Purifier
After replacing the filter, look for these indicators of success:
- Reduced noise: A clean filter lets air flow freely, so the fan doesn’t strain.
- Faster odor removal: Test it by cooking something smelly. A fresh carbon filter should clear the air in 30–60 minutes.
- Improved allergy symptoms: If you sneeze less or sleep better, the purifier is doing its job.
When to Seek Help
If you’ve replaced the filter but still notice:
- Excessive noise
- Weak airflow
- Persistent odors
…the issue might be deeper. Check for:
- Dust buildup inside the purifier (wipe with a dry cloth)
- A faulty fan motor (contact Honeywell support)
- Air leaks around the filter (reinstall and ensure a tight seal)
Data Table: Honeywell Filter Replacement Guide
| Model | Pre-Filter | HEPA Filter | Carbon Filter | Replacement Frequency |
|---|---|---|---|---|
| HPA100 | Washable or Replaceable (HRF-AP1) | True HEPA (HRF-R2) | Combined with HEPA | Pre-filter: 3 months HEPA: 12 months |
| HPA200 | Washable or Replaceable (HRF-AP1) | True HEPA (HRF-R3) | Combined with HEPA | Pre-filter: 3 months HEPA: 12 months |
| HPA300 | Washable (HRF-AP1) | True HEPA (HRF-R3) | Separate (HRF-A300) | Pre-filter: 3 months HEPA: 12 months Carbon: 6–12 months |
| HPA5300 | Washable (HRF-AP1) | True HEPA (HRF-R3) | Separate (HRF-A300) | Pre-filter: 3 months HEPA: 12 months Carbon: 6–12 months |
Final Thoughts: A Small Task, Big Impact
Changing your Honeywell air purifier’s filter is one of those tasks that feels trivial—until you realize how much it affects your daily life. I remember the first time I replaced mine after a year of neglect. Within hours, my allergies calmed, the room smelled fresher, and the purifier was whisper-quiet again. It was a reminder that even the best tech needs care.
Don’t let the filter light intimidate you. With this guide, you’ve got the tools to do it right. Buy the right filters, follow the steps, and set reminders. And if you’re ever unsure? Honeywell’s customer support is surprisingly helpful—they’ve talked me through a few hiccups over the years. At the end of the day, a clean filter isn’t just about the purifier—it’s about the air you breathe, the sleep you get, and the home you enjoy. So take the 10 minutes, swap that filter, and breathe easy. You’ve earned it.
Frequently Asked Questions
How do I know when to change the filter on my Honeywell air purifier?
Most Honeywell air purifiers have a filter replacement indicator light that turns on when it’s time to change the filter. If your model doesn’t have one, check the filter every 6–12 months for visible dust buildup or reduced airflow. Regular replacement ensures optimal performance and cleaner air.
What type of filter does my Honeywell air purifier need?
Honeywell air purifiers typically use either a HEPA filter, a carbon pre-filter, or a combination filter—check your model’s manual or the label inside the purifier for the exact replacement type. Using the correct filter ensures your unit works efficiently and maintains air quality.
How to change the filter on a Honeywell air purifier safely?
First, unplug the unit to ensure safety, then open the front or side panel to access the filter compartment. Remove the old filter, dispose of it properly, and insert the new one following the airflow direction arrows on the frame. Close the panel and reset the filter indicator if needed.
Can I wash and reuse my Honeywell air purifier filter?
No, most Honeywell HEPA and carbon filters are not washable—they’re designed for one-time use. Attempting to clean them can damage the filtration material and reduce efficiency. Always replace with a new, compatible filter for best results.
Where can I buy replacement filters for my Honeywell air purifier?
Replacement filters are available on Amazon, Walmart, Home Depot, or directly from Honeywell’s website. Be sure to match the filter model number to your purifier (e.g., HRF-AP1 or HRF-R1) to guarantee a proper fit and performance.
How often should I replace the pre-filter on my Honeywell air purifier?
The carbon pre-filter should be replaced every 3–6 months, depending on usage and air quality. It helps trap large particles and odors, so frequent replacement keeps your main HEPA filter lasting longer and working more efficiently.