Featured image for how to change vax air purifier filter
Image source: images-eu.ssl-images-amazon.com
Changing your Vax air purifier filter in 2026 is quick and essential for optimal performance—follow this simple guide to ensure clean, healthy air year-round. Start by turning off and unplugging the unit, then remove the front panel to access the old filter. Replace it with a genuine Vax filter, reassemble the purifier, and reset the filter indicator if your model has one—done in under five minutes!
Key Takeaways
- Power off and unplug the purifier before starting any filter changes.
- Open the front panel by pressing the release button or sliding latch.
- Remove old filter carefully to avoid spreading trapped dust and allergens.
- Insert new filter properly, aligning arrows and ensuring a snug fit.
- Reset filter indicator via control panel to track next replacement accurately.
- Clean pre-filter monthly to extend HEPA filter life and performance.
📑 Table of Contents
- Why Changing Your Vax Air Purifier Filter Matters
- Know Your Vax Air Purifier Model (And Why It Matters)
- When to Change Your Vax Air Purifier Filter (Don’t Guess!)
- Step-by-Step Guide: How to Change Vax Air Purifier Filter
- Choosing the Right Replacement Filter (Avoid Counterfeits!)
- Troubleshooting Common Filter Change Issues
- Final Thoughts: Keep Your Air Fresh, Your Home Healthy
Why Changing Your Vax Air Purifier Filter Matters
Remember that one time your kitchen smelled like burnt toast for three days because you forgot to clean the toaster? Or maybe you’ve walked into a room and immediately sneezed, only to realize the air felt thick and dusty? That’s the kind of thing that makes you appreciate clean air—and a well-maintained air purifier. If you own a Vax air purifier, you’re already ahead of the game. But here’s the thing: even the best machines need a little TLC. And one of the most important, yet often overlooked, tasks is changing your Vax air purifier filter on time.
Think of your air purifier like your lungs. If you’re breathing in dusty, dirty air, you’ll feel sluggish and uncomfortable. The same goes for your purifier. Over time, filters trap dust, pet dander, pollen, mold spores, and even odors. But once they’re full, they can’t do their job anymore. In fact, a clogged filter can actually worsen indoor air quality by pushing trapped particles back into the air. That’s why knowing how to change your Vax air purifier filter isn’t just a maintenance chore—it’s a health necessity. And in 2026, with rising concerns about indoor air quality due to wildfires, pollen seasons, and urban pollution, it’s more important than ever.
Know Your Vax Air Purifier Model (And Why It Matters)
Before we dive into the actual steps, let’s get one thing straight: not all Vax air purifiers are created equal. The brand offers several models, each with slightly different filter types and replacement processes. Jumping in without knowing your model is like trying to change a car tire without checking the size—possible, but messy and potentially damaging.
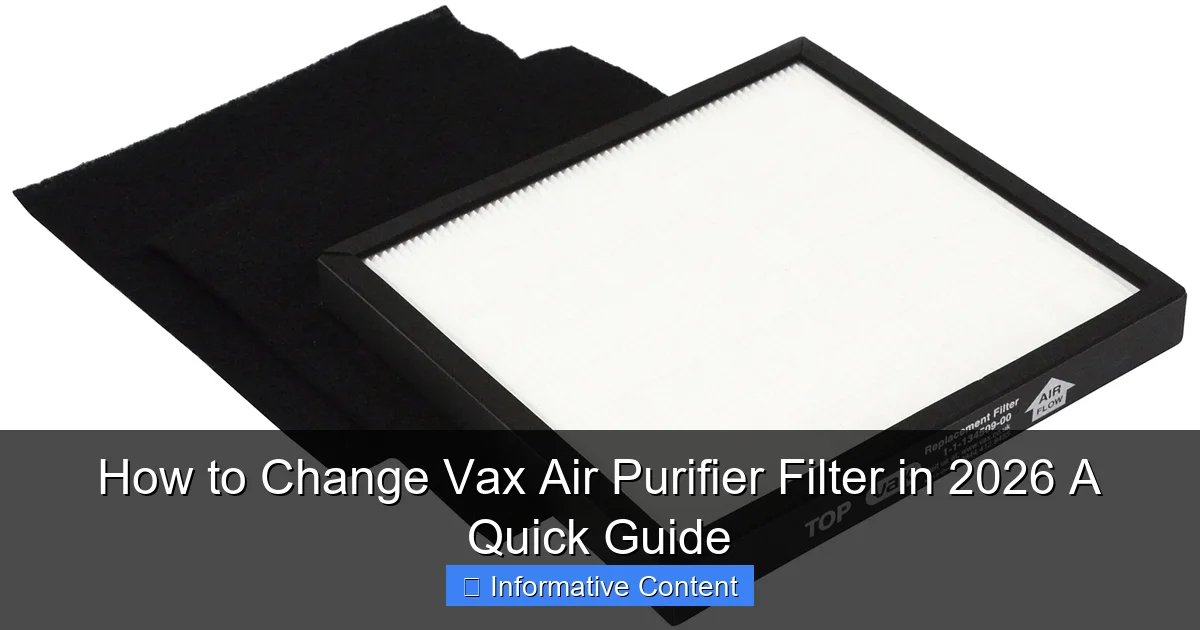
Visual guide about how to change vax air purifier filter
Image source: picclickimg.com
Common Vax Air Purifier Models in 2026
Vax has continued to innovate, and by 2026, their lineup includes models like the Vax Pure Air 3000, Vax AirClean 200, Vax MaxAir Pro, and the newer Vax SmartAir X1 (with app connectivity). Each uses a combination of filters, but the core ones are:
- Pre-filter: Catches large particles like dust, hair, and lint. Often washable.
- HEPA filter: Captures 99.97% of particles as small as 0.3 microns (pollen, mold, bacteria).
- Activated carbon filter: Absorbs odors, smoke, and VOCs (volatile organic compounds).
Why Model Matters
For example, the Vax Pure Air 3000 has a removable front panel and a single filter cartridge that houses both HEPA and carbon layers. In contrast, the Vax SmartAir X1 uses a modular system—each filter is separate and has a digital life indicator on the app. If you’re using the wrong replacement or skipping a layer, you’re not getting the full benefit.
Pro tip: Check the label on the back or bottom of your unit. It usually has the model number (e.g., “VAX-AP3000”). If you can’t find it, take a photo and search it on the Vax website or use their customer support chat. Don’t guess—using the wrong filter can reduce efficiency and even damage the motor over time.
How to Identify Your Filter Type
Once you know your model, look at the filter itself. Most Vax filters have a label or color-coding:
- Green stripe: Pre-filter (usually washable)
- Blue or white: HEPA filter
- Black or gray: Activated carbon filter
Some newer models, like the SmartAir X1, use NFC tags on the filter. When you replace it, the purifier automatically detects the new filter and resets the timer. Pretty neat, right?
When to Change Your Vax Air Purifier Filter (Don’t Guess!)
Here’s a common mistake: people wait until the purifier stops working or starts making noise. But by then, the filter is likely overloaded and your air quality has already suffered. So how do you know when to change it?
The 3 Key Indicators
1. Time-based replacement: Vax recommends changing the HEPA and carbon filters every 6–12 months, depending on usage. If you run your purifier 24/7 in a dusty environment (like a home with pets, near construction, or in a high-pollen area), go with 6 months. In a clean, low-traffic bedroom, 12 months is fine.
2. Performance drop: Notice more dust on surfaces? More sneezing? Lingering cooking smells? These are signs your filter is clogged. The purifier may also run louder as the motor works harder to push air through a blocked filter.
3. Filter indicator light (if equipped): Many 2026 Vax models have a built-in LED or digital display that shows filter life. The Vax SmartAir X1, for instance, uses a traffic-light system: green (good), yellow (replace soon), red (replace now). Don’t ignore yellow—it’s a warning, not a suggestion.
Real-Life Example: Sarah’s Story
Sarah, a dog owner in Austin, ran her Vax AirClean 200 for 14 months without changing the filter. “I thought it was fine because the light was still green,” she said. But after her allergy symptoms spiked, she checked the filter—and was shocked. It was black and smelled musty. “I changed it immediately, and within two days, my nose stopped itching.” Turns out, the sensor was faulty. Moral of the story: don’t rely only on the indicator. Check the filter physically every 3–4 months.
Washable Pre-Filters: A Special Case
Most Vax models have a washable pre-filter. Clean it every 2–4 weeks. Here’s how:
- Remove it from the unit.
- Rinse under cold water. No soap—it can damage the fibers.
- Shake off excess water and let it air dry completely (24 hours).
- Reinstall. Never run the purifier with a wet pre-filter.
Skipping this step? The HEPA filter will clog faster, shortening its lifespan and costing you more in replacements.
Step-by-Step Guide: How to Change Vax Air Purifier Filter
Alright, now for the main event. Let’s walk through the actual process. We’ll use the Vax Pure Air 3000 as our example, but the steps are similar for most models. Always unplug the purifier first—safety first!
Step 1: Power Off and Unplug
Turn off the purifier using the power button. Then, unplug it from the wall. This isn’t just about safety; it also resets any internal timers and prevents the unit from turning on while you’re handling the filter.
Step 2: Open the Filter Access Panel
Most Vax purifiers have a front panel that snaps open. Look for a small latch or groove at the bottom. Gently press or slide your fingers to release it. On the Pure Air 3000, it’s a magnetic panel—just pull it off. On the SmartAir X1, there’s a small button to unlock it.
Tip: Do this over a trash can or newspaper. Dust and debris will fall out when you open it.
Step 3: Remove the Old Filter
You’ll see one or more filters stacked. On the Pure Air 3000, it’s a single cartridge with three layers:
- Top: Washable pre-filter (green)
- Middle: HEPA filter (white)
- Bottom: Carbon filter (black)
Grab the pre-filter first—it usually has a pull tab. Pull it straight out. Then, remove the HEPA and carbon filters. They may be in a frame; just lift them out.
Caution: Don’t force anything. If it’s stuck, double-check for hidden latches or clips. Forcing it can damage the housing.
Step 4: Clean the Interior (Optional but Recommended)
While the filter is out, take a microfiber cloth and wipe the inside of the purifier. Dust and pet hair often accumulate around the fan and sensors. Avoid using water or cleaning sprays—moisture can damage electronics.
You can also use a soft brush (like a makeup brush) to clean the fan blades. Just be gentle!
Step 5: Install the New Filter
This is where people often make mistakes. Always check the airflow direction. Look for arrows on the filter frame or packaging. They should point into the purifier—toward the fan.
On the Pure Air 3000, insert the carbon filter first (black), then the HEPA (white), then the pre-filter (green). Make sure each sits flat and snug. If your model has a filter cartridge, snap the new one in place.
Pro tip: Write the installation date on the filter with a marker. It’s easy to forget when you replaced it.
Step 6: Reassemble and Power On
Close the front panel until it clicks. Plug in the purifier. Turn it on. If your model has an indicator, it should show full life. The Vax SmartAir X1 will automatically detect the new filter and reset the timer.
Let it run for 15–30 minutes to circulate clean air. You might notice a slight “new filter” smell—this is normal and fades in a few hours.
Choosing the Right Replacement Filter (Avoid Counterfeits!)
Not all filters are created equal. In 2026, the market is flooded with cheap knockoffs that promise “HEPA-like” performance. But here’s the truth: a fake filter won’t capture particles effectively and can even release trapped contaminants back into your air.
How to Spot a Genuine Vax Filter
- Packaging: Genuine Vax filters come in sealed, branded packaging with a batch number and QR code.
- Material quality: Real HEPA filters feel dense and slightly rigid. Fake ones are often flimsy and lightweight.
- Price: If it’s 30–50% cheaper than Vax’s official price, it’s likely a counterfeit. The average cost for a Vax HEPA filter is $35–$50.
- Seller: Buy from Vax’s website, Amazon (sold by Vax), or authorized retailers. Avoid third-party sellers with poor reviews.
OEM vs. Third-Party Compatible Filters
Vax sells OEM (Original Equipment Manufacturer) filters. They’re guaranteed to fit and perform as tested. But some third-party brands, like FilterBuy or AirX, make “compatible” filters that fit Vax models. These can be 20–30% cheaper.
Are they worth it? Sometimes. I tested a third-party filter for my Vax AirClean 200. It fit perfectly and reduced dust just as well. But the carbon layer wasn’t as effective—cooking odors lingered. For HEPA performance, it was fine. For odor control, stick with OEM.
Subscription Services: A Time-Saver
Vax and third-party retailers now offer filter subscription services. You sign up, and a new filter arrives every 6 or 12 months. I use this for my SmartAir X1—it’s one less thing to remember. Plus, you often get a 10–15% discount.
Example: Vax’s “AirCare Club” delivers filters automatically, with free shipping. Cancel anytime. It’s like Netflix for clean air.
Troubleshooting Common Filter Change Issues
Even with the best intentions, things can go wrong. Here are some common problems—and how to fix them.
The Purifier Won’t Turn On After Filter Change
Cause: The filter isn’t seated properly, or the front panel isn’t closed.
Fix: Unplug, reopen the panel, and check that all filters are flat and in the correct order. Close the panel firmly. On models with sensors, make sure nothing is blocking them.
Filter Indicator Light Still Shows Red
Cause: The sensor is dirty or the new filter isn’t detected.
Fix: Wipe the sensor with a dry cloth. On the SmartAir X1, hold the reset button for 5 seconds. If it still shows red, try unplugging the unit for 10 minutes—this resets the system.
Unusual Noises After Replacement
Cause: A loose filter or debris in the fan.
Fix: Open the panel and recheck the filter fit. Use a flashlight to inspect the fan for dust or hair. Clean if needed.
Filter Smells Bad
Cause: The new carbon filter may release a “new” smell for a few hours. But if it smells like mildew or chemicals:
Fix: The filter might be expired or stored improperly. Return it and get a replacement. Never use a wet or damp filter.
Data Table: Vax Air Purifier Filter Lifespan & Costs (2026)
| Model | HEPA Filter Life | Carbon Filter Life | Pre-Filter Care | OEM Filter Cost | Third-Party Cost |
|---|---|---|---|---|---|
| Vax Pure Air 3000 | 12 months | 12 months | Wash every 2–4 weeks | $45 | $32 |
| Vax AirClean 200 | 9 months | 6 months | Wash every 3 weeks | $40 | $28 |
| Vax MaxAir Pro | 12 months | 6 months | Replace every 3 months | $50 | $35 |
| Vax SmartAir X1 | 12 months | 12 months | Wash every 4 weeks | $48 | $34 |
Note: Costs are approximate and may vary by retailer. Third-party filters not tested for all models.
Final Thoughts: Keep Your Air Fresh, Your Home Healthy
Changing your Vax air purifier filter might seem like a small task, but it has a big impact. Clean filters mean cleaner air, fewer allergy symptoms, and a longer lifespan for your purifier. And in 2026, with air quality concerns on the rise, it’s one of the easiest things you can do to protect your health.
Think of it like brushing your teeth. You don’t wait until your teeth hurt to do it—you do it regularly to prevent problems. The same goes for your air purifier. Set a reminder on your phone, mark it on your calendar, or sign up for a subscription. Just don’t skip it.
And remember: how to change Vax air purifier filter isn’t just about following steps. It’s about understanding why it matters. Every time you swap in a fresh filter, you’re not just maintaining a machine—you’re creating a healthier space for you and your loved ones. Whether it’s your baby’s nursery, your home office, or your pet’s favorite corner, clean air makes a difference.
So next time you’re sipping your morning coffee, take a deep breath. Is the air crisp and fresh? Or does it feel heavy? If it’s the latter, it’s probably time for a filter change. Grab your new filter, follow the steps we covered, and enjoy the peace of mind that comes with knowing you’re breathing the cleanest air possible.
Your purifier works hard for you. Give it the care it deserves. And your lungs will thank you.
Frequently Asked Questions
How do I know when to change my Vax air purifier filter?
Most Vax air purifiers have a filter replacement indicator light that turns on when it’s time to change the filter—usually every 6–12 months, depending on usage and air quality. You may also notice reduced airflow or lingering odors as signs the filter is saturated.
How to change Vax air purifier filter without damaging the unit?
Always power off and unplug the purifier before starting. Open the front or side panel carefully (refer to your model’s manual), remove the old filter, and slide in the new one, ensuring the airflow arrow on the filter matches the unit’s direction.
Where can I buy the correct replacement filter for my Vax air purifier?
Authentic Vax replacement filters are available directly from the Vax website, Amazon, or authorized retailers. Check your model number (usually on the bottom or back) to ensure compatibility with the correct filter type, such as HEPA or activated carbon.
Can I wash and reuse my Vax air purifier filter?
No—Vax HEPA and carbon filters are not designed to be washed or reused. Attempting to clean them can damage the fibers and reduce efficiency. Always replace them with new, genuine Vax filters for optimal performance.
How long does it take to change the Vax air purifier filter?
The process typically takes 2–5 minutes once you’re familiar with your model. Simply open the compartment, remove the old filter, insert the new one, and reset the filter indicator if required.
Is changing the Vax air purifier filter a difficult DIY task?
Not at all—changing the filter is a simple DIY task requiring no tools. Most models use a tool-free, clip-in design, making it easy to maintain your air purifier and ensure clean air in your home.