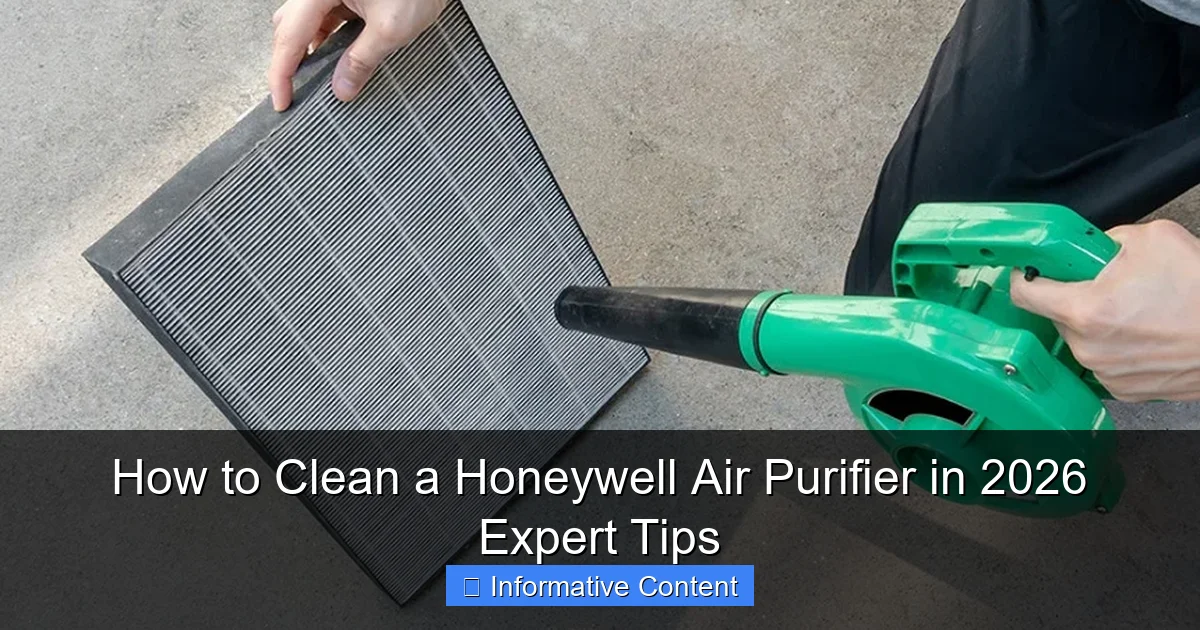
Featured image for how to clean a honeywell air purifier
Image source: hvaclifehack.com
Always unplug your Honeywell air purifier before cleaning to ensure safety and prevent damage. Wipe the exterior with a damp cloth and mild soap, then remove and rinse the pre-filter monthly, while the HEPA filter should only be vacuumed—never washed—to maintain peak performance in 2026.
Key Takeaways
- Turn off and unplug the unit before cleaning for safety.
- Vacuum the exterior weekly to remove dust and debris buildup.
- Wash or replace filters as recommended to maintain efficiency.
- Use a dry cloth for the internal fan and motor areas.
- Clean the pre-filter monthly with mild soap and water.
- Avoid harsh chemicals that can damage components or emit fumes.
- Reassemble carefully to ensure proper airflow and performance.
📑 Table of Contents
- How to Clean a Honeywell Air Purifier in 2026: Expert Tips
- Why Cleaning Your Honeywell Air Purifier Matters
- What You’ll Need to Clean Your Honeywell Air Purifier
- Step-by-Step Guide to Cleaning Your Honeywell Air Purifier
- How Often Should You Clean Your Honeywell Air Purifier?
- Common Mistakes to Avoid When Cleaning
- Maintaining Your Honeywell Air Purifier for Long-Term Performance
- Final Thoughts: Breathe Easy with a Clean Air Purifier
How to Clean a Honeywell Air Purifier in 2026: Expert Tips
Imagine this: you’ve been running your Honeywell air purifier faithfully for months, maybe even years. It hums quietly in the corner, doing its job filtering out dust, pet dander, and allergens. You breathe easier, your allergies are under control, and your home feels fresher. But lately, you’ve noticed it’s not working as well as it used to. The airflow feels weaker, and there’s a faint musty smell when it turns on. Sound familiar?
Chances are, your air purifier just needs a good cleaning. Just like your vacuum or coffee maker, your Honeywell air purifier isn’t immune to buildup. Over time, dust, hair, and other particles collect on the filters and internal components, reducing efficiency and potentially circulating stale air instead of clean air. The good news? Cleaning your Honeywell air purifier is simpler than you might think—and doing it regularly can extend its life, improve performance, and keep your indoor air truly fresh. In this guide, I’ll walk you through everything you need to know to clean your Honeywell air purifier the right way in 2026, with expert-backed tips and practical advice you can use today.
Why Cleaning Your Honeywell Air Purifier Matters
Let’s start with the “why.” Why should you even bother cleaning your air purifier? After all, isn’t it designed to clean the air for you? While that’s true, air purifiers—especially those with multiple filters—are not self-cleaning machines. They rely on filters to trap pollutants, and those filters eventually get clogged. When that happens, the unit has to work harder to pull air through, which can lead to reduced airflow, louder operation, and even overheating.
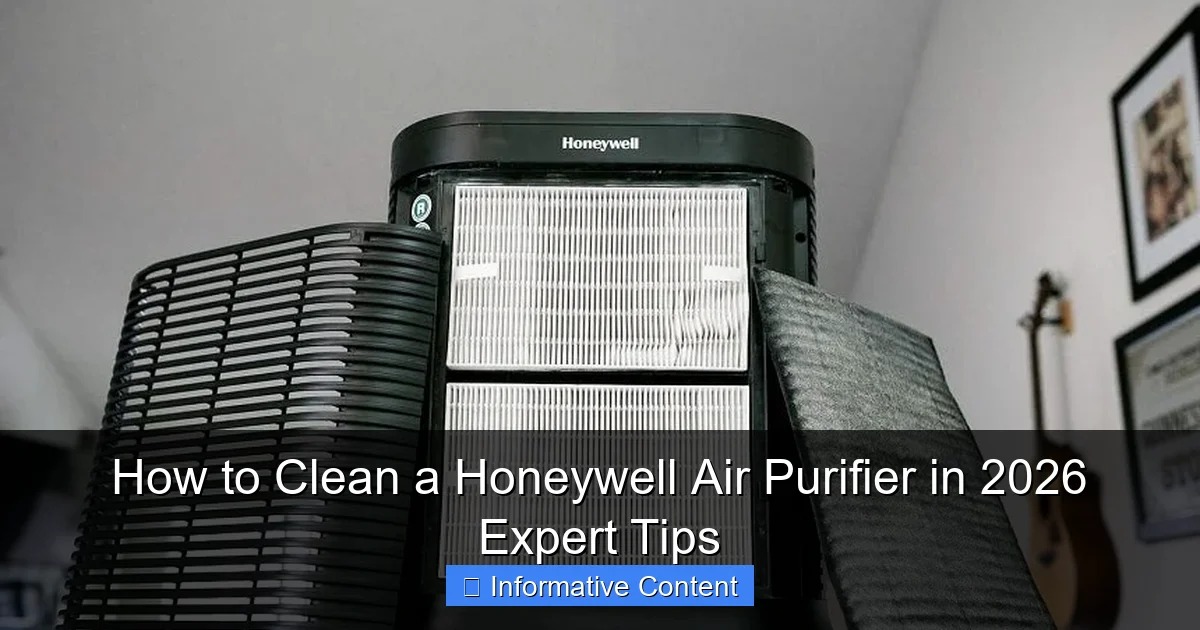
Visual guide about how to clean a honeywell air purifier
Image source: hvaclifehack.com
Beyond performance issues, a dirty air purifier can actually become a source of indoor air pollution. Mold, bacteria, and trapped allergens can grow on neglected filters, especially in humid environments. When the purifier runs, it can blow these contaminants back into your home. That’s the opposite of what you want! Regular cleaning prevents this buildup and ensures your purifier is doing its job effectively.
Signs It’s Time to Clean Your Air Purifier
You don’t need to wait for a warning light (though some newer Honeywell models do have filter change indicators). Here are a few telltale signs that your air purifier needs attention:
- Reduced airflow: If you notice the fan isn’t pushing air as strongly as it used to, it’s likely due to clogged filters or internal dust buildup.
- Unusual odors: A musty or sour smell when the unit is running often indicates mold or bacteria growth on the filters.
- Increased noise: A louder-than-usual hum or rattling noise can mean the fan is working harder due to restricted airflow.
- Visible dust or debris: If you can see dust caked on the exterior vents or around the filter housing, it’s time for a deep clean.
- Allergy flare-ups: If you or your family members are sneezing or experiencing more allergy symptoms, your purifier may not be filtering effectively.
I learned this the hard way last spring. My Honeywell HPA300 had been running nonstop during pollen season, and I didn’t clean it for over six months. One day, my eyes started watering more than usual, and I realized the purifier wasn’t helping anymore. After cleaning it thoroughly, the difference was night and day—my allergies improved, and the unit ran quieter. That’s when I made cleaning a monthly habit.
What You’ll Need to Clean Your Honeywell Air Purifier
Before you start, gather the right tools. You don’t need anything fancy—just a few household items and a little time. Here’s what I keep in my cleaning kit:
- Soft microfiber cloths: These are gentle on surfaces and great for wiping down the exterior and internal parts.
- Mild dish soap: A drop or two is perfect for cleaning non-electrical components.
- White vinegar: A natural disinfectant that helps remove odors and mildew.
- Vacuum with a brush attachment: Ideal for removing loose dust from filters and vents.
- Compressed air (optional): Useful for blowing dust out of hard-to-reach areas like fan blades.
- Replacement filters (if needed): Check your model’s manual to see when filters should be replaced—cleaning won’t help if they’re beyond their lifespan.
- Rubber gloves: Optional, but helpful if you’re sensitive to dust or cleaning solutions.
Pro tip: Always unplug your air purifier before cleaning. Safety first! Even though most Honeywell models have low voltage, it’s best to avoid any risk of electric shock.
Understanding Your Honeywell Model
Honeywell makes a range of air purifiers, from compact desktop units like the Honeywell HPA100 to larger tower models like the HPA300 and even smart purifiers with app connectivity. While the cleaning process is similar across models, there are a few differences to note:
- Pre-filters: Most Honeywell purifiers have a washable pre-filter that captures large particles like hair and dust. This is usually the first layer and should be cleaned regularly.
- HEPA filters: These capture 99.97% of particles as small as 0.3 microns. They’re not washable and should only be vacuumed gently—never rinsed with water.
- Carbon filters: Used to absorb odors and gases. These are also not washable and should be replaced when needed.
- UV-C light (on select models): Some newer Honeywell purifiers include a UV light to kill bacteria and viruses. This bulb should be cleaned gently with a dry cloth and replaced annually.
If you’re not sure which filters your model has, check the user manual or look up your model number on Honeywell’s website. I keep a printed copy of my manual taped to the side of my purifier—it’s saved me more than once!
Step-by-Step Guide to Cleaning Your Honeywell Air Purifier
Now for the main event: how to actually clean your Honeywell air purifier. I’ll break it down into simple, manageable steps. Whether you have a small bedroom unit or a whole-room purifier, this process works for most models.
Step 1: Turn Off and Unplug the Unit
Before you do anything, make sure the air purifier is completely powered off and unplugged from the wall. This is non-negotiable. Even if the unit seems off, there could still be residual power. I learned this the hard way when I once tried to clean a plugged-in fan—let’s just say I won’t make that mistake again.
Step 2: Remove the Filters
Open the front or side panel of your purifier (the exact method varies by model). Most Honeywell units have a latch or sliding cover. Gently remove the filters in the order they’re stacked. Typically, that’s:
- Pre-filter (washable)
- HEPA filter (not washable)
- Carbon filter (not washable, if present)
Take note of how they’re arranged so you can put them back in the correct order. I like to take a quick photo with my phone before removing anything—this way, I don’t have to guess later.
Step 3: Clean the Pre-Filter
The pre-filter is your first line of defense and usually the dirtiest. It’s designed to catch large particles, so it gets clogged quickly. Here’s how to clean it:
- Use a vacuum with a brush attachment to remove loose dust and hair.
- If it’s very dirty, rinse it under lukewarm water. Avoid hot water, as it can warp the material.
- Add a drop of mild dish soap if needed, but rinse thoroughly to avoid residue.
- Let it air dry completely—this can take several hours. Never reinstall a damp filter, as it can promote mold growth.
I clean my pre-filter every two weeks during high-use seasons (like spring and fall) and monthly the rest of the year. It makes a huge difference in performance.
Step 4: Vacuum the HEPA and Carbon Filters
HEPA and carbon filters are not washable, but you can extend their life with gentle cleaning. Use your vacuum’s brush attachment to lightly suction dust from the surface. Don’t press too hard—you don’t want to damage the delicate fibers.
For carbon filters, avoid using any liquids. They’re designed to absorb odors, and moisture can ruin their effectiveness. If your carbon filter smells sour or looks discolored, it’s time to replace it.
Pro tip: If you have a model with a UV-C light, gently wipe the bulb with a dry microfiber cloth. Do not use water or cleaning solutions—UV bulbs are fragile and can crack if wet.
Step 5: Clean the Interior and Exterior
While the filters are out, take the opportunity to clean the inside of the unit. Use a dry or slightly damp microfiber cloth to wipe down the fan blades, motor housing, and air intake vents. If there’s stubborn dust, a can of compressed air can help blow it out.
For the exterior, wipe down the plastic casing with a cloth dampened with water and a tiny bit of dish soap. Avoid spraying liquid directly onto the unit. Dry it thoroughly with a clean cloth.
I also like to clean the control panel with a slightly damp cloth. Over time, fingerprints and dust can build up, making buttons harder to press. Just be careful not to let moisture seep into the electronics.
Step 6: Reassemble and Test
Once everything is dry, carefully reinstall the filters in the correct order. Close the panel securely and plug the unit back in. Turn it on and listen—does it sound smoother? Is the airflow stronger? If yes, you’ve done a great job!
If the unit doesn’t turn on or makes a strange noise, double-check that all parts are properly seated. Sometimes a filter can be slightly misaligned, causing the unit to detect an error.
How Often Should You Clean Your Honeywell Air Purifier?
Cleaning frequency depends on several factors: how often you use the purifier, your indoor air quality, and whether you have pets or allergies. Here’s a general guideline I follow:
| Component | Cleaning Frequency | Notes |
|---|---|---|
| Pre-filter | Every 2–4 weeks | More often if you have pets or live in a dusty area |
| HEPA filter | Every 3–6 months (vacuuming) | Replace every 12 months or as recommended |
| Carbon filter | Every 3–6 months (inspection) | Replace every 6–12 months, depending on odor levels |
| Exterior and interior | Monthly | Wipe down surfaces and check for dust buildup |
| UV-C bulb (if applicable) | Every 6 months (cleaning), annually (replace) | Check manufacturer guidelines for bulb lifespan |
In my home, I clean the pre-filter every two weeks during spring and fall (pollen season) and monthly otherwise. I vacuum the HEPA filter every three months and replace it annually. I also do a full interior wipe-down every month. It only takes 10–15 minutes, and it keeps my purifier running like new.
If you have pets, smokers in the home, or live in a high-pollution area, you may need to clean more frequently. I have two cats, so I notice pet hair building up faster. I’ve learned to check the pre-filter weekly during shedding season.
Common Mistakes to Avoid When Cleaning
Even with the best intentions, it’s easy to make mistakes when cleaning your air purifier. Here are a few I’ve made (and learned from):
- Washing the HEPA filter: This is a big no-no. HEPA filters are made of delicate fibers that can tear or degrade when wet. Never rinse or soak them. Vacuuming is the only safe cleaning method.
- Using harsh chemicals: Avoid bleach, ammonia, or strong cleaners. They can damage plastic parts and leave harmful residues. Stick to mild soap and water.
- Reinstalling damp filters: Always let filters dry completely before putting them back. A damp filter can grow mold and ruin the unit.
- Ignoring the fan and motor area: Dust buildup here can reduce efficiency and cause overheating. Take the time to clean it gently.
- Skipping the manual: Every Honeywell model is slightly different. Always refer to your user manual for specific instructions.
One time, I tried to clean my HEPA filter with water because it looked really dirty. Big mistake. The filter warped, and the unit wouldn’t work properly until I replaced it. I learned that lesson the expensive way—now I stick to vacuuming only.
Maintaining Your Honeywell Air Purifier for Long-Term Performance
Cleaning is just one part of air purifier care. To get the most out of your Honeywell unit, follow these maintenance tips:
- Replace filters on schedule: Even with regular cleaning, filters have a limited lifespan. Mark replacement dates on your calendar or set a phone reminder.
- Run the purifier regularly: Don’t let it sit unused for long periods. Running it at least a few hours a day helps prevent dust buildup and keeps the motor in good condition.
- Keep the area around the purifier clean: Dust and debris near the unit can get sucked in, making the filters work harder. Vacuum or sweep the floor nearby.
- Use the right settings: On days with high pollution or allergens, run the purifier on a higher fan speed. On cleaner days, a lower setting saves energy.
- Check for software updates (smart models): If you have a Wi-Fi-enabled Honeywell purifier, check the app periodically for firmware updates that can improve performance.
I also like to keep a log of when I clean and replace filters. It’s just a simple note in my phone, but it helps me stay on track. After all, consistency is key to clean air.
Final Thoughts: Breathe Easy with a Clean Air Purifier
Cleaning your Honeywell air purifier might not be the most exciting chore, but it’s one of the most important things you can do for your indoor air quality. A well-maintained purifier works more efficiently, lasts longer, and truly delivers on its promise of cleaner, healthier air. Whether you’re battling allergies, pet dander, or just want a fresher home, regular cleaning makes all the difference.
By following the steps in this guide—cleaning the pre-filter, vacuuming the HEPA filter, wiping down the interior, and replacing filters when needed—you’ll keep your Honeywell air purifier running smoothly for years to come. And remember, it doesn’t have to be perfect. Even a monthly cleaning routine can significantly improve performance.
So, the next time you walk into a room and take a deep breath of fresh air, you’ll know your purifier is doing its job—thanks to your care and attention. Here’s to cleaner air and healthier living in 2026 and beyond.
Frequently Asked Questions
How do I clean my Honeywell air purifier filter?
To clean your Honeywell air purifier filter, first power off and unplug the unit. For pre-filters, vacuum or rinse gently with water and let dry completely before reinstalling. Note that HEPA filters are not washable and should be replaced every 12 months.
How often should I clean my Honeywell air purifier?
Clean the pre-filter every 2–4 weeks and wipe down the exterior monthly. For optimal performance, deep-clean the internal components (like fan blades) every 6 months using a soft, dry cloth—always follow your model’s manual for specific guidance.
Can I use water to clean my Honeywell air purifier?
You can lightly dampen a cloth to wipe the exterior or rinse the pre-filter (if removable). Never submerge the main unit or use harsh chemicals. Always ensure parts are fully dry before reassembling your Honeywell air purifier.
What’s the best way to clean Honeywell air purifier sensors?
For units with sensors, gently wipe them with a dry, lint-free cloth. Avoid moisture or compressed air, as this can damage sensitive components. Check your manual for sensor location and model-specific cleaning tips.
How to clean a Honeywell air purifier fan?
Unplug the unit, remove the front grill, and use a soft brush or microfiber cloth to remove dust from the fan blades. For stubborn grime, lightly dampen the cloth—never spray liquid directly inside the air purifier.
Do I need special tools to clean my Honeywell air purifier?
No, most cleaning requires only a soft cloth, brush, and vacuum. A screwdriver may be needed for disassembly (if recommended in the manual). Always prioritize gentle tools to avoid damaging your Honeywell air purifier.