Featured image for how to clean air purifier filter at home
Image source: kroger.com
Cleaning your air purifier filter at home in 2026 is faster and safer than ever—start by turning off and unplugging the unit, then carefully remove the filter according to your model’s manual. Use a soft brush or vacuum with a HEPA attachment to remove dust and debris, and for washable filters, rinse with cool water and air-dry completely before reinstalling to maintain peak performance and air quality.
“`html
How to Clean Air Purifier Filter at Home in 2026
Let’s be honest—your air purifier works hard. Every day, it quietly pulls in dust, pollen, pet dander, and even invisible pollutants, all while you go about your life. But here’s the thing: if you don’t clean the filter regularly, that hardworking machine starts to struggle. It’s like running a marathon with a stuffy nose—it just doesn’t work as well.
I learned this the hard way. A few months ago, I noticed my apartment started feeling stuffier, even though my purifier was on. I checked the filter—yikes. It was clogged with a grayish layer of gunk. Once I cleaned it, the difference was night and day. The air felt lighter, the fan ran quieter, and my allergies improved. That’s when I realized: knowing how to clean air purifier filter at home in 2026 isn’t just helpful—it’s essential.
Whether you’ve got a basic desktop model or a high-end smart purifier, this guide will walk you through the process step by step. No technical skills required. Just a little time, a few simple tools, and the right approach. By the end, you’ll not only know how to clean air purifier filter at home in 2026, but you’ll also understand why it matters—and how to keep your indoor air truly fresh.
Key Takeaways
- Turn off and unplug your air purifier before cleaning for safety.
- Vacuum pre-filters monthly to remove dust and extend filter life.
- Rinse or replace HEPA filters only if manufacturer instructions allow it.
- Use mild soap and water for washable filters; air-dry completely.
- Check carbon filters every 3–6 months; replace if odors persist.
- Never oversaturate filters to prevent mold and damage to the unit.
- Maintain a cleaning schedule to ensure optimal air quality and efficiency.
Why This Matters / Understanding the Problem
Air purifiers are one of those appliances we tend to “set and forget.” But unlike your fridge or microwave, they actively collect contaminants. Over time, those contaminants build up—especially on the filter. And when the filter gets clogged, your purifier has to work harder to pull air through. That means higher energy use, louder noise, and less effective cleaning.
Worse, a dirty filter can actually release trapped particles back into the air. Imagine your purifier becoming part of the problem instead of the solution. That’s not just inefficient—it’s counterproductive.
In 2026, indoor air quality is more important than ever. With rising concerns about allergens, wildfire smoke, and even lingering viruses, we rely on our purifiers more than ever. Regular maintenance—especially cleaning the filter—ensures your device performs at its best when you need it most.
Plus, cleaning your filter extends its lifespan. Many manufacturers recommend replacing filters every 6–12 months, but with proper care, you might stretch that timeline. That saves money and reduces waste—a win-win.
So yes, learning how to clean air purifier filter at home in 2026 is a small task with big rewards. It’s not just about clean air—it’s about smarter, more sustainable living.
What You Need
Before we dive in, let’s gather the essentials. You don’t need a toolkit or special skills—just a few household items and a little patience.
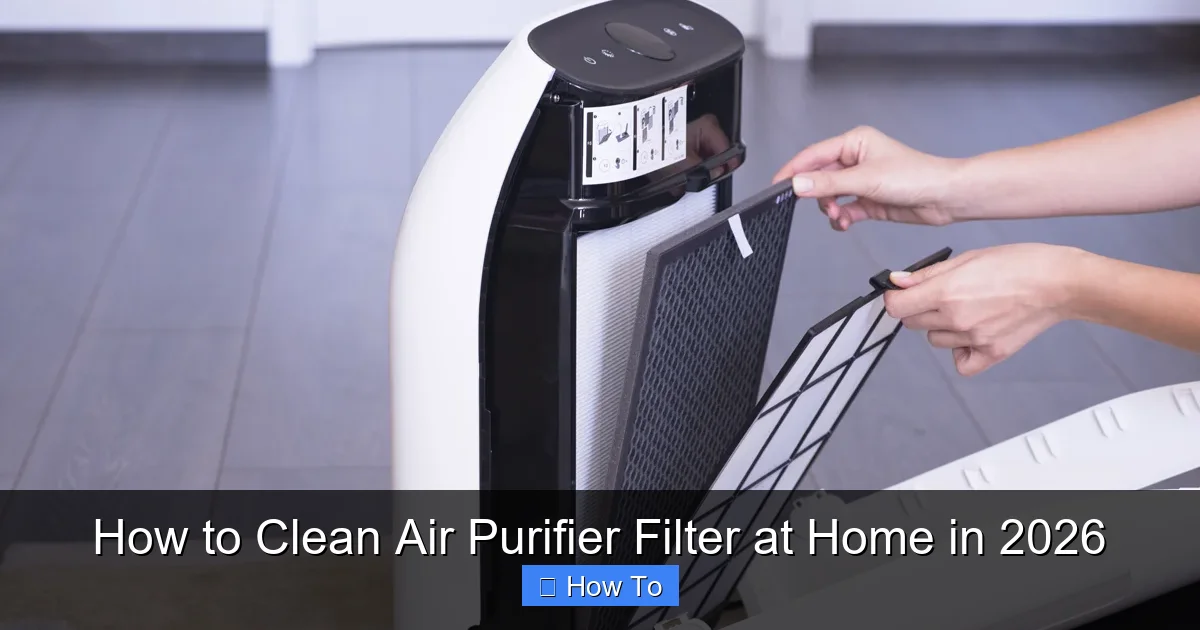
Visual guide about how to clean air purifier filter at home
Image source: housedecorz.com
- Your air purifier (obviously!)
- A soft-bristled brush (an old toothbrush works great)
- A vacuum cleaner with a brush attachment (optional but helpful)
- Mild dish soap (if washing is needed)
- A clean, dry towel
- A well-ventilated area (like near an open window or outside)
- Rubber gloves (optional, but helpful if you’re sensitive to dust)
Most air purifiers come with user manuals that specify whether the filter is washable or not. If yours doesn’t, check the model number online. In general, pre-filters are washable, while HEPA filters are not—but we’ll cover that in detail below.
Pro tip: Always unplug your purifier before cleaning. Safety first!
Step-by-Step Guide to How to Clean Air Purifier Filter at Home in 2026
Now for the main event. Whether you’re a first-time cleaner or just refreshing your routine, these steps will help you clean your air purifier filter safely and effectively. Let’s go.
Step 1: Turn Off and Unplug Your Air Purifier
Before touching anything, make sure your purifier is completely powered off and unplugged. This isn’t just about avoiding shocks—it’s about protecting the motor and internal components. Even if the unit seems off, residual power can be risky.
I once made the mistake of cleaning while it was still plugged in. The fan started spinning unexpectedly—scary! Now, I always double-check. It takes two seconds and gives me peace of mind.
Once it’s unplugged, move the purifier to a clean, flat surface. A table or countertop works best. If you’re cleaning outside, even better—less dust tracked back inside.
Step 2: Locate and Remove the Filter
Every air purifier is a little different, but most have a front or side panel that opens easily. Look for latches, clips, or screws. Some newer models have magnetic covers—just pull gently.
Once the panel is open, you’ll see the filter. It’s usually rectangular and may have a label indicating the type (like “HEPA” or “Carbon”). Carefully slide it out. If it’s stuck, don’t force it. Check for hidden clips or tabs.
Some purifiers have multiple filters—a pre-filter, a HEPA filter, and sometimes a carbon filter. Take note of the order so you can reinstall them correctly. I like to take a quick photo with my phone before removing anything. That way, I don’t mix them up later.
Step 3: Identify the Filter Type
This is crucial. Not all filters are created equal, and cleaning methods vary.
- Pre-filters: These catch large particles like hair and dust. They’re usually foam or mesh and are almost always washable.
- HEPA filters: These trap tiny particles like pollen and smoke. Most HEPA filters are not washable. You can vacuum them gently, but never rinse with water.
- Carbon filters: These absorb odors and gases. They’re not washable and typically need replacement every few months.
If you’re unsure, check the manual or the manufacturer’s website. When in doubt, assume it’s not washable. Using water on a non-washable filter can ruin it—and that’s an expensive mistake.
Step 4: Clean the Pre-Filter (If Applicable)
If your purifier has a washable pre-filter, this is where the real cleaning happens. Start by using a soft brush or your vacuum’s brush attachment to remove loose dust. Do this over a trash can or outside to avoid spreading debris.
For deeper cleaning, rinse the pre-filter under lukewarm water. Use a mild dish soap if needed—just a drop. Gently scrub with the brush, focusing on clogged areas. Avoid harsh scrubbing; you don’t want to tear the material.
Once clean, rinse thoroughly to remove all soap residue. Soap left behind can create odors or even damage the filter over time.
Then, pat the filter dry with a clean towel. Let it air-dry completely—ideally for 24 hours. Never reinstall a damp filter. Moisture can lead to mold or mildew, which defeats the whole purpose of clean air.
I learned this the hard way too. I once put a slightly damp filter back in, thinking it would dry inside. A week later, I noticed a musty smell. Yuck. Now I always wait a full day.
Step 5: Vacuum the HEPA Filter (If Applicable)
If your purifier has a HEPA filter, you can’t wash it—but you can vacuum it. This removes surface dust and extends its life.
Use your vacuum’s brush attachment on the lowest suction setting. Gently run it over both sides of the filter. Focus on areas with visible buildup. Don’t press too hard; you’re not trying to deep-clean, just remove loose particles.
Some experts recommend vacuuming every 1–2 months, depending on usage. If you have pets or live in a dusty area, you might need to do it more often.
Important: Never use water, compressed air, or harsh chemicals on a HEPA filter. These can damage the delicate fibers and reduce efficiency.
Step 6: Wipe Down the Interior and Exterior
While the filter is out, take a moment to clean the inside of the purifier. Use a dry or slightly damp microfiber cloth to wipe down the fan blades, housing, and any accessible surfaces. Avoid getting water near electrical components.
For the exterior, a quick wipe with a damp cloth removes dust and fingerprints. If your model has a touchscreen or buttons, use a cloth lightly dampened with water—never spray liquid directly on the device.
This step is easy to skip, but it makes a big difference. A clean machine looks better and runs more efficiently.
Step 7: Reinstall the Filter and Reassemble
Once everything is dry and clean, it’s time to put it all back together. Make sure the filter is seated properly—no gaps or bends. Reattach the cover securely.
Double-check that all parts are in the right order. If you took a photo earlier, now’s the time to reference it.
Plug the purifier back in and turn it on. Listen for unusual noises. If it sounds off, turn it off immediately and recheck the installation.
Run it on a low setting for a few minutes to make sure everything’s working. You should notice improved airflow and quieter operation.
Pro Tips & Common Mistakes to Avoid
Even with the best intentions, it’s easy to make small mistakes. Here’s what I’ve learned from my own trial and error—and from talking to HVAC experts.
Pro Tip: Set a cleaning reminder on your phone. I use a monthly calendar alert: “Check air purifier filter.” It’s simple, but it works. Consistency is key when it comes to how to clean air purifier filter at home in 2026.
Warning: Don’t clean your filter too often. Over-cleaning—especially washing a pre-filter too frequently—can wear it out faster. Stick to the manufacturer’s recommendations.
Common Mistake: Assuming all filters are washable. I’ve seen people ruin expensive HEPA filters by rinsing them. Always check the label or manual first.
Pro Tip: If you have pets, consider cleaning the pre-filter every 2–3 weeks. Pet hair clogs filters fast. I clean mine every other week during shedding season—it’s a game-changer.
Warning: Never use bleach or strong cleaners. They can degrade filter materials and leave harmful residues. Stick to mild soap and water.
Pro Tip: Keep a spare pre-filter if possible. That way, you can swap them out while one dries. Some brands sell affordable replacements.
One last thing: if your filter looks torn, brittle, or heavily discolored—even after cleaning—it’s time to replace it. No amount of cleaning will restore a damaged filter. Your purifier deserves the best.
FAQs About How to Clean Air Purifier Filter at Home in 2026
Got questions? You’re not alone. Here are the most common ones I hear—and my honest answers.
Q: How often should I clean my air purifier filter?
A: It depends. For pre-filters, every 2–4 weeks is ideal. HEPA filters should be vacuumed every 1–2 months. But if you have pets, allergies, or live in a dusty area, you might need to clean more often. Listen to your purifier—if it sounds louder or the air feels stuffier, it’s time.
Q: Can I wash a HEPA filter?
A: Generally, no. Most HEPA filters are not designed to get wet. Water can damage the fibers and reduce efficiency. Instead, gently vacuum the surface. If your manual says it’s washable, follow those instructions carefully.
Q: What if my filter smells bad?
A: A musty or sour smell usually means mold or trapped moisture. If the filter is washable, clean it thoroughly and let it dry completely. If it’s not washable, it’s likely time to replace it. Also, check the purifier’s interior for mold—clean it with a damp cloth.
Q: Can I clean my air purifier filter with compressed air?
A: It’s not recommended. Compressed air can push dust deeper into the filter or damage delicate fibers. Vacuuming is safer and just as effective for surface cleaning.
Q: Do I need to clean the carbon filter?
A: Carbon filters aren’t washable and can’t be vacuumed effectively. They absorb odors over time and eventually saturate. Most need replacement every 3–6 months. You can’t clean them—only replace them.
Q: Will cleaning the filter improve air quality?
A: Absolutely. A clean filter captures more pollutants and runs more efficiently. You’ll notice better airflow, quieter operation, and fresher air—especially if you’ve been neglecting maintenance.
Q: Is it worth cleaning an old filter, or should I just replace it?
A: If the filter is torn, brittle, or more than a year old, replace it. Cleaning can help extend life, but it won’t restore a worn-out filter. Think of it like changing tires—sometimes maintenance isn’t enough.
Final Thoughts
Cleaning your air purifier filter might not be the most exciting chore, but it’s one of the most impactful. A few minutes of effort can lead to cleaner air, lower energy bills, and a longer-lasting appliance. And in 2026, when we’re all more aware of indoor air quality, that matters.
Remember, knowing how to clean air purifier filter at home in 2026 isn’t just about following steps—it’s about building a habit. Set a reminder, stay consistent, and don’t skip the basics. Your lungs (and your purifier) will thank you.
So grab that toothbrush, unplug your machine, and give your filter the attention it deserves. Fresh air is just a clean filter away.
“`