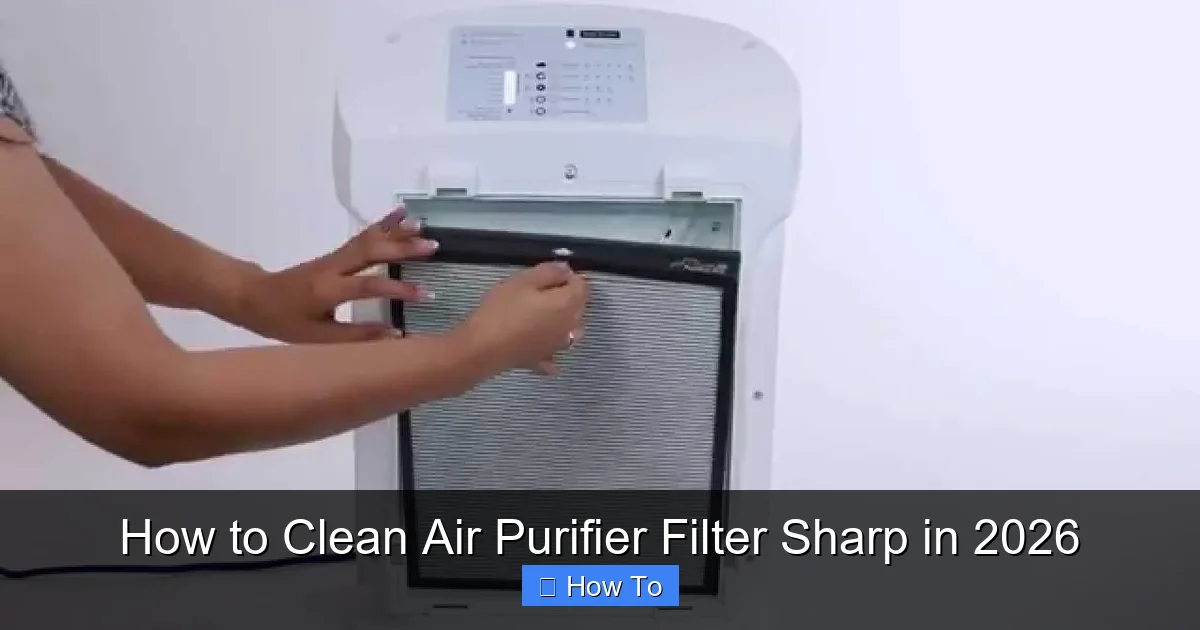
Featured image for how to clean air purifier filter sharp
Image source: i.ytimg.com
Cleaning your Sharp air purifier filter regularly is essential to maintain optimal performance and extend its lifespan. Follow a simple process: turn off the unit, remove the filter, gently vacuum or rinse (if washable), and let it dry completely before reinstalling. Never use harsh chemicals or submerge non-washable filters—Sharp models often feature specific care guidelines, so always check your manual for 2026 compatibility and safety tips.
“`html
How to Clean Air Purifier Filter Sharp in 2026
Key Takeaways
- Turn off and unplug the air purifier before cleaning for safety.
- Remove the filter carefully to avoid damaging sensitive components.
- Vacuum loose debris first to extend filter lifespan and efficiency.
- Use mild soap and water for deep cleaning; avoid harsh chemicals.
- Air-dry completely before reinstalling to prevent mold growth.
- Clean every 3–6 months to maintain optimal air quality performance.
- Replace if damaged—cleaning won’t fix tears or heavy wear.
Why This Matters / Understanding the Problem
Let’s be honest: we don’t think about our air purifiers until they start sounding like a jet engine or, worse, stop working altogether. I learned this the hard way last winter when my Sharp air purifier started blowing musty air instead of cleaning it. Turns out, the filter was clogged with dust, pet hair, and who-knows-what from my cat’s latest shedding phase.
Dirty filters don’t just reduce performance—they can actually recirculate pollutants, making the air in your home worse than before. That’s why learning how to clean air purifier filter Sharp in 2026 isn’t just a maintenance tip—it’s a health necessity.
Sharp’s air purifiers (like the FP-J80E-W or KC-G50-W) use advanced filtration systems, including HEPA filters, pre-filters, and sometimes humidifying filters. While HEPA filters aren’t meant to be cleaned and should be replaced, the pre-filters and some humidifying filters can and should be cleaned regularly. Doing this properly keeps your unit running efficiently, saves you money on replacements, and ensures clean air year-round.
And here’s the good news: cleaning your Sharp air purifier filter isn’t rocket science. With the right tools and a little attention, you can do it in under 20 minutes. Let’s walk through the process step by step—just like I do every 4 weeks in my own home.
What You Need
Before diving in, gather everything so you don’t have to run back and forth mid-clean. Trust me, nothing kills motivation like realizing you forgot the microfiber cloth.
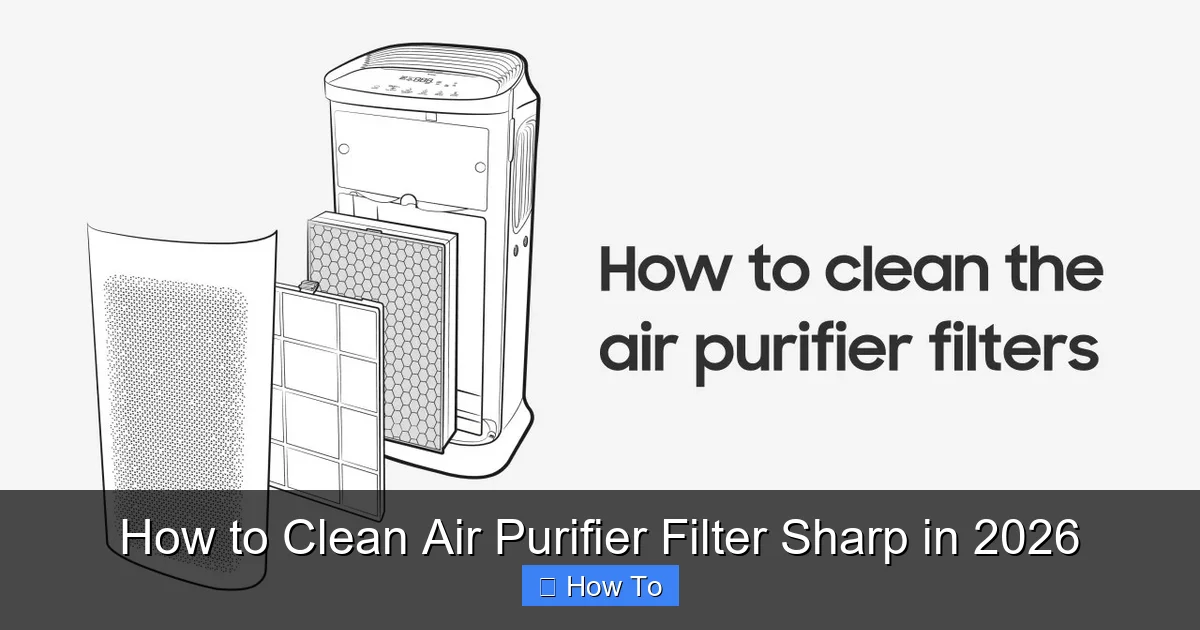
Visual guide about how to clean air purifier filter sharp
Image source: i.ytimg.com
- Soft microfiber cloth – for wiping down the exterior and filter housing
- Vacuum with a brush attachment – essential for removing dust from pre-filters
- Soft-bristled brush – a clean toothbrush or small paintbrush works great
- Mild dish soap – avoid harsh chemicals
- Lukewarm water – never hot, never cold straight from the tap
- Clean towel or drying rack – for air-drying filters
- Compressed air (optional) – great for stubborn dust in tight crevices
- Replacement HEPA filter (if needed) – check your model’s manual to confirm if it’s time
Pro tip: Keep a small cleaning kit near your purifier. I store mine in a plastic bin with my vacuum attachment and a spare toothbrush. It makes the whole process feel less like a chore and more like a quick refresh.
Now, before we begin: always unplug your Sharp air purifier. Safety first. No one wants a surprise zap while handling filters.
Step-by-Step Guide to How to Clean Air Purifier Filter Sharp in 2026
Step 1: Turn Off and Unplug the Unit
Yes, this seems obvious, but I’ve seen people skip it. Don’t be that person. Unplugging ensures you won’t accidentally turn it on while cleaning—or worse, damage the internal electronics.
Also, let the purifier sit for 10–15 minutes after unplugging. This allows any residual dust to settle, making cleanup easier and safer.
Pro Insight: I once forgot to unplug and accidentally hit the power button while wiping the back. The fan kicked on and sent a cloud of dust into my face. Not fun. Now, I double-check the plug every time.
Step 2: Open the Filter Compartment
Most Sharp models (like the FP series) have a front or side panel that slides or clicks open. Look for a small tab or button—usually near the bottom or side.
On humidifying models (KC-G50-W, for example), you’ll also need to remove the water tank and humidifying filter. Set them aside carefully.
Gently pull the panel open. Don’t force it. If it doesn’t budge, double-check the manual—some models require a slight twist or press.
This is where you’ll see the different filters stacked inside. From front to back (or top to bottom), you’ll typically find:
- Pre-filter – the first line of defense, catches large particles
- HEPA filter – removes fine particles like pollen, mold, and pet dander
- Activated carbon filter – reduces odors and VOCs (optional on some models)
- Humidifying filter (on KC models) – wicks water for humidification
Knowing which filter is which is key to how to clean air purifier filter Sharp in 2026—because not all filters are created equal.
Step 3: Remove the Pre-Filter for Cleaning
The pre-filter is usually the first one you see. It’s a mesh or foam screen that catches hair, lint, and big dust bunnies. This is the one you can and should clean regularly—every 2–4 weeks depending on your environment.
Grab the edges and pull it out gently. It should come out with no resistance.
Now, here’s what I do:
- Use the vacuum’s brush attachment to suck up loose dust from both sides.
- If it’s really grimy (think: pet hair stuck like glue), use the soft-bristled brush to dislodge stubborn debris.
- For deep cleaning: rinse under lukewarm water. Add a drop of mild dish soap if needed.
- Gently scrub with your fingers—don’t use a sponge or scrubber, which can tear the mesh.
- Rinse thoroughly until the water runs clear.
Never use hot water—it can warp or shrink the foam or mesh. And never wring it out. Just let it air dry completely before reinstalling.
Warning: If the pre-filter is torn, cracked, or has holes, replace it. A damaged pre-filter lets dust bypass the HEPA filter, reducing efficiency and shortening the life of more expensive filters.
Step 4: Handle the HEPA Filter with Care
This is the big one. The HEPA filter is the workhorse of your Sharp purifier. It captures particles as small as 0.3 microns—think pollen, smoke, and even some viruses.
Important: HEPA filters cannot be washed or cleaned. Water will damage the delicate fibers, and vacuuming can tear them.
So what do you do?
- Remove the HEPA filter carefully. Don’t shake it—this releases trapped particles into the air.
- Inspect it closely. Look for discoloration, tears, or excessive dust buildup.
- If it’s just dusty, use the vacuum’s brush attachment to gently clean the surface. Only vacuum the surface—don’t press hard.
- If it’s dark gray or black, or you see visible damage, it’s time to replace it.
Most Sharp HEPA filters last 6–12 months, depending on usage and air quality. I live with two cats and a wood-burning stove, so I replace mine every 8 months. In a clean apartment? You might stretch it to 12.
Check your model’s manual for the exact replacement schedule. Some newer Sharp models have indicator lights that tell you when it’s time.
Step 5: Clean or Replace the Carbon Filter (If Applicable)
Some Sharp models include an activated carbon filter behind the HEPA filter. It’s usually black and looks like a thin mat. This filter absorbs odors, smoke, and volatile organic compounds (VOCs).
Like the HEPA filter, carbon filters cannot be cleaned. They lose effectiveness over time as they “fill up” with absorbed particles.
So what can you do?
- Vacuum the surface gently to remove loose dust.
- Replace it every 3–6 months, depending on usage. If you cook a lot, have pets, or live in a polluted area, replace it more often.
- Don’t try to “reactivate” it by baking it in the oven—it won’t work and could release trapped pollutants.
I keep a calendar reminder to check mine every 3 months. It’s easy to forget, but once you notice lingering cooking smells or musty odors, it’s probably overdue.
Step 6: Clean the Humidifying Filter (For KC Models)
If you have a Sharp KC model (like the KC-G50-W or KC-850), you’ll have a humidifying filter—a white, sponge-like wick that draws water into the humidification chamber.
This filter is meant to be cleaned regularly. Hard water deposits, mold, and algae can build up fast, especially if you use tap water.
Here’s my method:
- Remove the humidifying filter from the water tray.
- Rinse it under lukewarm water. Gently squeeze to remove loose debris.
- Soak it in a mix of 1 part white vinegar to 3 parts water for 30 minutes. This dissolves mineral deposits and kills mold spores.
- Rinse thoroughly until the vinegar smell is gone.
- Air dry completely—never install a damp humidifying filter. Moisture can lead to mold growth inside the unit.
Replace the humidifying filter every 6–12 months. If it starts to smell bad, crumble, or turn yellow, replace it immediately.
And a quick tip: always use distilled or demineralized water in your humidifier. It prevents mineral buildup and keeps the filter cleaner for longer.
Step 7: Wipe Down the Interior and Exterior
While the filters are drying, take a moment to clean the inside and outside of the purifier.
- Use a dry microfiber cloth to wipe down the fan blades and interior housing. Avoid getting water near the motor or electronics.
- If there’s dust in tight spots, use compressed air or a dry brush.
- Wipe the exterior with a slightly damp (not wet) microfiber cloth. A drop of mild soap is okay, but wipe dry immediately.
- Clean the air intake and outlet grilles. Dust here can block airflow and reduce efficiency.
I like to do this every time I clean the filters. It keeps the whole unit looking and working like new.
Step 8: Reassemble and Restart
Once all filters are completely dry, it’s time to put everything back.
- Start with the humidifying filter (if applicable), then the carbon filter, then the HEPA filter, and finally the pre-filter.
- Make sure each filter is seated properly and clicks or slides into place.
- Reinsert the water tank (on humidifying models) and fill it with clean water.
- Close the front panel securely.
- Plug the unit back in.
Turn it on and listen. It should run smoothly and quietly. If it’s noisy or smells odd, unplug it and double-check that all filters are properly installed and dry.
Many Sharp models have a “filter reset” button or app notification. Use it to reset the filter timer so you know when the next cleaning is due.
Pro Tips & Common Mistakes to Avoid
After years of cleaning my own Sharp air purifier, I’ve picked up a few tricks—and made a few mistakes. Here’s what I wish I knew earlier.
Pro Tip #1: Set a recurring reminder. I use my phone’s calendar to ping me every 4 weeks for pre-filter cleaning and every 6 months for deep maintenance. It’s easy to forget, but consistency makes all the difference.
Pro Tip #2: Label your replacement filters. I write the installation date with a permanent marker on the side of each HEPA and carbon filter. It helps me track how long they last and plan replacements.
Pro Tip #3: Use a filter cover. Some Sharp models come with a removable pre-filter cover. If yours doesn’t, consider a third-party mesh cover. It catches hair and lint before they reach the pre-filter, cutting cleaning time in half.
Common Mistake #1: Rushing the drying process. Never reinstall a damp filter. Mold grows fast, and a moldy humidifying filter can spread spores into your home. I learned this after a humid summer when my KC-G50-W started smelling like a swamp.
Common Mistake #2: Using harsh cleaners. Bleach, ammonia, or strong detergents can damage filter materials and leave harmful residues. Stick to mild soap and water—or vinegar for mineral buildup.
Common Mistake #3: Ignoring the manual. Every Sharp model is slightly different. The FP-J80E-W has a different filter layout than the KC-850. Always check your manual for model-specific instructions. It’s free online if you’ve lost the paper copy.
Bonus Insight: If you have allergies or asthma, clean your filters in a well-ventilated area or wear a mask. Dust and mold spores can trigger symptoms, especially when disturbed.
FAQs About How to Clean Air Purifier Filter Sharp in 2026
Can I wash the HEPA filter in my Sharp air purifier?
Nope. The HEPA filter is made of delicate fibers that break down when wet. Washing it will ruin it. Instead, gently vacuum the surface to remove loose dust. If it’s dark or damaged, replace it. Cleaning the pre-filter regularly helps extend the life of the HEPA filter, which is a big part of how to clean air purifier filter Sharp in 2026 the right way.
How often should I clean the pre-filter?
Every 2–4 weeks, depending on your environment. If you have pets, live in a dusty area, or use the purifier 24/7, clean it every 2 weeks. In a clean, pet-free home, every 4 weeks is fine. I set a reminder for every 28 days—close enough.
My Sharp purifier smells musty after cleaning. What’s wrong?
That usually means a damp humidifying filter or mold inside the unit. Make sure all filters are 100% dry before reinstalling. If the smell persists, run the purifier on high for 1–2 hours with the windows open to air it out. If it still smells, the humidifying filter may be moldy and need replacing.
Can I use compressed air on the HEPA filter?
Only if you’re very gentle. Use low pressure and hold the can at least 12 inches away. Never blast it directly at the filter. Compressed air is better for cleaning the fan blades and housing, not the HEPA itself.
Do I need to clean the humidifying filter if I use distilled water?
Yes, but less often. Distilled water reduces mineral buildup, but mold and algae can still grow. Clean the humidifying filter every 2–3 months, even with distilled water. It’s a small step that prevents big problems.
How do I know when to replace the HEPA filter?
Signs include reduced airflow, louder operation, and persistent odors. Most Sharp models have a filter indicator light. If it’s red or blinking, it’s time. Also, if the filter is dark gray or black, or you see tears, replace it. Don’t wait.
Can I clean my Sharp air purifier filter with a washing machine?
Absolutely not. No part of your Sharp air purifier filter should go in a washing machine. The agitation and heat will destroy the materials. Stick to hand cleaning with water, vacuuming, and gentle brushing.
Final Thoughts
Learning how to clean air purifier filter Sharp in 2026 isn’t just about keeping your machine running—it’s about breathing cleaner, healthier air. A well-maintained purifier removes allergens, odors, and pollutants, making your home a safer space, especially during allergy season or wildfire smoke events.
It’s not about perfection. It’s about consistency. Even if you only clean the pre-filter every month and replace the HEPA once a year, you’re doing more than most people. And that makes a real difference.
So grab your microfiber cloth, unplug your unit, and give it a refresh. Your lungs (and your cat) will thank you. And if you’re ever unsure, just pull up this guide—or check your manual. You’ve got this.
One last thing: share this with someone who’s struggling with stale air or a noisy purifier. A little knowledge goes a long way. After all, clean air shouldn’t be a luxury—it should be a habit.
“`