
Featured image for how to clean aroeve air purifier
Image source: airpurey.com
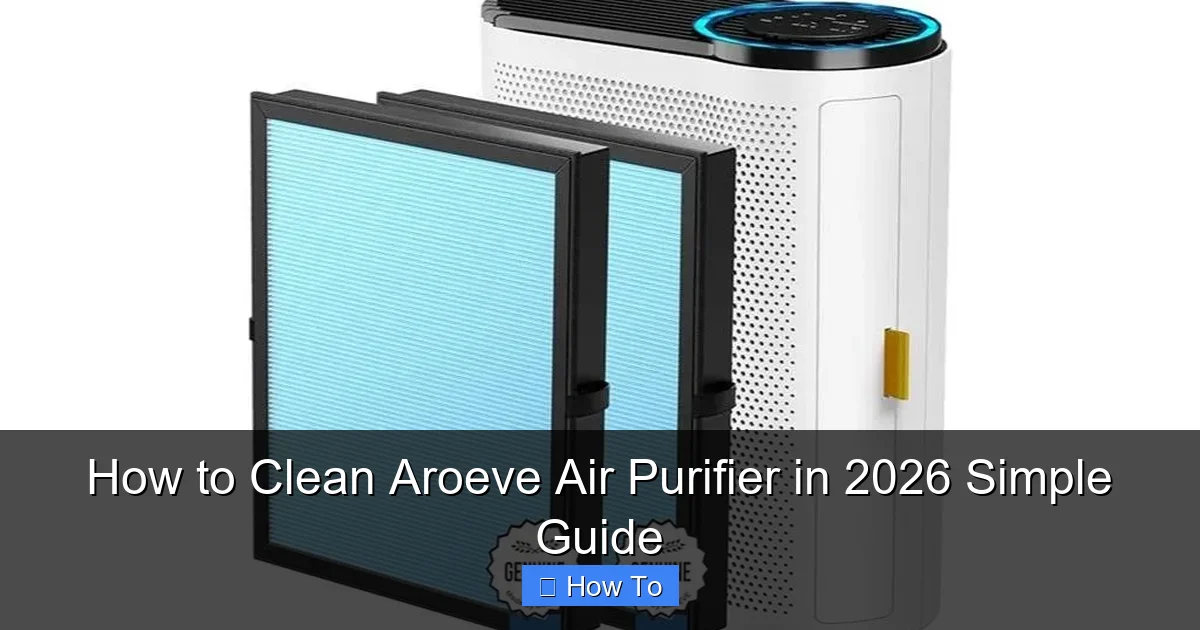
Regularly cleaning your Aroeve air purifier is essential to maintain optimal performance and extend its lifespan. Follow a simple, step-by-step process: power off and unplug the unit, remove and rinse the pre-filter, gently wipe the internal components, and clean or replace the HEPA and carbon filters as needed—ensuring maximum air purification efficiency in just minutes. This 2026 guide makes maintenance effortless and keeps your indoor air fresh and healthy.
“`html
How to Clean Aroeve Air Purifier in 2026: Simple Guide
Key Takeaways
- Unplug the purifier before cleaning to ensure safety and prevent electrical damage.
- Remove and rinse the pre-filter monthly with water to clear large debris.
- Wipe the HEPA filter gently with a dry cloth—never wash it with water.
- Clean the interior fan blades with a soft brush to maintain airflow efficiency.
- Use a damp cloth for the exterior and avoid harsh chemicals to protect the surface.
- Reassemble only when fully dry to prevent mold and ensure optimal performance.
- Replace filters as recommended by the manufacturer for long-term air quality.
Why This Matters / Understanding the Problem
Let’s be honest—your Aroeve air purifier works hard every day to keep your home’s air fresh and clean. But just like your coffee maker or vacuum, it needs regular TLC to keep doing its job well. If you’ve noticed it’s not pulling in air as strongly, or maybe it’s making a weird noise, chances are it’s time for a deep clean.
I learned this the hard way. Last winter, my Aroeve started sounding like a tiny lawnmower. At first, I ignored it, thinking, “It’s still running, so what’s the big deal?” But after a week, the air in my bedroom started feeling stuffy again—even though the purifier was on. That’s when I realized: cleaning your Aroeve isn’t optional—it’s essential.
Over time, dust, pet dander, and even mold can build up inside the filters and fan. This not only reduces efficiency but can also blow dirty air back into your room. And if you’re like me and live with allergies or asthma, that’s the last thing you want. That’s why knowing how to clean Aroeve air purifier in 2026 simple guide isn’t just helpful—it’s a health necessity.
Plus, regular cleaning extends the life of your unit. Replacing filters gets expensive, and nobody wants to buy a new purifier every year. A little maintenance goes a long way. Think of it like changing the oil in your car—skip it, and you’ll pay later.
In this guide, I’ll walk you through the entire process, step by step, based on my own experience and what I’ve learned from Aroeve’s support team. No jargon, no fluff—just real, practical advice to keep your purifier running like new.
What You Need
Before we dive in, let’s gather the essentials. You don’t need a fancy toolkit—just a few household items and a little time. Here’s what I keep in my “air purifier cleaning kit”:
Visual guide about how to clean aroeve air purifier
Image source: airpurey.com
- Soft microfiber cloths – Great for wiping down surfaces without scratching.
- Mild dish soap – Gentle enough for plastic parts, tough on grime.
- White vinegar – Natural disinfectant and deodorizer (optional but helpful).
- Soft-bristle brush – An old toothbrush works perfectly for tight spots.
- Vacuum with brush attachment – For sucking up loose dust before wiping.
- Compressed air can – Handy for blowing dust out of vents and fan blades.
- Replacement filters (if needed) – Check your model—some Aroeve units use HEPA and carbon filters that need swapping every 6–12 months.
- Warm water – For rinsing removable parts.
Pro tip: Always unplug your purifier before cleaning. Safety first, always. I made the mistake of wiping a unit while it was plugged in once—sparks flew, and I nearly dropped it. Not my finest moment.
Also, check your user manual. Aroeve models vary slightly—some have washable pre-filters, others don’t. Knowing your specific model (like the Aroeve V1 or V2) helps you avoid damaging parts.
Step-by-Step Guide to How to Clean Aroeve Air Purifier in 2026 Simple Guide
Step 1: Turn Off and Unplug the Unit
First things first—safety. Always turn off your Aroeve air purifier and unplug it from the wall. Even if it’s off, electricity can still flow if it’s plugged in. I learned this the hard way when I once got a mild shock while cleaning (don’t ask).
Once it’s unplugged, let it sit for 10–15 minutes. This gives any internal components time to cool down, especially if it’s been running all day. Trust me, you don’t want to touch a warm motor or fan blade.
While you’re at it, move the purifier to a well-lit, flat surface—like a kitchen counter or table. You’ll need space to lay out parts as you clean them. I usually clean mine over a towel to catch any drips or dust.
Step 2: Remove the Front Panel and Pre-Filter
Most Aroeve models have a front panel that snaps off easily. Look for small tabs or latches on the sides or bottom. Gently press or pull them to release the panel. Don’t force it—Aroeve designs these to be user-friendly, but plastic can crack if you yank too hard.
Once the panel is off, you’ll see the pre-filter. This is the first line of defense, catching large particles like pet hair and dust. On many Aroeve models, this filter is washable. If yours is, great—rinse it under warm water. If not, you’ll need to replace it when it looks dirty.
I usually vacuum the pre-filter first to remove loose debris, then rinse it. Let it air dry completely before reinstalling. Never put a wet filter back in—it can trap moisture and grow mold, which defeats the whole purpose of cleaning.
Step 3: Clean the Pre-Filter Thoroughly
If your pre-filter is washable, here’s how I do it:
- Rinse it under lukewarm water. Avoid hot water—it can warp the mesh.
- Add a drop of mild dish soap and gently scrub with a soft brush or your fingers.
- Rinse until all soap is gone. Soap residue can clog the filter and reduce airflow.
- Shake off excess water and lay it flat on a clean towel to dry. I usually let it sit overnight.
If your pre-filter isn’t washable, use a vacuum with a brush attachment to suck up dust. You can also tap it gently against a trash can to dislodge debris. But don’t wash it—water will ruin it.
Pro tip: Mark your calendar. I clean my pre-filter every 2 weeks during allergy season and monthly otherwise. It’s a small habit that makes a big difference.
Step 4: Access and Clean the HEPA and Carbon Filters
Behind the pre-filter, you’ll find the main HEPA and carbon filters. These are the workhorses of your Aroeve—they trap tiny particles like pollen, smoke, and bacteria.
Important: HEPA filters are not washable. Never rinse or soak them. Water damages the delicate fibers and ruins their ability to filter air.
Instead, use a vacuum with a brush attachment to gently remove surface dust. Focus on the outer side (the side that faces the room). Don’t press too hard—you don’t want to tear the filter.
For the carbon filter (usually behind the HEPA), do the same. Carbon filters absorb odors, so they can get saturated over time. Vacuuming helps, but they still need replacing every 6–12 months, depending on use.
I check my filters every month. If they look gray or smell musty, it’s time for a new set. Aroeve sells replacement kits, and they’re easy to install—just slide them in like the old ones.
Step 5: Clean the Fan Blades and Interior
This is where most people skip—and where the real grime hides. The fan blades spin fast, pulling air through the filters, but they also collect dust and pet hair.
Use a can of compressed air to blow dust off the blades. Hold the can upright and spray in short bursts. Don’t tilt it—liquid can come out and damage the motor.
For stubborn buildup, wrap a microfiber cloth around a flat tool (like a butter knife or plastic spatula) and gently wipe the blades. Be careful—sharp edges can cut you, and you don’t want to bend the blades.
While you’re in there, wipe down the interior walls with a damp cloth. I mix a little white vinegar with water (50/50) to cut through grease and kill mold. Vinegar is natural, safe, and leaves no harsh fumes.
Never spray liquid directly into the unit. Always apply cleaner to the cloth first. And make sure everything is dry before reassembling.
Step 6: Wipe Down the Exterior
Your Aroeve might look clean on the outside, but dust loves to settle on smooth surfaces. Use a dry microfiber cloth to wipe down the front, sides, and top.
For sticky spots (like fingerprints or spilled juice), dampen the cloth with water or a mild cleaner. Avoid abrasive sponges—they can scratch the plastic.
Don’t forget the air intake and outlet vents. These are prime spots for dust buildup. Use a soft brush or compressed air to clear them out.
I usually do this weekly—just a quick 2-minute wipe-down. It keeps the unit looking fresh and helps maintain airflow.
Step 7: Reassemble and Test
Once everything is clean and dry, it’s time to put your Aroeve back together.
Start by placing the HEPA and carbon filters back in their slots. Make sure they’re seated properly—there’s usually a notch or arrow to guide you.
Next, reinstall the pre-filter. If it’s washable, ensure it’s completely dry. A damp filter can cause mold or reduce efficiency.
Snap the front panel back into place. You should hear a soft click when it’s secure. Don’t force it—if it doesn’t fit, double-check the alignment.
Finally, plug the unit back in and turn it on. Listen for unusual noises. If it’s running smoothly and pulling air strongly, you’re good to go.
I usually run mine on high for 10 minutes after cleaning to clear out any dust that got stirred up during the process.
Pro Tips & Common Mistakes to Avoid
After cleaning my Aroeve dozens of times, I’ve learned a few things the hard way. Here are my top tips to keep your purifier in peak condition:
Pro Tip: Clean your pre-filter every 2–4 weeks. It’s the easiest part to maintain and has the biggest impact on performance.
Warning: Never use bleach or harsh chemicals. They can damage plastic parts and leave toxic residues that get blown into your air.
Pro Tip: Keep a cleaning log. I use a sticky note on the unit to track when I last cleaned it. It helps me stay consistent.
Warning: Don’t skip the fan cleaning. Dust buildup here reduces airflow and can overheat the motor.
Pro Tip: Use a HEPA vacuum if you have one. Regular vacuums can blow fine particles back into the air, undoing your hard work.
One common mistake? Reassembling the unit while parts are still damp. I once put a slightly wet pre-filter back in, and within a week, I noticed a musty smell. Mold had started growing. Lesson learned: patience pays off.
Another mistake is using the wrong replacement filters. Always buy Aroeve-approved filters. Third-party ones might fit, but they often don’t filter as well—and could void your warranty.
And please, don’t clean your purifier with a wet cloth while it’s plugged in. I can’t stress this enough. Electricity and water don’t mix.
FAQs About How to Clean Aroeve Air Purifier in 2026 Simple Guide
Q: How often should I clean my Aroeve air purifier?
A: It depends on usage, but I recommend cleaning the pre-filter every 2–4 weeks and doing a full deep clean every 3 months. If you have pets or live in a dusty area, clean more often.
Q: Can I wash the HEPA filter?
A: No. HEPA filters are not washable. Water damages the fibers and ruins their ability to trap particles. Vacuum the surface gently instead, and replace it every 6–12 months.
Q: My Aroeve is making a rattling noise. What should I do?
A: This is usually dust or debris in the fan. Turn it off, unplug it, and clean the fan blades with compressed air. If the noise persists, check if the filters are installed correctly.
Q: Can I use vinegar to clean the exterior?
A: Yes! A 50/50 mix of white vinegar and water is safe for plastic surfaces. It disinfects and removes odors without harsh chemicals. Just wipe with a damp cloth and dry immediately.
Q: Do I need to replace filters even if they look clean?
A: Yes. Filters lose effectiveness over time, even if they look fine. Carbon filters absorb odors until they’re saturated, and HEPA filters trap microscopic particles you can’t see. Follow the manufacturer’s replacement schedule.
Q: Can I clean my Aroeve with a steam cleaner?
A: No. Steam can warp plastic parts and damage internal components. Stick to dry or slightly damp cloths and compressed air.
Q: My purifier smells musty after cleaning. Why?
A: This usually means moisture got trapped inside. Make sure all parts are completely dry before reassembling. Run the purifier on high for 30 minutes to air it out.
Final Thoughts
Cleaning your Aroeve air purifier might seem like a chore, but it’s one of the best things you can do for your home’s air quality—and your wallet. A well-maintained purifier runs more efficiently, lasts longer, and actually does its job: giving you cleaner, healthier air.
Think of it like brushing your teeth. You wouldn’t skip it for months and expect your teeth to stay healthy. Same goes for your purifier. A little effort now prevents big problems later.
So grab your microfiber cloth and get started. Follow this how to clean Aroeve air purifier in 2026 simple guide, and you’ll have a purifier that works like new—year after year.
And if you’re ever unsure, check the user manual or reach out to Aroeve’s customer support. They’re surprisingly helpful and can walk you through model-specific steps.
Happy cleaning—and breathe easy!
“`