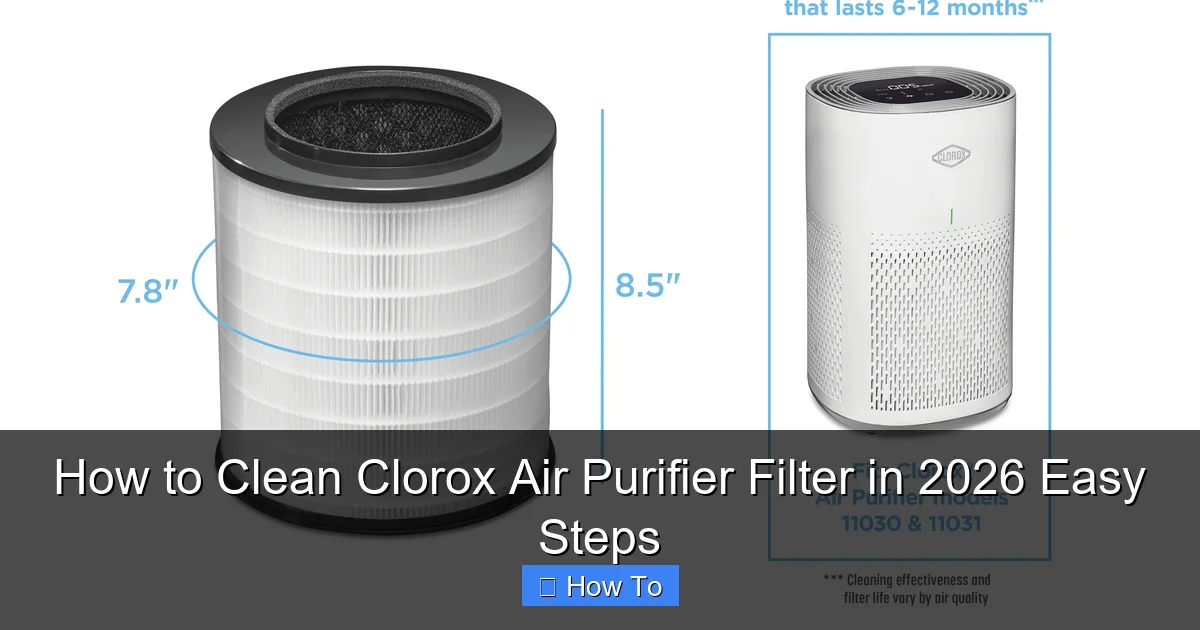
Featured image for how to clean clorox air purifier filter
Image source: i5.walmartimages.com
Keeping your Clorox air purifier filter clean is essential for optimal performance and long-term efficiency. Follow these simple steps in 2026: turn off and unplug the unit, remove the filter, gently vacuum or rinse it (if washable), and let it dry completely before reinstalling. Regular cleaning not only improves air quality but also extends the life of your purifier—ensuring cleaner, fresher air with minimal effort.
“`html
How to Clean Clorox Air Purifier Filter in 2026 Easy Steps
Key Takeaways
- Turn off and unplug the purifier before cleaning for safety.
- Remove the filter gently to avoid damaging its structure.
- Vacuum the filter surface to remove loose dust and debris.
- Rinse with cool water only if the filter is washable.
- Air-dry completely before reinstalling to prevent mold growth.
- Check manufacturer guidelines to confirm cleaning compatibility.
- Replace filters as recommended even if cleaned regularly.
Why This Matters / Understanding the Problem
Let’s be real—your Clorox air purifier has been quietly working overtime since you brought it home. It’s filtering out dust, pet dander, pollen, and even that mysterious “what-is-that-smell” from last week’s cooking experiment. But here’s the thing: just like your favorite coffee maker or vacuum, it needs a little TLC to keep doing its job well.
Over time, the filter inside your Clorox air purifier gets clogged with all the gunk it’s been trapping. If you don’t clean or replace it regularly, it can’t pull air through efficiently. That means less clean air for you—and more strain on the motor. Worse yet, a dirty filter can start circulating stale or musty air instead of freshening your space.
I learned this the hard way. Last winter, I noticed my allergies were worse even though my purifier was running nonstop. Turns out, the filter was packed with dust and hadn’t been cleaned in over six months. Once I gave it a proper refresh using the right how to clean Clorox air purifier filter in 2026 easy steps, the difference was night and day. My nose stopped itching, and the room actually smelled… clean.
Cleaning your Clorox air purifier filter isn’t just about maintenance—it’s about breathing easier, saving energy, and extending the life of your device. And the good news? It’s way simpler than you think. Whether you’ve got the Clorox True HEPA Air Purifier or another model, these steps will keep your unit running like new.
What You Need
Before we dive in, let’s gather everything so you’re not scrambling mid-clean. Most of these items are probably already in your cleaning caddy—or under the sink.
- Soft-bristle brush (an old toothbrush works great!)
- Microfiber cloth (lint-free is best)
- Mild dish soap (nothing harsh or fragranced)
- Warm water (not hot—hot water can warp filters)
- Vacuum cleaner with brush attachment (optional but helpful)
- Replacement filter (if yours is damaged or overdue—more on that later)
- Clean, dry towel
Pro tip: Check your user manual first! Some Clorox models have washable pre-filters, while others use non-washable HEPA filters that need replacing. Knowing your model saves you from accidentally ruining a $50 filter.
Step-by-Step Guide to How to Clean Clorox Air Purifier Filter in 2026 Easy Steps
Step 1: Turn Off and Unplug Your Purifier
Safety first, always. Before touching anything inside your Clorox air purifier, make sure it’s completely powered down and unplugged from the wall. I can’t tell you how many times I’ve forgotten this step and nearly gave myself a jolt (don’t be me!).
This also gives the unit time to cool down if it’s been running. Plus, unplugging eliminates any risk of accidental startup while you’re handling the internal components.
Step 2: Remove the Front Panel or Cover
Most Clorox air purifiers have a front grille or cover that snaps off easily. Gently press the release tabs (usually at the top or sides) and lift it away. If yours has screws, grab a Phillips-head screwdriver—but honestly, most newer models are tool-free.
Set the cover aside on a soft surface so it doesn’t scratch. While you’re at it, take a quick look at the inside of the cover. If it’s dusty, wipe it down with a dry microfiber cloth. That dust didn’t magically appear—it’s been bouncing around your room!
Step 3: Locate and Remove the Filter
Once the cover is off, you’ll see the filter sitting snugly in its housing. Depending on your model, you might have one main HEPA filter or a combo setup (like a pre-filter + HEPA). Look for labels like “Pre-Filter” or “HEPA H13”—these help identify what you’re dealing with.
Carefully lift the filter straight out. Avoid twisting or bending it, especially if it’s a rigid HEPA filter. If it feels stuck, double-check for clips or latches holding it in place. Never force it—gentle pressure usually does the trick.
Step 4: Vacuum Loose Debris (If Applicable)
If your Clorox purifier has a washable pre-filter (often the outermost layer), start by vacuuming both sides using the brush attachment. This removes large particles like pet hair, dust bunnies, and pollen without wetting the filter prematurely.
I like to do this over a trash can so the debris doesn’t settle back into my clean space. A 30-second pass with the vacuum can remove up to 70% of surface gunk—making the next steps way more effective.
Step 5: Wash the Washable Pre-Filter (Only If Recommended)
Now, here’s where things get model-specific. Only wash the pre-filter if your user manual says it’s washable. Most Clorox models include a reusable foam or mesh pre-filter designed for rinsing—but the main HEPA filter is almost always non-washable.
If yours is washable, rinse it under lukewarm water. Add a drop of mild dish soap if it’s really grimy, then gently scrub with your soft-bristle brush. Focus on the folds and corners where dust loves to hide.
Never soak a HEPA filter. Water damages the delicate fibers and ruins its ability to trap ultrafine particles. If you’re unsure, err on the side of caution and skip the water.
Step 6: Air-Dry Completely
This step is non-negotiable. After washing (or even just vacuuming), let the pre-filter dry completely before reinstalling. I usually lay it flat on a clean towel in a well-ventilated area—away from direct sunlight or heat sources, which can warp the material.
Rushing this step is a common mistake. Putting a damp filter back into your purifier can lead to mold growth, musty odors, or even electrical issues. Give it at least 4–6 hours, or overnight if possible.
Step 7: Wipe Down the Interior and Fan Blades
While your filter dries, take a moment to clean the inside of the purifier. Use a dry or slightly damp microfiber cloth to wipe the fan blades, housing, and any accessible surfaces. Built-up dust here can reduce airflow and make your unit work harder.
Avoid spraying cleaner directly into the unit. Instead, lightly dampen your cloth and wipe gently. And please—no compressed air! It can push dust deeper into the motor or damage sensitive parts.
Step 8: Reinstall the Filter and Cover
Once everything is bone-dry, slide the pre-filter back into place. Make sure it sits flat and secure—no gaps or wrinkles. Then reinstall the main HEPA filter (if removable) or any other components exactly as they were.
Finally, snap the front cover back on. Give it a gentle press around the edges to ensure it’s fully seated. A loose cover can cause rattling noises or reduce efficiency.
Step 9: Plug In and Test
Plug your Clorox air purifier back in and turn it on. Listen for smooth operation—no unusual noises or vibrations. Run it on low for 10–15 minutes to make sure air is flowing properly.
If everything sounds good, you’re done! Your purifier is now breathing easy—and so are you.
Pro Tips & Common Mistakes to Avoid
After cleaning dozens of air purifiers (mine and my friends’), I’ve picked up a few golden rules that make all the difference.
Pro Tip: Mark your calendar! Set a reminder every 2–3 months to check your filter. Pets, smokers, or high-pollen seasons may require more frequent cleaning. Consistency beats perfection every time.
Warning: Don’t use compressed air, bleach, or harsh chemicals. These can degrade filter materials and leave toxic residues. Stick to water, mild soap, and gentle brushing.
Common Mistake: Assuming all filters are washable. HEPA filters are precision-engineered—washing them voids warranties and destroys performance. Always check your manual.
Another thing I’ve learned? Don’t wait until your purifier smells funky or sounds labored. By then, the filter is likely beyond saving. Regular maintenance using the how to clean Clorox air purifier filter in 2026 easy steps keeps performance consistent and prevents costly replacements.
And if you’re ever unsure whether to clean or replace, ask yourself: Is the filter visibly torn? Does it smell musty even after cleaning? Has it been over 12 months since the last replacement? If yes to any of these, it’s time for a new one.
FAQs About How to Clean Clorox Air Purifier Filter in 2026 Easy Steps
Q: How often should I clean my Clorox air purifier filter?
A: For washable pre-filters, every 2–4 weeks is ideal—especially if you have pets or live in a dusty area. The main HEPA filter typically lasts 6–12 months, but check your manual for specifics. When in doubt, look inside: if it’s gray or clogged, it’s time.
Q: Can I vacuum my HEPA filter instead of replacing it?
A: Light vacuuming of the surface is okay for removing loose dust, but it won’t restore full efficiency. HEPA filters trap microscopic particles deep within their fibers—once saturated, they need replacing. Vacuuming buys you a little time, but don’t rely on it long-term.
Q: My filter got wet—can I still use it?
A: Only if it’s a washable pre-filter and it’s completely dry. Never reinstall a damp HEPA filter. Moisture promotes mold and bacteria growth, which your purifier will then blow into your room. When in doubt, replace it.
Q: Do I need special cleaning products?
A: Nope! Warm water and a drop of mild dish soap are all you need for washable parts. Avoid vinegar, alcohol, or disinfectants—they can leave residues or degrade materials over time.
Q: Will cleaning the filter improve my purifier’s performance?
A: Absolutely. A clean filter restores airflow, reduces noise, and helps the unit capture pollutants more effectively. You’ll notice better air quality within hours—and your electricity bill might even dip slightly thanks to improved efficiency.
Q: What if my Clorox model doesn’t have a removable filter?
A: Some compact or older models have sealed units. In that case, focus on vacuuming the exterior vents and replacing the entire unit when needed. Check Clorox’s website for compatible replacement filters or upgrade options.
Q: Is it worth buying a replacement filter, or should I just get a new purifier?
A: If your purifier is less than 3–5 years old and otherwise working well, replacing the filter is far more cost-effective. New HEPA filters for Clorox models typically cost $20–$50—way cheaper than a whole new unit.
Final Thoughts
Cleaning your Clorox air purifier filter doesn’t have to be a chore. With these how to clean Clorox air purifier filter in 2026 easy steps, you can keep your unit running smoothly in under 30 minutes—with tools you already own.
Remember: a clean filter means cleaner air, quieter operation, and a longer life for your purifier. Plus, you’ll sleep better knowing you’re breathing the freshest air possible. So grab that toothbrush, unplug your unit, and give it the refresh it deserves.
Your lungs (and your nose) will thank you.
“`