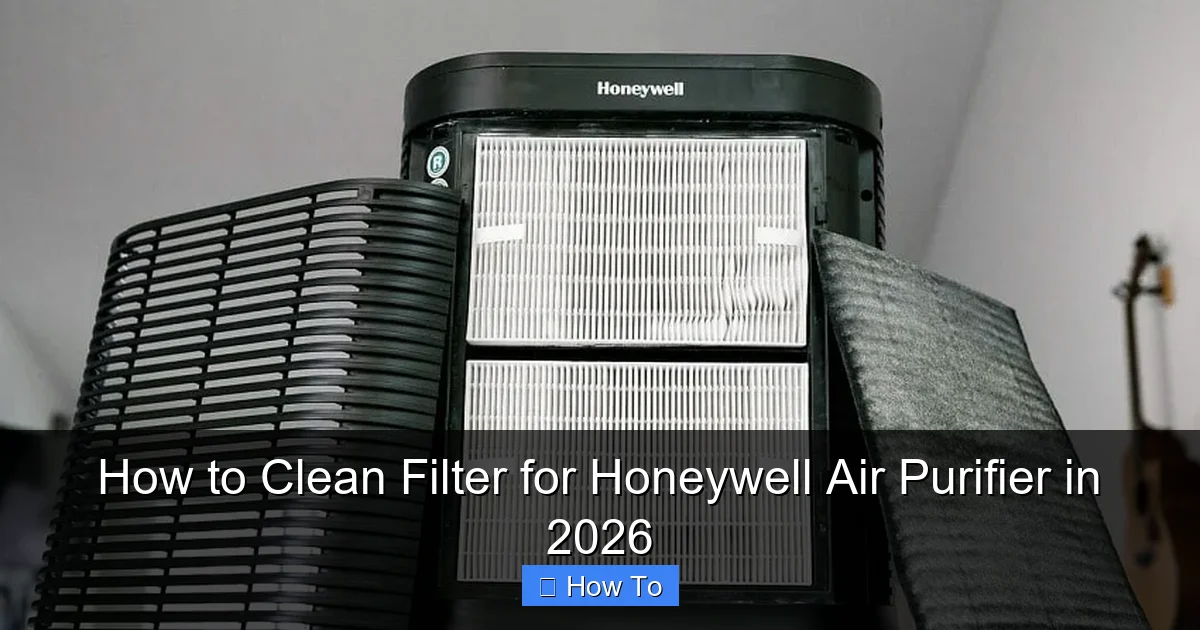
Featured image for how to clean filter for honeywell air purifier
Image source: houseandbeyond.org
Keeping your Honeywell air purifier running efficiently starts with regular filter maintenance—clean or replace filters every 3–6 months to ensure optimal air quality. In 2026, cleaning reusable filters is simple: remove the filter, vacuum debris, rinse gently with cool water, and let it dry completely before reinserting. Never use soap or submerge non-washable filters, and always refer to your model’s manual for specific care instructions to avoid damage.
“`html
How to Clean Filter for Honeywell Air Purifier in 2026
Key Takeaways
- Turn off and unplug the purifier before cleaning to ensure safety.
- Remove the filter carefully to avoid damaging the unit or filter.
- Vacuum loose debris first for a quick, effective pre-clean.
- Wash with mild soap if reusable, then dry thoroughly.
- Replace every 6–12 months depending on usage and air quality.
- Check indicator lights to track filter maintenance schedules.
- Never submerge non-washable filters—wipe gently with a dry cloth.
Why This Matters / Understanding the Problem
Let’s be real: air purifiers are like the unsung heroes of our homes. They quietly work to keep our air clean while we go about our lives. But if you’ve noticed your Honeywell air purifier isn’t performing like it used to—maybe the airflow is weaker, the room smells stale, or your allergies are acting up—it’s likely time to clean your filter.
Over time, dust, pet dander, pollen, and even cooking smoke clog up the filters. A dirty filter doesn’t just reduce efficiency—it can actually blow pollutants back into the air. And if you’re relying on your purifier for better sleep, allergy relief, or clean indoor air during wildfire season, a neglected filter defeats the whole purpose.
That’s why knowing how to clean filter for Honeywell air purifier in 2026 isn’t just helpful—it’s essential. Whether you own a Honeywell HPA300, HPA100, or the newer Smart Air Purifiers, regular maintenance keeps them running smoothly and extends their lifespan.
Now, before you panic and think you need special tools or a degree in engineering—relax. This is one of the easiest home maintenance tasks you’ll ever do. And the best part? You don’t have to replace the filter every time. Many models have washable pre-filters and HEPA filters that can be cleaned (or vacuumed) to restore performance.
Let’s walk through the process together, like I’m sitting across from you with a cup of coffee, sharing what I’ve learned from years of managing indoor air quality in my own home.
What You Need
You don’t need much to clean your Honeywell air purifier filter. Here’s a quick rundown of what you’ll need—most of which you probably already have lying around:
Visual guide about how to clean filter for honeywell air purifier
Image source: homeairwiki.com
- A vacuum cleaner with a soft brush attachment – This is your best friend for removing dust without damaging the filter.
- Mild dish soap or castile soap – For cleaning washable pre-filters. Avoid harsh detergents.
- Clean, lukewarm water – Never use hot water; it can warp or shrink the filter material.
- A clean, lint-free towel or paper towels – For drying.
- A well-ventilated area or outdoor space – Great for dusting off filters without making a mess.
- Soft-bristle brush (optional) – Like a clean toothbrush or makeup brush for stubborn grime.
- Replacement filters (on hand, not always needed) – Just in case yours is beyond cleaning.
Pro Tip: Always check your model number before cleaning. Some Honeywell purifiers have non-washable HEPA filters—only the pre-filter is cleanable. You can find the model number on the back or bottom of your unit.
Now, a quick note: not all filters are meant to be washed. The HEPA (High-Efficiency Particulate Air) filter in most Honeywell models is not washable. But the pre-filter—the first layer that catches large particles—is often removable and cleanable. We’ll cover both in the steps below.
Step-by-Step Guide to How to Clean Filter for Honeywell Air Purifier in 2026
Step 1: Turn Off and Unplug the Air Purifier
Before you do anything, power down your Honeywell air purifier and unplug it. This isn’t just a safety tip—it’s a must. You don’t want to risk damaging the motor or internal electronics while handling the filters.
I learned this the hard way when I once forgot to unplug my unit and accidentally pressed the power button while cleaning. The sudden airflow scared the heck out of me—and nearly sent a filter flying across the room. Not fun.
So, unplug it, let it sit for a minute, and give yourself peace of mind. Safety first, always.
Step 2: Remove the Front Cover and Access the Filters
Most Honeywell air purifiers have a front grille or cover that snaps or slides off. On models like the HPA100, HPA200, and HPA300, you’ll find a latch or button on the top or side.
Press it gently and pull the cover forward. Some models (like the newer Smart Air Purifiers) have a magnetic front panel—just lift it off.
Once the cover is off, you’ll see the pre-filter (usually a black or gray mesh screen) in front of the main HEPA filter. The pre-filter is what we’re focusing on for cleaning, but it’s good to inspect both.
Here’s a quick way to tell them apart: the pre-filter is thin, flexible, and has a coarse mesh. The HEPA filter is thicker, pleated, and looks like accordion paper. Never wash the HEPA filter—we’ll cover how to care for it in a bit.
Step 3: Remove the Pre-Filter for Cleaning
Grab the pre-filter by its frame or handle (if it has one) and gently pull it out. Some models have a small tab or label that says “Remove for Cleaning.”
If it’s stuck, don’t yank it. Wiggle it slightly from side to side. The last thing you want is to tear the mesh or bend the frame.
Once it’s out, take a good look at it. Is it covered in dust, pet hair, or greasy residue from cooking? That’s normal—especially if you live with pets or cook frequently. But it’s a clear sign it’s time to clean it.
Warning: If the pre-filter has visible tears, warping, or permanent stains, it’s time to replace it. A damaged pre-filter can’t trap particles effectively and may even damage the HEPA filter behind it.
Step 4: Vacuum the Pre-Filter (Dry Cleaning Method)
For light to moderate buildup, dry vacuuming is the safest and most effective method.
Attach the soft brush nozzle to your vacuum cleaner and gently run it over both sides of the pre-filter. Use slow, overlapping strokes—like you’re mopping the floor, not scrubbing a pan.
Focus on areas with visible dust or hair. Pay extra attention to the edges and corners, where debris tends to gather.
This method removes up to 80–90% of surface debris without risking damage from water. I use this weekly for maintenance, especially during pollen season.
After vacuuming, give the filter a quick tap against your hand or a trash can to dislodge any loose particles stuck in the mesh.
Step 5: Wash the Pre-Filter (For Heavy Buildup)
If the pre-filter is really dirty—think greasy from kitchen use or clogged with pet hair—it’s time for a deeper clean.
Here’s how:
- Fill a sink or basin with lukewarm water (not hot—hot water can melt the adhesive or warp the frame).
- Add a few drops of mild dish soap or castile soap. No bleach, no ammonia, no fabric softener.
- Submerge the pre-filter and let it soak for 5–10 minutes. Don’t scrub yet—just let the soap loosen the grime.
- Gently agitate the water with your fingers or use a soft-bristle brush to lightly scrub both sides. Avoid pressing too hard—you don’t want to tear the mesh.
- Rinse thoroughly under clean, lukewarm water until all soap residue is gone. Hold it up to the light—no bubbles means it’s clean.
Pro Tip: If you have hard water, rinse with distilled or filtered water to avoid mineral deposits on the mesh.
Step 6: Dry the Pre-Filter Completely
This step is non-negotiable. Never reinstall a damp pre-filter. Moisture can lead to mold, mildew, and even damage the motor if it seeps in.
After rinsing:
- Shake off excess water gently.
- Lay the filter flat on a clean towel, mesh side up.
- Pat the frame lightly with another towel to absorb moisture.
- Let it air-dry in a well-ventilated area for at least 4–6 hours. Overnight is even better.
I like to dry mine near a window (but out of direct sunlight) or near a fan. Avoid using a hairdryer or heater—the heat can warp the plastic frame or melt the mesh.
Step 7: Inspect and Clean the HEPA Filter (Vacuum Only)
Now, let’s talk about the HEPA filter. As I mentioned earlier, you should never wash a HEPA filter. Water damages the delicate pleated paper, reducing its ability to trap microscopic particles like mold spores, viruses, and fine dust.
But you can extend its life with gentle vacuuming:
- Use the soft brush attachment on your vacuum.
- Run it lightly over the inlet side (the side facing the pre-filter) in short, gentle strokes.
- Do the same on the outlet side (the side facing the fan).
- Don’t press hard—just let the suction do the work.
This removes surface dust and helps maintain airflow. I do this every 2–3 months, or whenever the pre-filter gets cleaned.
Warning: If the HEPA filter is visibly dirty, discolored, or smells musty, it’s time to replace it—usually every 6–12 months, depending on usage. Honeywell recommends replacement based on the “Filter Reset” indicator on newer models.
Step 8: Reinstall the Filters and Front Cover
Once the pre-filter is completely dry, it’s time to put everything back.
- Slide the pre-filter back into its slot, making sure it’s seated properly and facing the right way (the mesh should face outward).
- Push it in until it clicks or sits flush with the unit.
- Replace the HEPA filter (if you removed it for inspection).
- Snap or slide the front cover back into place. Make sure it’s secure—no loose edges or gaps.
Give the cover a gentle tug to confirm it’s locked in. You don’t want it falling off when the purifier is running.
Step 9: Reset the Filter Indicator (If Your Model Has One)
Many newer Honeywell air purifiers (like the HPA300, HPA5200, and Smart Air Purifiers) have a built-in filter life indicator.
After cleaning or replacing filters, you’ll need to reset the timer:
- Press and hold the “Filter Reset” or “Check Filter” button for 3–5 seconds.
- Wait for the light to turn off or reset (usually a green or blue light).
This tells the purifier to start tracking filter life from zero. It’s easy to forget, but skipping this step means your indicator won’t accurately reflect when it’s time for the next clean or replacement.
Step 10: Power On and Test
Plug your air purifier back in and turn it on. Set it to a low or medium fan speed first to make sure everything is working smoothly.
Listen for unusual noises—like rattling or grinding. If you hear anything odd, turn it off and double-check that the filters are properly seated.
After a few minutes, you should notice improved airflow and a fresher smell in the room. That’s your sign that how to clean filter for Honeywell air purifier in 2026 was a success!
Pro Tips & Common Mistakes to Avoid
Over the years, I’ve made a few mistakes—and learned a ton from them. Here are my top insider tips and pitfalls to avoid:
Pro Tip #1: Clean the pre-filter every 2–4 weeks if you have pets, allergies, or cook often. Otherwise, every 4–6 weeks is fine. Think of it like changing your furnace filter—regular maintenance pays off.
Pro Tip #2: Keep a log or set a phone reminder. I use my calendar to remind me every month. It’s easy to forget, but consistency keeps your air purifier running at peak performance.
Pro Tip #3: Use a dusting wand or microfiber cloth to wipe down the exterior and vents. Dust buildup on the outside can reduce intake efficiency.
Common Mistake #1: Washing the HEPA filter. I once tried to rinse mine—big mistake. It never worked the same again. Remember: HEPA = vacuum only.
Common Mistake #2: Reinstalling a damp pre-filter. I learned this when my purifier started smelling like mildew. Let it dry completely—no shortcuts.
Common Mistake #3: Ignoring the filter indicator. If your model has one, use it. It’s based on real usage, not just time. A filter in a dusty basement may need replacing faster than one in a clean bedroom.
Pro Tip #4: If you’re unsure about your model, check Honeywell’s official user manual online. Just search “Honeywell [your model number] manual PDF.” They’re free and super detailed.
FAQs About How to Clean Filter for Honeywell Air Purifier in 2026
Q: Can I wash the HEPA filter in my Honeywell air purifier?
A: No, and please don’t! The HEPA filter is made of fine pleated paper that traps microscopic particles. Washing it with water will damage the fibers, reduce efficiency, and may void your warranty. Stick to vacuuming only for the HEPA filter. If it’s dirty or smelly, it’s time to replace it.
Q: How often should I clean the pre-filter?
A: It depends on your environment. In a pet-free, low-dust home, every 4–6 weeks is fine. If you have pets, smoke, or live in a dusty area, clean it every 2–3 weeks. I clean mine weekly during pollen season and it makes a huge difference in allergy symptoms.
Q: My Honeywell purifier has a “Check Filter” light. Does that mean I need to clean or replace the filter?
A: The light usually means it’s time to inspect the filter. If the pre-filter is dirty, clean it. If the HEPA filter is gray or smells musty, replace it. After cleaning, reset the indicator to keep the system accurate.
Q: Can I use a hairdryer to dry the pre-filter faster?
A: I wouldn’t recommend it. The heat can warp the plastic frame or melt the mesh. Air-drying is safer and just as effective. If you’re in a hurry, use a fan to speed up drying—but never heat.
Q: What if my pre-filter is cracked or torn?
A: Replace it immediately. A damaged pre-filter can’t trap large particles, which means more dust reaches the HEPA filter and shortens its life. Honeywell sells genuine replacement filters, or you can get compatible ones from trusted brands—just make sure they fit your model.
Q: Do I need to clean the inside of the air purifier?
A: Yes, occasionally. Use a soft, dry cloth to wipe down the inside surfaces and fan blades. Avoid using water or cleaning sprays—they can damage electronics. A vacuum with a brush attachment works great for removing dust from the housing.
Q: Is there a way to tell if my air purifier is working after cleaning?
A: Absolutely. After cleaning, you should notice:
- Stronger airflow (put your hand near the outlet).
- Quieter operation (less strain on the motor).
- Fresher air (no stale or dusty smell).
- Reduced allergy symptoms (if that’s your goal).
If you don’t see improvement, double-check that the filters are installed correctly and the unit isn’t blocked by furniture.
Final Thoughts
Cleaning your Honeywell air purifier filter isn’t just a chore—it’s an act of self-care. You’re not just maintaining a machine; you’re investing in cleaner air, better sleep, and fewer allergy flare-ups.
Now that you know how to clean filter for Honeywell air purifier in 2026, I hope you feel empowered, not overwhelmed. It takes less than 30 minutes, costs nothing (if you use what you have at home), and pays off every single day.
Start simple: set a reminder, grab your vacuum, and give your purifier the love it deserves. And remember—cleaning the pre-filter regularly means your HEPA filter lasts longer, saving you money in the long run.
Your home deserves clean air. And now, you’ve got the tools to make it happen. Go ahead—breathe easy.
“`