Featured image for how to clean filter philips air purifier
Image source: airpurifiersonline.com.au
Keeping your Philips air purifier running efficiently starts with regular filter cleaning—follow these simple steps in 2026 to maintain peak performance. Turn off the unit, remove the filter, and gently vacuum or rinse it (if washable) to eliminate dust and debris. Always let the filter dry completely before reinserting to prevent mold and ensure optimal air purification.
“`html
How to Clean Filter Philips Air Purifier in 2026 Easy Steps
Key Takeaways
- Turn off and unplug the air purifier before cleaning for safety.
- Remove the filter carefully to avoid damaging its structure.
- Vacuum the pre-filter monthly to remove dust and debris.
- Wash reusable filters with lukewarm water and let air dry completely.
- Replace HEPA filters every 6–12 months for optimal performance.
- Reset the filter indicator after cleaning or replacing the filter.
Why This Matters / Understanding the Problem
Let’s be honest—your Philips air purifier works hard every day to keep your home’s air fresh and clean. But if you’ve noticed it’s not running as smoothly as it used to, or the air doesn’t feel as crisp, there’s a good chance the filter needs attention. I learned this the hard way last winter when my living room started smelling a little musty, even though the purifier was on full blast.
Turns out, a clogged or dirty filter doesn’t just reduce efficiency—it can actually worsen indoor air quality. Dust, pet dander, pollen, and even cooking fumes build up over time, and if the filter isn’t cleaned or replaced properly, it becomes less effective. Worse, it can start circulating stale air instead of purifying it.
That’s why knowing how to clean filter Philips air purifier in 2026 easy steps isn’t just helpful—it’s essential. Regular maintenance keeps your unit running efficiently, extends its lifespan, and ensures you’re breathing the cleanest air possible. Plus, it saves you money by avoiding unnecessary filter replacements or costly repairs down the line.
In this guide, I’ll walk you through everything I’ve learned from years of using Philips air purifiers—what works, what doesn’t, and how to keep your machine in top shape without breaking a sweat.
What You Need
Before we dive in, let’s gather the basics. You don’t need fancy tools or special cleaners—just a few household items and about 15–20 minutes of your time.
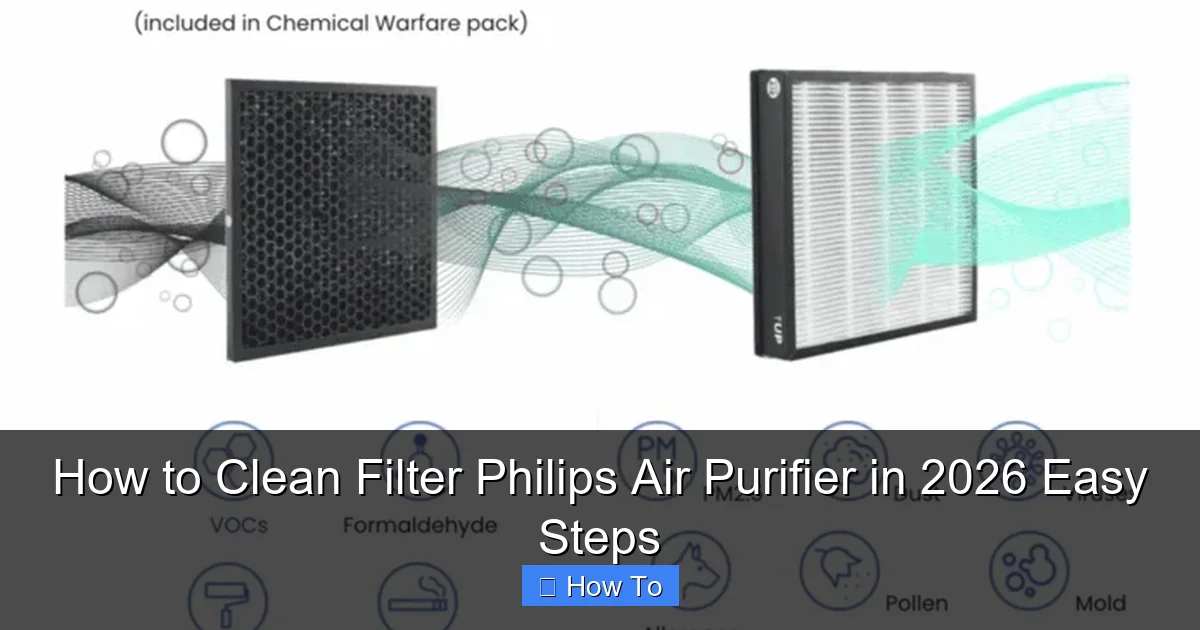
Visual guide about how to clean filter philips air purifier
Image source: cdn.shortpixel.ai
- Soft brush or vacuum with brush attachment – Great for gently removing surface dust.
- Mild dish soap and warm water – For washable pre-filters (if your model has one).
- Clean, dry microfiber cloth – Perfect for wiping down the exterior and internal parts.
- Replacement HEPA filter (if needed) – Check your model’s manual; some filters aren’t washable and must be replaced every 6–12 months.
- Owner’s manual – Always handy for model-specific instructions.
Pro tip: If you’re unsure which filter your Philips model uses, check the label inside the front cover or search your model number online. Most newer Philips purifiers (like the AC1215, AC2887, or Series 3000) use a combination of a washable pre-filter and a non-washable HEPA filter.
Step-by-Step Guide to How to Clean Filter Philips Air Purifier in 2026 Easy Steps
Step 1: Turn Off and Unplug the Unit
Safety first! Always power down your air purifier and unplug it from the wall before doing any cleaning. I made the mistake of forgetting this once and got a mild shock—lesson learned the hard way.
This step isn’t just about avoiding accidents. It also prevents the motor from accidentally turning on while you’re handling the internals, which could damage the machine or hurt you.
Step 2: Remove the Front Panel and Access the Filters
Most Philips air purifiers have a front cover that snaps off easily. Gently press the release buttons or lift the panel upward—no tools needed. Once it’s off, you’ll see the filters inside.
Typically, there are two main filters:
- Pre-filter: This is the outermost layer, usually made of foam or mesh. It catches large particles like hair and dust.
- HEPA filter: Located behind the pre-filter, this is the workhorse that traps tiny pollutants like allergens and smoke.
Some models also include an activated carbon filter for odors—handle this carefully, as it’s often delicate.
Step 3: Remove the Pre-Filter (If Washable)
Check your manual to confirm if your pre-filter is washable. On most Philips models, it is. Carefully pull it out—it should slide or lift right out.
If it’s visibly dirty (gray or dusty), it’s time for a clean. Rinse it under lukewarm water. Avoid hot water—it can warp the material. Use a drop of mild dish soap if needed, but don’t scrub too hard. You’re not trying to sanitize it, just remove surface debris.
After rinsing, shake off excess water and let it air-dry completely—usually takes 2–4 hours. Never reinstall a damp filter; moisture can promote mold growth and damage the unit.
Step 4: Vacuum the HEPA Filter (Do Not Wash!)
Here’s a big one: never wash the HEPA filter. I used to think “clean is clean,” but water ruins the delicate fibers that trap microscopic particles.
Instead, use a vacuum cleaner with a soft brush attachment. Gently run it over both sides of the HEPA filter to remove loose dust. Do this over a trash can to avoid spreading allergens.
Be thorough but gentle—pressing too hard can tear the filter. If your model has a carbon filter, vacuum that too, but avoid touching the charcoal layer directly.
Step 5: Clean the Interior and Fan Blades
While the filters are out, take a moment to clean inside the purifier. Dust loves to settle on the fan blades and inner walls.
Use your vacuum’s brush attachment to suck up loose debris. For stubborn grime, wipe with a slightly damp microfiber cloth—never spray water directly into the unit.
If you see pet hair wrapped around the fan, carefully remove it with tweezers or your fingers. A clean fan spins more efficiently and reduces strain on the motor.
Step 6: Wipe Down the Exterior
Your air purifier might look clean on the outside, but dust builds up quickly—especially on the air intake vents.
Use a dry or slightly damp microfiber cloth to wipe the front, sides, and top. For sticky spots (like fingerprints), a tiny bit of soapy water works, but make sure the cloth isn’t dripping.
Don’t forget the control panel! Use a dry cloth to avoid damaging the buttons or sensors.
Step 7: Reassemble and Reset the Filter Indicator (If Applicable)
Once everything is dry and clean, put the filters back in the correct order: pre-filter first, then HEPA (and carbon, if present). Make sure they’re seated properly—misaligned filters can cause air leaks.
Snap the front panel back into place until it clicks securely.
Many Philips models have a filter replacement indicator light. After cleaning or replacing filters, you’ll need to reset it. Usually, this involves holding the “Filter” or “Reset” button for 3–5 seconds. Check your manual for exact steps—this small reset keeps your purifier running smartly.
Step 8: Plug In and Test
Plug the unit back in and turn it on. Listen for smooth operation—no unusual noises or vibrations. Set it to a low speed first, then increase to check airflow.
If everything sounds and feels right, you’re good to go! Your purifier should now be running more efficiently, and your air should feel noticeably fresher.
Pro Tips & Common Mistakes to Avoid
Over the years, I’ve made a few blunders—and learned from them. Here’s what to keep in mind when tackling how to clean filter Philips air purifier in 2026 easy steps.
Pro Tip: Clean your pre-filter every 2–4 weeks, depending on usage. If you have pets or live in a dusty area, go for every 2 weeks. For the HEPA filter, vacuum monthly and replace every 6–12 months.
Warning: Never use compressed air to clean filters. It might seem efficient, but the force can damage the delicate HEPA fibers, reducing their effectiveness.
Common Mistake: Assuming all filters are washable. Always check your model—some HEPA filters are labeled “non-washable” for a reason. Washing them voids the warranty and ruins performance.
Insider Insight: Keep a cleaning log. I jot down the date I clean or replace filters in a notes app. It helps me stay consistent and reminds me before the indicator light even comes on.
Bonus Hack: Place your purifier on a elevated surface (like a stand or table) to improve airflow and reduce dust intake from the floor. Just make sure it’s stable and not blocking vents.
FAQs About How to Clean Filter Philips Air Purifier in 2026 Easy Steps
Q: Can I wash the HEPA filter in my Philips air purifier?
A: No—and this is a big one. HEPA filters are not designed to get wet. Water damages the fine fibers that capture tiny particles. Instead, vacuum the surface gently every month. Only replace it when the indicator light comes on or every 6–12 months.
Q: How often should I clean my Philips air purifier filter?
A: It depends on usage, but here’s a good rule of thumb: clean the washable pre-filter every 2–4 weeks, vacuum the HEPA filter monthly, and replace it every 6–12 months. If you have pets, allergies, or live in a polluted area, lean toward the shorter end of that range.
Q: My filter indicator light is on—does that mean I need a new filter?
A: Not necessarily. Sometimes the light comes on based on time, not actual filter condition. If your pre-filter is washable, clean it first and reset the indicator. If the HEPA filter looks heavily soiled or it’s been over a year, then yes—it’s time for a replacement.
Q: Can I use a wet cloth to clean the inside of the purifier?
A: Only slightly damp—never wet. Excess moisture can damage electronic components. Always unplug the unit first, and make sure no water drips into the motor or fan area. When in doubt, use a dry cloth.
Q: What if my Philips air purifier is making a rattling noise after cleaning?
A: This usually means a filter isn’t seated properly or the front panel isn’t fully closed. Turn off the unit, unplug it, and double-check that all filters are in the correct order and the cover is securely snapped in. Also, make sure nothing (like a stray sock or toy) got inside during cleaning.
Q: Are third-party filters safe to use?
A: I’ve tried them, and honestly—they’re hit or miss. Some work fine, but others don’t fit perfectly or lack the same filtration quality. For best results and to maintain your warranty, stick with genuine Philips filters. They’re designed specifically for your model.
Q: How do I know if my air purifier is actually working better after cleaning?
A: You’ll notice it! The fan should run quieter, airflow will feel stronger, and odors or allergens should clear up faster. If you have an air quality monitor, you might even see PM2.5 levels drop more quickly. Trust your senses—cleaner air feels fresher and easier to breathe.
Final Thoughts
Cleaning your Philips air purifier might not be the most exciting chore, but it’s one of the most impactful things you can do for your home’s air quality. By following these how to clean filter Philips air purifier in 2026 easy steps, you’re not just maintaining a machine—you’re investing in your health and comfort.
Think of it like changing the oil in your car. Skip it, and performance suffers. Do it regularly, and everything runs smoother, longer. Plus, it only takes 15 minutes every few weeks—less time than scrolling through your phone.
So next time you walk into a room and take a deep breath of fresh, clean air, remember: that’s the power of a well-maintained purifier. And now, you’ve got the know-how to keep it that way.
Ready to get started? Grab your vacuum, unplug that purifier, and give it the care it deserves. Your lungs—and your peace of mind—will thank you.
“`