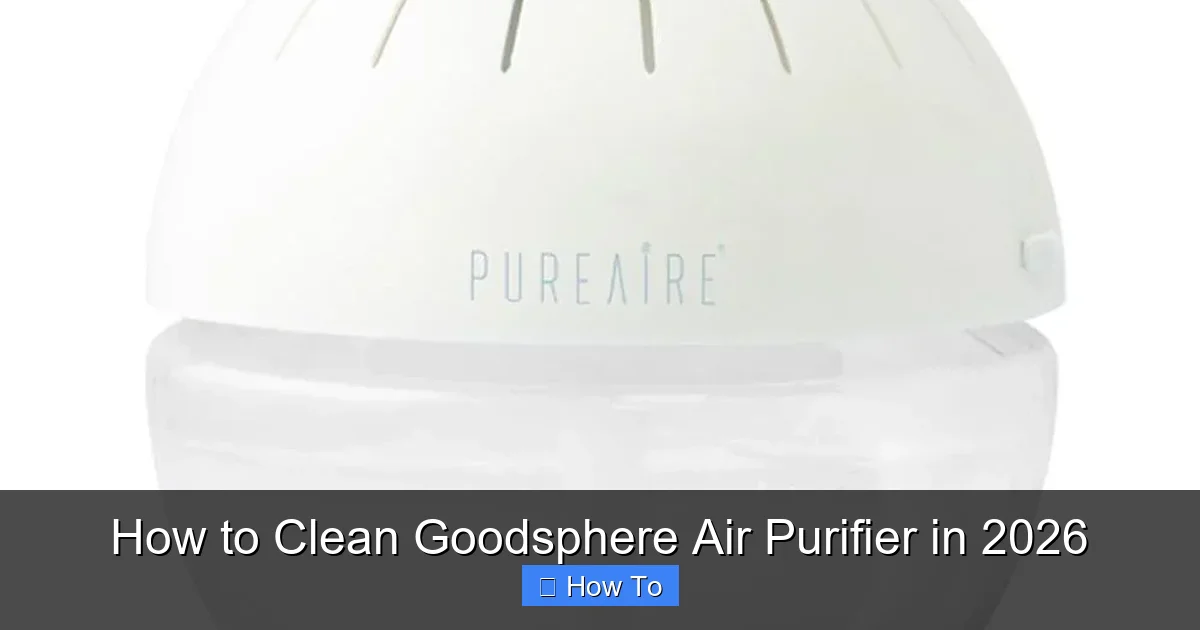
Featured image for how to clean goodsphere air purifier
Image source: cdn.shopify.com
Keeping your Goodsphere Air Purifier clean ensures peak performance and longer lifespan. In 2026, regular maintenance—like wiping the exterior, vacuuming the pre-filter, and gently cleaning the HEPA and carbon filters—remains essential for optimal air quality. Always power off and unplug the unit before cleaning, and replace filters as recommended to maintain efficiency.
“`html
How to Clean Goodsphere Air Purifier in 2026
Key Takeaways
- Unplug the unit before cleaning to ensure safety and prevent electrical damage.
- Remove and rinse the pre-filter monthly with water to clear large debris.
- Wipe the HEPA filter gently with a dry cloth—do not wash or soak.
- Clean the interior with a microfiber cloth to remove dust and buildup.
- Sanitize the exterior weekly using a damp cloth and mild cleaner.
- Reassemble only when dry to avoid mold or internal damage.
- Replace filters as recommended to maintain optimal air purification performance.
Why This Matters / Understanding the Problem
Let’s be real—your Goodsphere Air Purifier works hard. Every day, it traps dust, pet dander, cooking smells, and even invisible pollutants. But after months of use, that invisible work starts to show. The airflow slows. The filter gets clogged. And worse? You might not realize it’s happening until your air feels stale again.
That’s why knowing how to clean Goodsphere Air Purifier in 2026 isn’t just a maintenance tip—it’s essential for keeping your home truly fresh. I learned this the hard way last winter when my purifier started making a weird humming noise. Turns out, the pre-filter was caked with dust, and the HEPA filter was overdue for a checkup.
Cleaning your unit regularly keeps it running efficiently, extends its life, and ensures you’re breathing clean air. Plus, it’s way cheaper than replacing filters every few months. In this guide, I’ll walk you through the process step by step, based on real experience and what Goodsphere recommends—no fluff, no guesswork.
What You Need
Before we dive in, let’s gather your tools. The good news? You probably already have most of these at home.
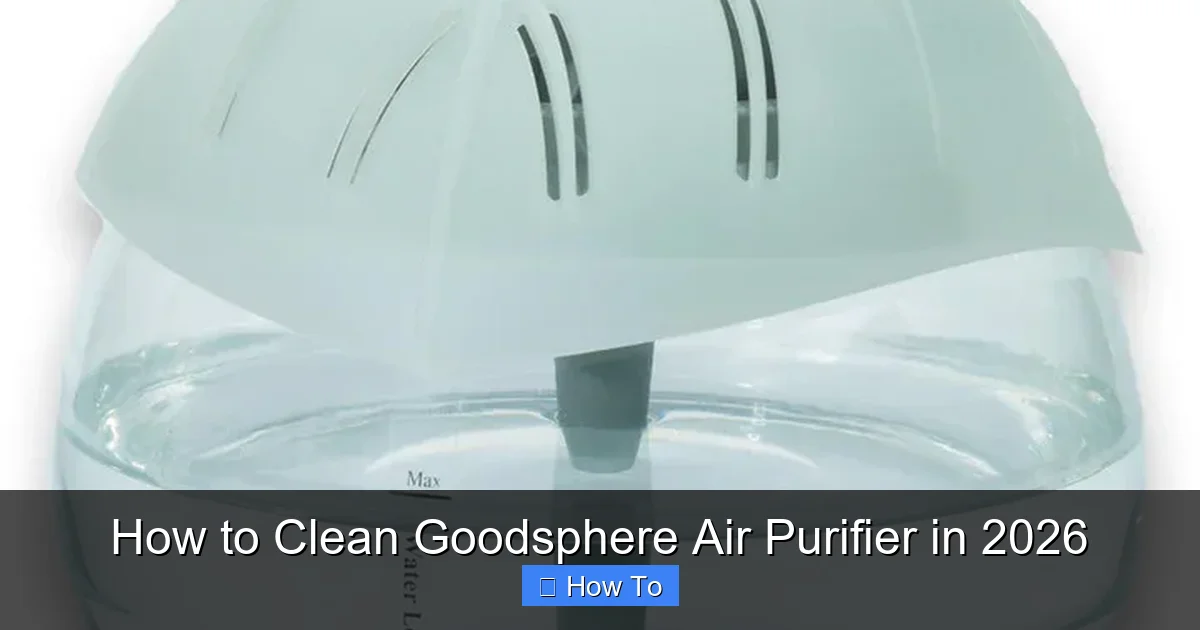
Visual guide about how to clean goodsphere air purifier
Image source: cdn.shopify.com
- Microfiber cloth (or any soft, lint-free cloth)
- Vacuum with a brush attachment (a handheld vacuum works great)
- Compressed air can (optional, but helpful for tight spots)
- Mild dish soap (like Dawn or similar—nothing harsh or abrasive)
- Lukewarm water (never hot or cold)
- Clean towel (for drying)
- Replacement filters (if due—check your model’s schedule)
- Small container (to hold screws or small parts)
And of course, your Goodsphere Air Purifier—ideally turned off and unplugged. Safety first!
Pro tip: I keep a little cleaning kit in a shoebox near the purifier. That way, I’m never scrambling for supplies when it’s time to clean. It makes the whole process feel less like a chore and more like a quick 15-minute reset.
Step-by-Step Guide to How to Clean Goodsphere Air Purifier in 2026
Step 1: Turn Off and Unplug the Unit
Seriously—don’t skip this. Even if you’re just wiping the outside, always unplug your purifier. I once got a tiny shock (more surprise than pain) from a unit I thought was off. Not fun.
Once it’s off, give it a minute to cool down if it’s been running. Then, move it to a flat, open space—like your kitchen table or a countertop. You’ll want good lighting and room to work.
Step 2: Remove the Front Panel and Access the Filters
Most Goodsphere models have a front grille or panel that snaps off. Gently press the release tabs (usually on the sides or bottom) and lift it away.
Behind it, you’ll see the pre-filter—a mesh screen that catches large particles. Slide it out carefully. If you see dust or hair clinging to it, that’s a sign it’s doing its job.
Next, locate the HEPA filter. It’s usually a rectangular cartridge with a pull tab. Pull it straight out—don’t twist or force it. Some models also have a carbon filter behind the HEPA, which looks like a black mesh or foam layer. Note: not all models have this, so don’t panic if yours doesn’t.
Warning: Don’t remove the internal fan or motor. That’s not meant for home cleaning and could void your warranty. Stick to the accessible parts—filters, grilles, and exterior.
Step 3: Clean the Pre-Filter
The pre-filter is your first line of defense, so it gets the dirtiest. Here’s how I clean mine:
- Rinse it under lukewarm water in the sink. Use your fingers to gently rub off any stuck-on debris.
- Add a drop of mild dish soap if needed. Avoid scrubbing with anything abrasive—no steel wool, no brushes with stiff bristles.
- Rinse thoroughly until the water runs clear.
- Shake off excess water, then lay it flat on a clean towel to dry. Never put it back wet—this can lead to mold or damage the purifier.
I usually let mine dry overnight, but if you’re in a rush, 4–6 hours in a well-ventilated area should do it.
Step 4: Vacuum the HEPA and Carbon Filters (If Applicable)
Important: HEPA filters cannot be washed. Water ruins their delicate fibers. But you can extend their life with gentle vacuuming.
- Use the brush attachment on your vacuum. Set it to low or medium power.
- Lightly vacuum both sides of the HEPA filter, holding the nozzle a few inches away. Focus on the surface—don’t press hard.
- If you have a carbon filter, do the same. It’s more fragile, so be extra gentle.
I do this every 2–3 weeks during allergy season. It keeps airflow strong and delays the need for replacement. But remember: vacuuming only removes surface dust. It won’t restore a truly clogged or expired filter.
Step 5: Wipe Down the Interior and Air Inlets
While the filters are out, take a moment to clean inside the unit. Use a dry microfiber cloth to wipe down the interior walls and air inlets.
If you see dust buildup in the corners, use the vacuum’s crevice tool or a can of compressed air to blow it out. I like to angle the can downward so debris falls out, not deeper in.
For sticky spots (maybe from cooking residue?), dampen a corner of the cloth with a tiny bit of soapy water. Wring it out well—you want it just barely damp. Wipe, then dry immediately with a second cloth.
Pro tip: I keep a small paintbrush (the soft kind) in my cleaning kit. It’s perfect for getting dust out of tight crevices around the fan housing. Works like a charm!
Step 6: Clean the Exterior
Your purifier’s outside collects dust, fingerprints, and pet hair too. Here’s how to make it shine:
- Dampen a microfiber cloth with water or a 50/50 mix of water and white vinegar (for extra disinfecting).
- Wipe down the entire surface, including the control panel and vents.
- For stubborn stains, use a drop of dish soap on the cloth—never directly on the unit.
- Dry with a clean, dry cloth to prevent water spots.
I avoid using glass cleaner or harsh sprays. They can leave streaks or damage plastic finishes. Simple water or vinegar is all you need.
Step 7: Reassemble the Unit
Now that everything is clean and dry, it’s time to put it back together.
- Insert the HEPA filter first, sliding it in until it clicks or seats firmly. Make sure it’s facing the right way—there’s usually an arrow or label.
- If you have a carbon filter, place it behind the HEPA (check your manual for exact order).
- Slide the pre-filter back into its slot. It should fit snugly with no gaps.
- Snap the front panel back into place. You should hear a soft click.
Double-check that all parts are secure. A loose filter can cause noise or poor performance.
Step 8: Run a Test Cycle
Plug the purifier back in and turn it on. Start at the lowest fan speed to make sure everything is working.
Listen for any unusual sounds—like rattling or grinding. If you hear something off, turn it off and recheck the filter placement.
After a few minutes, increase the speed. The airflow should feel strong and steady. If it’s weak, one of the filters might not be seated properly.
Real talk: I once forgot to fully insert the pre-filter after cleaning. The unit ran fine, but airflow was half what it should be. Took me 10 minutes to realize—and it was an easy fix. So take that extra second to make sure everything’s in place.
Step 9: Mark Your Calendar for the Next Clean
Consistency is key. I use a simple trick: I set a monthly reminder on my phone for a quick wipe and pre-filter rinse. Every 3 months, I do the full deep clean.
For the HEPA filter, check the manufacturer’s recommendation. Most Goodsphere models suggest replacing it every 6–12 months, depending on use. If you have pets, smoke, or live in a dusty area, lean toward 6 months.
Keep a log or note in your calendar with the date you cleaned and when filters were last replaced. It helps you stay on track and avoid guesswork.
Pro Tips & Common Mistakes to Avoid
Over the years, I’ve learned a few things the hard way. Here’s what I wish someone had told me when I first started cleaning my Goodsphere purifier.
Pro tip #1: Label your filters. If you have multiple units (like one for the living room and one for the bedroom), write the room and date on the side with a dry-erase marker. It’s a small thing, but it saves confusion later.
Pro tip #2: Clean during the day, not at night. Why? Because if you find a problem—like a cracked filter or a loose part—you can fix it right away. No midnight stress.
Pro tip #3: Use a filter subscription service. Goodsphere offers auto-ship options for replacement filters. I signed up last year, and it’s been a game-changer. I never run out, and I get a small discount.
Now, for the mistakes I’ve seen (and made):
- Washing the HEPA filter: This is the #1 no-no. Water destroys the electrostatic charge that makes HEPA filters effective. Once wet, it’s toast.
- Forgetting to unplug: Even a small shock isn’t worth it. Unplug first, clean second.
- Using harsh chemicals: Bleach, ammonia, or abrasive cleaners can damage plastic and rubber parts. Stick to mild soap and water.
- Ignoring the pre-filter: It’s easy to think, “Oh, it’s just a mesh screen.” But a clogged pre-filter forces the HEPA to work harder, shortening its life.
- Reassembling while damp: Moisture inside the unit can lead to mold or electrical issues. Always dry filters and surfaces completely.
One more thing: don’t over-clean. I used to deep clean every month, but after checking the manual, I realized that’s overkill for my usage. Now I do a light clean monthly and a full clean every 3 months. Less stress, same results.
FAQs About How to Clean Goodsphere Air Purifier in 2026
Can I wash the HEPA filter?
Nope. HEPA filters are made of delicate fibers that trap tiny particles. Water breaks down those fibers and ruins the filter’s ability to capture allergens. Instead, vacuum it gently every few weeks to remove surface dust. Replace it when it looks gray or clogged—usually every 6–12 months.
How often should I clean the pre-filter?
I recommend cleaning it every 2–4 weeks, depending on use. If you have pets, cook often, or live in a dusty area, clean it weekly. A quick rinse under water takes 5 minutes and makes a big difference in airflow.
My purifier smells musty after cleaning. What’s wrong?
That usually means moisture is trapped inside. Make sure all filters and the interior are completely dry before reassembling. If the smell persists, leave the unit open in a dry, ventilated room for 24 hours. Avoid running it until the smell is gone—this can spread mold spores.
Can I use compressed air on the filters?
Yes—but with caution. Use low pressure and hold the can 6–8 inches away. Never blast directly into the HEPA filter. It can dislodge fibers or damage the structure. I use it more for cleaning the unit’s interior than the filters themselves.
Do I need to replace the carbon filter?
Only if your model has one. Carbon filters absorb odors and gases, but they don’t last as long as HEPA filters. If you notice cooking smells or pet odors lingering, it might be time to replace it. Most last 3–6 months. Check your manual for specifics.
Is it safe to clean while the purifier is on?
Absolutely not. Always turn off and unplug the unit before cleaning. Even if you’re just wiping the outside, it’s not worth the risk. I’ve seen units with exposed fans—definitely not something you want your fingers near.
What if I lost my manual?
Goodsphere has a digital manual library on their website. Just search your model number (usually on the back or bottom of the unit). It includes cleaning schedules, filter specs, and troubleshooting tips. Super helpful when you’re not sure which filter goes where.
Final Thoughts
Cleaning your Goodsphere Air Purifier isn’t rocket science. But it does require a little attention to detail—and consistency. Knowing how to clean Goodsphere Air Purifier in 2026 means you’re not just maintaining a machine. You’re taking care of the air you and your family breathe every day.
Start simple: unplug, remove the pre-filter, rinse it, vacuum the HEPA, wipe down the outside, and reassemble. Do this every few weeks, and you’ll notice better airflow, quieter operation, and fewer allergy symptoms.
And remember—this isn’t a one-time thing. Think of it like brushing your teeth. A quick clean now prevents bigger problems later. Set a reminder, grab your microfiber cloth, and give your purifier the love it deserves.
Your lungs will thank you. And hey, if you’re ever in doubt, just come back to this guide. I’ve been there, done that, and learned from my mistakes. Now it’s your turn to keep the air fresh—one clean at a time.
“`