Featured image for how to clean gp plus air purifier filters
Image source: cdn11.bigcommerce.com
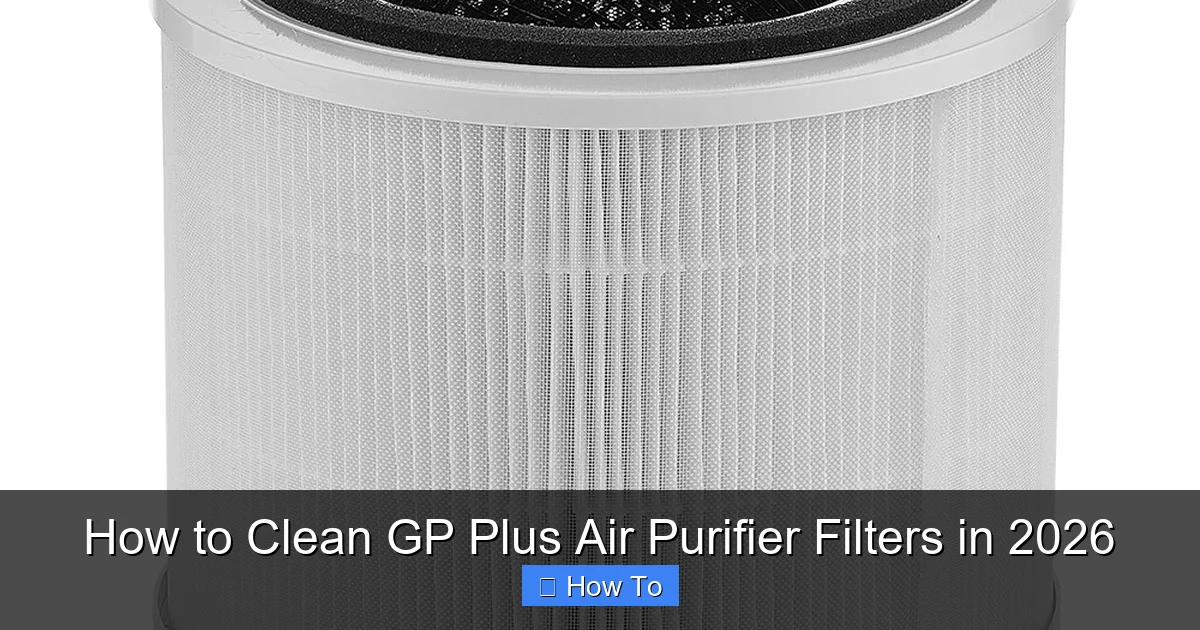
Regularly cleaning your GP Plus air purifier filters every 4–6 weeks ensures peak performance and longer filter life. Simply remove the filters, gently vacuum or rinse with cool water (if washable), and let them dry completely before reinstalling to maintain optimal air quality. Never use harsh chemicals or submerge non-washable filters—this can damage the media and void your warranty.
“`html
How to Clean GP Plus Air Purifier Filters in 2026
Key Takeaways
- Turn off and unplug the purifier before cleaning for safety.
- Remove filters gently to avoid damaging delicate components.
- Vacuum pre-filters weekly to remove surface dust and debris.
- Rinse HEPA filters monthly with cool water only—no soap.
- Air-dry filters completely before reinserting to prevent mold.
- Replace filters annually or as recommended for optimal performance.
- Check filter indicators regularly to maintain air quality efficiency.
Why This Matters / Understanding the Problem
Let’s be honest—air purifiers are the quiet heroes of our homes. They work 24/7, filtering out dust, pollen, pet dander, and even those sneaky cooking odors. But if you’ve ever opened your GP Plus air purifier and seen a filter that looks like it’s been through a sandstorm, you know it’s time to act. A clogged filter isn’t just gross—it’s inefficient. It reduces airflow, strains the motor, and defeats the whole purpose of cleaner air.
That’s why learning how to clean GP Plus air purifier filters in 2026 isn’t just about maintenance. It’s about keeping your air quality high and your machine running smoothly. I learned this the hard way after my purifier started making a weird grinding noise. Turns out, a dust-caked filter was the culprit.
Over the years, I’ve tried every method—from vacuuming to washing—and I’ve made mistakes (like soaking a HEPA filter in soapy water… don’t do that). But now, I’ve got a solid, no-fuss routine that keeps my GP Plus purifier in top shape. And I’m sharing it with you—straight, simple, and from real experience.
Whether you’re a first-time owner or just need a refresher, this guide covers everything: what tools you need, how to clean different filter types, and how to avoid costly errors. By the end, you’ll know exactly how to clean GP Plus air purifier filters in 2026—safely, effectively, and without breaking a sweat.
What You Need
Before diving in, gather these tools. Trust me, having everything ready saves time and frustration. You don’t want to be halfway through cleaning and realize you’re missing a key item.

Visual guide about how to clean gp plus air purifier filters
Image source: sabatdeals.com
- Soft microfiber cloth – For wiping down the exterior and filter housing.
- Soft-bristled brush (like a clean paintbrush or makeup brush) – For gently removing dust from pre-filters and mesh screens.
- Vacuum with a brush attachment – For deep-cleaning pre-filters and removing surface dust.
- Compressed air can (optional) – For blowing out stubborn debris from crevices.
- Mild dish soap – Only for washable pre-filters (never HEPA or carbon filters).
- Clean water – For rinsing washable filters (room temperature is best).
- Clean towel – For drying filters and surfaces.
- Replacement HEPA and carbon filters – Always keep spares on hand for when it’s time to swap (more on that later).
- Owner’s manual – For model-specific guidance (yes, really—read it).
Pro tip: Set up a small cleaning station near a sink or outdoor area. It keeps things organized and prevents dust from spreading indoors. And if you have pets or allergies, wear a mask during cleaning—disturbed dust can trigger reactions.
Now, let’s get to the good stuff: the step-by-step process for how to clean GP Plus air purifier filters in 2026.
Step-by-Step Guide to How to Clean GP Plus Air Purifier Filters in 2026
Step 1: Power Down and Unplug
First things first: safety. Always turn off and unplug your GP Plus air purifier before opening it. I know it sounds obvious, but I’ve rushed this step once and nearly got a jolt. Not fun.
Once unplugged, let the unit cool down if it’s been running for a while. This also helps any residual dust settle, making the cleaning process less messy.
Now, locate the filter access panel. Most GP Plus models have a front or side door with a simple latch or slide mechanism. Open it slowly—some models have internal sensors that might trigger an error if opened too quickly.
Warning: Never force the panel open. If it feels stuck, double-check for hidden screws or locking tabs. Forcing it can break the latch or damage internal wiring.
Step 2: Remove the Filters in Order
GP Plus air purifiers typically use a multi-stage filtration system. The order matters—both for removal and reinstallation.
Most models have this sequence:
- Pre-filter (usually a mesh or foam layer, outermost)
- HEPA filter (middle layer, white or off-white, pleated)
- Activated carbon filter (optional, often a flat black sheet or granular bed)
Remove them one at a time, placing each on a clean surface (like a towel). Label them with sticky notes if needed—especially if you have multiple units or similar-looking filters.
Why remove in order? Because the pre-filter catches the big stuff, protecting the HEPA and carbon layers. If you skip this step, you risk damaging the more delicate filters during cleaning.
This is a key part of how to clean GP Plus air purifier filters in 2026: respect the filter hierarchy.
Step 3: Clean the Pre-Filter (The Workhorse)
The pre-filter is your first line of defense. It catches hair, lint, and large dust particles. Over time, it gets caked—especially if you have pets or live in a dusty area.
Here’s how I clean mine:
- Vacuum it first – Use the brush attachment on your vacuum to remove loose debris. Hold the filter over a trash can to catch falling dust.
- Brush gently – Use a soft-bristled brush to dislodge stubborn grime. Work in the direction of the mesh or foam texture.
- Rinse (if washable) – Most GP Plus pre-filters are washable. Hold it under lukewarm running water. If it’s extra dirty, mix a few drops of mild dish soap with water and gently scrub with your fingers or the brush. Never use harsh cleaners, bleach, or hot water.
- Air dry completely – Shake off excess water, then lay the filter flat on a clean towel. Let it dry for at least 2–4 hours (overnight is better). Never reinstall a damp filter—it can grow mold or damage the unit.
I learned the hard way that rushing the drying step once caused a musty smell in my purifier. Not cool. Now, I always dry mine overnight.
For non-washable pre-filters (rare, but some models have disposable ones), vacuum and brush only. Replace if damaged or too clogged.
Pro Tip: Clean your pre-filter every 2–4 weeks if you run the purifier daily. In low-dust environments, every 6 weeks is fine.
Step 4: Handle the HEPA Filter (The Delicate One)
The HEPA filter is the star—it captures 99.97% of particles as small as 0.3 microns. But it’s also the most sensitive. Never wash a HEPA filter. Water destroys the fine fibers, rendering it useless.
So how do you clean it?
- Vacuum the surface – Use the brush attachment on your vacuum to remove dust from both sides. Work in gentle, straight strokes—don’t press hard.
- Blow out debris (optional) – Use a can of compressed air to blow dust from the pleats. Hold the can upright and spray in short bursts. Keep it at least 6 inches away to avoid damaging the filter.
- Inspect for damage – Look for tears, holes, or dark spots. If the filter looks compromised, it’s time to replace it—no amount of cleaning will help.
I once thought I could “revive” a HEPA filter by rinsing it. Big mistake. It lost all effectiveness and cost me a replacement. Now, I treat it like a museum artifact—gentle handling only.
How often should you clean the HEPA filter? Every 2–3 months. But replace it every 6–12 months, depending on usage and air quality. GP Plus models often have filter life indicators—check yours.
This is a crucial part of how to clean GP Plus air purifier filters in 2026: clean, don’t wash, the HEPA.
Step 5: Address the Carbon Filter (The Odor Fighter)
The activated carbon filter removes odors, VOCs, and gases. It’s usually a flat sheet or a bed of black granules inside a mesh frame.
Here’s the deal: carbon filters can’t be cleaned effectively. The carbon is “spent” after absorbing pollutants—it doesn’t regenerate like a sponge.
But you can:
- Vacuum the surface – Use the brush attachment to remove dust from the mesh frame. This helps airflow but doesn’t restore the carbon’s power.
- Inspect for clumping or damage – If the carbon granules are stuck together or the frame is bent, it’s time to replace.
I once tried to “bake” my carbon filter in the sun to “recharge” it. Spoiler: it didn’t work. The carbon was still saturated. Save yourself the trouble—replace it when it’s done.
Replace carbon filters every 6–12 months. If you cook often, smoke, or live in a polluted area, replace it every 3–6 months.
Pro tip: Some GP Plus models have a combined HEPA + carbon filter. In that case, treat it like a HEPA—vacuum only, no washing, and replace on schedule.
Step 6: Wipe Down the Interior and Housing
While the filters are out, give the inside of the purifier some love. Dust and debris love to hide in the nooks.
- Vacuum the interior – Use the brush attachment to clean the fan, ducts, and filter housing. Pay attention to corners and edges.
- Wipe with a microfiber cloth – Dampen it slightly with water (no soap) to remove sticky residue or grime. Never use abrasive cleaners—they can scratch surfaces.
- Blow out crevices – Use compressed air to clear dust from sensors, vents, and small openings.
I once found a dead spider in my purifier’s intake grill. Gross, right? A quick wipe and vacuum saved the day—and my air quality.
This step is often overlooked, but it’s essential for how to clean GP Plus air purifier filters in 2026. A clean interior means better airflow and longer filter life.
Step 7: Reinstall Filters in Reverse Order
Now, put everything back—in reverse order of removal.
- Place the carbon filter first (if applicable).
- Add the HEPA filter—make sure it’s seated properly and the pleats are aligned.
- Reinstall the pre-filter—ensure it’s snug and covers the entire intake area.
Check for gaps or misalignment. A poorly seated filter can cause air leaks, reducing efficiency.
Close the access panel firmly. Some models have a “click” sound when it’s fully secured. If yours has a filter reset button, press it now (check your manual).
Plug the purifier back in and turn it on. Listen for smooth operation. If it’s noisy or the filter indicator light is still on, double-check your installation.
Step 8: Reset the Filter Indicator (If Applicable)
Many GP Plus models have a filter life indicator that tracks usage. After cleaning or replacing filters, you’ll need to reset it.
How? It varies by model, but common methods include:
- Press and hold the “Filter” or “Reset” button for 3–5 seconds.
- Use the app (if your model is Wi-Fi enabled).
- Follow the steps in your manual (seriously, keep it handy).
I once ignored the reset step and got a false “replace filter” alert two weeks later. Not a big deal, but annoying. Now, I reset it immediately.
Pro Tips & Common Mistakes to Avoid
Over the years, I’ve made (and fixed) plenty of mistakes. Here’s what I wish I’d known sooner:
Pro Tip #1: Label your filters. I use a permanent marker to write the install date on the frame. It’s a game-changer for tracking replacements.
Pro Tip #2: Keep a cleaning log. Note the date and which filters you cleaned or replaced. It helps you stay on schedule and troubleshoot issues.
Pro Tip #3: Use a timer. Set a monthly reminder on your phone to check your pre-filter. It’s easy to forget until it’s too late.
Now, the common mistakes to avoid:
- Washing HEPA or carbon filters – I’ve said it before, but it’s worth repeating. Water ruins them.
- Using harsh cleaners – Stick to mild soap and water for washable parts. Bleach and ammonia can degrade materials and leave toxic residues.
- Reinstalling damp filters – It causes mold, odors, and potential electrical issues.
- Ignoring the manual – GP Plus models vary. Your manual has specific guidance for your unit—use it.
- Skipping the interior clean – A dirty housing reduces airflow and shortens filter life.
- Using generic replacement filters – Off-brand filters may not fit or perform as well. Stick to GP Plus-approved parts for best results.
One last thing: if you live in a high-pollution area or have allergies, consider upgrading to a higher-grade HEPA filter (like True HEPA or Medical Grade). It’s a small investment for big air quality gains.
FAQs About How to Clean GP Plus Air Purifier Filters in 2026
Can I wash the HEPA filter in my GP Plus purifier?
No. Never wash a HEPA filter. Water damages the delicate fibers, reducing its effectiveness to zero. Instead, vacuum it gently with a brush attachment or use compressed air. Replace it every 6–12 months, depending on usage.
How often should I clean my pre-filter?
Clean your pre-filter every 2–4 weeks if you run the purifier daily, especially with pets or in dusty environments. In low-dust areas, every 6 weeks is fine. Just check it monthly—if it looks gray or feels heavy with dust, clean it.
My filter indicator light is still on after cleaning. What should I do?
First, make sure you’ve reset the filter life indicator (check your manual). If it’s still on, double-check that the filters are installed correctly and the access panel is fully closed. Some models won’t reset if the panel is loose. If the problem persists, contact GP Plus support.
Can I use compressed air on all filters?
Yes, but with caution. Use it on pre-filters and HEPA filters to blow out debris from pleats. Keep the can 6+ inches away and use short bursts. Never use it on a carbon filter with loose granules—it can scatter the carbon. For carbon sheets, it’s safe.
How do I know when to replace my filters?
Signs include:
- Reduced airflow (purifier sounds louder or air feels weaker)
- Persistent odors (carbon filter is spent)
- Visible damage (tears, holes, clumping)
- Filter life indicator light is on (after reset)
As a rule, replace HEPA and carbon filters every 6–12 months. Pre-filters last longer but replace them if they’re torn or too dirty to clean.
Are there any filters I should never clean?
Yes. Never clean:
- Non-washable HEPA filters (all GP Plus HEPA filters fall here)
- Carbon filters (they can’t be regenerated)
- Filters with loose granules or foam (they’ll fall apart)
When in doubt, replace instead of clean.
Can I clean my GP Plus purifier with a damp cloth?
Only the exterior. Wipe it with a lightly damp microfiber cloth (no soap). For the interior, vacuum and use compressed air. Never let water or liquid cleaners near the motor, fan, or sensors.
Final Thoughts
Cleaning your GP Plus air purifier filters isn’t rocket science—but it does matter. A clean filter means cleaner air, lower energy use, and a longer-lasting machine. And now, you know exactly how to clean GP Plus air purifier filters in 2026—the right way.
Start simple: clean the pre-filter monthly, vacuum the HEPA every few months, and replace filters on schedule. Keep your tools handy, follow the steps, and don’t skip the manual.
Remember, maintenance is a habit. The more consistent you are, the better your purifier performs. And your lungs? They’ll thank you.
So grab that microfiber cloth, set a reminder, and make filter cleaning part of your routine. Your air—and your health—will be better for it.
Now go breathe easy. You’ve got this.
“`