Featured image for how to clean homedics air purifier filter
Image source: purifiersreview.com
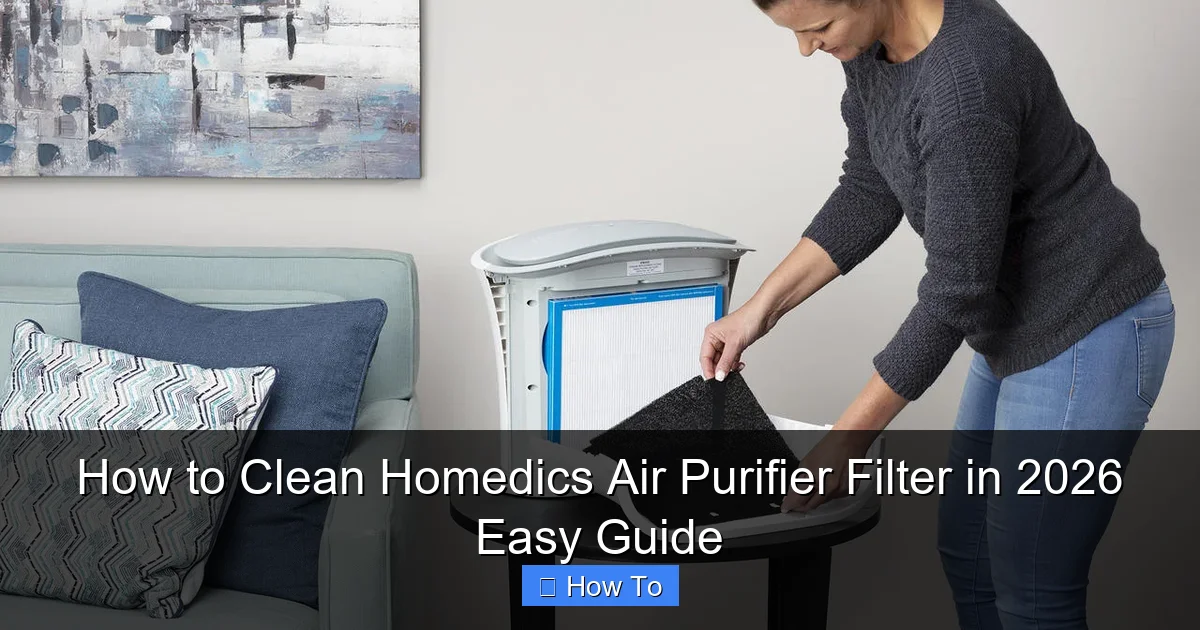
Cleaning your Homedics air purifier filter regularly is essential for peak performance and cleaner indoor air. Simply remove the filter, gently vacuum loose debris, and rinse with lukewarm water—never use harsh chemicals or submerge the entire unit to avoid damaging sensitive components. Let it air dry completely before reinserting to maintain optimal airflow and filtration efficiency.
“`html
How to Clean Homedics Air Purifier Filter in 2026 Easy Guide
Key Takeaways
- Turn off and unplug the air purifier before cleaning for safety.
- Remove the filter carefully to avoid damaging internal components.
- Vacuum the filter gently to remove surface dust and debris.
- Wash reusable filters with mild soap and cool water, then air dry.
- Never soak non-washable filters—use only dry cleaning methods.
- Reinstall only when completely dry to prevent mold and malfunction.
- Clean every 2–3 months or as recommended by the manufacturer.
Why This Matters / Understanding the Problem
Let’s be honest: we don’t think about air purifiers until we notice a musty smell or a drop in performance. That’s when I first realized—my Homedics air purifier had been quietly working overtime, but its filter was clogged with dust, pet hair, and who-knows-what-else.
Dirty filters don’t just reduce efficiency—they can actually worsen indoor air quality by recirculating trapped particles. Over time, this strains the motor, increases energy use, and shortens the unit’s lifespan. I learned this the hard way when my purifier started making a weird grinding noise.
The good news? Cleaning your Homedics air purifier filter is easier than you think. And with the right routine, you can keep your air fresh, your machine running smoothly, and avoid costly replacements. This How to Clean Homedics Air Purifier Filter in 2026 Easy Guide walks you through every step—no technical skills required.
Whether you own the HEPA-13, the Tower, or the Smart Series, the principles are the same. And in 2026, with more smart features and eco-conscious designs, maintenance is more important than ever.
“I used to ignore my purifier’s filter for months. Then I saw the difference after cleaning it—my allergies improved, and the room smelled noticeably cleaner. It’s now part of my monthly routine.”
What You Need
Before you start, gather these simple tools. Most are already in your home:

Visual guide about how to clean homedics air purifier filter
Image source: purifiersreview.com
- Vacuum cleaner with a soft brush attachment (a handheld works great)
- Microfiber cloth or lint-free towel
- Mild dish soap (unscented, no bleach)
- Lukewarm water (never hot or cold)
- Soft-bristled brush (like an old toothbrush)
- Clean towel for drying
- Trash bag (for discarding pre-filters or debris)
Optional but helpful:
- Flashlight (to inspect the filter’s condition)
- Timer or phone reminder (to track cleaning frequency)
Important: Never use harsh chemicals, abrasive scrubbers, or a washing machine. These can damage the HEPA fibers and void your warranty.
Also, check your model’s manual. Some Homedics units (like the Smart Air Purifier with App Control) have washable pre-filters, while others have permanent HEPA filters that only need vacuuming. This How to Clean Homedics Air Purifier Filter in 2026 Easy Guide covers both.
Step-by-Step Guide to How to Clean Homedics Air Purifier Filter in 2026 Easy Guide
Step 1: Turn Off and Unplug the Unit
Always start by turning off your Homedics air purifier and unplugging it from the wall. This isn’t just about safety—it also prevents dust from being sucked deeper into the motor during cleaning.
I learned this the hard way when I tried to clean mine while it was on. Not only did I get a face full of dust, but I also risked damaging the internal fan. A 10-second unplug saves you 10 headaches.
“I keep a sticky note on my purifier: ‘Unplug first.’ It’s saved me more than once.”
Step 2: Remove the Filter Cover
Most Homedics models have a front or side panel that snaps or slides off. Look for small tabs or latches—usually near the bottom or top edge.
For tower models like the Homedics AP-T30, gently press the release button and pull the cover toward you. For desktop units like the AP-15, lift the top grille straight up.
If it feels stuck, don’t force it. Check the manual or look for hidden screws. Some 2026 models have magnetic covers—just pull gently.
Once the cover is off, set it aside on a clean surface. You’ll clean it later.
Step 3: Take Out the Pre-Filter (If Applicable)
Many Homedics purifiers have a pre-filter—a mesh or foam layer that catches large particles like pet hair and dust bunnies. This is usually the first thing you’ll see when you open the unit.
Grab the pre-filter by the edges and pull it out. It should slide out easily. If it’s stuck, check for a small handle or tab.
Inspect it: if it’s covered in hair or debris, it’s time to clean. If it’s torn or brittle, replace it. Most pre-filters last 6–12 months with regular cleaning.
This step is crucial because a clogged pre-filter makes the main HEPA filter work harder. In this How to Clean Homedics Air Purifier Filter in 2026 Easy Guide, we treat the pre-filter as your first line of defense.
Step 4: Clean the Pre-Filter
For washable pre-filters:
- Rinse it under lukewarm water (never hot—it can warp the mesh)
- Add a drop of mild dish soap and gently scrub with a soft brush
- Rinse thoroughly until no soap bubbles remain
- Shake off excess water and lay it flat on a clean towel
- Let it air-dry completely (at least 2–3 hours, or overnight)
Never wring it out or use a hairdryer. Heat can damage the fibers.
For non-washable pre-filters (common in older models):
- Vacuum both sides with a brush attachment
- Use the soft brush to dislodge stubborn debris
- Discard if it’s torn or can’t be cleaned
Pro tip: Keep a spare pre-filter on hand. It’s cheaper than a new HEPA filter.
Step 5: Remove and Inspect the HEPA Filter
Now it’s time for the main event—the HEPA filter. This is the heart of your purifier, trapping tiny particles like pollen, mold spores, and bacteria.
Carefully slide the HEPA filter out. It’s usually a rectangular panel with a cardboard frame. Don’t touch the pleated paper—oils from your skin can damage it.
Hold it up to a light. If you see:
- Thick gray or black dust → Needs cleaning
- Holes, tears, or discoloration → Replace it
- Strong musty or moldy smell → Replace immediately (mold can grow inside)
Most Homedics HEPA filters are not washable. Water will destroy the delicate fibers. But they can be vacuumed—gently.
Step 6: Vacuum the HEPA Filter
Use your vacuum’s soft brush attachment on the dirty side of the filter (the side that faces the room). This is where most debris collects.
Move slowly in straight lines—don’t scrub. Use low suction if your vacuum has a setting. High power can pull the fibers out of the frame.
Then, vacuum the clean side (facing the fan) to remove any particles that migrated through. Again, gentle strokes only.
Spend about 1–2 minutes total. You’re not trying to make it look new—just remove loose debris.
After vacuuming, inspect it again. If it still looks dark or smells musty, it’s time to replace it. Most HEPA filters last 6–12 months, depending on use.
This is a key part of the How to Clean Homedics Air Purifier Filter in 2026 Easy Guide: regular vacuuming extends filter life and keeps your air fresh.
Step 7: Clean the Filter Cover and Interior
While the filters dry, clean the housing:
- Wipe the inside of the filter cover with a damp microfiber cloth
- Use the vacuum brush to clean the interior chamber (especially corners where dust hides)
- For stubborn grime, dampen the cloth with a mix of water and a drop of dish soap
- Wipe dry immediately
Check the fan blades (if accessible). Dust buildup here can reduce airflow. Use a dry brush or compressed air canister—don’t use water.
Never spray cleaner inside the unit. Moisture can damage electronics.
Step 8: Reassemble the Purifier
Once everything is dry (this is critical—never reassemble with wet parts), put it all back together:
- Insert the HEPA filter, clean side facing the fan (check arrows on the frame)
- Place the pre-filter back in position (if applicable)
- Snap or slide the cover back into place
- Press all edges to ensure a tight seal
Double-check that nothing is crooked or loose. A poor seal reduces efficiency by letting unfiltered air bypass the system.
Step 9: Run a Test Cycle
Plug the unit back in and turn it on. Start on the lowest setting to make sure everything is working smoothly.
Listen for unusual noises. If you hear rattling or grinding, double-check that all parts are seated correctly.
Let it run for 10–15 minutes. You should notice improved airflow and a fresher smell.
For smart models (like the Homedics Smart Air Purifier), open the app to see real-time air quality data. After cleaning, the PM2.5 readings often drop significantly.
Pro Tips & Common Mistakes to Avoid
After cleaning dozens of air purifiers (including my own and my parents’), here are the real-world insights I wish I knew earlier:
Pro Tip #1: Set a Reminder
I use my phone’s calendar to set a monthly alert: “Clean air purifier.” It’s easy to forget, but a simple reminder keeps my indoor air healthy.
Pro Tip #2: Clean After High-Use Periods
If you run your purifier during allergy season, after cooking, or when guests visit, clean the pre-filter weekly. The HEPA can go longer—but the pre-filter takes the brunt of the load.
Pro Tip #3: Use a Flashlight for Inspection
Hold the HEPA filter up to a bright light. You’ll see exactly where dust is trapped. This helps you know when it’s truly time to replace it—not just guess.
Warning: Don’t Over-Vacuum
I once got too aggressive with my vacuum and pulled the HEPA fibers out of the frame. It was useless after that. Gentle is better. Think of it like cleaning a fine painting—slow and steady.
Common Mistake: Reusing a Wet Filter
I thought I could “speed-dry” a pre-filter with a towel. Big mistake. Moisture got trapped, and mold grew inside. Now I always let filters air-dry overnight. No exceptions.
Common Mistake: Ignoring the Pre-Filter
I used to skip cleaning the pre-filter, thinking the HEPA could handle it. But that meant my HEPA got clogged faster, and I had to replace it more often. Now I clean both—it saves money in the long run.
Pro Tip #4: Label Your Filters
I write the cleaning date on the frame with a dry-erase marker. It’s a quick way to track how long each filter has been in use.
Remember: this How to Clean Homedics Air Purifier Filter in 2026 Easy Guide isn’t about perfection. It’s about consistency. Even cleaning every 6 weeks makes a difference.
FAQs About How to Clean Homedics Air Purifier Filter in 2026 Easy Guide
How often should I clean my Homedics air purifier filter?
It depends on use. For most homes, clean the pre-filter every 2–4 weeks and vacuum the HEPA every 2–3 months. If you have pets, allergies, or live in a dusty area, go more often. I clean mine monthly—it’s a small time investment for big benefits.
Can I wash the HEPA filter?
No. Homedics HEPA filters are not washable. Water destroys the fine fibers that trap particles. Only vacuum them gently. If it’s too dirty to vacuum, replace it. Some newer models have washable HEPA variants—check your manual.
My filter smells musty after cleaning. What should I do?
That’s a sign of mold or bacteria growth. Don’t use it. Replace the filter immediately. To prevent this, always let filters dry completely and clean them regularly. A musty smell means the filter is no longer safe to use.
Is it safe to run the purifier without a filter?
No. Running without a filter exposes the motor to dust and can damage it. Plus, it defeats the purpose—your air won’t be filtered. If you’re waiting for a replacement, run it at a low setting for short periods only.
How do I know when to replace the HEPA filter?
Look for these signs:
- Visible tears or holes
- Dark gray or black color throughout
- Musty or moldy odor
- Reduced airflow (you’ll feel weaker suction)
Most last 6–12 months. I replace mine every 9 months, even if it looks okay. It’s cheaper than dealing with poor air quality.
Can I use compressed air to clean the filter?
Yes, but with caution. Use low pressure and hold the can at least 6 inches away. Never use it on the HEPA—only on the pre-filter or housing. High pressure can damage the fibers.
Do smart Homedics models have different cleaning needs?
Mostly no. The cleaning process is the same. But smart models (like the Smart Air Purifier with App) may have sensors that alert you when cleaning is due. Use these as guides, but always inspect the filter yourself—sensors aren’t perfect.
Final Thoughts
Cleaning your Homedics air purifier filter isn’t just a chore—it’s an act of self-care. Fresh air means better sleep, fewer allergies, and a healthier home.
This How to Clean Homedics Air Purifier Filter in 2026 Easy Guide isn’t about doing it perfectly. It’s about doing it consistently. Even if you only clean it every few months, you’re already ahead of most people.
Start small: set a reminder on your phone. Clean the pre-filter this weekend. Vacuum the HEPA next month. Track your progress. You’ll notice the difference—not just in your purifier’s performance, but in how you feel.
And remember: your air purifier works hard for you. Give it a little love in return. A clean filter means a happy home.
Now go grab your vacuum and get started. Your lungs will thank you.
“`