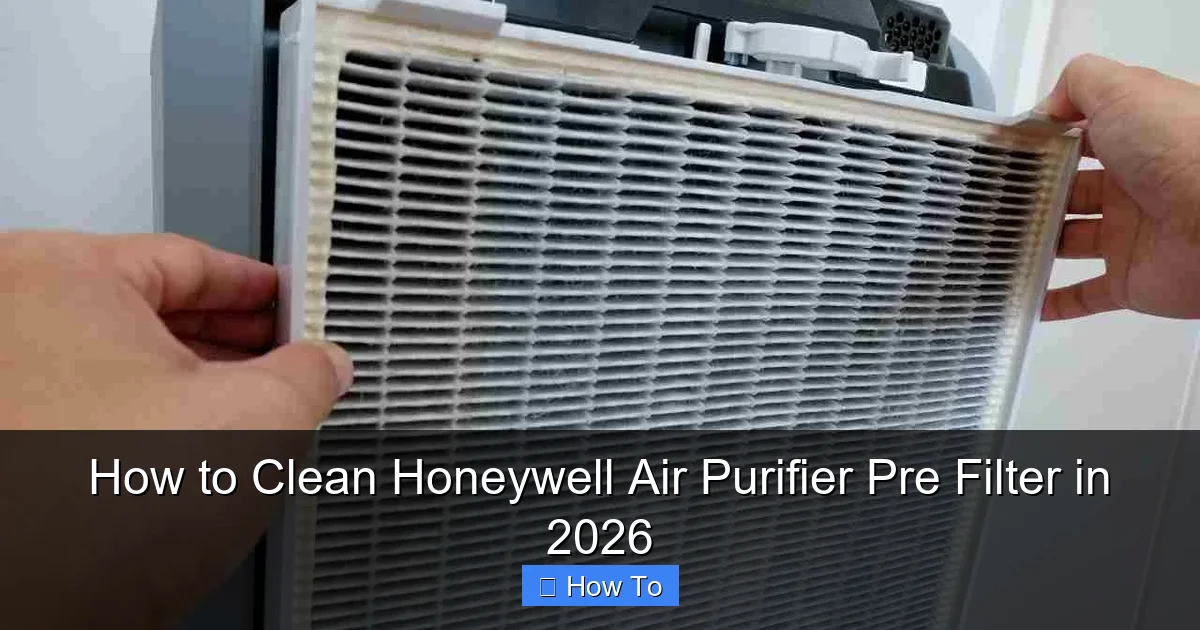
Featured image for how to clean honeywell air purifier pre filter
Image source: cleaninup.com
Cleaning your Honeywell air purifier pre-filter every 2–4 weeks ensures optimal performance and extends the life of your device. Simply remove the pre-filter, vacuum loose debris, and rinse under cool water—never use harsh chemicals or submerge the unit to maintain air quality and system efficiency. A quick, regular clean keeps allergens and dust at bay in 2026 and beyond.
“`html
How to Clean Honeywell Air Purifier Pre Filter in 2026
Key Takeaways
- Turn off and unplug the purifier before cleaning for safety.
- Remove the pre-filter carefully to avoid damaging the unit.
- Vacuum loose debris first to extend filter life.
- Wash with mild soap and lukewarm water if reusable.
- Air-dry completely before reinstalling to prevent mold.
- Clean every 1–2 months for optimal performance.
- Replace if damaged or no longer effective after cleaning.
Why This Matters / Understanding the Problem
Let’s be honest: we all love that fresh, clean air our Honeywell air purifier delivers. But after a few weeks of use, I noticed something weird—my allergies were flaring up again. I checked the main HEPA filter, which was fine. Then it hit me: the pre-filter. That thin, mesh-like screen at the front? It was caked with dust, pet hair, and even a suspicious-looking cobweb.
That’s when I realized: cleaning the pre-filter isn’t optional. It’s the first line of defense, catching the big stuff before it clogs the more expensive HEPA filter. Neglect it, and you’re not just wasting money—you’re letting allergens and pollutants sneak through. That’s why knowing how to clean Honeywell air purifier pre filter in 2026 is essential for keeping your unit efficient, long-lasting, and truly effective.
Whether you’ve got a Honeywell HPA300, HPA100, or any other model with a washable pre-filter, this guide is your go-to. I’ll walk you through the process step by step, just like I wish someone had done for me when I first bought mine.
What You Need
Before we dive in, let’s gather what you’ll need. Nothing fancy—just a few household items you probably already have:
Visual guide about how to clean honeywell air purifier pre filter
Image source: dylbs6e8mhm2w.cloudfront.net
- Soft microfiber cloth (or a clean, lint-free rag)
- Mild dish soap (like Dawn—nothing with bleach or harsh chemicals)
- Lukewarm water (not hot—hot water can warp the mesh)
- Small bowl or sink (for soaking, if needed)
- Vacuum with a soft brush attachment (optional, but super helpful)
- Hairdryer or fan (to speed up drying)
And, of course, your Honeywell air purifier. Most models (like the HPA100, HPA200, HPA300, and even the newer HPA500) have a removable pre-filter. If yours is labeled “washable,” you’re good to go. If not, check your manual—some pre-filters are disposable.
Pro tip: Never use a pressure washer, steel wool, or abrasive cleaners. You’ll ruin the mesh and void your warranty. Trust me, I learned that the hard way.
Step-by-Step Guide to How to Clean Honeywell Air Purifier Pre Filter in 2026
Let’s get into the nitty-gritty. I’ll walk you through each step, with real-life hiccups and fixes I’ve discovered over the years.
Step 1: Power Off and Unplug the Unit
First things first: turn off and unplug your air purifier. This isn’t just about safety—it’s about giving your device a proper reset. I once tried cleaning mine while it was still running (don’t ask), and the fan kicked on mid-spray. Not fun.
Unplugging also gives you peace of mind. You don’t want to risk electrical issues, especially if you’re using a wet cloth or spray.
⚠️ Warning: Never clean any part of your air purifier while it’s plugged in. Even if it’s “off,” residual power can be dangerous.
Step 2: Remove the Pre-Filter
Now, locate the pre-filter. On most Honeywell models, it’s behind the front grille. Here’s how to remove it:
- Press the release tabs on the sides of the front cover (usually two or four).
- Gently pull the cover off. Some models have a magnetic latch—just wiggle it loose.
- You’ll see the pre-filter: a thin, black or gray mesh screen. It’s usually held in place by a frame or clips.
- Slide or lift it out carefully. Don’t force it—if it’s stuck, check for hidden latches.
On my HPA200, the pre-filter has a small handle. I just grab it and pull straight out. Easy peasy.
💡 Pro Tip: Take a quick photo with your phone before removing the filter. That way, you’ll remember how it fits back in—especially if your model has directional arrows.
Step 3: Vacuum the Pre-Filter (Dry First)
Before you get it wet, vacuum both sides of the pre-filter. Use the soft brush attachment to avoid scratching the mesh. This removes loose dust, pet hair, and lint—saving you from scrubbing later.
I do this every 2–3 weeks, even if I’m not washing it. It keeps the airflow strong and reduces deep clean frequency.
If you don’t have a vacuum, a clean, dry microfiber cloth works. Just wipe gently—don’t rub aggressively.
Step 4: Wash the Pre-Filter
Now for the fun part: washing. Here’s how:
- Fill a small bowl or sink with lukewarm water (not hot—hot water can warp the plastic frame).
- Add a few drops of mild dish soap. No need to make bubbles—just enough to lift grime.
- Submerge the pre-filter and let it soak for 5–10 minutes. This loosens stuck-on dust and grease.
- Use your fingers or a soft cloth to gently wipe both sides. Focus on the mesh—don’t scrub the frame.
- Rinse thoroughly under cool running water. Make sure all soap is gone—residue can attract dust.
I once used a scrub brush (bad idea). The mesh tore, and I had to order a replacement. Learn from my mistake: gentle wins every time.
💡 Pro Tip: If the pre-filter is really dirty (think: yellowed, oily, or smelly), soak it for 15–20 minutes. But never use vinegar, bleach, or ammonia—they degrade the mesh.
Step 5: Dry the Pre-Filter Completely
This step is critical. Never reinstall a damp pre-filter. Moisture can:
- Cause mold or mildew inside the unit
- Damage the HEPA filter
- Create musty odors
Here’s how to dry it fast:
- Shake off excess water.
- Place the pre-filter on a clean towel in a well-ventilated area. Avoid direct sunlight (UV rays can weaken the mesh).
- Use a fan or hairdryer on cool setting to speed up drying. Hold the dryer 6–8 inches away—don’t melt the frame!
- Wait at least 1–2 hours. I usually leave mine overnight to be safe.
Test: Run your fingers over the mesh. If it feels cool or damp, it’s not ready. Patience pays off.
Step 6: Reinstall the Pre-Filter
Once it’s bone-dry, put it back:
- Align the pre-filter with the grooves or clips in the unit.
- Slide or snap it in place. Make sure it’s flat—no wrinkles or gaps.
- Reattach the front cover. Push the tabs or magnets until they click.
Double-check the airflow arrows (if your model has them). They should point into the unit.
💡 Pro Tip: If your model has a “filter reset” button (like the HPA300), press it after reinstalling. This resets the timer so you know when to clean it next.
Step 7: Test the Air Purifier
Plug it back in and turn it on. Listen for unusual noises or vibrations. If it sounds off, power it down and recheck the pre-filter placement.
Set it to medium or high speed for 10–15 minutes. You should feel a strong airflow. If it’s weak, the pre-filter might not be seated properly.
Pro Tips & Common Mistakes to Avoid
Over the years, I’ve made—and fixed—a lot of mistakes. Here’s what I wish I knew sooner:
Clean Every 2–4 Weeks (Not Just When It’s Gross)
I used to wait until the pre-filter looked like a dust bunny convention. Big mistake. Even a thin layer of dust reduces airflow by 10–20%. Now, I vacuum it weekly and wash it monthly.
How often? Depends on your environment:
- High dust/pet hair: Clean every 2 weeks
- Moderate use: Every 3–4 weeks
- Low traffic: Every 6 weeks
Label Your Filters
I keep a small label on the pre-filter frame with the last cleaning date. No more guessing: “Did I clean it last month or the month before?”
Don’t Mix Pre-Filter and HEPA Filter Care
They’re different! The pre-filter is washable. The HEPA filter is not—it’s a paper-like material that breaks down if wet. Replace it every 12–18 months (or as recommended).
Mixing them up? I did once. Tried to vacuum the HEPA filter with a brush. The fibers ripped. Cost me $60 to replace. Ouch.
Store Spare Pre-Filters Properly
If you have a spare (great idea!), store it in a sealed bag in a cool, dry place. Humidity can cause mildew, even when not in use.
Common Mistakes
- Using hot water: Warps the frame and mesh.
- Scrubbing with abrasive tools: Tears the mesh. Use fingers or a soft cloth.
- Reinstalling damp filters: Causes mold. Dry for at least 2 hours.
- Ignoring the front cover: Wipe it down with a damp cloth while you’re at it.
- Skipping the reset button: If your model has one, use it!
💡 Pro Tip: Set a monthly reminder on your phone. “Clean pre-filter” with a photo of the filter. Out of sight, out of mind is the enemy of clean air.
FAQs About How to Clean Honeywell Air Purifier Pre Filter in 2026
Can I clean my Honeywell pre-filter with vinegar?
Nope. Vinegar is acidic and can degrade the mesh over time. Stick to mild dish soap and water. I tried it once (thinking it’d kill bacteria), and the mesh started fraying after two washes. Not worth the risk.
How do I know if my pre-filter needs replacing?
Even with regular cleaning, pre-filters wear out. Look for:
- Visible tears or holes in the mesh
- Persistent odors after cleaning
- Discoloration (yellow/brown stains that won’t wash out)
- Warping or cracks in the frame
If you see any of these, it’s time for a new one. Most Honeywell pre-filters cost $10–$20 and last 1–2 years with care.
Is it safe to use a hairdryer to dry the pre-filter?
Yes—but only on the cool setting. Heat can melt the plastic frame or warp the mesh. I use a hairdryer on low, held 8 inches away, for 5–10 minutes. Then let it air-dry the rest of the way.
What if my Honeywell model doesn’t have a washable pre-filter?
Some models (like the HPA090) have a disposable pre-filter. If yours is labeled “non-washable” or “replace every 3 months,” don’t try to clean it. Just replace it. Check your manual or the Honeywell website to confirm.
Can I clean the pre-filter while the unit is running?
Absolutely not. Unplug it first. Even if the power button is off, the unit can still have electrical current. Safety first.
How often should I replace the HEPA filter?
Every 12–18 months, depending on use. If you clean the pre-filter regularly, the HEPA filter will last longer. But don’t wait too long—clogged HEPA filters reduce efficiency and can strain the motor.
My air purifier smells musty after cleaning. What’s wrong?
That’s a red flag. It means:
- The pre-filter wasn’t fully dry
- You used a cleaning product with strong fragrance
- There’s mold in the unit
Unplug it, let it air out for 24 hours, and recheck the pre-filter. If the smell persists, wipe the inside of the unit with a damp cloth and mild soap. Never use air fresheners or essential oils inside the purifier.
Final Thoughts
Cleaning your Honeywell air purifier pre-filter isn’t rocket science. But it’s one of those small, easy tasks that makes a huge difference in air quality, energy efficiency, and how long your purifier lasts.
Now that you know how to clean Honeywell air purifier pre filter in 2026, you’re not just maintaining a gadget—you’re investing in healthier air for you and your family. And trust me, your lungs will thank you.
Here’s my final advice: clean it regularly, dry it thoroughly, and don’t skip the little details. Set a reminder, keep your tools handy, and make it part of your monthly routine. In a few weeks, you’ll notice the difference—cleaner air, quieter operation, and fewer allergy flare-ups.
And if you ever run into trouble? Don’t panic. Check the manual, look up your model on Honeywell’s website, or reach out to their customer service. They’re surprisingly helpful.
Happy cleaning—and breathe easy!
“`