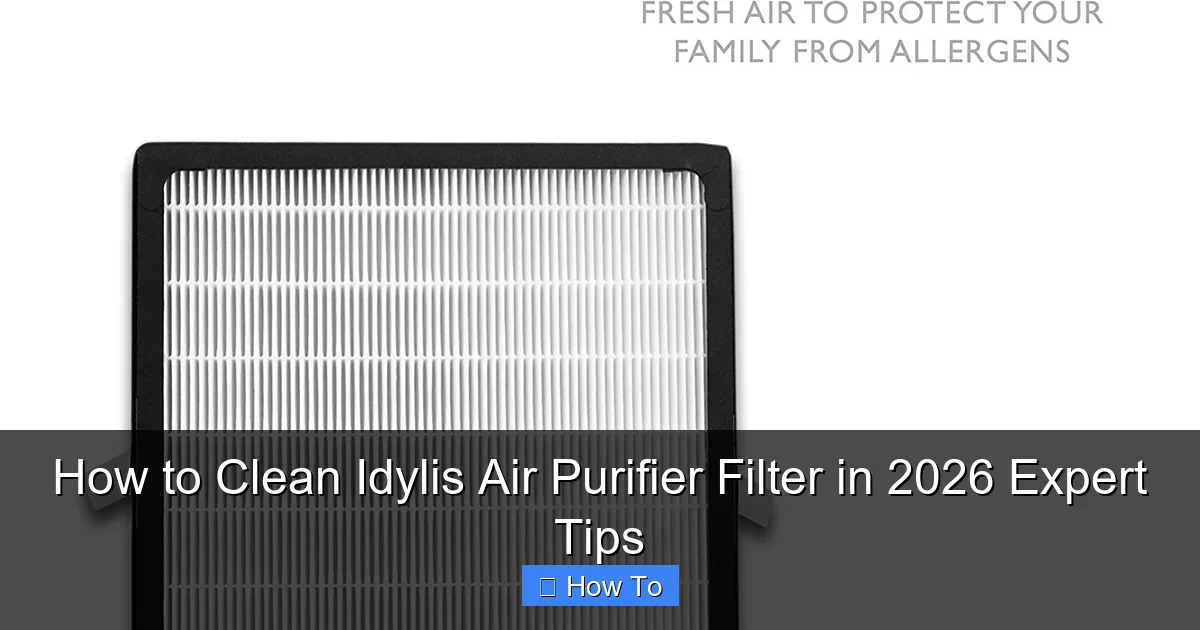
Featured image for how to clean idylis air purifier filter
Image source: cdn.shopify.com
Regularly cleaning your Idylis air purifier filter is essential to maintain optimal performance and indoor air quality. Follow these expert-approved steps—power off the unit, remove the filter, gently vacuum or rinse (if washable), and allow it to dry completely before reinserting—to extend filter life and ensure efficient allergen removal in 2026 and beyond.
“`html
How to Clean Idylis Air Purifier Filter in 2026 Expert Tips
Key Takeaways
- Turn off and unplug the purifier before cleaning for safety.
- Use a soft brush to gently remove dust from the filter surface.
- Vacuum monthly to extend filter life and maintain efficiency.
- Never use water on HEPA filters—it damages the fibers.
- Replace filters annually or as recommended for optimal performance.
- Check pre-filters weekly and rinse if washable to reduce strain.
Why This Matters / Understanding the Problem
You’ve probably noticed that your home feels a little stuffy lately—maybe you’re sneezing more, or that musty smell just won’t go away. Your Idylis air purifier is supposed to help, but if the filter’s clogged or dirty, it’s not doing its job. A neglected filter can’t trap dust, pollen, pet dander, or smoke particles effectively. In fact, a dirty filter might even worsen air quality by pushing stale, unfiltered air back into your space.
Over time, dust and debris build up, reducing airflow and efficiency. You might even hear the purifier working harder than usual—like a car engine straining uphill. That’s your clue: it’s time to clean the filter. But here’s the catch: not all filters are the same. Some are washable; others aren’t. And if you clean the wrong one the wrong way, you could damage it or shorten its life.
That’s why knowing how to clean Idylis air purifier filter in 2026 expert tips isn’t just helpful—it’s essential. Whether you’re dealing with a pre-filter, HEPA, or carbon filter, doing it right keeps your air clean, your machine healthy, and your lungs happy. And let’s be real: replacing filters every few months gets expensive. Cleaning them properly saves money and reduces waste.
Think of it like brushing your teeth. You wouldn’t skip it for months and expect fresh breath, right? Same with your air purifier. Regular cleaning is part of the routine. In this guide, I’ll walk you through everything you need—no jargon, no fluff. Just real, practical advice based on years of troubleshooting my own units and helping friends keep theirs in top shape.
What You Need
Before you start, gather these items. Nothing fancy—most are already in your home. Having everything ready saves time and avoids frustration mid-process.

Visual guide about how to clean idylis air purifier filter
Image source: mobileimages.lowes.com
- Your Idylis air purifier (obviously)
- Soft microfiber cloth (for wiping down the exterior)
- Vacuum cleaner with a soft brush attachment (or a handheld vacuum)
- Clean, cool water (never hot—this can warp plastic parts)
- Mild dish soap (like Dawn—nothing with bleach or harsh chemicals)
- Clean towel or drying rack (for air-drying the washable filter)
- Flashlight (optional, but helpful for inspecting the filter)
- Replacement filters (on standby) (in case yours is damaged or not washable)
Pro tip: Check your model number before cleaning. Idylis has several series (like AP-100, AP-150, or AP-300), and not all filters are designed the same. You can usually find the model number on the back or bottom of the unit. This matters because some models have a pre-filter that’s washable, while the main HEPA or carbon filter is not.
Also, avoid paper towels or abrasive scrubbers. They can tear delicate mesh or leave lint behind. And skip the garden hose—water pressure can crush the filter’s structure. Stick to gentle tools. This isn’t a deep clean of your car; it’s a spa day for your purifier.
Step-by-Step Guide to How to Clean Idylis Air Purifier Filter in 2026 Expert Tips
Now, let’s get into the nitty-gritty. I’ll walk you through each step, just like I do when I clean my own unit every 2–4 weeks. This routine keeps my air crisp and my machine running smoothly.
Step 1: Power Down and Unplug the Unit
First things first: turn off and unplug the air purifier. This isn’t just about safety (though that’s huge). It also prevents the motor from kicking on while you’re working, which could be dangerous or damage the unit.
Let’s say you’ve had it running all day. The fan might still be warm. Give it 5–10 minutes to cool down. No need to rush. Once it’s off and cool, move it to a flat, clean surface—like a kitchen counter or table. This gives you room to work and keeps dust from falling back into the machine.
⚠️ Warning: Never clean a plugged-in purifier. Even if it’s off, residual electricity can pose a risk. Unplug it. Always.
Step 2: Open the Air Purifier and Remove the Filters
Now, locate the filter compartment. On most Idylis models, it’s on the side or back. Look for a latch, sliding panel, or twist-off cover. Some models use a simple snap-on design—just press the tabs gently and pull.
Once open, you’ll see one or more filters. Here’s what you’ll typically find:
- Pre-filter (outer layer): Usually a coarse mesh, often washable. Catches large particles like pet hair and dust bunnies.
- HEPA filter (middle layer): Thin, paper-like material. Not washable. Traps tiny particles like pollen and mold spores.
- Carbon filter (optional, inner layer): Dark, charcoal-infused mesh. Absorbs odors and VOCs. Also not washable.
Gently slide each filter out. Don’t yank. If a filter sticks, wiggle it slightly. Use your flashlight to inspect the housing for dust buildup. If it’s grimy, wipe it down later.
💡 Pro tip: Take a photo of the filter arrangement before removing anything. This helps you remember how to reassemble—especially if you have multiple filters or a complex setup.
Step 3: Clean the Washable Pre-Filter (If Applicable)
This is where how to clean Idylis air purifier filter in 2026 expert tips really shines. The pre-filter is your first line of defense and often the only one you can wash.
Here’s how:
- Hold the pre-filter under cool running water. Use your fingers to gently rub off dust and hair.
- If it’s really dirty, add a drop of mild dish soap. Scrub lightly with your fingertips—no brushes or sponges. They can tear the mesh.
- Rinse thoroughly. You want all soap residue gone. Leftover soap can create a film that clogs the filter.
- Shake off excess water. Don’t wring it—this can stretch or damage the frame.
- Place the filter on a clean towel or drying rack. Let it air dry completely—this can take 4–12 hours, depending on humidity.
Never use hot water. High temps can warp the plastic frame or melt the adhesive holding the mesh. And don’t put it in the dryer or near a heater. Just let nature do its thing.
⚠️ Warning: If the pre-filter is cracked, torn, or has a loose mesh, don’t wash it. Replace it. A damaged filter won’t catch anything—and worse, it might let debris into the motor.
Step 4: Vacuum the Non-Washable HEPA and Carbon Filters
This is critical: HEPA and carbon filters should never be washed. Water ruins their structure. Instead, use a vacuum with a soft brush attachment.
Here’s the method:
- Hold the filter vertically (like a standing screen).
- Use the vacuum’s brush attachment to gently suck up dust from both sides. Move in slow, straight lines—don’t scrub in circles. This helps avoid pushing debris deeper.
- Focus on the corners and edges—these collect the most grime.
- Flip the filter and repeat.
For the HEPA filter, you might see a lot of dust. That’s normal—it means it’s working. For the carbon filter, look for dark spots or a greasy film (common in kitchens). That’s odor buildup. A good vacuuming can revive it.
After vacuuming, inspect both filters with a flashlight. If the HEPA filter looks gray or has visible holes, it’s time to replace it. Most HEPA filters last 6–12 months, depending on use. Carbon filters often need replacing every 3–6 months, especially in smoky or pet-heavy homes.
💡 Pro tip: Vacuum the filters every 2–4 weeks. This extends their life and keeps your purifier running efficiently. Think of it like flossing—regular maintenance prevents bigger problems.
Step 5: Wipe Down the Air Purifier Housing
While the filters are drying or being vacuumed, clean the inside of the purifier. Use a microfiber cloth to wipe the housing, fan blades, and any vents. If there’s stubborn dust, lightly dampen the cloth—just a little. Never let water drip into the motor or electrical parts.
For tight spaces, use a cotton swab or the vacuum’s crevice tool. Pay attention to the air intake—where air enters. This often gets clogged with pet hair or lint. A clean intake means better airflow and less strain on the motor.
Also, check the sensor (if your model has one). It’s usually near the intake. A dirty sensor can misread air quality and run the purifier unnecessarily. Gently wipe it with a dry cloth.
Step 6: Reinstall the Filters and Close the Unit
Once the pre-filter is completely dry, it’s time to put everything back. Start with the carbon filter (if you have one), then the HEPA filter, then the pre-filter. Make sure each one sits flat and secure—no gaps or misalignment.
Slide the filters in gently. If something feels tight, don’t force it. Double-check the orientation. Some filters have arrows showing airflow direction. Make sure they point toward the motor.
Then, close the compartment. Snap, slide, or twist the cover shut. Give it a light tug to ensure it’s secure. A loose cover can let unfiltered air bypass the system.
Step 7: Power On and Test
Plug the purifier back in and turn it on. Listen for normal fan sounds—smooth, steady, not rattling or grinding. If it sounds off, double-check the filter placement.
Let it run for 10–15 minutes. You should feel clean air coming from the exhaust. If your model has an air quality indicator, watch it. It should show improvement within a few minutes.
Bonus: Run it on high for 30 minutes to clear any dust that got stirred up during cleaning. This is like a “reset” for your air.
Pro Tips & Common Mistakes to Avoid
After years of cleaning my own and helping others, I’ve picked up some golden rules—and seen some epic fails. Here’s what to keep in mind:
💡 Pro tip: Clean the pre-filter every 2–4 weeks. Vacuum the HEPA and carbon filters monthly. Replace HEPA filters every 6–12 months and carbon filters every 3–6 months. Set phone reminders—this stuff is easy to forget.
⚠️ Common mistake: Washing the HEPA filter. I’ve seen people do it, thinking they’re saving money. But water destroys the paper fibers. Once wet, it can’t trap particles. It’s like trying to catch fish with a net full of holes.
💡 Pro tip: Use a vacuum with a HEPA filter. This ensures you’re not just kicking dust back into the air. Regular vacuums can blow fine particles around.
⚠️ Common mistake: Skipping the drying step. A damp pre-filter can grow mold. I learned this the hard way—my purifier started smelling musty after a rushed cleaning. Now I plan ahead and clean on a sunny, low-humidity day.
💡 Pro tip: Keep spare filters. If you damage one during cleaning, you can swap it in immediately. No downtime for your air quality.
⚠️ Common mistake: Using harsh cleaners or compressed air. Bleach, alcohol, or ammonia can degrade filter materials. And compressed air can tear the delicate mesh. Stick to water, mild soap, and gentle vacuuming.
Also, remember: not all “Idylis” purifiers are the same. Some models (like the AP-300) have a permanent pre-filter, while others (like the AP-100) use a disposable one. Always check your manual. If you lost it, search online for “[your model] filter cleaning instructions.” Most Idylis manuals are free to download.
FAQs About How to Clean Idylis Air Purifier Filter in 2026 Expert Tips
Let’s tackle the questions I hear most—straight, no fluff.
Can I wash the HEPA filter in my Idylis purifier?
No. The HEPA filter is made of paper-like fibers that trap tiny particles. Water ruins the structure. Even a little moisture can cause mold or reduce efficiency. Vacuum it gently instead. If it’s gray, torn, or smells musty, replace it.
How often should I clean the pre-filter?
Every 2–4 weeks. If you have pets, kids, or live in a dusty area, clean it weekly. A clogged pre-filter forces the purifier to work harder, which can shorten its life. Think of it like changing the lint trap in your dryer—regular cleaning saves energy and prevents fires.
Is it safe to use a hairdryer to dry the pre-filter faster?
No. Heat can warp the plastic frame or melt the adhesive. Air-dry it at room temperature. It might take longer, but it’s safer. If you’re in a hurry, clean it on a sunny, dry day—natural airflow speeds things up.
What if my filter is damaged or missing?
Don’t run the purifier. A damaged filter can’t clean the air, and a missing one lets dust into the motor. Replace it ASAP. You can buy genuine Idylis filters online or from appliance stores. Some third-party brands work too—just check compatibility.
Can I use vinegar to clean the filter?
Not recommended. Vinegar is acidic and can degrade the mesh or frame over time. Mild dish soap and water are safer. If you want a natural cleaner, a tiny bit of baking soda in water (rinsed well) is okay—but still, soap is better.
How do I know if my filter needs replacing?
Look for these signs:
- Visible tears or holes
- Gray or black color (not just dusty)
- Musty smell
- Purifier runs louder than usual
- Reduced airflow
If you see any of these, it’s time for a new filter. Don’t push it—a bad filter can’t clean your air.
Are all Idylis air purifiers the same when it comes to filters?
Nope. Models vary. Some have washable pre-filters; others don’t. Some have carbon filters; others skip them. Always check your manual or model number. When in doubt, contact Idylis customer support. They’re usually helpful.
Final Thoughts
Cleaning your Idylis air purifier filter isn’t rocket science—but it does matter. A clean filter means clean air, lower energy bills, and a longer-lasting machine. And with how to clean Idylis air purifier filter in 2026 expert tips, you’re not just following steps. You’re building a habit that protects your health.
Start small. Set a reminder to clean the pre-filter every month. Vacuum the main filters. Keep replacements on hand. It takes 20–30 minutes, tops. And the payoff? Breathing easier, fewer allergy attacks, and a home that smells fresh—not stale.
Remember: your air purifier is only as good as its filter. Treat it with care, and it’ll return the favor. And if you ever run into trouble, don’t stress. Most issues are fixable with a little patience and the right tools.
So go ahead—plug it back in, turn it on, and take a deep breath. That’s the sound of clean air. You’ve earned it.
“`