Featured image for how to clean live pure air purifier
Image source: airnmore.com
Regularly cleaning your Live Pure Air Purifier every 2–4 weeks ensures peak performance and longer filter life in 2026. Follow the manufacturer’s guide to safely remove, vacuum, and wipe down components—especially the pre-filter and HEPA filter—while avoiding moisture damage to sensitive parts. Never skip monthly maintenance, as clogged filters reduce airflow and purifying efficiency.
“`html
How to Clean Live Pure Air Purifier in 2026 for Best Performance
Key Takeaways
- Turn off and unplug the purifier before cleaning for safety.
- Vacuum the exterior weekly to remove dust and debris buildup.
- Wash reusable filters monthly with mild soap and air dry completely.
- Replace HEPA filters every 6–12 months for optimal air quality.
- Clean the ionizer plates gently with a soft brush to maintain efficiency.
- Wipe internal sensors carefully to ensure accurate air quality readings.
- Reassemble securely after cleaning to prevent performance issues.
Why This Matters / Understanding the Problem
Let’s be real—your Live Pure air purifier works hard. It’s quietly humming away, filtering out dust, pet dander, smoke, and even those invisible pollutants that sneak into your home. But here’s the thing: even the best machines need a little TLC to keep doing their job right.
I learned this the hard way. Last winter, my allergies were worse than usual, even though my air purifier was running 24/7. I assumed it was just seasonal changes—until I opened the unit and found a thick layer of grime clogging the filters. Yikes. That’s when I realized: cleaning your Live Pure air purifier isn’t optional—it’s essential for keeping your indoor air truly clean.
Over time, dust and debris build up on filters and internal components. This not only reduces airflow but can also cause the motor to work harder, shortening the lifespan of your device. Worse, a dirty purifier might start blowing contaminated air back into your room. In 2026, with more people spending time indoors and air quality concerns on the rise, maintaining your purifier isn’t just about performance—it’s about health.
So, if you’ve been wondering how to clean Live Pure air purifier in 2026 for best performance, you’re in the right place. This guide will walk you through everything you need to know—step by step—so your purifier stays efficient, quiet, and effective year-round.
What You Need
Before we dive in, let’s gather the essentials. Don’t worry—you probably already have most of these at home. Here’s what you’ll need to clean your Live Pure air purifier thoroughly:

Visual guide about how to clean live pure air purifier
Image source: i2.wp.com
- Soft microfiber cloth – Great for wiping down the exterior without scratching.
- Mild dish soap – Gentle enough for filters and plastic parts.
- Warm water – For rinsing washable components.
- Vacuum with brush attachment – Helps remove loose dust from vents and pre-filters.
- Compressed air (optional) – Useful for blowing dust out of hard-to-reach areas.
- Replacement filters (if needed) – Check your model’s manual to see if your HEPA or carbon filter needs swapping.
- Small bowl or sink – For soaking washable parts.
- Timer or calendar reminder – To stay on top of regular maintenance.
Most Live Pure models—like the Live Pure LP-3000 or LP-5000—have similar cleaning requirements, but always double-check your user manual. Some parts are washable; others aren’t. We’ll cover that in detail below.
Step-by-Step Guide to How to Clean Live Pure Air Purifier in 2026 for Best Performance
Step 1: Turn Off and Unplug the Unit
Safety first! Before you do anything, make sure your air purifier is completely powered off and unplugged from the wall outlet. I can’t stress this enough—even if the unit seems off, there could still be residual power. Unplugging eliminates any risk of electric shock or accidental startup while you’re handling internal components.
Visual guide about how to clean live pure air purifier
Image source: i2.wp.com
This simple step also gives the motor and internal parts time to cool down if the purifier has been running. Hot components can warp or become brittle, making them harder to clean safely.
Step 2: Remove the Front Panel and Filters
Now it’s time to access the heart of your purifier. Most Live Pure models have a front panel that either snaps off or is held in place by a latch. Gently press the release button or lift the panel upward—don’t force it. If it doesn’t come off easily, check for hidden clips or screws (some models require a Phillips head screwdriver).
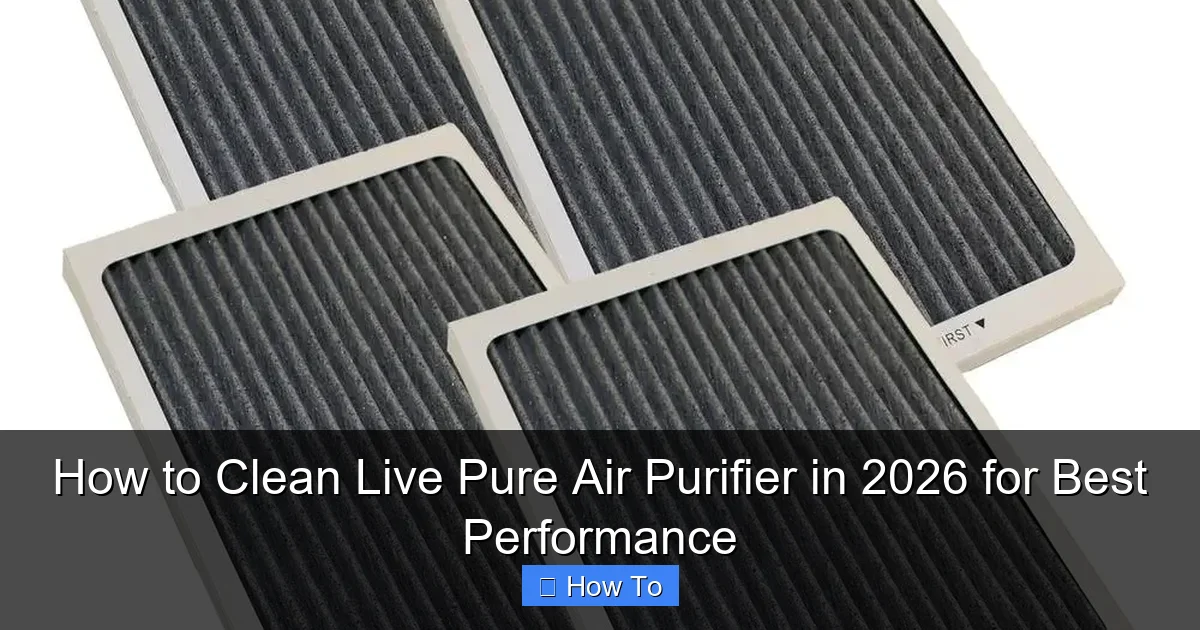
Once the panel is off, you’ll see the filters. Typically, there are two or three:
- Pre-filter – Catches large particles like hair and dust.
- HEPA filter – Traps 99.97% of tiny pollutants, including pollen and mold spores.
- Activated carbon filter – Absorbs odors and volatile organic compounds (VOCs).
Carefully remove each filter and set them aside. Take a moment to inspect them. If the HEPA filter looks dark gray or brown and feels heavy, it’s likely time for a replacement. Most HEPA filters last 6–12 months, depending on usage and air quality.
Step 3: Vacuum the Interior and Vents
With the filters out, you’ll notice dust buildup inside the unit—especially around the fan blades and air intake vents. Use your vacuum’s brush attachment to gently suction away loose debris. Be careful not to press too hard; the internal components are delicate.
If you have compressed air, now’s the time to use it. Spray short bursts into the fan housing and around the motor area to dislodge stubborn dust. Hold the can upright and keep it at least 6 inches away to avoid moisture buildup.
I learned this trick from a technician who serviced my unit years ago. He said, “Dust is the enemy of airflow.” And he was right—after vacuuming, my purifier sounded quieter and pulled in air more efficiently.
Step 4: Clean the Washable Pre-Filter
The pre-filter is usually the dirtiest part—and the easiest to clean. If yours is labeled “washable” (check the manual!), rinse it under lukewarm water. Avoid hot water, as it can warp the material.
For extra grime, add a drop of mild dish soap to a bowl of warm water and let the filter soak for 10–15 minutes. Then, gently scrub with your fingers or a soft brush. Rinse thoroughly until all soap residue is gone.
Important: Never put a wet filter back into the unit. Let it air-dry completely—overnight is best. Putting a damp filter in can lead to mold growth or damage the motor.
Step 5: Wipe Down the Exterior and Interior Surfaces
While the pre-filter dries, use a microfiber cloth dampened with water (or a 50/50 water-vinegar mix for tougher stains) to wipe down the exterior of the purifier. Pay special attention to the control panel, handle, and air vents.
For the interior, use a dry or slightly damp cloth to clean the plastic housing. Avoid spraying liquids directly into the unit. If there’s sticky residue, a cotton swab dipped in rubbing alcohol works wonders—just make sure it’s fully dry before reassembly.
I like to clean the exterior weekly, but the interior only needs attention every 1–2 months, depending on how dusty your home is.
Step 6: Replace or Reinstall Filters
Once everything is dry, it’s time to put your purifier back together. Start by placing the clean (or new) pre-filter into its slot. Make sure it’s seated properly—most models have a directional arrow or notch to guide you.
Next, install the HEPA and carbon filters. These are typically non-washable, so if they’re old or damaged, replace them with genuine Live Pure filters. Using third-party filters might save money, but they often don’t fit as well or perform as efficiently.
When reinstalling the front panel, align the clips or hinges carefully and press firmly until it clicks into place. Give it a gentle tug to ensure it’s secure.
Step 7: Plug In and Test the Unit
Now for the moment of truth. Plug your purifier back in and turn it on. Listen for unusual noises—grinding, rattling, or weak airflow could mean something’s not seated correctly.
Run the purifier on the lowest setting for 10–15 minutes to let it stabilize. Then, check the air quality indicator (if your model has one). You should notice improved airflow and a fresher smell within minutes.
Pro tip: Run your purifier in a well-ventilated area for the first hour after cleaning to let any residual moisture or cleaning fumes dissipate.
Pro Tips & Common Mistakes to Avoid
Cleaning your Live Pure air purifier seems straightforward, but there are a few pitfalls even seasoned users fall into. Here’s what I’ve learned from my own mistakes—and from talking to other homeowners.

Visual guide about how to clean live pure air purifier
Image source: i2.wp.com
Pro Tip: Set a recurring reminder on your phone or calendar to clean your pre-filter every 2 weeks and do a full deep clean every 3 months. Consistency is key to maintaining performance.
Warning: Never soak the HEPA or carbon filters in water. These are delicate and designed to trap particles—not withstand moisture. Wetting them can ruin their structure and reduce efficiency.
Common Mistake: Forgetting to clean the exterior vents. Dust builds up on the intake and output grilles, blocking airflow. Use a soft brush or toothbrush to clean these areas monthly.
Pro Insight: If your purifier smells musty after cleaning, it might have mold inside. In that case, consider using a UV-C sanitizing wand (if your model supports it) or contact Live Pure customer support for guidance.
Don’t Rush Drying: I once made the mistake of reinstalling a slightly damp pre-filter. Within a week, I noticed a mildew smell. Letting it dry completely prevented a bigger problem.
Another thing to keep in mind: if you have pets or live in a high-pollen area, you may need to clean your purifier more often. I clean mine every 10 days during spring and fall—my dog sheds like crazy, and the pre-filter clogs fast.
FAQs About How to Clean Live Pure Air Purifier in 2026 for Best Performance
Q: How often should I clean my Live Pure air purifier?
A: For most homes, clean the pre-filter every 2 weeks and do a full deep clean every 3 months. If you have pets, allergies, or live in a dusty area, increase frequency to every 1–2 weeks.
Q: Can I wash the HEPA filter?
A: No. HEPA filters are not washable. They’re made of tightly packed fibers that lose effectiveness when wet. Replace them every 6–12 months, depending on usage.
Q: What if my purifier still smells bad after cleaning?
A: Lingering odors could mean mold or bacteria inside the unit. Try running the purifier with a bowl of baking soda nearby to absorb smells. If the issue persists, check for moisture in the filters or contact Live Pure support.
Q: Do I need to replace all filters at once?
A: Not necessarily. The pre-filter can often be reused for years if cleaned properly. The HEPA and carbon filters should be replaced based on the manufacturer’s schedule—usually every 6–12 months.
Q: Can I use bleach or strong cleaners?
A: Avoid harsh chemicals like bleach or ammonia. They can damage plastic parts and leave harmful residues. Stick to mild soap, water, or a vinegar solution.
Q: My purifier is making a loud noise after cleaning. What’s wrong?
A: This usually means a filter isn’t seated correctly or the fan is obstructed. Turn off the unit, unplug it, and double-check that all components are properly installed.
Q: Is it safe to clean the purifier while it’s running?
A: Absolutely not. Always unplug the unit before cleaning. Running it while handling internal parts can cause injury or damage the motor.
Final Thoughts
Cleaning your Live Pure air purifier might not be the most exciting chore, but it’s one of the most important things you can do for your home’s air quality. Think of it like changing the oil in your car—it keeps everything running smoothly and extends the life of your investment.
By following this guide on how to clean Live Pure air purifier in 2026 for best performance, you’ll ensure your unit works efficiently, quietly, and effectively. Plus, you’ll breathe easier knowing your air is truly clean.
Start today: unplug your purifier, grab a microfiber cloth, and give it the care it deserves. Your lungs—and your peace of mind—will thank you.
“`