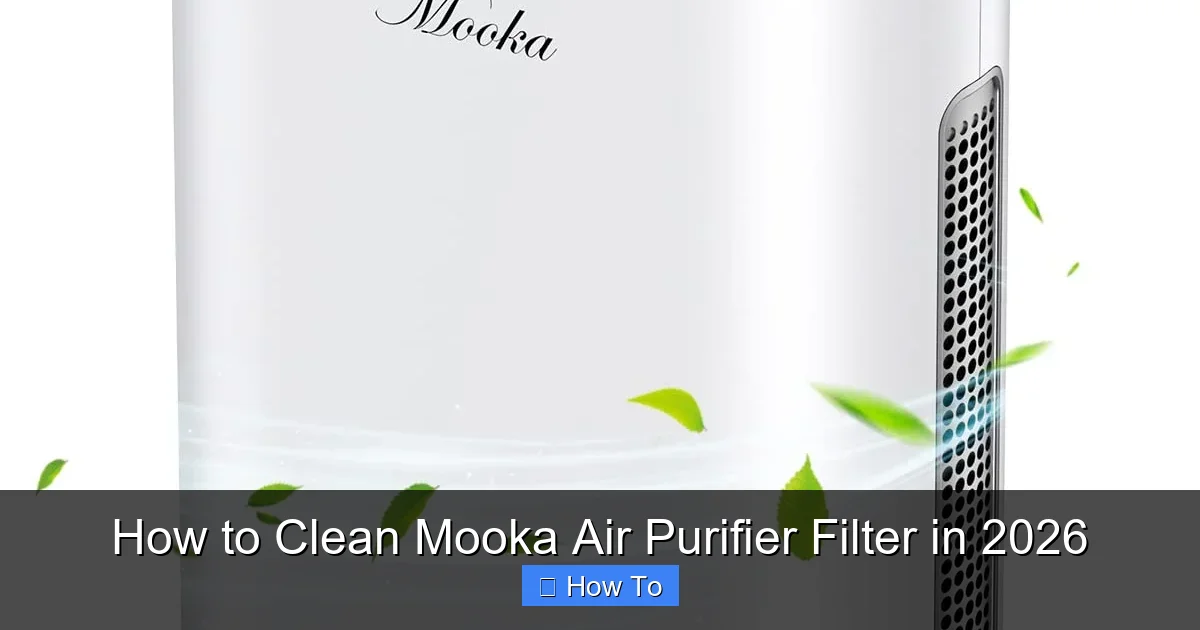
Featured image for how to clean mooka air purifier filter
Image source: cleanestor.com
Regularly cleaning your Mooka air purifier filter every 2–4 weeks ensures peak performance and longer filter life. Follow simple steps: power off, remove the filter, gently vacuum or rinse (if washable), and let it air-dry completely before reinserting. Never use harsh chemicals or run the purifier with a damp filter to avoid damage and maintain air quality.
How to Clean Mooka Air Purifier Filter in 2026
Key Takeaways
- Unplug the purifier before cleaning to ensure safety and prevent damage.
- Vacuum the pre-filter monthly to remove large dust and debris effectively.
- Soak HEPA filter in mild soap water for 10 mins, then air-dry fully.
- Never use harsh chemicals or submerge filters to avoid material degradation.
- Inspect for wear regularly; replace filters every 6–12 months for optimal performance.
- Reset filter indicator after cleaning to maintain accurate monitoring.
Why This Matters / Understanding the Problem
Let’s be honest—your Mooka air purifier is doing a *lot* of work behind the scenes. Whether it’s pollen, pet dander, or that mystery smell from last night’s dinner, it’s quietly filtering the air so you can breathe easier. But here’s the thing: if you’ve never cleaned the filter, you’re basically asking it to work overtime with clogged lungs. And just like you, it can’t perform well under those conditions.
Over time, dust, hair, and airborne particles build up on the pre-filter and main filter. This reduces airflow, makes your purifier noisier, and can even cause it to emit musty odors. Worst case? It stops removing pollutants effectively, and you’re breathing in the very things you’re trying to avoid. That’s why knowing how to clean Mooka air purifier filter in 2026 isn’t just a maintenance tip—it’s essential for clean, healthy air at home.
I learned this the hard way. A few months ago, my allergies spiked, and I couldn’t figure out why. My Mooka was running 24/7, but the air felt stale. I opened the unit, and the pre-filter looked like a furry dust monster. Once I cleaned it? Night and day difference. My sinuses cleared, and the unit ran quieter. That’s when I realized: cleaning the filter isn’t optional. It’s the heart of how your purifier works.
Whether you’re a first-time Mooka owner or just need a refresher, this guide walks you through the entire process. We’ll keep it simple, practical, and—dare I say—kind of satisfying. Because let’s face it: there’s something oddly gratifying about pulling out a clean, dust-free filter.
What You Need
Before we dive into the steps, let’s gather your cleaning kit. Don’t worry—you probably have most of this already. The goal is to clean safely without damaging the sensitive filters inside your Mooka unit.
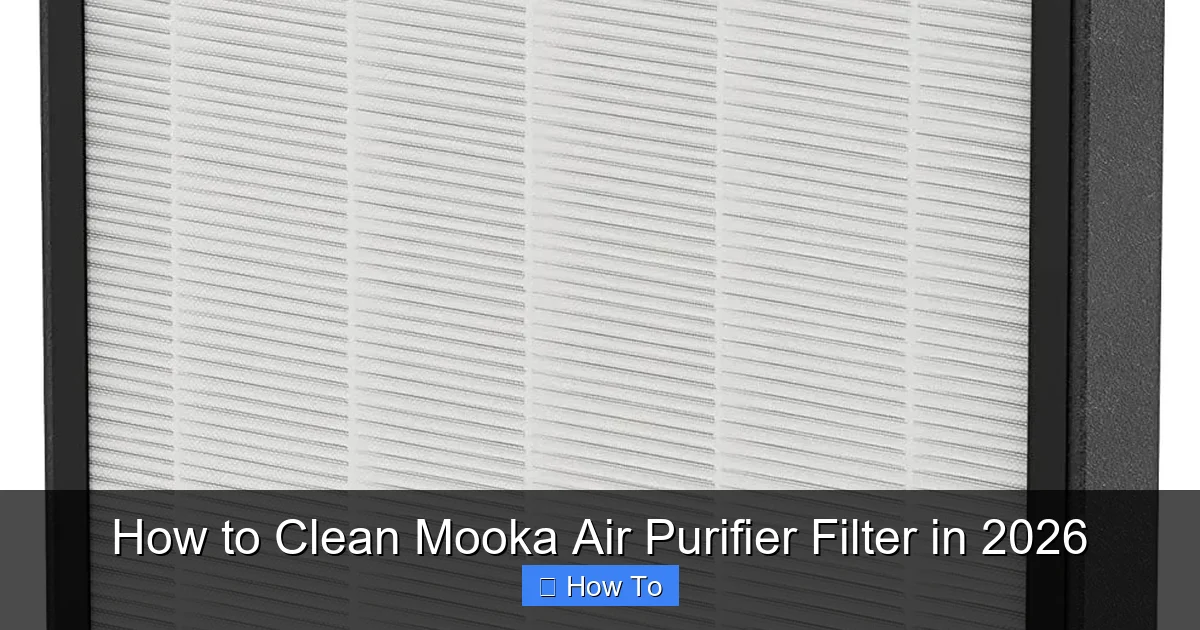
Visual guide about how to clean mooka air purifier filter
Image source: m.media-amazon.com
- Mooka air purifier (obviously)
- Soft-bristled brush (like a clean paintbrush or makeup brush—no metal bristles!)
- Vacuum cleaner with a brush attachment (a handheld vacuum works great)
- Dry microfiber cloth (for wiping the exterior and inner chamber)
- Compressed air can (optional, but helpful for tight spaces)
- Clean, dry workspace (a kitchen table or countertop works)
- Timer or phone reminder (to track cleaning frequency)
Important: Do not use water, soap, or wet cloths on the HEPA or carbon filters. These are not washable. Only the outer pre-filter (the mesh screen) can be lightly rinsed—and even then, only under specific conditions (we’ll cover that).
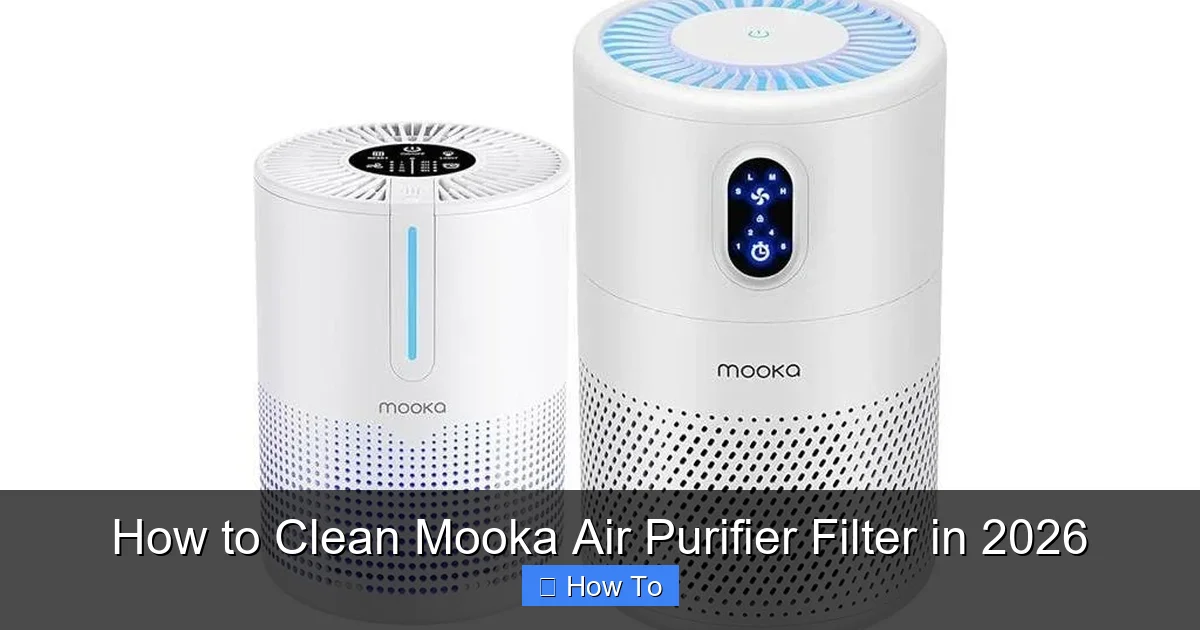
Also, check your Mooka model. Most models (like the Mooka A3, A5, or Mooka Pro) have similar filter layouts, but some newer 2026 editions may include a washable pre-filter with a removable foam layer. Always refer to your user manual, but this guide covers the standard cleaning process for how to clean Mooka air purifier filter in 2026 across most units.
Pro insight: I keep a small cleaning caddy with my brush, cloth, and vacuum attachment. It lives next to the purifier so I don’t have to hunt for tools. Makes the whole process faster and more likely to happen regularly.
Step-by-Step Guide to How to Clean Mooka Air Purifier Filter in 2026
Step 1: Power Down and Unplug the Unit
First things first: turn off and unplug your Mooka air purifier. This isn’t just a safety tip—it’s non-negotiable. You’re going to be opening the unit, and you don’t want it turning on mid-clean.
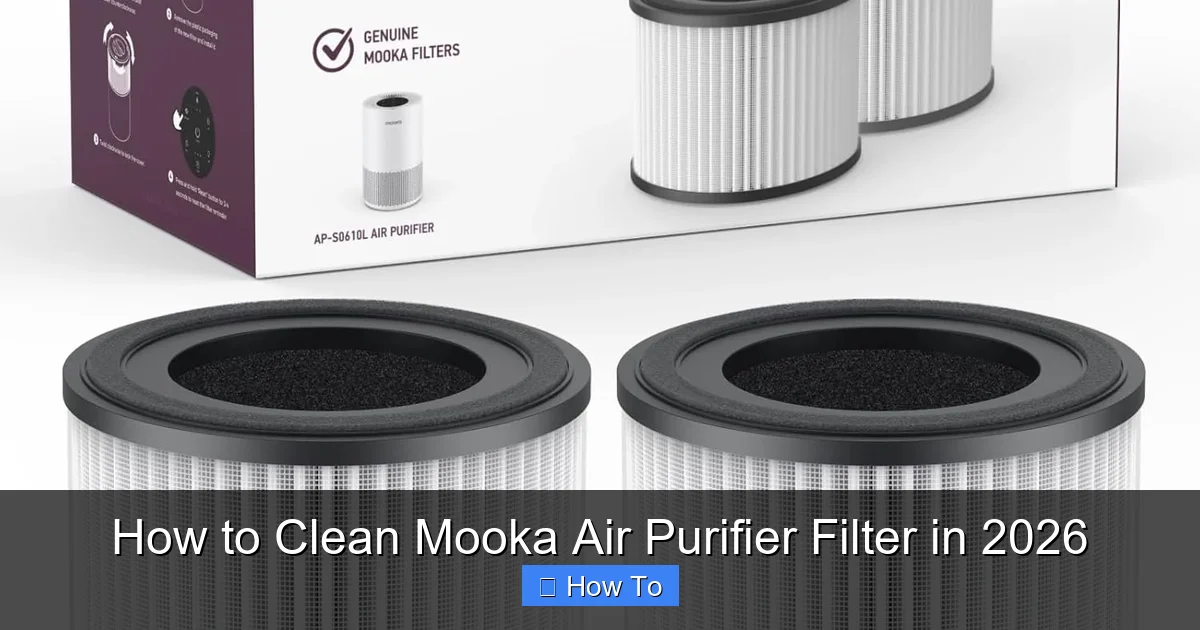
Visual guide about how to clean mooka air purifier filter
Image source: airpurey.com
I once forgot this step (don’t judge) and accidentally hit the power button while wiping the control panel. The fan kicked in, and I nearly dropped the filter. Not fun. So, unplug it, set it on a stable surface, and give it a moment to fully power down.
This step also ensures the internal components aren’t warm or moving, making the cleaning process safer and more effective.
Step 2: Remove the Front Cover or Filter Door
Most Mooka models have a magnetic front cover or a latch-based door. Gently pull it open. You’ll hear a soft click or feel a slight resistance—don’t force it. If it doesn’t budge, double-check for a hidden latch (some models have a small button near the base).
Once open, you’ll see the filter stack. Typically, it’s a layered system:
- Pre-filter (outer mesh) – catches large particles like hair and lint
- True HEPA filter (middle) – traps microscopic allergens, dust, and mold spores
- Activated carbon filter (inner, optional) – absorbs odors and VOCs
Take a moment to observe the condition. If the pre-filter looks dark gray or fuzzy, it’s definitely time for cleaning. This is the first line of defense in how to clean Mooka air purifier filter in 2026.
Warning: Don’t yank the filters out. Some are held in place with small tabs or guides. Slide them out gently to avoid tearing the edges.
Step 3: Remove and Inspect the Pre-Filter
The pre-filter is the easiest to clean and the most frequently clogged. It’s usually a gray or black mesh screen attached to a plastic frame. Carefully pull it out and lay it on your workspace.
Hold it up to the light. Can you see through it? If not, it’s clogged. Run your fingers over the surface—does it feel gritty or sticky? That’s a sign of heavy buildup. This is normal, especially if you have pets, live in a dusty area, or cook often.
Now, check the manufacturer’s label on the frame. Some Mooka pre-filters are labeled “washable.” If yours is, you’re in luck—we’ll clean it thoroughly. If not, stick to vacuuming and brushing (more on that in a sec).
Step 4: Vacuum the Pre-Filter and Frame
Grab your vacuum’s brush attachment and gently run it over the pre-filter. Use light pressure—don’t press hard enough to bend or tear the mesh. Vacuum both sides, holding the filter at an angle so the bristles can reach into the crevices.
Then, vacuum the plastic frame. Dust loves to hide in the corners and along the edges. A quick pass with the brush nozzle will pull out the debris.
For stubborn spots, use your soft-bristled brush. Lightly scrub in a circular motion. This helps dislodge hair, lint, and fine dust that the vacuum can’t reach.
Pro tip: I like to do this over a trash can. It catches falling dust and makes cleanup easier. No one wants to chase dust bunnies across the floor.
Step 5: Rinse the Pre-Filter (If Washable)
Only do this if your pre-filter is labeled “washable” or “rinsable.” Most Mooka models have this feature, but it’s always good to confirm.
Take the pre-filter to a sink. Use lukewarm water and a gentle stream—no pressure washer! Hold it under the tap, running water from the clean side (the side that faces inward) to the dirty side. This helps push debris out without pushing it deeper.
Do not use soap, detergent, or scrubbing pads. These can damage the mesh and leave residues. Just water is enough. If there’s a stubborn stain, use your soft brush again—very lightly.
Rinse thoroughly until the water runs clear. Then, gently shake off excess water and let it air dry completely. This is crucial: never reinstall a damp filter. It can mold, smell bad, and damage the HEPA filter behind it.
I leave mine on a clean towel near an open window for 2–3 hours. In humid climates, it might take longer. If you’re in a rush, use a fan to speed up drying.
Personal note: I tried using a hair dryer once to dry the pre-filter faster. Big mistake. The heat warped the mesh, and I had to replace it. Stick to air drying. Your patience will be rewarded.
Step 6: Vacuum the HEPA and Carbon Filters (If Applicable)
Now, let’s talk about the main filters. The HEPA filter is not washable. Same for the carbon filter (if your model has one). But you can still clean them—gently.
Use the vacuum’s brush attachment to lightly vacuum both sides of the HEPA filter. Focus on the outer surface, where dust accumulates. Don’t press hard. The HEPA fibers are delicate, and aggressive vacuuming can tear them or reduce filtration efficiency.
For the carbon filter, vacuuming is even gentler. It’s often a thin layer of activated carbon between mesh screens. Just a light pass to remove surface dust is enough. Over-vacuuming can dislodge carbon granules, which is messy and unnecessary.
Some people use compressed air to blow out the filters. I’ve done this, but only from a distance (6+ inches away). Hold the can upright and use short bursts. Blow from the clean side (the side facing the fan) toward the dirty side. This helps push debris out without damaging the media.
Important: Never vacuum or blow air through the HEPA filter in the opposite direction of airflow (i.e., from the inside out). This can embed particles deeper or damage the filter’s structure.
This step is a key part of how to clean Mooka air purifier filter in 2026—it extends the life of your non-washable filters and keeps your purifier efficient.
Step 7: Clean the Interior Chamber
While the filters are drying (or after vacuuming), don’t skip the inside of the purifier. Dust and hair love to settle in the corners, on the fan blades, and along the air intake.
Use your vacuum brush to clean the chamber walls, base, and fan housing. For tight spaces, the compressed air can is your best friend. Just don’t blow directly into the fan motor—this can push debris deeper or damage components.
Wipe down the interior with a dry microfiber cloth. If there’s sticky residue (like from cooking), lightly dampen the cloth with water—but never spray liquid inside the unit. Wring it out well so it’s barely damp.
Check the air intake and exhaust vents. These can get clogged with lint or pet hair. A quick vacuum pass keeps airflow strong.
Real-life example: My cat loves to nap near the purifier. Her fur was clogging the intake grill. After cleaning it, the airflow improved, and the unit stopped making a low rumbling noise. A 5-minute job saved me from a service call.
Step 8: Reassemble the Filters and Unit
Once everything is dry and clean, it’s time to put it all back together.
Start with the HEPA and carbon filters. Make sure they’re seated properly in their guides. The HEPA filter usually has a foam gasket on one side—this should face outward to create a tight seal.
Then, install the pre-filter. If it was rinsed, ensure it’s 100% dry. Slide it back into place, making sure the frame clicks or locks into position.
Finally, reattach the front cover. It should snap or magnetically seal shut. Don’t force it. If it doesn’t close easily, double-check that the filters are seated correctly.
Plug the unit back in and power it on. Listen for normal fan operation. No unusual noises? Great. Check the indicator light—some Mooka models have a filter reset button you’ll need to press after cleaning (more on that in the FAQs).
Step 9: Reset the Filter Timer (If Your Model Has One)
Many 2026 Mooka models include a filter life indicator. After cleaning, you may need to reset the timer so it starts counting from zero.
To do this:
- Press and hold the “Filter Reset” or “Reset” button (usually on the control panel) for 3–5 seconds.
- The indicator light should blink or turn green, signaling a reset.
- Consult your manual if the button isn’t labeled clearly.
This step is important because the timer tracks usage, not actual filter condition. Resetting it after cleaning ensures you’re not replacing filters prematurely.
Pro Tips & Common Mistakes to Avoid
Pro tip 1: Clean the pre-filter every 2–4 weeks. If you have pets, smoke, or live in a dusty area, do it weekly. I set a phone reminder every 14 days. It’s become part of my routine, like changing the sheets.
Visual guide about how to clean mooka air purifier filter
Image source: m.media-amazon.com
Pro tip 2: Take photos of the filter layout before removing anything. It’s easy to forget how they stack, especially with multiple layers. I keep a “filter diagram” on my phone for quick reference.
Pro tip 3: Label your filters with a date. Use a dry-erase marker or small sticker. Write “Cleaned: [date]” on the frame. This helps you track cleaning frequency and know when it’s time to replace (HEPA filters usually last 6–12 months).
Common mistake: Using wet cloths on HEPA filters. This can cause mold, reduce efficiency, and void the warranty. Stick to vacuuming or compressed air only.
Common mistake: Forgetting to clean the pre-filter regularly. It’s the “first line of defense,” and a clogged one forces the HEPA filter to work harder, shortening its life.
Common mistake: Not checking the manual. Some 2026 Mooka models have slight design changes. Always refer to your specific model’s guide for any unique steps or warnings.
Personal insight: I once skipped cleaning for two months. The purifier started smelling musty. When I opened it, the pre-filter was so clogged it was almost black. Cleaning it took 20 minutes instead of 5. Lesson learned: consistency is key.
Remember, cleaning your Mooka air purifier isn’t about perfection—it’s about consistency. A quick 5–10 minute clean every few weeks keeps the unit running smoothly and ensures you’re actually getting clean air.
FAQs About How to Clean Mooka Air Purifier Filter in 2026
Can I wash the HEPA filter in my Mooka?
Nope. The HEPA filter is not washable. It’s made of ultra-fine fiberglass or synthetic fibers that trap microscopic particles. Water or soap will damage the fibers, reduce efficiency, and could create a health hazard. Stick to vacuuming or compressed air. This is a core part of how to clean Mooka air purifier filter in 2026—knowing what *not* to do is just as important as what to do.
How often should I clean the pre-filter?
Every 2–4 weeks, depending on use. If you have pets, allergies, or cook often, clean it weekly. I have two cats and a dog, so I clean mine every 10 days. If you live in a clean, low-dust environment, every 3–4 weeks is fine. The key is to check it regularly—don’t wait for the indicator light.
What if my pre-filter isn’t labeled “washable”?
Then don’t rinse it. Only vacuum and brush it. Some older or budget models have non-washable pre-filters. In that case, cleaning means removing surface debris, not deep cleaning. Still effective! Just avoid water.
My purifier smells musty after cleaning. What’s wrong?
Most likely, the pre-filter wasn’t fully dry before reinserting. Even a slightly damp filter can grow mold, which causes a musty odor. Always air-dry for at least 2–3 hours. If the smell persists, check the HEPA filter for mold (rare but possible if it got wet). In that case, you may need to replace it.
Do I need to replace the filters after cleaning?
Not necessarily. HEPA and carbon filters can last 6–12 months, depending on use. Clean them regularly, but replace them when they’re visibly dirty, torn, or when the filter life indicator suggests it. A clean filter isn’t the same as a new one—eventually, the media degrades. But cleaning extends that lifespan significantly.
Can I use compressed air on the carbon filter?
Yes, but gently. Use short bursts from a distance. The carbon layer is fragile, and aggressive air can dislodge granules. Vacuuming is safer, but compressed air is okay if used carefully. Avoid pointing the nozzle directly at the surface—angle it slightly.
Is there a difference in cleaning 2026 Mooka models vs. older ones?
Mostly no. The core process is the same. However, some 2026 models have improved pre-filters with better mesh density or removable foam layers. Always check your manual. But the steps we covered—unplugging, vacuuming, rinsing (if washable), and drying—apply to nearly all Mooka units, including the latest 2026 editions.
Final Thoughts
Cleaning your Mooka air purifier filter isn’t a chore—it’s a small act of self-care. You’re not just maintaining a device; you’re ensuring the air you and your loved ones breathe is as clean as possible. And honestly, it’s one of those tasks that feels surprisingly good once you’ve done it.
Knowing how to clean Mooka air purifier filter in 2026 means you’re in control. No more guessing, no more stale air, no more unnecessary filter replacements. Just a simple, repeatable process that takes minutes and pays off every time you take a deep breath.
Start small. Set a reminder. Clean the pre-filter every two weeks. Keep your tools handy. And don’t stress over perfection—just do it consistently. Your purifier (and your lungs) will thank you.
And if you’re ever in doubt? Refer back to this guide. Keep it bookmarked. Share it with a friend who just bought a Mooka. Because clean air shouldn’t be a luxury—it should be a habit.
Now, go give your Mooka a fresh start. You’ve got this.