Featured image for how to clean my germguardian air purifier
Image source: compressorlab.com
Regularly cleaning your GermGuardian air purifier every 2–4 weeks ensures peak performance and longer filter life in 2026. Follow the manufacturer’s guide to safely remove, vacuum, and wipe down the pre-filter, HEPA filter, and exterior—never use water on internal components. Consistent maintenance boosts air quality and prevents costly repairs.
“`html
How to Clean My GermGuardian Air Purifier in 2026 for Best Performance
Key Takeaways
- Unplug the unit first: Always disconnect power before cleaning to ensure safety and prevent damage.
- Clean the pre-filter monthly: Vacuum or rinse to remove dust and extend HEPA filter life.
- Replace the HEPA filter yearly: Follow manufacturer guidelines for optimal air purification performance.
- Wipe the UV-C bulb gently: Use a soft, dry cloth to maintain germ-killing efficiency.
- Clean the exterior weekly: Use a damp cloth to prevent dust buildup on surfaces.
- Avoid harsh chemicals: Stick to mild cleaners to protect internal components and finishes.
Why This Matters / Understanding the Problem
Let’s be honest—most of us bought a GermGuardian air purifier to breathe easier, not to become weekend appliance mechanics. But here’s the thing: even the smartest, most advanced air purifier loses its magic if it’s clogged with dust, pet dander, or last winter’s mold spores. I learned this the hard way.
Last year, my bedroom started smelling faintly musty, even though I run my GermGuardian AC4825 every night. At first, I blamed the humidifier. Then the allergies kicked in. Finally, I opened the front panel—and wow. The pre-filter looked like it had hosted a dust bunny convention. That’s when it hit me: cleaning your air purifier isn’t optional—it’s essential.
If you’re searching for “how to clean my GermGuardian air purifier in 2026 for best performance,” you’re already ahead of the curve. Regular maintenance doesn’t just keep your machine running smoothly—it actually improves air quality, extends the unit’s lifespan, and saves you money on replacements. Think of it like changing the oil in your car: skip it, and you’ll pay later.
In 2026, with more people working from home and indoor air quality becoming a top health priority, keeping your GermGuardian in peak condition isn’t just smart—it’s necessary. Whether you’ve got pets, live in a dusty city apartment, or just want to breathe cleaner air, this guide will walk you through the process step by step. No jargon, no fluff—just real talk from someone who’s been there.
What You Need
Before we dive in, let’s gather our supplies. Don’t worry—you probably already have most of these lying around the house.
- Microfiber cloth (lint-free is best—no streaks!)
- Mild dish soap (avoid harsh chemicals—they can damage filters)
- Soft-bristle brush (an old toothbrush works great)
- Vacuum cleaner with a brush attachment (optional but super helpful)
- Compressed air can (for tight spots—great for vents)
- Replacement filters (if it’s time—check your model’s schedule)
- Warm water (not hot—hot water can warp plastic parts)
Pro tip: Always unplug your GermGuardian before cleaning. Safety first, always.
Now, let’s get into the nitty-gritty.
Step-by-Step Guide to How to Clean My GermGuardian Air Purifier in 2026 for Best Performance
Cleaning your GermGuardian isn’t rocket science—but doing it right makes all the difference. Follow these steps every 2–3 months (or monthly if you have pets or allergies) to keep your unit humming like new.
Step 1: Turn Off and Unplug the Unit
This might seem obvious, but I’ve seen people skip this step—and it’s a big no-no. Always turn off your GermGuardian and unplug it from the wall before you start. Not only is this safer, but it also prevents accidental starts while you’re handling internal parts.
I once forgot to unplug mine and nearly gave myself a shock while wiping the exterior. Lesson learned.
Step 2: Remove the Front Panel and Pre-Filter
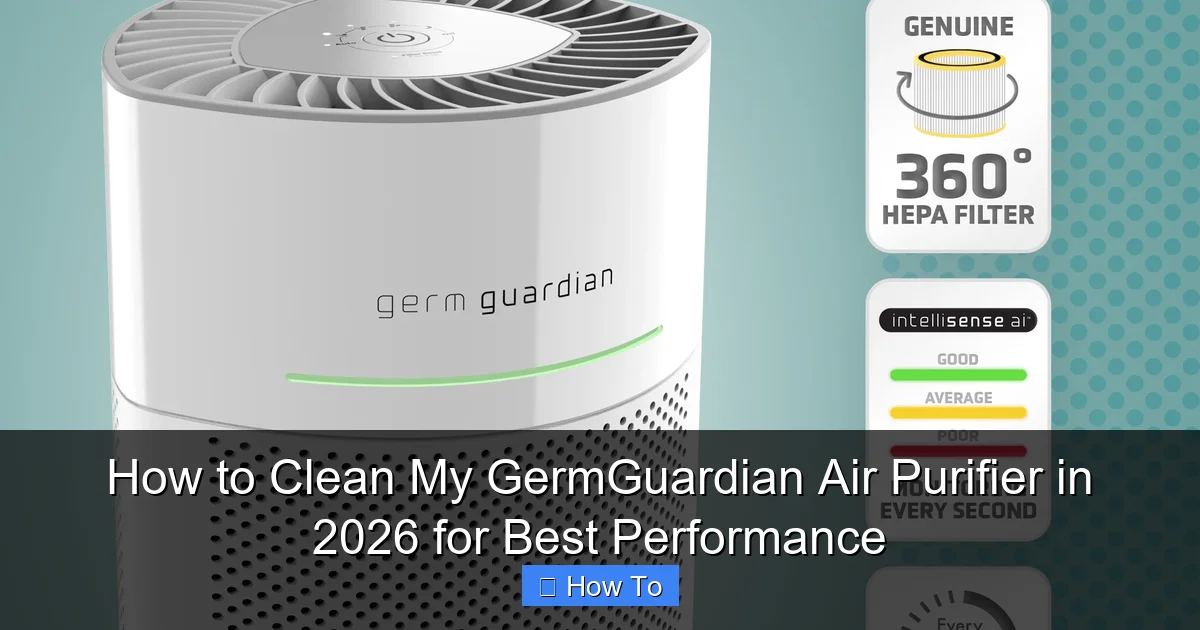
Gently pull the front grille or panel off your GermGuardian. Most models, like the AC4825 or AC5350, have a snap-on design—no tools needed. Once it’s off, you’ll see the pre-filter, usually a gray or black mesh screen.
This is the first line of defense against large particles like hair, dust, and pet fur. Over time, it gets clogged, reducing airflow and making your purifier work harder.
Carefully remove the pre-filter. If it’s washable (check your manual), you’re in luck. If not, you’ll need to replace it—but we’ll cover that later.
Step 3: Vacuum the Pre-Filter and Interior
Use your vacuum’s brush attachment to gently remove surface dust from the pre-filter. Don’t press too hard—you don’t want to tear the mesh.
Then, vacuum the inside of the unit, especially around the fan and intake vents. Dust loves to hide in corners, and over time, it can build up and reduce efficiency.
I like to use compressed air for tight spots—like between the fan blades or around the UV-C light housing (if your model has one). Just hold the can upright and give it short bursts. Don’t shake it—liquid can come out and damage electronics.
Step 4: Wash the Pre-Filter (If Washable)
If your pre-filter is labeled as washable, rinse it under lukewarm water. Add a drop of mild dish soap if it’s really grimy—like after a pet shedding season.
Gently scrub with a soft brush (an old toothbrush works perfectly). Avoid scrubbing too hard—you don’t want to damage the fibers.
Rinse thoroughly until the water runs clear. Soap residue can attract more dust later.
Let it air dry completely—ideally overnight. Never reinstall a damp filter. Moisture can lead to mold growth, which defeats the whole purpose of having an air purifier.
Step 5: Wipe Down the Interior and Exterior
While the pre-filter dries, use a microfiber cloth to wipe down the inside of the unit. Focus on the fan housing, UV-C lamp (if present), and any plastic surfaces.
For the exterior, a slightly damp cloth with a bit of soap works well. Wipe the front grille, control panel, and base. Avoid getting water near buttons or vents.
I like to use a dry cloth afterward to prevent streaks—especially on the display screen.
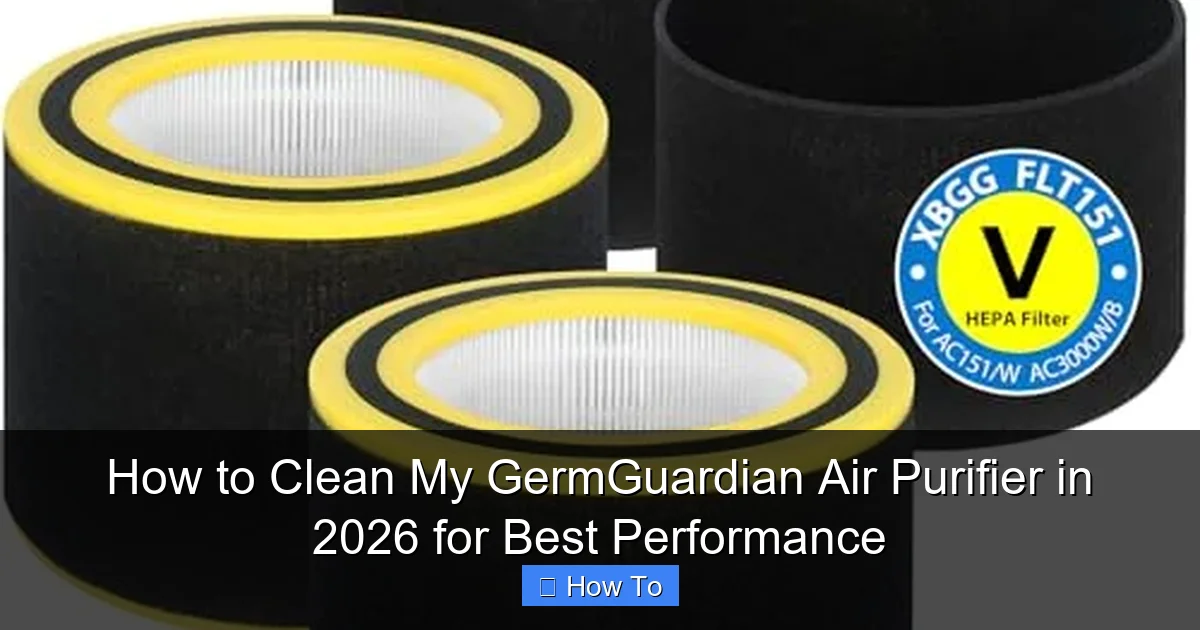
Step 6: Check and Clean the HEPA Filter (If Accessible)
Here’s where things get tricky. Most GermGuardian models use a True HEPA filter, which isn’t meant to be washed. You can’t rinse it—water destroys the delicate fibers.
But you *can* gently vacuum the surface to remove loose dust. Use the brush attachment on low suction. Do this every few months to extend the filter’s life.
If your model has a removable HEPA filter (like some AC5000 series), take it out and vacuum both sides. Be gentle—this filter is expensive to replace.
Never wash a HEPA filter. I made that mistake once with an old purifier—ended up buying a new one the next week.
Step 7: Inspect the UV-C Light (If Your Model Has One)
Some GermGuardian models, like the AC4825E or AC5350W, include a UV-C light to kill germs and mold. Over time, this bulb can get dusty, reducing its effectiveness.
Use a dry microfiber cloth to gently wipe the glass sleeve. Don’t use water or cleaners—UV bulbs are sensitive.
If the light looks dim or hasn’t been replaced in over a year, consider swapping it out. Most UV-C bulbs last about 9–12 months.
Step 8: Reassemble and Test
Once everything is dry, reinsert the pre-filter and snap the front panel back on. Make sure it’s secure—loose panels can cause rattling or reduce airflow.
Plug the unit back in and turn it on. Listen for unusual noises. If it’s running smoothly and the fan sounds strong, you’re good to go.
Run it on high for 10–15 minutes to circulate clean air and make sure everything’s working properly.
Pro Tips & Common Mistakes to Avoid
Even with the best intentions, it’s easy to make mistakes when cleaning your GermGuardian. Here’s what I’ve learned from trial and error.
Pro Tip: Set a calendar reminder every 2–3 months. I use Google Calendar with a recurring event: “Clean GermGuardian – breathe easy!” It takes 15 minutes, but the payoff is huge.
Warning: Never use bleach, ammonia, or abrasive cleaners. They can damage plastic parts and leave harmful fumes in your air.
Common Mistake: Reinstalling a damp pre-filter. This can lead to mold growth inside the unit—exactly what you’re trying to avoid. Always let it dry completely.
Pro Tip: If you have pets, clean the pre-filter monthly. Pet hair clogs filters fast, and a dirty filter means your purifier isn’t doing its job.
Common Mistake: Ignoring the filter replacement schedule. Even if your HEPA filter looks clean, it loses efficiency over time. Most last 6–12 months. Check your manual and replace as recommended.
Pro Tip: Keep your GermGuardian at least 6 inches away from walls or furniture. This ensures proper airflow and prevents dust from being sucked in from behind.
One thing I wish I’d known earlier: cleaning your air purifier isn’t just about the machine—it’s about your health. A well-maintained purifier removes up to 99.97% of airborne particles. A dirty one? Maybe 50%. That’s a huge difference when you’re trying to reduce allergens or protect your lungs.
FAQs About How to Clean My GermGuardian Air Purifier in 2026 for Best Performance
How often should I clean my GermGuardian air purifier?
For most people, every 2–3 months is ideal. But if you have pets, smoke, or live in a dusty area, clean the pre-filter monthly. The HEPA filter should be replaced every 6–12 months, depending on usage.
Visual guide about how to clean my germguardian air purifier
Image source: bermudajanitorial.bm
Visual guide about how to clean my germguardian air purifier
Image source: cleancrispair.com
Visual guide about how to clean my germguardian air purifier
Image source: cleancrispair.com
Can I wash the HEPA filter?
No. True HEPA filters are not washable. Water damages the delicate fibers. You can gently vacuum the surface to remove dust, but never rinse or soak it.
What happens if I don’t clean my air purifier?
A dirty purifier works harder, uses more energy, and becomes less effective. Over time, dust and mold can build up inside, reducing airflow and potentially releasing contaminants back into your room.
Is it safe to clean the UV-C light?
Yes, but only with a dry cloth. Never use liquids. And always unplug the unit first. UV-C light is safe when enclosed, but avoid direct exposure to skin or eyes.
Can I use a damp cloth on the control panel?
Yes, but wring it out well. Avoid excess moisture near buttons or vents. A slightly damp microfiber cloth is safe for wiping the display and controls.
How do I know when to replace the filter?
Most GermGuardian models have a filter replacement indicator light. If yours doesn’t, check the manual for recommended intervals. You’ll also notice reduced airflow or a musty smell if the filter is clogged.
Will cleaning improve my air quality?
Absolutely. A clean purifier removes more allergens, dust, and pollutants. I noticed fewer allergy symptoms within days of my first deep clean.
Final Thoughts
Cleaning your GermGuardian air purifier might not be the most exciting chore, but it’s one of the most important. Think of it as a small act of self-care—for you, your family, and your home.
When you take 15 minutes every few months to clean your unit, you’re not just maintaining a machine. You’re investing in better sleep, fewer allergies, and peace of mind. And in 2026, with air quality concerns on the rise, that’s more valuable than ever.
So the next time you’re wondering, “How to clean my GermGuardian air purifier in 2026 for best performance?”—remember: it’s simple, it’s worth it, and you’ve got this.
Start today. Unplug, open it up, and give your purifier the love it deserves. Your lungs will thank you.
“`