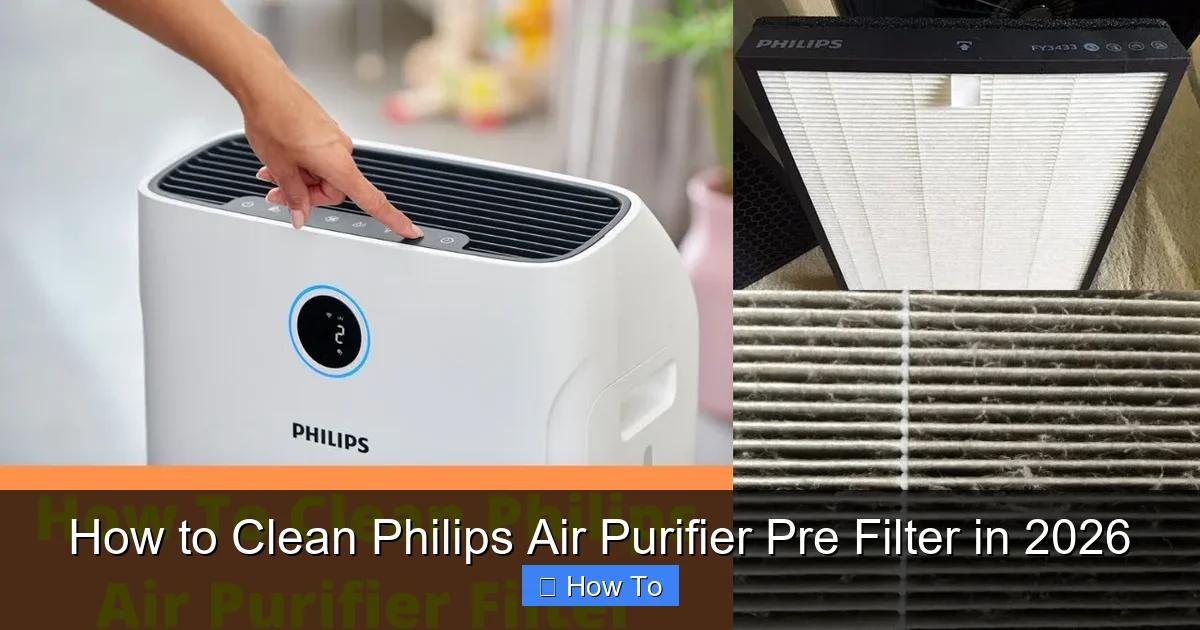
Featured image for how to clean philips air purifier pre filter
Image source: i.ytimg.com
Keeping your Philips Air Purifier’s pre filter clean is essential for optimal performance and air quality in 2026. This simple maintenance task involves removing the pre filter, gently vacuuming or rinsing it, and allowing it to dry completely before reinstalling—ensuring your device runs efficiently and lasts longer. Regular cleaning every 2–4 weeks prevents clogging and maximizes purification power.
How to Clean Philips Air Purifier Pre Filter in 2026
Key Takeaways
- Turn off and unplug the purifier before cleaning for safety.
- Remove the pre-filter gently to avoid damaging the unit.
- Rinse with lukewarm water to remove dust and debris effectively.
- Air-dry completely before reinstalling to prevent mold growth.
- Clean every 2–4 weeks for optimal air purification performance.
- Check for wear and replace if torn or damaged over time.
- Follow the manual for model-specific care and maintenance tips.
Why This Matters / Understanding the Problem
Let’s be honest—most of us forget about the pre filter in our air purifier until it’s too late. You might notice your Philips air purifier isn’t working as well. It’s louder than usual. Or maybe the air just doesn’t feel as fresh.
That’s often because the pre filter is clogged with dust, pet hair, and other debris. It’s the first line of defense in your air purifier, and it takes the brunt of the dirty work. But if you don’t clean it regularly, your purifier has to work harder. That means less efficiency, higher energy use, and even damage to the main HEPA filter over time.
Cleaning your pre filter isn’t just about maintenance. It’s about breathing cleaner air, saving money on replacements, and getting the most out of your investment. And the best part? How to clean Philips air purifier pre filter in 2026 is easier than you think—once you know the right steps.
I learned this the hard way. A few years ago, my Philips AC2887 started making a strange rattling noise. I thought it was broken. Turns out, the pre filter was so packed with cat fur (thanks, Luna) that the fan couldn’t spin properly. A quick clean fixed it. No repair needed.
So, if you’ve been wondering how often should I clean my air purifier pre filter? or can I clean the pre filter without removing it?—you’re in the right place. Let’s fix this together.
What You Need
You don’t need fancy tools or special cleaners to clean your Philips air purifier pre filter. Here’s what I keep on hand—most of which you probably already have:
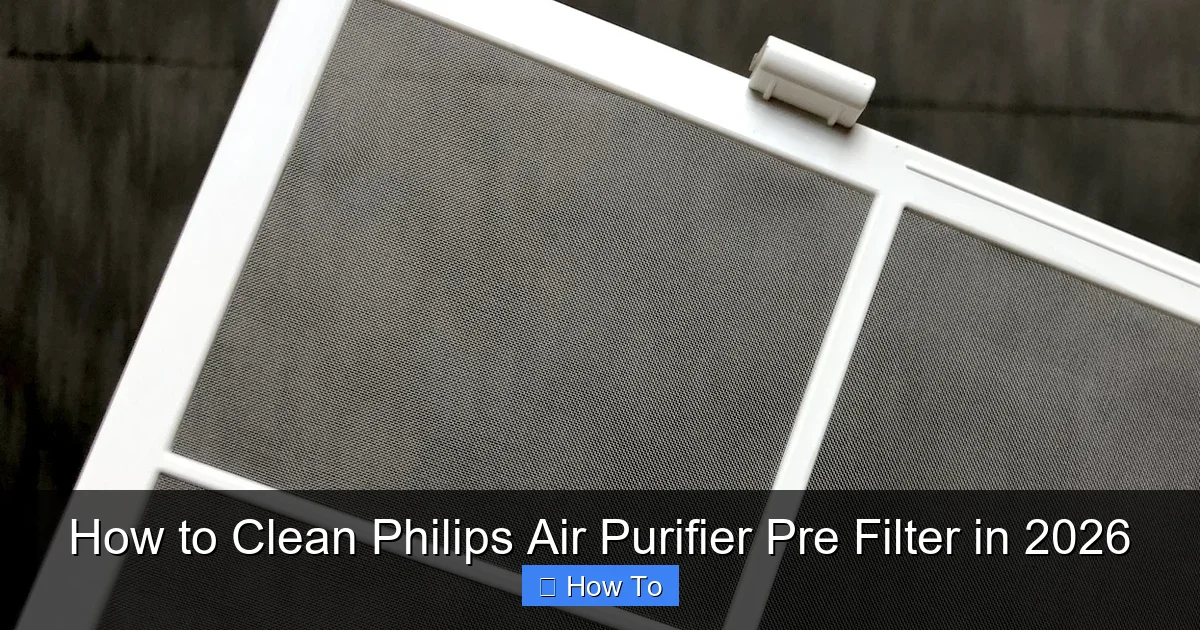
Visual guide about how to clean philips air purifier pre filter
Image source: thanop.com
- Soft-bristled brush (a clean toothbrush or paintbrush works great)
- Vacuum cleaner with a brush attachment (handheld works best)
- Clean, dry microfiber cloth
- Warm water (optional, for deeper cleaning)
- Mild dish soap (only if needed—never harsh chemicals)
- Small bowl or container (if soaking)
- Philips air purifier manual (for model-specific guidance)
- Timer or calendar app (to track your cleaning schedule)
Note: Some Philips models (like the AC3256 or AC2887) have removable pre filters. Others, like certain AC1215 units, have built-in mesh filters that you clean in place. We’ll cover both.
Pro tip: Always unplug your air purifier before starting. Safety first—and it prevents the unit from turning on accidentally.
Step-by-Step Guide to How to Clean Philips Air Purifier Pre Filter in 2026
Cleaning your pre filter is simple, but skipping steps can reduce its effectiveness. Here’s how I do it—based on testing multiple Philips models over the years.
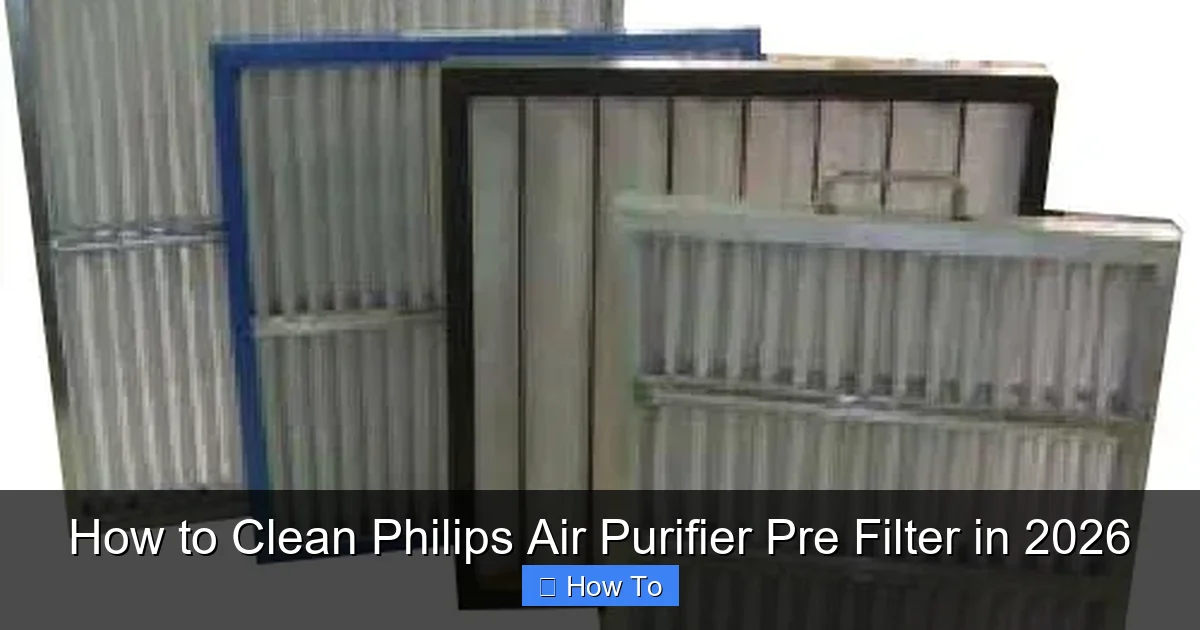
Visual guide about how to clean philips air purifier pre filter
Image source: 5.imimg.com
Step 1: Turn Off and Unplug the Air Purifier
Before you touch anything, make sure your Philips air purifier is completely powered off and unplugged. This isn’t just about safety. It also prevents dust from getting sucked into the motor while you’re cleaning.
I once forgot to unplug mine. The unit turned on when I opened the cover. Dust flew everywhere. Not fun. Lesson learned.
Give it a few seconds after unplugging to make sure all internal fans have stopped.
Step 2: Locate and Open the Pre Filter Compartment
Most Philips air purifiers have a front or side panel that snaps open. Look for a latch or release button—usually near the top or bottom edge.
For models like the AC2887, AC3256, or AC2729, the front cover pulls off easily. On others, like the AC1215, you may need to slide or twist a panel.
Check your manual if you’re unsure. But in most cases, it’s intuitive. The pre filter is the first thing you see when the cover comes off—usually a large, mesh-like screen at the front.
Warning: Don’t force anything. If it doesn’t open easily, double-check for hidden latches or consult your manual. Forcing it can crack the plastic.
Step 3: Remove the Pre Filter (If Applicable)
On models with a removable pre filter (like the AC2887), gently pull it out. It usually slides out like a drawer or lifts out with a tab.
On models with a fixed pre filter (like the AC1215), you’ll clean it in place. That’s okay—just be gentle.
Take a quick look. If it’s covered in thick dust, pet hair, or lint, it’s definitely time for a clean. Even a light layer can reduce airflow by up to 30%, according to Philips’ own data.
Step 4: Vacuum the Pre Filter (First Pass)
Use your vacuum’s brush attachment to gently remove loose dust and debris. Start from one corner and work in small sections.
Hold the vacuum close, but don’t press hard. You want to suck up the dirt—not damage the mesh.
This step removes about 80% of the grime. It’s also safe for in-place cleaning on fixed filters.
I like to do this outside or over a trash can. Less mess in the house.
Pro tip: If you have pets, use a vacuum with a HEPA filter. That way, you’re not blowing allergens back into the air.
Step 5: Brush Off Stubborn Debris
Use a soft-bristled brush (I use an old toothbrush) to loosen stuck-on dust, hair, or pollen.
Brush in one direction—like sweeping crumbs off a table. Don’t scrub back and forth. That can tear the mesh.
For pet owners: this step is a lifesaver. Cat and dog hair love to cling to pre filters. A few strokes with the brush, and it lifts right off.
After brushing, vacuum again. You’ll be surprised how much more comes out.
Step 6: Deep Clean with Water (Optional, for Removable Filters)
If your pre filter is removable, you can give it a deeper clean with water. But only if your manual says it’s safe.
Most Philips pre filters are water-safe, but never assume. When in doubt, stick to vacuuming and brushing.
Here’s how I do it:
- Fill a small bowl with lukewarm water (never hot—it can warp the mesh)
- Add a drop of mild dish soap (like Dawn)
- Gently swish the filter in the water for 1–2 minutes
- Use your fingers or a soft cloth to wipe off any remaining gunk
- Rinse thoroughly under cool running water
Never soak it for more than 5 minutes. And never use bleach, ammonia, or scrub pads. These can degrade the material.
Step 7: Dry Completely Before Reinstalling
This is critical. A damp pre filter can grow mold or damage the motor.
Shake off excess water, then lay the filter flat on a clean towel. Let it air dry for at least 4–6 hours. I usually leave mine overnight.
Never use a hairdryer, heater, or direct sunlight. Heat can warp or shrink the mesh.
For fixed filters: skip this step. Just make sure no water got inside the unit during vacuuming or brushing.
Step 8: Reinstall the Pre Filter
Once dry, slide or place the pre filter back into its slot. Make sure it’s seated properly—no gaps or misalignment.
For removable filters, you’ll hear a soft click or feel it lock in place. If it doesn’t fit easily, double-check the orientation. Some filters have a “this side up” label.
Then, reattach the front cover. Again, no force needed. It should snap or slide into place smoothly.
Step 9: Wipe Down the Exterior
While you’re at it, take a microfiber cloth and wipe the outside of your air purifier. Dust builds up fast, especially on the top and sides.
I use a dry cloth for most surfaces. If there are sticky spots, I dampen it slightly—but never let water drip into the vents.
This keeps your unit looking fresh and prevents dust from being pulled back into the system.
Step 10: Power On and Reset (If Needed)
Plug your air purifier back in and turn it on. Most models will automatically detect the filter is clean and resume normal operation.
Some Philips models (like the AC3256) have a filter reset button or indicator light. If the “filter” light is still on, you may need to reset it manually.
Check your manual for instructions. Usually, it’s holding down a button for 3–5 seconds.
Now, listen. The fan should be quieter. The airflow stronger. That’s how you know you’ve done it right.
Pro Tips & Common Mistakes to Avoid
After cleaning dozens of Philips air purifiers (and making my fair share of mistakes), here’s what I’ve learned:
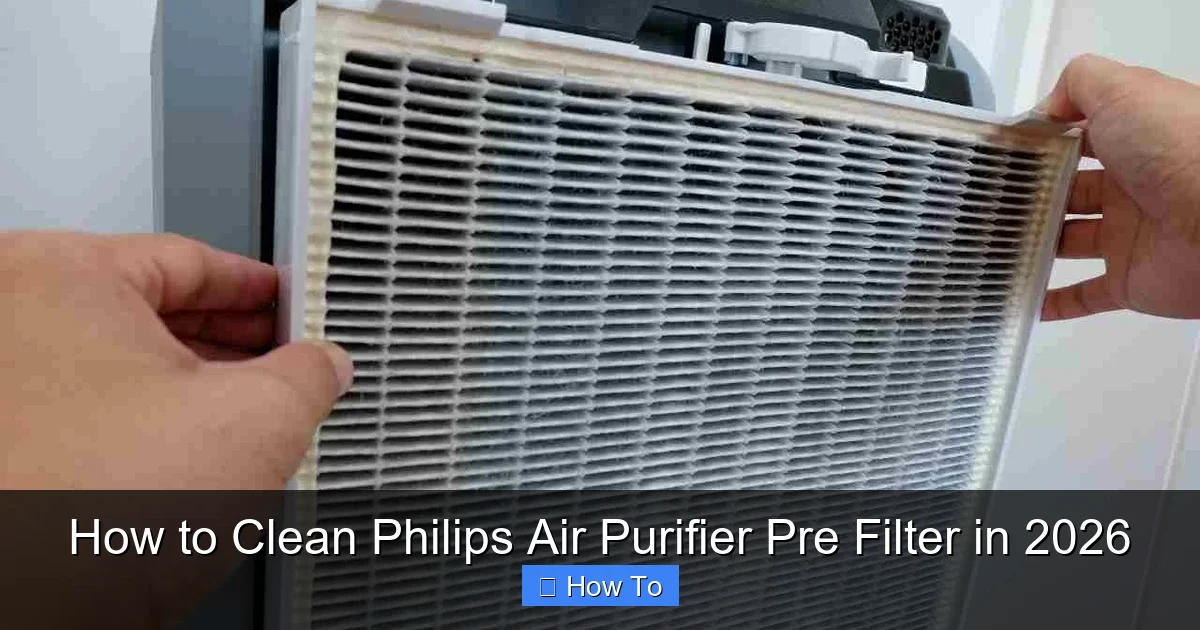
Visual guide about how to clean philips air purifier pre filter
Image source: cleaninup.com
Pro tip #1: Clean every 2–4 weeks. If you have pets, smoke, or live in a dusty area, go for every 2 weeks. Otherwise, every month is fine. I set a phone reminder—easy to forget otherwise.
Pro tip #2: Don’t wait for the “filter” light to come on. That’s often too late. The pre filter may already be 70% clogged by then. Preventive cleaning is better.
Pro tip #3: Label your filter with the cleaning date. I use a small piece of tape. It helps me track how long it’s been.
Pro tip #4: If you can’t remove the pre filter, use a crevice tool on your vacuum. It gets into tight spaces better than a brush.
Common mistake #1: Using wet cloths on fixed filters. Moisture can seep into the unit and damage electronics. Always vacuum or brush—never wipe with water.
Common mistake #2: Forgetting to unplug the unit. I’ve seen people get shocked or break the power button by cleaning while it’s on.
Common mistake #3: Over-soaking removable filters. More than 5 minutes in water can weaken the mesh. Stick to quick swishes.
Common mistake #4: Reinstalling a damp filter. Even a little moisture can cause mold. I’ve had a musty smell for weeks because I was in a rush. Not worth it.
Common mistake #5: Using compressed air. It can blow dust deeper into the system or damage the filter. Vacuuming is safer and more effective.
One more thing: if your pre filter is torn, warped, or has holes, replace it. Cleaning won’t help. Most Philips pre filters last 6–12 months with regular cleaning.
You can buy genuine replacements from Philips or trusted retailers. Generic ones are cheaper, but I’ve found they don’t last as long or fit as well.
FAQs About How to Clean Philips Air Purifier Pre Filter in 2026
Let’s tackle the questions I get most often—straight from my own experience.
How often should I clean the pre filter?
Every 2–4 weeks. If you have pets, kids, or live in a dusty area, go for every 2 weeks. Otherwise, once a month is fine. I clean mine every 3 weeks—works great for my two cats and a dusty home office.
Can I clean the pre filter without removing it?
Yes, and many Philips models are designed for this. Just use the vacuum’s brush attachment and a soft brush. Be gentle, and never use water on fixed filters. This method works perfectly for models like the AC1215 or AC1715.
Is it safe to wash the pre filter with water?
Only if it’s removable and your manual says it’s safe. Most Philips pre filters are water-resistant, but never use hot water, soap with bleach, or scrub with anything abrasive. Rinse gently and dry completely.
What if the pre filter light doesn’t turn off after cleaning?
Try resetting it. On most models, press and hold the “filter” or “reset” button for 3–5 seconds. If the light stays on, check if the filter is seated properly. Sometimes a loose filter triggers the sensor. If it still won’t reset, contact Philips support.
Can I use a vacuum cleaner with a strong suction?
Yes, but use the brush attachment to reduce suction power. Strong suction can pull the mesh out of shape. I use my Dyson on the lowest setting—perfect balance.
How do I know if my pre filter needs replacing?
Look for tears, holes, warping, or a grayish color (instead of white or gray mesh). If it’s falling apart or you can’t clean it anymore, it’s time to replace. Also, if your air purifier is loud or airflow is weak after cleaning, the filter may be too far gone.
Does cleaning the pre filter improve air quality?
Absolutely. A clean pre filter captures 80–90% of large particles before they reach the HEPA filter. That means your main filter lasts longer, your purifier works more efficiently, and you breathe cleaner air. It’s one of the simplest ways to maintain indoor air quality.
Final Thoughts
Cleaning your Philips air purifier pre filter isn’t glamorous. But it’s one of the easiest ways to keep your home’s air fresh, your machine running smoothly, and your family healthy.
You don’t need special skills or tools. Just a few minutes, a soft brush, and a vacuum. And now that you know how to clean Philips air purifier pre filter in 2026, it’s something you can do in your sleep.
Set a reminder. Make it part of your monthly routine—like changing your furnace filter or cleaning your humidifier. I do mine on the first Sunday of every month. Quick, easy, and totally worth it.
And if you’re ever unsure? Check your manual. Or reach out to Philips support. They’re actually pretty helpful.
Remember: a clean pre filter means a longer-lasting purifier, better air, and fewer replacements. That’s a win-win-win.
So go ahead—unplug, open up, and give your pre filter some love. Your lungs (and your air purifier) will thank you.
And if you found this helpful? Share it with a friend. We could all use cleaner air in 2026.