Featured image for how to clean renpho air purifier filter
Image source: renpho.uk
Cleaning your Renpho air purifier filter in 2026 is quick and simple with the right steps. Start by turning off and unplugging the unit, then carefully remove the filter and gently vacuum or rinse it (if washable) to remove dust and debris. Allow the filter to dry completely before reinserting to maintain optimal performance and air quality.
“`html
How to Clean Renpho Air Purifier Filter in 2026 Easy Steps
Key Takeaways
- Turn off and unplug the purifier before cleaning for safety.
- Remove the filter carefully to avoid damaging internal components.
- Vacuum the pre-filter gently to remove dust and debris buildup.
- Wash reusable filters with mild soap and cool water only.
- Air-dry completely before reinserting to prevent mold or damage.
- Replace non-washable filters every 6–12 months as recommended.
- Clean the exterior weekly with a dry or slightly damp cloth.
Why This Matters / Understanding the Problem
Let’s be honest—air purifiers are like the unsung heroes of our homes. They quietly work all day, pulling dust, pet dander, and allergens out of the air so we can breathe easier. But if you’ve ever opened up your Renpho air purifier and seen a gray, fuzzy filter, you know it’s not doing its job as well as it could.
Over time, filters get clogged. That means less airflow, reduced efficiency, and even worse—your purifier might start blowing dirty air back into the room. Yikes. I learned this the hard way when my allergies flared up during what should’ve been a “clean air” week. Turns out, my Renpho filter hadn’t been cleaned in months.
Cleaning your Renpho air purifier filter isn’t just about maintenance—it’s about performance, longevity, and your health. And the good news? It’s way easier than you think. Whether you’re a first-time owner or just need a refresher, this guide will walk you through how to clean Renpho air purifier filter in 2026 easy steps—no tools, no stress, just clear, breathable results.
What You Need
Before we dive in, let’s gather what you’ll need. Don’t worry—you probably already have most of this lying around the house.
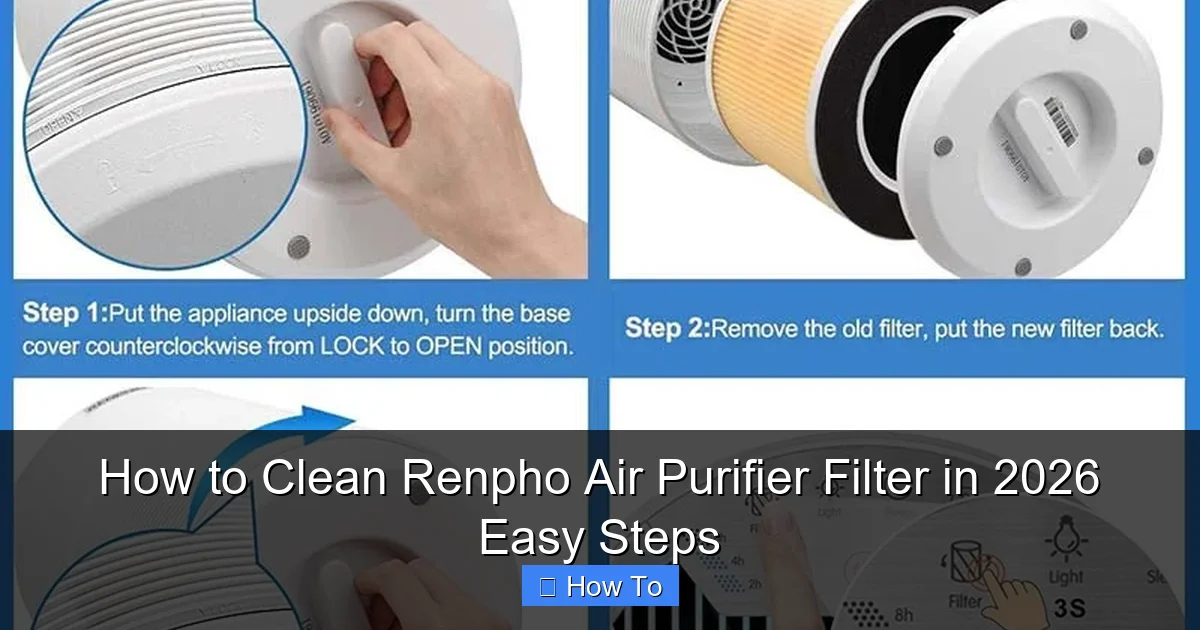
Visual guide about how to clean renpho air purifier filter
Image source: cdn.shopify.com
- Soft-bristle brush (an old toothbrush works great)
- Vacuum cleaner with a brush attachment
- Mild dish soap (optional, for washable pre-filters)
- Clean, dry cloth or paper towels
- Lukewarm water (never hot!)
- Well-ventilated area (like near an open window or outside)
Pro tip: Always unplug your Renpho air purifier before starting. Safety first—even if it seems obvious, it’s easy to forget when you’re in “cleaning mode.”
Step-by-Step Guide to How to Clean Renpho Air Purifier Filter in 2026 Easy Steps
Step 1: Turn Off and Unplug Your Renpho Air Purifier
Before touching anything, make sure your unit is completely powered down. I can’t stress this enough—even if the display is off, it could still be drawing power. Unplugging it eliminates any risk of electrical shock or accidentally turning it on while you’re handling the filter.
Visual guide about how to clean renpho air purifier filter
Image source: airpurifyreviews.com
Also, give the unit a few minutes to cool down if it’s been running. Warm motors and electronics don’t mix well with moisture, and we’re about to get hands-on.
Step 2: Locate and Remove the Front Panel
Most Renpho models—like the popular RENPHO True HEPA Air Purifier—have a front grille or panel that snaps off easily. Look for small tabs or clips along the edges. Gently press or pull them to release the panel.
If you’re not sure where the clips are, check your user manual or look for subtle seams. Don’t force it—Renpho designs these to open smoothly with a little pressure. Once it’s off, set it aside in a safe spot so it doesn’t get scratched or lost.
Step 3: Take Out the Pre-Filter
Behind the front panel, you’ll see the first layer: the pre-filter. This is the mesh-like screen that catches big particles like pet hair and dust bunnies. It’s usually gray or white and sits right in front of the main HEPA filter.
Simply lift it out—it should come free with little resistance. If it feels stuck, double-check for hidden clips or tabs. Once removed, inspect it. If it’s caked with fur or debris, it’s definitely time for a clean.
Step 4: Vacuum the Pre-Filter
Grab your vacuum cleaner and attach the brush nozzle. Gently run it over both sides of the pre-filter. Focus on areas with visible buildup—especially corners and edges where dust loves to hide.
I like to do this outside or over a trash can to avoid spreading dust back into my home. If you’re indoors, open a window for ventilation. This step removes the bulk of the debris so you don’t have to scrub as much later.
Step 5: Wash the Pre-Filter (If Washable)
Not all Renpho pre-filters are washable, so check your model. Most newer ones are labeled “washable” or “reusable.” If yours is, rinse it under lukewarm water. Avoid hot water—it can warp the mesh or damage adhesives.
If there’s stubborn grime, add a drop of mild dish soap and gently scrub with your soft-bristle brush. Rinse thoroughly until no soap remains. Soap residue can trap dust and reduce airflow.
After washing, shake off excess water and lay the filter flat on a clean towel. Let it air-dry completely—this usually takes 4 to 6 hours. Never reinstall a damp filter. Moisture can breed mold or damage the internal components.
Step 6: Vacuum the Main HEPA Filter
Now, carefully remove the main HEPA filter. This is the thick, pleated filter behind the pre-filter. It’s designed to capture tiny particles like pollen, mold spores, and smoke.
Important: The HEPA filter is not washable. Never soak it or run water through it. Doing so will ruin its ability to trap fine particles.
Instead, use your vacuum’s brush attachment to gently clean both sides. Go slowly—don’t press too hard. The goal is to remove surface dust without damaging the delicate fibers. I usually spend about 2–3 minutes per side, making sure to get into the pleats.
If your Renpho model has a carbon filter (often a thin black layer behind the HEPA), treat it the same way—light vacuuming only. Carbon filters absorb odors and gases, and water will destroy their effectiveness.
Step 7: Wipe Down the Interior and Fan Blades
While the filters are out, take a moment to clean the inside of the unit. Use a dry or slightly damp cloth to wipe down the housing, especially around the fan and air intake areas.
Pet hair and dust love to cling to fan blades. If you see buildup, wrap a cloth around a butter knife or use a cotton swab to gently remove it. Be careful not to bend the blades—they’re precision-balanced for quiet operation.
This step isn’t always necessary, but it makes a big difference in airflow and noise levels. I do it every time I clean the filters, just to keep things running smoothly.
Step 8: Reassemble the Air Purifier
Once everything is dry and clean, it’s time to put it all back together. Start by placing the HEPA filter back into its slot—make sure it’s seated properly and facing the right direction (most have an arrow indicating airflow).
Next, insert the pre-filter. It should snap or slide into place easily. Finally, reattach the front panel. Press firmly around the edges until you hear or feel the clips engage.
Double-check that everything is secure before plugging the unit back in. A loose filter or panel can cause rattling or reduce efficiency.
Step 9: Reset the Filter Indicator (If Applicable)
Many Renpho models have a filter replacement light that turns on after a certain number of hours. Even if you’re just cleaning—not replacing—the filter, it’s a good idea to reset the indicator so you know when the next maintenance is due.
To reset, press and hold the “Filter” or “Reset” button for 3–5 seconds until the light turns off or changes color. Check your manual for model-specific instructions.
This small step helps you stay on top of maintenance and avoid guessing when it’s time to clean again.
Pro Tips & Common Mistakes to Avoid
After cleaning dozens of air purifiers—including my own Renpho—I’ve learned a few things the hard way. Here’s what to keep in mind:
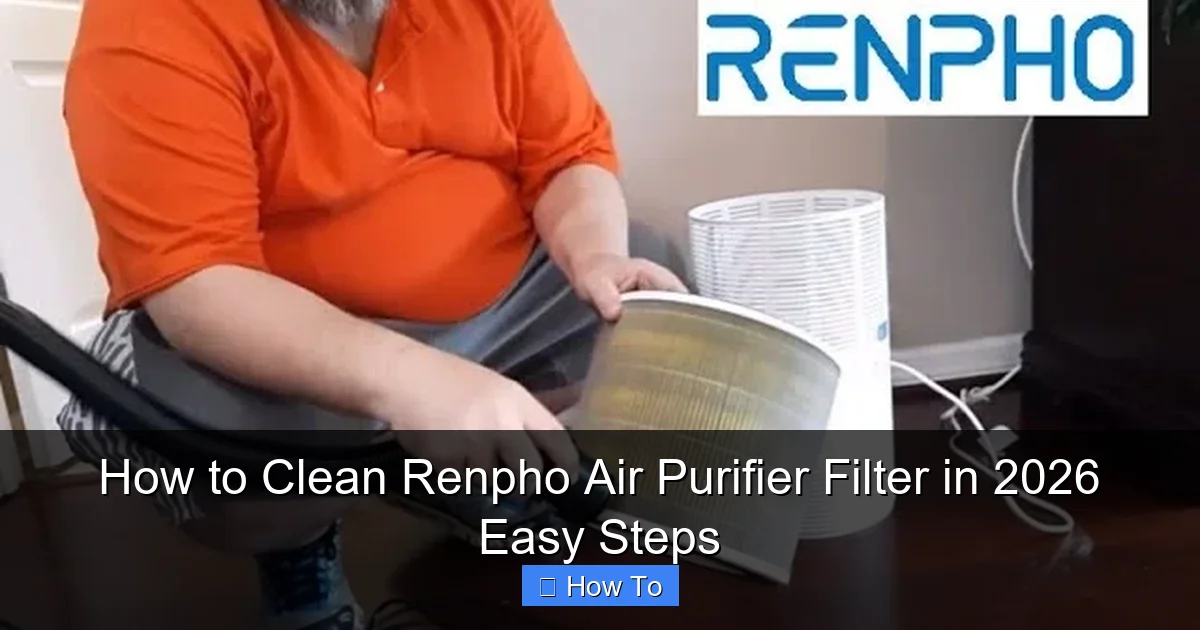
Visual guide about how to clean renpho air purifier filter
Image source: i.ytimg.com
Pro Tip: Clean your pre-filter every 2–4 weeks, depending on usage. If you have pets or live in a dusty area, you might need to do it weekly. The HEPA filter should be vacuumed monthly and replaced every 6–12 months.
Warning: Never use compressed air to clean the HEPA filter. It might seem efficient, but the high pressure can tear the fibers and ruin the filter’s integrity.
Common Mistake: Reinstalling a damp pre-filter. Even if it feels dry to the touch, moisture can linger in the mesh. Always let it air-dry overnight to be safe.
Pro Insight: Keep a cleaning log. I use a sticky note on the unit with the date I last cleaned it. It’s a simple habit that prevents guesswork and keeps your purifier running at peak performance.
Also, avoid using harsh chemicals or disinfectant sprays on any part of the filter. They can leave residues that affect air quality or damage materials over time.
FAQs About How to Clean Renpho Air Purifier Filter in 2026 Easy Steps
Q: Can I wash the HEPA filter in my Renpho air purifier?
A: No, the HEPA filter is not washable. Water will damage its delicate fibers and reduce its ability to capture fine particles. Only vacuum it gently to remove surface dust.
Q: How often should I clean the pre-filter?
A: It depends on your environment. If you have pets, smoke, or live in a dusty area, clean it every 2 weeks. Otherwise, once a month is usually enough. Check it regularly—if it looks gray or clogged, it’s time.
Q: What if my Renpho filter smells bad?
A: A musty or smoky smell usually means the filter is saturated and needs replacing—not just cleaning. While you can vacuum it, persistent odors often indicate the carbon layer is exhausted. Consider a new filter if the smell doesn’t go away.
Q: Can I use a hairdryer to speed up drying?
A: It’s not recommended. High heat can warp the pre-filter or damage adhesives. Let it air-dry naturally in a well-ventilated area. Patience pays off here.
Q: My Renpho air purifier is still noisy after cleaning. What’s wrong?
A: Noise can come from loose parts, a misaligned filter, or dust in the fan. Double-check that everything is securely reassembled. If the problem persists, inspect the fan blades for debris or contact Renpho support.
Q: Do I need to clean the exterior of the unit?
A: Yes! Dust builds up on the outer grilles and vents, blocking airflow. Wipe the outside with a dry or slightly damp cloth weekly. Avoid spraying liquid directly on the unit.
Q: Is it worth cleaning the filter, or should I just replace it?
A: Cleaning the pre-filter is always worth it—it’s reusable and saves money. The HEPA filter should be vacuumed regularly but replaced when it looks dark or the indicator light comes on. Cleaning extends its life, but it won’t last forever.
Final Thoughts
Cleaning your Renpho air purifier filter doesn’t have to be a chore. With these how to clean Renpho air purifier filter in 2026 easy steps, you can keep your unit running efficiently, your air fresh, and your allergies at bay—all in under 30 minutes.
Remember, consistency is key. A little maintenance every few weeks goes a long way. Your lungs (and your wallet) will thank you when you’re not replacing filters every few months.
So next time you walk past your Renpho, give it a quick glance. If the filter looks dirty, don’t wait. Follow these steps, breathe easier, and enjoy the quiet hum of clean air doing its job.
“`