Featured image for how to clean shark air purifier dust filter
Image source: storables.com
Keeping your Shark air purifier running efficiently starts with regular cleaning of the dust filter—don’t wait for performance to drop. In just a few simple steps, you can remove debris, maintain airflow, and extend the life of your device, ensuring cleaner air in your home. Follow the 2026 guide to clean your Shark air purifier dust filter safely and effectively, without damaging sensitive components.
“`html
How to Clean Shark Air Purifier Dust Filter in 2026
Key Takeaways
- Power off first: Always unplug the purifier before cleaning to ensure safety.
- Remove the filter: Open the back panel and take out the dust filter carefully.
- Vacuum gently: Use a brush attachment to remove loose dust and debris.
- Rinse if washable: Soak the filter in lukewarm water if it’s labeled as washable.
- Air dry completely: Let the filter dry for 24 hours before reinstalling.
- Replace when worn: Install a new filter if it shows damage or reduced efficiency.
- Clean monthly: Maintain performance by cleaning the filter every 4 weeks.
Why This Matters / Understanding the Problem
Let’s be honest—your Shark air purifier has been quietly working overtime. Whether it’s pet dander, cooking smoke, or that mysterious layer of dust that appears overnight, your purifier’s dust filter has been catching it all. But here’s the thing: even the best air purifiers lose their mojo when the filter gets clogged.
I learned this the hard way last winter. My allergies were acting up, and I couldn’t figure out why—until I opened up my Shark purifier and saw the filter was basically a gray sponge. It wasn’t just dirty; it was suffocating. That’s when I realized how important it is to know how to clean Shark air purifier dust filter in 2026—not just for performance, but for your health.
Over time, dust, pollen, and debris build up on the filter, reducing airflow and forcing your purifier to work harder. This doesn’t just spike your energy bill—it also means less clean air circulating in your home. Plus, a dirty filter can start to smell musty, which defeats the whole purpose of having an air purifier in the first place.
The good news? Cleaning the dust filter is easier than you think. And with a little regular maintenance, you can keep your Shark purifier running like new—without needing to replace the filter every few months. Whether you’ve owned your unit for years or just unboxed it, this guide will walk you through the process step by step, so you can breathe easy knowing your air is truly clean.
What You Need
Before we dive into the cleaning process, let’s gather everything you’ll need. The great thing about cleaning your Shark air purifier dust filter is that you probably already have most of these items lying around the house.
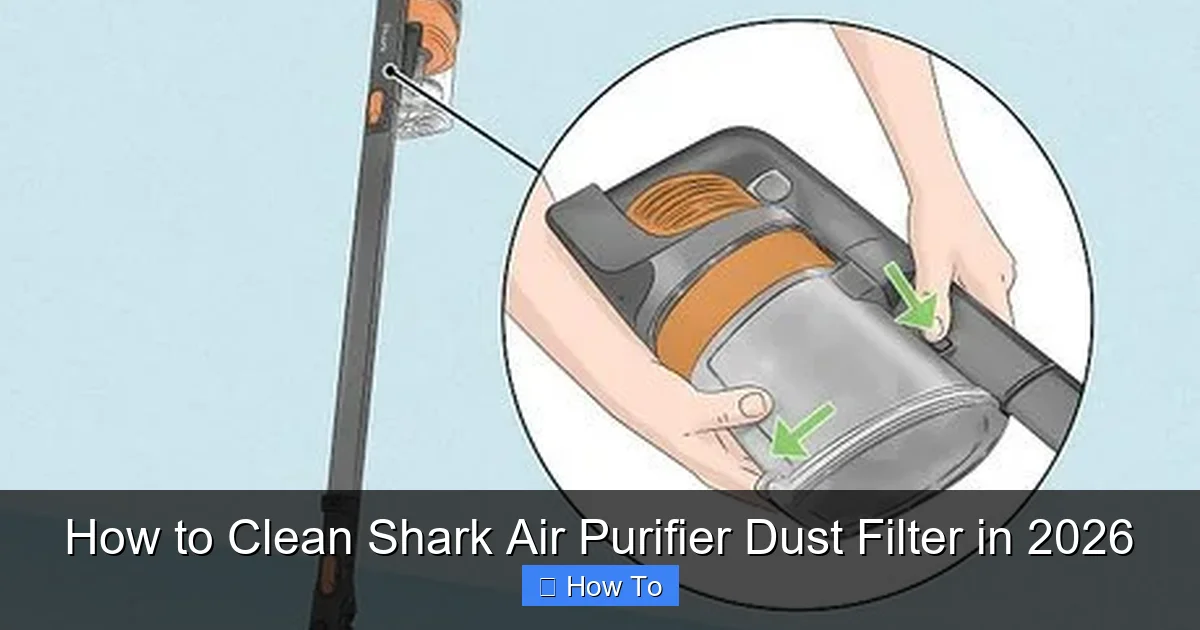
Visual guide about how to clean shark air purifier dust filter
Image source: wikihow.com
- Soft-bristle brush (an old toothbrush works great)
- Vacuum cleaner with a brush attachment
- Mild dish soap (nothing harsh or scented)
- Lukewarm water (hot water can warp the filter)
- Clean, dry towel
- Pair of gloves (optional, but helpful if you have sensitive skin)
- Well-ventilated area (like a garage, balcony, or near an open window)
You don’t need any special cleaning solutions or tools. Avoid using bleach, ammonia, or any abrasive cleaners—they can damage the filter material and reduce its effectiveness. Also, never use compressed air, as it can tear the delicate fibers.
If you’re not sure which model you have, check the label on the back or bottom of your purifier. Most Shark air purifiers use a washable pre-filter or a reusable dust filter, but some models combine multiple filter types. This guide focuses on the standard washable dust filter, which is common in models like the Shark HE601, HE602, and HE400 series.
Step-by-Step Guide to How to Clean Shark Air Purifier Dust Filter in 2026
Step 1: Turn Off and Unplug the Unit
Safety first! Before you do anything, make sure your Shark air purifier is completely turned off and unplugged from the wall outlet. This isn’t just about avoiding electric shocks—it’s also about protecting the internal components from accidental damage while you’re handling the filter.
I once made the mistake of trying to remove the filter while the unit was still plugged in. Let’s just say the sudden power surge wasn’t fun. Now, I always double-check the power cord before I start.
Once it’s unplugged, let the unit sit for a few minutes to cool down if it’s been running. This is especially important if you’ve been using it on high speed for extended periods.
Step 2: Locate and Remove the Dust Filter
Now it’s time to access the filter. On most Shark air purifiers, the dust filter is located behind the front or side panel. Look for a latch, clip, or removable cover—usually marked with arrows or labeled “Filter.”
Gently press the release mechanism and pull the panel away. Some models have a magnetic cover, while others use clips. Be careful not to force it—if it doesn’t open easily, double-check the user manual or look for hidden tabs.
Once the panel is off, you’ll see the dust filter. It’s typically a mesh or foam-like material, often gray or white. Carefully slide it out. If your model has multiple filters (like a HEPA and a carbon filter), identify which one is the washable dust filter. The pre-filter or dust filter is usually the outermost layer and is designed to be cleaned, not replaced.
Pro tip: Take a quick photo of the filter setup before removing anything. This makes reassembly much easier, especially if you’re dealing with multiple layers.
Step 3: Vacuum Loose Debris
Before washing, use your vacuum cleaner with the brush attachment to remove surface dust and large particles. Hold the filter over a trash can or outside to avoid making a mess indoors.
Gently run the vacuum over both sides of the filter. Don’t press too hard—you want to lift the debris, not push it deeper into the fibers. This step removes the bulk of the buildup and makes the washing process more effective.
I like to do this outside on my porch. It’s faster, and I don’t have to worry about dust settling back into my living room. If you’re indoors, lay down a towel or sheet to catch the fallout.
Step 4: Wash the Filter with Mild Soap and Water
Fill a sink or basin with lukewarm water and add a few drops of mild dish soap. Submerge the filter and let it soak for 5–10 minutes. This helps loosen stubborn grime and embedded particles.
After soaking, gently agitate the filter with your hands. Use a soft-bristle brush (like an old toothbrush) to lightly scrub both sides, focusing on areas with visible buildup. Avoid twisting, wringing, or scrubbing aggressively—this can damage the filter’s structure.
Rinse thoroughly under cool running water until all soap residue is gone. Hold the filter up to the light to check for suds or discoloration. If you see any, rinse again. Soap left behind can attract more dust and reduce airflow.
Never use hot water. High temperatures can warp or melt the filter material, especially if it contains plastic components. Stick to lukewarm or cool water for best results.
Step 5: Dry the Filter Completely
This step is crucial. A damp filter can grow mold or mildew, which defeats the purpose of cleaning it. After rinsing, gently shake off excess water and pat the filter with a clean, dry towel.
Then, place the filter in a well-ventilated area to air dry. I usually prop mine up near a window or fan, making sure air can circulate on both sides. Avoid direct sunlight or heat sources like radiators—they can cause warping.
Let it dry for at least 12–24 hours. Rushing this step by using a hair dryer or placing it in the dryer can damage the filter. Patience here pays off in the long run.
Once it’s completely dry—no damp spots, no coolness to the touch—you’re ready to reinstall.
Step 6: Reinstall the Filter and Reassemble the Unit
Carefully slide the dry filter back into its housing. Make sure it’s seated properly and facing the right direction (most filters have an arrow or label indicating airflow direction).
Replace the front or side panel and secure it with the latch or clips. Give it a gentle tug to ensure it’s locked in place.
Plug the unit back in and turn it on. Run it on a low setting for a few minutes to make sure everything is working smoothly. Listen for unusual noises or reduced airflow—these could indicate improper installation.
If everything sounds good, you’re all set! Your Shark air purifier is now running with a clean, efficient dust filter.
Pro Tips & Common Mistakes to Avoid
Even with the best intentions, it’s easy to make small mistakes that can affect your purifier’s performance. Here’s what I’ve learned from years of maintaining my own unit—and from helping friends troubleshoot theirs.
Pro Tip: Clean your dust filter every 2–4 weeks, depending on usage. If you have pets, live in a dusty area, or cook frequently, you may need to clean it more often. A good rule of thumb: if you can’t see light through the filter when held up, it’s time for a wash.
Warning: Never wash a HEPA or carbon filter unless the manufacturer explicitly says it’s washable. Most HEPA filters are not reusable and should be replaced every 6–12 months. Cleaning them can ruin their ability to trap fine particles.
Another common mistake? Forgetting to dry the filter completely. I once reinstalled a slightly damp filter and noticed a musty smell a few days later. It took me a week to figure out it was mold growing inside. Don’t let that happen to you.
Also, avoid using fabric softener or dryer sheets when cleaning nearby fabrics. The chemicals can transfer to the filter and reduce its effectiveness.
If your filter starts to fray, tear, or lose its shape after repeated cleanings, it’s time to replace it. Most washable filters last 6–12 months with proper care. Check your model’s specifications for replacement recommendations.
FAQs About How to Clean Shark Air Purifier Dust Filter in 2026
Q: Can I clean my Shark air purifier filter with a washing machine?
A: No, never put your dust filter in the washing machine. The agitation and spin cycle can damage the delicate fibers. Stick to hand washing with mild soap and water.
Q: How often should I clean the dust filter?
A: For most households, every 2–4 weeks is ideal. If you have pets, smoke, or live in a high-pollution area, clean it weekly. Always check the filter visually—if it looks gray or clogged, it’s time.
Q: What if my filter smells bad after cleaning?
A: A musty smell usually means mold or mildew. Make sure the filter is completely dry before reinstalling. If the smell persists, the filter may be damaged and need replacement.
Q: Can I use vinegar to clean the filter?
A: It’s not recommended. Vinegar can degrade certain filter materials over time. Mild dish soap is safer and just as effective for removing dust and debris.
Q: My filter is still dirty after washing. What should I do?
A: Some buildup is normal, but if the filter remains discolored or stiff, it may be nearing the end of its lifespan. Consider replacing it, especially if your purifier isn’t performing as well as it used to.
Q: Do I need to clean the inside of the purifier too?
A: Yes, occasionally. Use a dry or slightly damp cloth to wipe down the interior surfaces and fan blades. Avoid getting water near electrical components.
Q: Will cleaning the filter improve air quality?
A: Absolutely. A clean filter ensures optimal airflow and filtration efficiency. You’ll notice better air quality, reduced odors, and quieter operation.
Final Thoughts
Knowing how to clean Shark air purifier dust filter in 2026 isn’t just about maintenance—it’s about taking control of your indoor air quality. A little effort every few weeks can make a big difference in how your purifier performs and how you feel at home.
I used to think air purifiers were “set it and forget it” appliances. But after seeing the difference a clean filter makes, I’ve made it part of my regular cleaning routine. It takes less than 15 minutes, and the peace of mind is worth it.
So grab your toothbrush, unplug that unit, and give your filter the TLC it deserves. Your lungs—and your Shark purifier—will thank you.
And remember: clean air starts with a clean filter. Breathe easy, friend.
“`