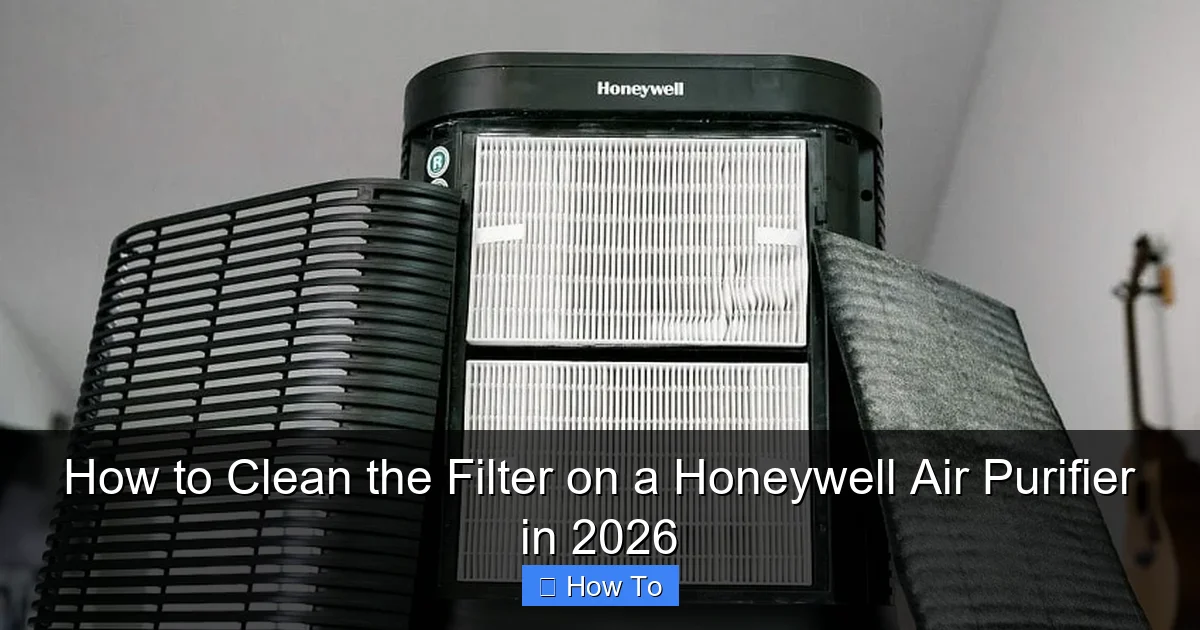
Featured image for how to clean the filter on a honeywell air purifier
Image source: houseandbeyond.org
Cleaning the filter on your Honeywell air purifier in 2026 is quick and essential for peak performance—start by powering off and removing the filter, then gently vacuum or rinse it (if washable) to remove dust and debris. Always let it dry completely before reinstalling to prevent mold and maintain air quality.
“`html
How to Clean the Filter on a Honeywell Air Purifier in 2026
Key Takeaways
- Turn off and unplug the purifier before cleaning for safety.
- Remove the filter carefully to avoid damaging internal components.
- Vacuum loose debris gently using a soft brush attachment.
- Rinse with lukewarm water if filter is washable; avoid soap.
- Air-dry completely for at least 24 hours before reinstalling.
- Replace every 6–12 months depending on usage and air quality.
- Check indicator lights to track filter maintenance schedule.
Why This Matters / Understanding the Problem
Let’s be honest: air purifiers are like the silent heroes of our homes. They work hard to keep the air clean, but they can’t do their job if their filters are clogged. I learned this the hard way when my Honeywell air purifier started sounding like a jet engine—and my allergies got worse, not better. That’s when I realized: how to clean the filter on a Honeywell air purifier in 2026 isn’t just a chore; it’s a necessity.
Dirty filters don’t just reduce performance—they can actually release trapped dust and allergens back into your air. Plus, a clogged filter forces your purifier to work harder, increasing energy use and shortening its lifespan. Whether you’re battling seasonal allergies, pet dander, or just want fresher air, keeping your filter clean is the key to getting the most out of your Honeywell unit.
In this guide, I’ll walk you through the exact steps I use to clean my Honeywell air purifier filter—no fluff, no guesswork. By the end, you’ll know exactly how to keep your air purifier running smoothly, quietly, and efficiently.
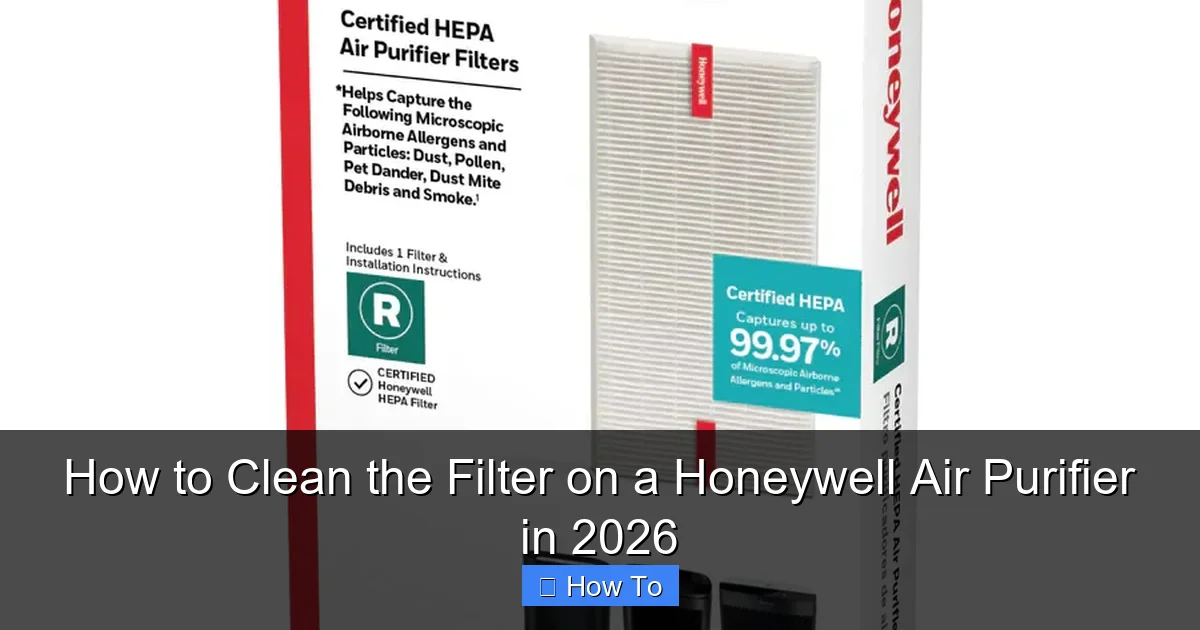
What You Need
Before diving in, gather these tools. Most are probably already in your home, and the rest are easy to find. The goal is to make how to clean the filter on a Honeywell air purifier in 2026 as simple as possible—no trips to the hardware store required.
Visual guide about how to clean the filter on a honeywell air purifier
Image source: mobileimages.lowes.com
- A soft-bristled brush (like a clean toothbrush or paintbrush)
- A vacuum with a hose and brush attachment
- A bowl or sink for rinsing (if your model allows it)
- Lukewarm water (never hot!)
- Microfiber cloth or soft towel
- Your Honeywell air purifier manual (check model compatibility)
- Replacement filter (if needed—more on this later)
Pro Tip: Always check your model number (usually on the back or bottom of the unit) before starting. Not all Honeywell filters are washable. Some are permanent, and others are disposable. We’ll cover how to tell the difference in a bit.
Step-by-Step Guide to How to Clean the Filter on a Honeywell Air Purifier in 2026
Step 1: Turn Off and Unplug the Air Purifier
First things first: safety. Always unplug your air purifier before opening it. I know it sounds obvious, but I’ve seen people skip this step—and it’s not worth the risk.
Visual guide about how to clean the filter on a honeywell air purifier
Image source: homeairwiki.com
Give the unit a minute to cool down if it’s been running. Then, locate the power switch (usually on the side or back) and flip it off. Unplug it from the wall outlet. This is non-negotiable—especially when handling internal components.
Why this matters: Even if the fan stops, internal circuits can still hold a charge. Unplugging ensures zero risk of electric shock.
Step 2: Remove the Front or Side Panel
Most Honeywell air purifiers have a front or side panel that slides or snaps off. Look for a small latch, tab, or groove near the bottom or sides.
On my Honeywell HPA300, there’s a small button on the front. I press it, and the panel pops open like a drawer. Other models may have a magnetic cover or screws (rare in newer models).
Gently pull the panel forward. Don’t force it—there’s usually a filter tray behind it. If it’s stuck, double-check the manual or look for hidden tabs.
Watch out: Some models have a safety switch that disables the unit when the panel is open. That’s normal and a good safety feature.
Step 3: Identify Your Filter Type
This is the most important step in how to clean the filter on a Honeywell air purifier in 2026. Not all filters are created equal.
- Washable Pre-Filter: Usually a thin, mesh-like screen at the front. Often labeled “Washable” or “Permanent.”
- Non-Washable HEPA Filter: Thick, pleated paper or fabric. Never rinse these—they’ll disintegrate.
- Activated Carbon Filter: Sometimes combined with HEPA. May be washable, but usually not. Check the label.
Look for text on the filter frame. If it says “Do Not Wash” or “Disposable,” stop here. You can only vacuum or replace it. If it says “Washable” or “Permanent,” proceed to cleaning.
Real Talk: I once tried rinsing a non-washable HEPA filter. Big mistake. It turned into a soggy mess and had to be replaced immediately. Always check the label!
Step 4: Remove the Pre-Filter (Washable Type)
If you have a washable pre-filter, gently slide it out of its tray. It’s usually held in place by small clips or grooves.
Hold it up to the light. If it’s covered in dust, hair, or lint, it’s time to clean. A clean pre-filter should look translucent, with visible mesh.
Set the HEPA and carbon filters aside (if present) on a clean towel. Don’t stack them—dust from the pre-filter can transfer.
Step 5: Vacuum the Pre-Filter
Start with a vacuum. Use the brush attachment on low suction. Gently run it over both sides of the pre-filter.
Focus on the corners and edges—dust loves to hide there. I usually spend about 30 seconds per side. This removes loose debris without damaging the mesh.
Pro Tip: Do this outside if possible. You’ll see a surprising amount of dust fly off—especially if you have pets or live in a dusty area.
Step 6: Rinse the Pre-Filter (If Washable)
Now, rinse under lukewarm water. Never use hot water—it can warp the frame or damage the mesh.
Hold the filter at an angle so water flows through the mesh, not just over it. Use your fingers or a soft brush to gently scrub both sides. No soap or cleaners—they can leave residue.
I like to do this over a sink or bowl. If you’re outside, use a bucket to avoid wasting water.
Warning: Don’t twist, wring, or bend the filter. The mesh is delicate and can tear easily.
Step 7: Dry the Pre-Filter Completely
This is crucial. A damp filter can grow mold or mildew when reinstalled. I’ve seen it happen—and it’s gross.
Shake off excess water. Then, lay the filter flat on a clean microfiber towel. Pat it gently to remove surface moisture.
Let it air-dry for at least 2–4 hours. I usually leave mine overnight. Avoid direct sunlight or heat sources (like radiators)—they can warp the plastic frame.
Time-Saver: If you’re in a hurry, use a fan to speed up drying. Just don’t point it directly at the mesh.
Step 8: Clean the HEPA and Carbon Filters (Non-Washable)
These filters can’t be rinsed, but they still need attention. Use your vacuum’s brush attachment on low suction.
Run it gently over the surface of the HEPA filter—both sides. Pay extra attention to the pleats, where dust accumulates.
For carbon filters, vacuum the side facing the room (usually the front). Never vacuum the side facing the HEPA—carbon granules can break loose.
If the HEPA filter looks dark or smells musty, it’s likely time to replace it (more on that in FAQs).
Step 9: Wipe Down the Interior
While the pre-filter dries, clean the inside of the purifier. Use a dry microfiber cloth to wipe down the filter tray, fan blades, and interior walls.
If there’s stubborn dust, use a slightly damp cloth—but make sure it’s not wet. Never spray water inside the unit.
This step is easy to skip, but it makes a big difference. A clean interior means better airflow and longer filter life.
Step 10: Reinstall the Filters
Once the pre-filter is completely dry, slide it back into its tray. Make sure it’s seated properly—no gaps or misalignment.
Next, reinstall the HEPA and carbon filters (if present). They usually have arrows showing airflow direction. Point the arrows toward the fan (usually inward).
Double-check that all filters are flat and secure. A crooked filter can cause air leaks or reduce efficiency.
Step 11: Close the Panel and Plug In
Snap or slide the front panel back into place. Listen for a click or feel for a secure fit.
Plug the purifier back in and turn it on. It should power up normally. If it doesn’t, check that the panel is fully closed—many units won’t run if the door is ajar.
Let it run for 10–15 minutes. You should notice quieter operation and better airflow.
Pro Tips & Common Mistakes to Avoid
Over the years, I’ve made a few blunders—and learned from them. Here’s what you need to know to avoid the same pitfalls when learning how to clean the filter on a Honeywell air purifier in 2026.

Visual guide about how to clean the filter on a honeywell air purifier
Image source: honeywellstore.com
- Don’t use compressed air. It seems fast, but it can blow dust deeper into the mesh or damage pleats.
- Never use soap or cleaners. Residue can affect air quality and damage filters.
- Check your model’s filter type every time. I once cleaned the wrong filter because I assumed—don’t be me.
- Set a cleaning reminder. I use my phone’s calendar. Every 2–4 weeks for pre-filters, every 3–6 months for HEPA (depending on use).
- Keep spare filters on hand. If you have allergies or pets, having a backup HEPA filter is a lifesaver.
Personal Insight: I used to clean my pre-filter every month. Then I got a cat. Now I do it every 10 days. Pets shed like crazy! Adjust your schedule based on your home’s air quality.
Another common mistake? Overcleaning. If your pre-filter is only slightly dusty, a quick vacuum is enough. Save rinsing for when it’s visibly dirty.
And finally—don’t forget the exterior. Wipe the outside of your purifier monthly with a dry or slightly damp cloth. Dust on the casing can get sucked in and clog the filters faster.
FAQs About How to Clean the Filter on a Honeywell Air Purifier in 2026
Q: How often should I clean my Honeywell air purifier filter?
Great question! For the pre-filter, clean every 2–4 weeks. If you have pets, smokers, or live in a dusty area, aim for every 1–2 weeks. The HEPA filter usually lasts 6–12 months, but vacuum it every 3 months to extend its life. Think of it like changing your toothbrush—regular maintenance prevents bigger issues.
Q: Can I wash the HEPA filter?
No. HEPA filters are made of delicate paper or fabric. Water ruins them. If yours is labeled “Washable,” it’s likely a pre-filter. The HEPA itself is almost always non-washable. When it’s dark, smelly, or no longer trapping dust, it’s time to replace it.
Q: My air purifier smells musty after cleaning. What’s wrong?
That’s usually mold or mildew—often from a damp filter. Make sure your pre-filter is 100% dry before reinstalling. If the smell persists, the HEPA filter may be contaminated. Replace it, and clean the interior thoroughly. A musty odor means mold is growing, which defeats the purpose of an air purifier!
Q: Do I need to replace the pre-filter?
Washable pre-filters can last 2–5 years if cleaned properly. But if the mesh is torn, the frame is cracked, or it’s no longer trapping dust, replace it. A damaged pre-filter lets debris reach your HEPA filter, shortening its life.
Q: My Honeywell model doesn’t have a washable filter. What do I do?
No problem! If your pre-filter is non-washable, just vacuum it every 2–4 weeks. Replace it every 3–6 months, or when it looks dirty. The key is regular maintenance—even if it’s not washable. Check your manual for replacement intervals.
Q: Can I clean the filter while the purifier is running?
Absolutely not. Always unplug and turn it off. It’s not just about safety—running the unit with no filter can damage the fan motor. Plus, you’ll inhale dust during cleaning. Not a good idea.
Q: Where can I buy replacement filters?
Honeywell sells them on Amazon, Walmart, Home Depot, and their official website. Always buy the correct model number (e.g., HRF-AP1 for HPA300). Third-party filters exist, but I recommend OEM for best fit and performance. A poorly fitting filter won’t work properly.
Final Thoughts
Learning how to clean the filter on a Honeywell air purifier in 2026 isn’t just about following steps—it’s about creating a habit. A clean filter means better air, less noise, and a longer-lasting machine. And honestly, it takes less time than making a cup of coffee.
Start small: clean your pre-filter this weekend. Set a reminder on your phone. Keep your manual handy. And remember—every Honeywell model is a little different, so always check your specific filter type.
The best part? You’ll notice the difference almost immediately. Fresher air, quieter operation, and fewer allergy flare-ups. That’s the real payoff.
So don’t wait for your purifier to sound like a jet engine. Take 15 minutes, follow these steps, and breathe easier. Your home—and your lungs—will thank you.
“`