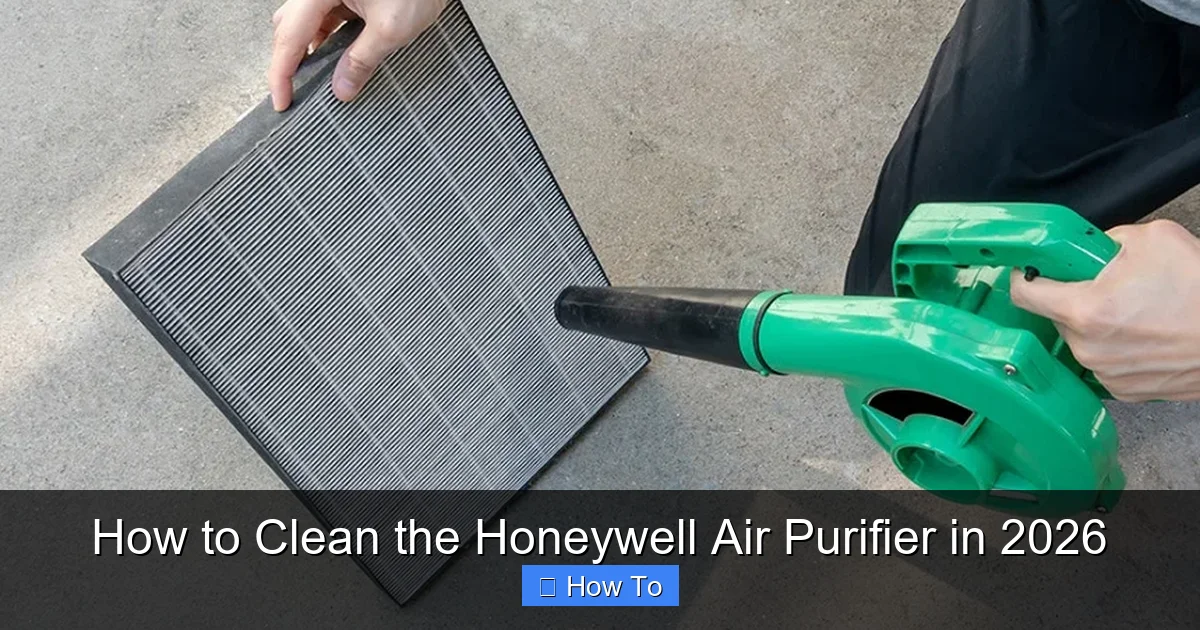
Featured image for how to clean the honeywell air purifier
Image source: hvaclifehack.com
Regularly cleaning your Honeywell air purifier is essential to maintain optimal performance and extend its lifespan. Follow a simple routine: unplug the unit, remove and rinse the pre-filter, wipe down the interior with a damp cloth, and clean or replace the HEPA filter as recommended—typically every 6 to 12 months. Neglecting maintenance reduces air quality and strains the motor, so consistent care ensures cleaner air and reliable operation in 2026 and beyond.
“`html
How to Clean the Honeywell Air Purifier in 2026
Let’s be real—your Honeywell air purifier has been working hard. Whether it’s filtering out pet dander, smoke, or just everyday dust, it’s quietly doing its job so you can breathe easier. But here’s the thing: even the best machines need a little TLC. If you’ve noticed your purifier isn’t performing like it used to—maybe it’s louder, less effective, or that “check filter” light won’t go off—it’s probably time for a deep clean.
I remember the first time I skipped cleaning mine. I thought, “It’s just sitting there—how dirty could it get?” Spoiler: very dirty. After a few months, the airflow dropped, and my allergies flared up again. That’s when I learned that knowing how to clean the Honeywell air purifier in 2026 isn’t just a nice-to-have—it’s essential for keeping your air (and your health) in top shape.
In this guide, I’ll walk you through everything you need to know—step by step—to clean your Honeywell air purifier safely and effectively. No fluff, no jargon. Just real talk from someone who’s been there, done that, and now breathes a little easier.
Key Takeaways
- Turn off and unplug the purifier before cleaning for safety.
- Wipe the exterior weekly with a dry or slightly damp cloth.
- Vacuum the pre-filter monthly to remove dust and debris.
- Replace HEPA filters every 12 months or as recommended.
- Clean the ionizer gently with a soft brush if applicable.
- Avoid water on electronics to prevent damage and malfunctions.
Why This Matters / Understanding the Problem
Air purifiers are like silent guardians. They pull in polluted air, trap contaminants, and push out cleaner air. But over time, dust, hair, pollen, and even mold can build up inside—especially in the filters and internal components. If you don’t clean it regularly, your purifier becomes less efficient, uses more energy, and can even start recirculating dirty air.
Think of it like a vacuum cleaner with a clogged hose. It might still turn on, but it’s not doing its job. The same goes for your Honeywell unit. A dirty pre-filter or clogged HEPA filter means weaker airflow, reduced purification power, and potentially higher electricity bills.
And here’s something many people don’t realize: cleaning your air purifier isn’t just about performance—it’s about longevity. Honeywell units are built to last, but only if you maintain them properly. Skipping regular maintenance can shorten the life of your machine and even void your warranty in some cases.
So whether you’ve had your purifier for six months or two years, learning how to clean the Honeywell air purifier in 2026 ensures you’re getting the most out of your investment. Plus, it’s surprisingly easy once you know the steps.
What You Need
Before we dive in, let’s gather the essentials. You don’t need fancy tools or expensive cleaners—just a few household items and a little time.
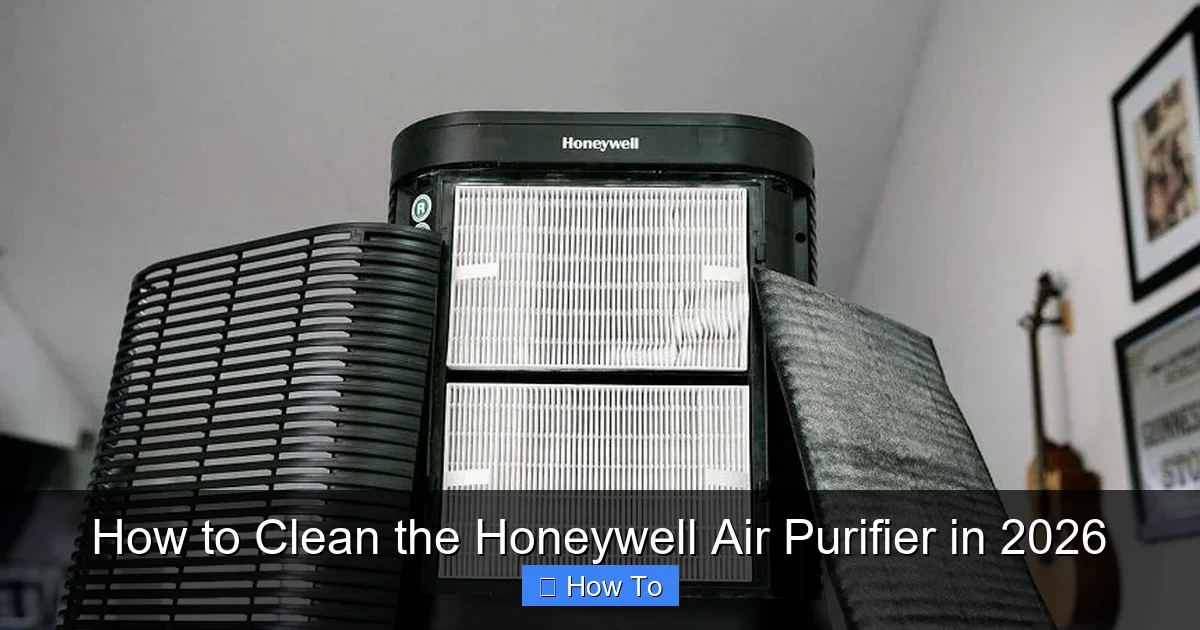
Visual guide about how to clean the honeywell air purifier
Image source: hvaclifehack.com
- Soft microfiber cloths – Great for wiping down surfaces without scratching.
- Mild dish soap – Gentle enough for plastic parts, tough enough on grime.
- White vinegar (optional) – Natural disinfectant for stubborn odors or mold.
- Vacuum cleaner with brush attachment – Perfect for sucking up dust from vents and filters.
- Compressed air (optional) – Handy for blowing dust out of tight spaces.
- Replacement filters (if needed) – Check your model’s manual to see if it’s time for a new HEPA or carbon filter.
- Warm water – For rinsing removable parts.
- Soft-bristled toothbrush – Ideal for scrubbing small crevices.
Most of these are probably already in your cleaning closet. If not, they’re easy to find at any grocery or hardware store. And don’t worry—you won’t need all of them for every cleaning. We’ll specify which ones to use in each step.
One quick note: always unplug your Honeywell air purifier before cleaning. Safety first, always.
Step-by-Step Guide to How to Clean the Honeywell Air Purifier in 2026
Step 1: Turn Off and Unplug the Unit
Before you touch anything, make sure your air purifier is completely powered down and unplugged from the wall. This isn’t just a suggestion—it’s a must. Even if the unit seems off, there could still be residual power in the system.

Visual guide about how to clean the honeywell air purifier
Image source: indoorbreathing.com
I learned this the hard way when I once tried to clean a fan while it was still plugged in. Let’s just say I got a small shock and a big lesson. So take the extra 10 seconds to unplug it. Your safety is worth it.
Once it’s unplugged, let the unit sit for about 10–15 minutes. This allows any internal components to cool down, especially if it’s been running recently.
Step 2: Remove the Front Panel and Pre-Filter
Most Honeywell air purifiers have a front panel that snaps off easily. Look for small tabs or latches on the sides or bottom. Gently press or pull to release it. If you’re not sure, check your user manual—Honeywell designs vary slightly by model.
Behind the panel, you’ll see the pre-filter. This is the first line of defense—it catches larger particles like pet hair and dust before they reach the HEPA filter. Over time, it gets clogged and needs cleaning.
Carefully remove the pre-filter. Some models have a washable pre-filter (often labeled “permanent” or “reusable”), while others require replacement. If yours is washable, great—we’ll clean it in the next step. If not, inspect it: if it’s gray or visibly dirty, it’s time to replace it.
Pro tip: Take a photo of how the filter sits before removing it. This makes reassembly much easier, especially if you’re new to this.
Step 3: Clean the Pre-Filter
If your pre-filter is washable, now’s the time to give it a good clean. Start by using your vacuum’s brush attachment to suck up loose dust and hair. This removes the bulk of the debris without damaging the filter.
Next, rinse it under lukewarm water. Avoid hot water—it can warp the material. Use a mild dish soap if needed, but don’t scrub too hard. Gently wipe or rinse until the water runs clear.
For stubborn odors or mildew (common in humid climates), mix equal parts water and white vinegar. Soak the filter for 10–15 minutes, then rinse thoroughly. Vinegar is a natural deodorizer and disinfectant, but make sure to rinse well—you don’t want your purifier smelling like a salad later.
After rinsing, shake off excess water and let the filter air-dry completely—preferably overnight. Never reinstall a damp filter. Moisture can lead to mold growth, which defeats the whole purpose of having an air purifier.
If your pre-filter isn’t washable, replace it with a genuine Honeywell replacement. Generic filters might fit, but they often don’t seal properly or filter as effectively.
Step 4: Vacuum the Interior and Vents
With the pre-filter removed, you’ll see the interior of the unit. This is where dust loves to hide. Use your vacuum’s brush attachment to gently clean around the fan blades, motor housing, and air intake vents.
Be careful not to touch the motor or electrical components. Focus on the accessible areas—dust buildup here can restrict airflow and make the fan work harder.
If you have compressed air, now’s a good time to use it. Spray short bursts into tight spaces, like between fan blades or around the motor housing. Hold the can upright to avoid spraying liquid.
Don’t forget the exterior vents. Use a dry microfiber cloth or the vacuum to remove dust from the front and back grilles. These areas often get overlooked but can significantly impact performance if clogged.
Step 5: Wipe Down the Exterior
While the interior is getting attention, don’t ignore the outside. Dust and fingerprints accumulate on the plastic casing, especially if your purifier sits on a nightstand or shelf.
Use a slightly damp microfiber cloth with a drop of dish soap to wipe down the exterior. Avoid spraying water directly on the unit—dampen the cloth instead. Pay extra attention to the control panel and buttons, where oils from your fingers can build up.
For stubborn stains or sticky residue, a 50/50 mix of water and vinegar works wonders. Just make sure the cloth isn’t dripping wet. After cleaning, wipe the surface with a dry cloth to prevent water spots.
If your model has a display screen, use a screen-safe cleaner or a dry microfiber cloth. Never use abrasive cleaners or paper towels—they can scratch the surface.
Step 6: Inspect and Clean the HEPA Filter (If Washable)
Now, let’s talk about the HEPA filter—the heart of your air purifier. Most Honeywell models use a non-washable HEPA filter, meaning you can’t rinse it. But some older or specific models (like certain True HEPA versions) have lightly washable components.
Check your user manual to confirm. If it says “do not wash,” skip to the next step. If it’s labeled as washable or reusable, proceed carefully.
To clean a washable HEPA filter, gently vacuum both sides to remove surface dust. Then, rinse it under lukewarm water—no soap, no scrubbing. Let it air-dry completely for at least 24 hours. Never force-dry with a hairdryer or heater—heat can damage the delicate fibers.
Important: Even if your HEPA filter is washable, it still has a lifespan. Most last 6–12 months, depending on usage and air quality. If it looks gray, smells musty, or the “replace filter” light is on, it’s time for a new one.
For non-washable HEPA filters, vacuuming is your best option. Use the brush attachment to gently remove dust from the surface. Don’t press too hard—you don’t want to tear the filter material.
Step 7: Clean the Carbon Filter (If Applicable)
Some Honeywell models include a carbon filter to absorb odors, smoke, and VOCs. These are usually not washable and should be replaced every 3–6 months.
However, you can extend their life by vacuuming the surface. Use the brush attachment to remove dust and debris. This helps maintain airflow and keeps the carbon active longer.
If your carbon filter is visibly dirty or no longer reducing odors, replace it. A fresh carbon filter makes a huge difference—especially if you cook often, have pets, or live in a smoky area.
Step 8: Reassemble the Unit
Once everything is clean and dry, it’s time to put your purifier back together. Start by placing the pre-filter back into its slot. Make sure it’s seated properly and facing the right direction—most have arrows indicating airflow direction.
Snap the front panel back into place. You should hear a gentle click when it’s secure. Don’t force it—if it doesn’t fit, double-check the alignment.
Plug the unit back in and turn it on. Listen for unusual noises or vibrations. If everything sounds normal, you’re good to go.
Run the purifier on low for about 30 minutes to ensure proper airflow. This also helps “reset” the system after cleaning.
Pro Tips & Common Mistakes to Avoid
Cleaning your Honeywell air purifier isn’t rocket science, but there are a few traps even experienced users fall into. Here’s what I’ve learned from trial, error, and a few “oops” moments.
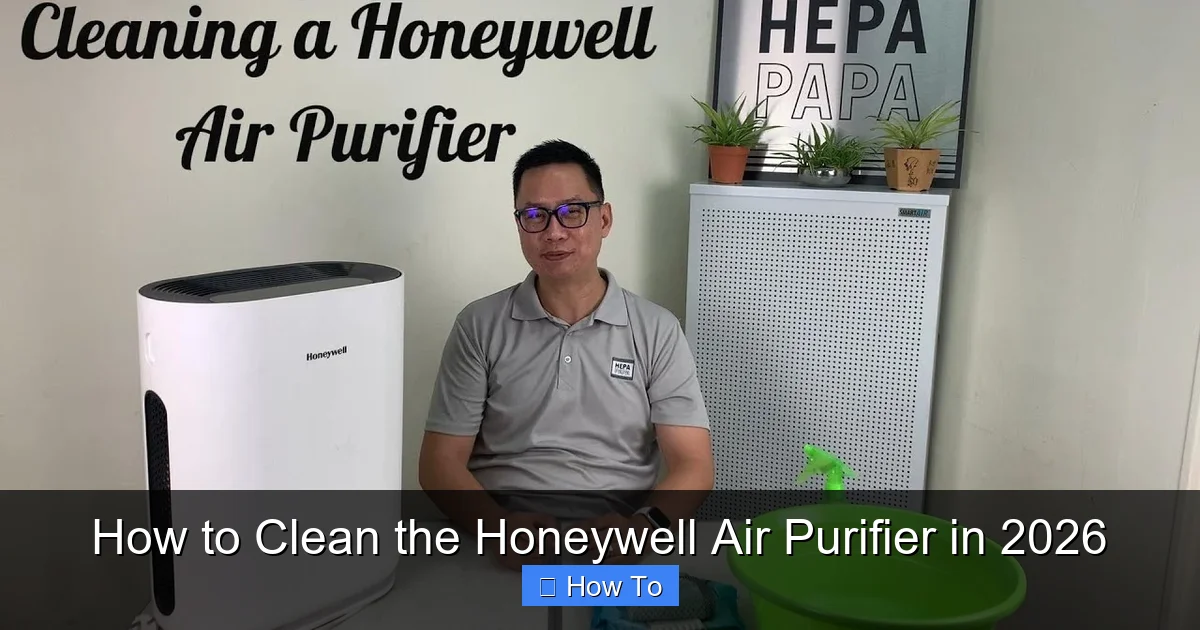
Visual guide about how to clean the honeywell air purifier
Image source: cleaningbasic.com
Pro Tip: Clean your pre-filter every 2–4 weeks, depending on usage. If you have pets or live in a dusty area, go for every 2 weeks. This simple habit can double the life of your HEPA filter.
Warning: Never use bleach, ammonia, or harsh chemicals. They can degrade filter materials and leave harmful residues in your air.
Common Mistake: Reinstalling a damp filter. I once thought “mostly dry” was good enough. It wasn’t. Within a week, I noticed a musty smell. Let filters dry completely—no shortcuts.
Pro Tip: Keep a cleaning log. Note the date you cleaned or replaced each filter. This helps you stay consistent and know when it’s time for replacements.
Common Mistake: Using generic filters to save money. I tried a third-party HEPA filter once—it fit, but the seal was poor, and my allergies worsened. Stick with genuine Honeywell filters for best results.
Pro Tip: Clean your purifier in a well-ventilated area. You’ll be stirring up dust, and you don’t want to breathe it in.
One last thing: don’t wait for the “replace filter” light to come on. These lights are helpful, but they’re not always accurate. If your air quality feels worse or the unit is louder than usual, it’s time to check—even if the light hasn’t triggered.
FAQs About How to Clean the Honeywell Air Purifier in 2026
Q: How often should I clean my Honeywell air purifier?
A: It depends on usage, but aim to clean the pre-filter every 2–4 weeks and do a full deep clean every 3–6 months. If you have pets, smoke, or live in a polluted area, clean more often.
Q: Can I wash the HEPA filter?
A: Most Honeywell HEPA filters are not washable. Check your model’s manual. If it says “do not wash,” only vacuum the surface. Washable versions are rare and must be dried completely.
Q: What happens if I don’t clean my air purifier?
A: Over time, dust buildup reduces airflow, makes the fan work harder, and can lead to overheating. Worst case? It stops purifying effectively and may even recirculate dirty air.
Q: Can I use a hairdryer to dry the filters faster?
A: No. Heat can damage the filter material, especially HEPA fibers. Always air-dry filters naturally—overnight is best.
Q: Do I need to clean the inside of the unit every time?
A: Not necessarily. Focus on the pre-filter and exterior weekly. Deep clean the interior every 3–6 months or if you notice reduced performance.
Q: My “replace filter” light won’t turn off after cleaning. What now?
A: Some models require a manual reset. Check your manual for instructions—usually a button combination or unplugging for 10 seconds. If that doesn’t work, the filter may need replacing.
Q: Can I clean my Honeywell air purifier with disinfectant wipes?
A: Avoid them. Many contain alcohol or chemicals that can degrade plastic or leave residues. Stick to mild soap and water or vinegar solutions.
Final Thoughts
Learning how to clean the Honeywell air purifier in 2026 isn’t just about maintenance—it’s about breathing cleaner, healthier air. A well-maintained purifier works more efficiently, lasts longer, and actually does what it’s supposed to: protect your indoor air quality.
It doesn’t take much time—maybe 20–30 minutes every few weeks—but the payoff is huge. You’ll notice better airflow, quieter operation, and fewer allergy symptoms. Plus, you’ll save money by extending the life of your filters and avoiding unnecessary replacements.
So don’t wait until your purifier starts struggling. Make cleaning a regular part of your routine. Set a calendar reminder, keep your supplies handy, and treat your air purifier like the hardworking appliance it is.
Your lungs—and your peace of mind—will thank you.
“`