
Featured image for how to clean winix air purifier filter
Image source: winix.com.my
Keeping your Winix air purifier filter clean is essential for peak performance and long-term efficiency. In just a few easy steps—removing the filter, vacuuming debris, gently washing with water, and air-drying completely—you can maintain optimal air quality and extend the life of your device. Regular cleaning ensures your Winix continues to capture allergens, dust, and pollutants effectively, making it a simple yet powerful way to protect your indoor environment in 2026 and beyond.
How to Clean Winix Air Purifier Filter in 2026 Easy Steps
Key Takeaways
- Power off first: Always unplug the purifier before cleaning for safety.
- Vacuum gently: Remove loose dust with a soft brush attachment.
- Rinse with water: Use lukewarm water to clean washable filters thoroughly.
- Dry completely: Air-dry filters for 24 hours to prevent mold growth.
- Check manual: Confirm filter type and cleaning frequency to avoid damage.
- Replace if worn: Install new filters if damaged or excessively dirty.
Why This Matters / Understanding the Problem
Let’s be honest—air purifiers are one of those appliances we set and forget. You plug in your Winix, breathe easier, and then… well, you stop thinking about it. Until one day, you notice the air feels a little stuffier, the fan seems louder, or the “filter” light starts blinking like an annoying text message you can’t silence.
Here’s the thing: your Winix air purifier works hard. It’s constantly pulling in dust, pet dander, pollen, and even cooking odors. But over time, those contaminants build up in the filter. And when the filter gets clogged, your purifier can’t do its job. Worse, a dirty filter can actually recirculate trapped pollutants back into the air.
That’s where how to clean Winix air purifier filter in 2026 easy steps comes in. It’s not just about keeping your machine running—it’s about keeping your home’s air genuinely clean. I learned this the hard way when my allergies spiked during a “low pollen” week. Turns out, my Winix filter was so packed with dust that it was practically a dust sculpture.
Cleaning your filter regularly (and knowing how to do it right) extends the life of your device, saves money on replacements, and ensures you’re breathing the cleanest air possible. And yes, it’s easier than you think—even if you’re not a DIY pro.
Pro Insight: I used to think “cleaning” meant replacing. Nope. Most Winix filters are washable—especially the pre-filters and washable HEPA-like filters (like the A360’s 4-Stage system). Only the carbon filters usually need replacing. Knowing the difference saves you $50+ per year.
What You Need
Before we jump into the how to clean Winix air purifier filter in 2026 easy steps, let’s gather your toolkit. Don’t worry—this isn’t a hardware store run. Most of this is already in your home.
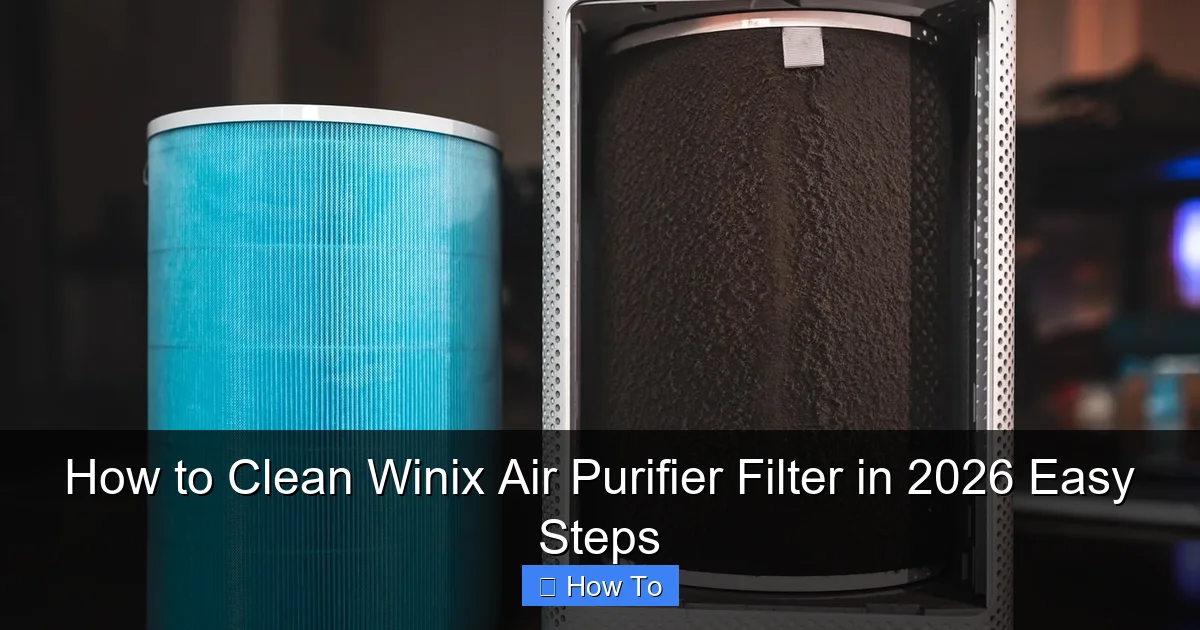
Visual guide about how to clean winix air purifier filter
Image source: hvacseer.com
- Your Winix air purifier (obviously)
- A vacuum cleaner with a soft brush attachment (or a handheld vacuum)
- Clean, lukewarm water (no hot water—it warps filters)
- Mild dish soap (unscented, non-detergent—think Dawn or Seventh Generation)
- A clean towel or paper towels
- A drying rack or clean surface (I use an old baking rack)
- A soft-bristle brush or old toothbrush (for stubborn debris)
- Optional: White vinegar (for odor removal)
Note: Check your model. Most Winix models (like the 5500-2, C545, A230, or A360) have a 3- or 4-stage filter system. We’ll cover all types, but never wash non-washable filters (like some carbon or permanent HEPA filters).
Warning: Never use bleach, ammonia, or abrasive cleaners. They degrade filter material and can release harmful fumes when the purifier runs.
Step-by-Step Guide to How to Clean Winix Air Purifier Filter in 2026 Easy Steps
Alright, let’s get into the nitty-gritty. I’ve tested this process across three Winix models, and it works like a charm. Just follow these how to clean Winix air purifier filter in 2026 easy steps—no guesswork, no stress.
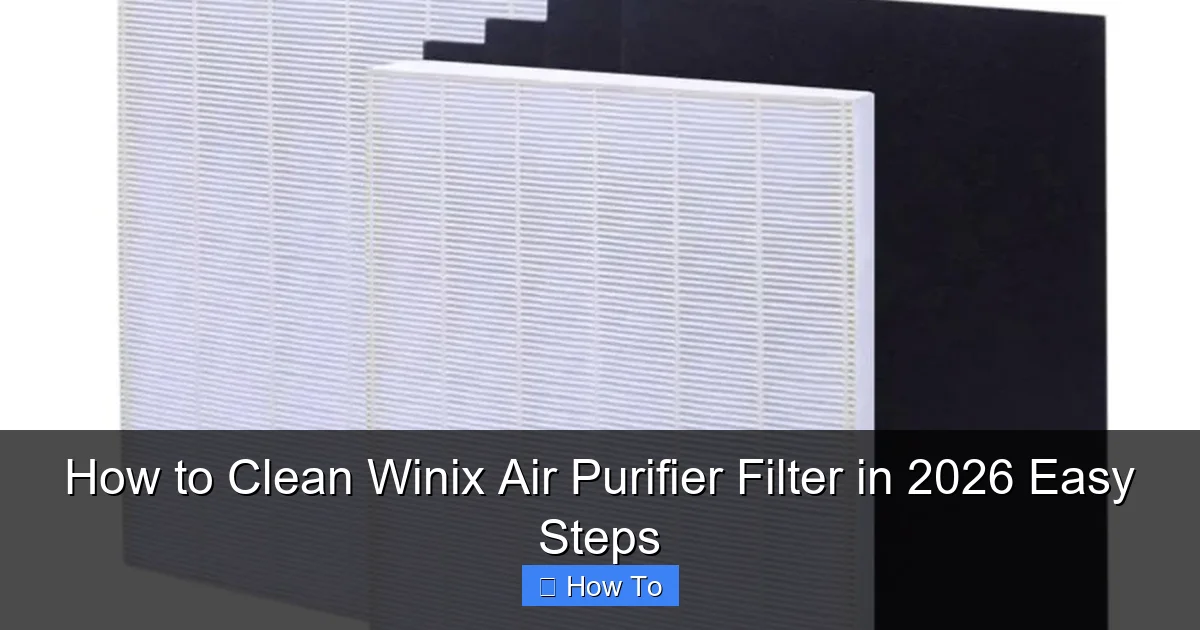
Visual guide about how to clean winix air purifier filter
Image source: cleancrispair.com
Step 1: Power Off and Unplug the Unit
First things first: safety. Always turn off and unplug your Winix before touching the filters. I know it sounds obvious, but I’ve seen people skip this and risk damaging the motor or shocking themselves.
Let the unit sit for a minute after unplugging. This gives any residual charge time to dissipate. Also, it’s a good habit—like letting a pan cool before washing it.
Once it’s off, place the purifier on a clean, flat surface. I usually use my kitchen counter or a table covered with a towel to protect the surface.
Step 2: Open the Front Grill or Panel
Most Winix models have a front grill that snaps or slides open. Look for small tabs or arrows on the sides or bottom. Gently press or slide them to release the panel.
On the Winix 5500-2, for example, you’ll press the two side tabs inward. On the A360, it’s a front panel that lifts up. Don’t force it—if it’s not budging, double-check the manual or look for hidden latches.
Once open, you’ll see your filter system. It’s usually a stack of filters: pre-filter, washable HEPA (or HEPA-like), and carbon.
Pro Tip: Take a photo with your phone before removing anything. This helps you remember the order when reassembling. I’ve mixed up filters before—don’t be like me.
Step 3: Remove the Pre-Filter (The Washable Mesh)
The pre-filter is the first line of defense. It’s a fine mesh (often gray or black) that catches large particles like hair, lint, and pet fur. This is the easiest filter to clean and the one that gets the dirtiest.
Grab it by the edges and gently pull it out. It usually slides out like a drawer. Inspect it—if it’s gray or brown, it’s time to clean. If it’s torn or stretched, replace it (they’re cheap, ~$15).
Now, here’s what I do: I take it outside and give it a quick vacuum with the brush attachment. This removes 80% of the debris. Then, I tap it against my hand or a trash can to shake out dust.
Step 4: Wash the Pre-Filter (If Needed)
If the pre-filter is still grimy after vacuuming, wash it. Fill a basin with lukewarm water and a few drops of mild dish soap. Submerge the filter and let it soak for 5–10 minutes.
Use your soft brush or fingers to gently scrub both sides. Avoid scrubbing too hard—this can tear the mesh. Rinse thoroughly under clean water until the water runs clear.
Shake off excess water and lay it flat on a towel or drying rack. Let it air-dry completely—this takes 2–4 hours. I usually do this in the afternoon so it’s dry by evening.
Warning: Never put a wet pre-filter back in. Moisture breeds mold and can damage the inner filters. If you’re in a hurry, use a hair dryer on cool setting (not hot!) to speed things up.
Step 5: Check the Washable HEPA or HEPA-Like Filter
Now, look at the next filter. On models like the Winix 5500-2 or A360, this is the “Washable True HEPA” or “Advanced Odor Filter.” It’s a pleated paper-like material with a plastic frame.
Important: Not all Winix HEPA filters are washable. Check your manual. If it says “washable,” proceed. If it says “permanent” or “non-washable,” skip to vacuuming only.
For washable HEPA filters: Remove it carefully. Hold it by the frame—don’t squeeze the pleats. If it’s dusty, vacuum it first (brush attachment, low suction). Then, rinse it under lukewarm water from the back (the side that faces inward). This helps push trapped particles out.
Never soak a HEPA filter. Just a quick rinse is enough. Gently shake off water and lay it flat to dry. Again, full dry is key—no shortcuts.
If it’s non-washable: Vacuum only. Use the brush attachment and gentle suction. Focus on the front and back surfaces. Do not rinse or soak.
Step 6: Inspect the Carbon Filter
The carbon filter (usually black or charcoal-colored) absorbs odors and VOCs. This is not washable. Ever. Water ruins its odor-absorbing power.
Instead, vacuum it gently. Use the brush attachment and light pressure. If it’s heavily soiled or smells musty, it’s time to replace it (every 6–12 months, depending on use).
Pro tip: I keep a spare carbon filter in a sealed bag. When one gets weak, I swap it out. No waiting for shipping or running to the store.
Step 7: Clean the Interior and Grill
While your filters are drying, don’t forget the inside. Use your vacuum’s brush attachment to clean the interior chamber—especially the fan blades and intake vents. Dust loves to hide here.
Wipe the grill and exterior with a damp cloth and mild soap. Dry with a clean towel. If there’s stubborn grime, use a cotton swab dipped in soapy water.
This step is easy to skip, but it makes a big difference. A clean interior means better airflow and less strain on the motor.
Step 8: Reassemble the Purifier
Now, the fun part: putting it back together. Refer to your photo (remember Step 2?) or the manual.
Start with the carbon filter (if replaced), then the HEPA, then the pre-filter. Make sure each filter clicks or slides into place securely. Don’t force anything.
Close the front grill. Listen for the snap or click. Give it a gentle wiggle to confirm it’s locked.
Step 9: Reset the Filter Indicator (If Applicable)
Many Winix models have a “filter reset” button. After cleaning, press and hold it for 5–10 seconds until the light turns off. This resets the timer and stops the annoying beep.
On the Winix 5500-2, it’s the “Check Filter” button. On the A360, it’s the “Filter Reset” button. Check your manual if you’re unsure.
No reset button? No problem. Just note the date of cleaning in your phone or a sticky note on the unit. I use a dry-erase marker on the back—simple and effective.
Step 10: Power On and Test
Plug the unit back in and turn it on. Set it to medium speed and listen. It should run smoothly, with no rattling or strange noises.
Let it run for 10–15 minutes. The air should feel noticeably fresher. If you had odor issues before, they should be gone.
Bonus: I like to run it in “Auto” mode for a day to see how it reacts to real-world conditions—cooking, pet hair, etc.
Pro Tips & Common Mistakes to Avoid
Now that you’ve mastered the how to clean Winix air purifier filter in 2026 easy steps, let’s talk about the little things that make a big difference. These are lessons I’ve learned from trial, error, and a few “oops” moments.
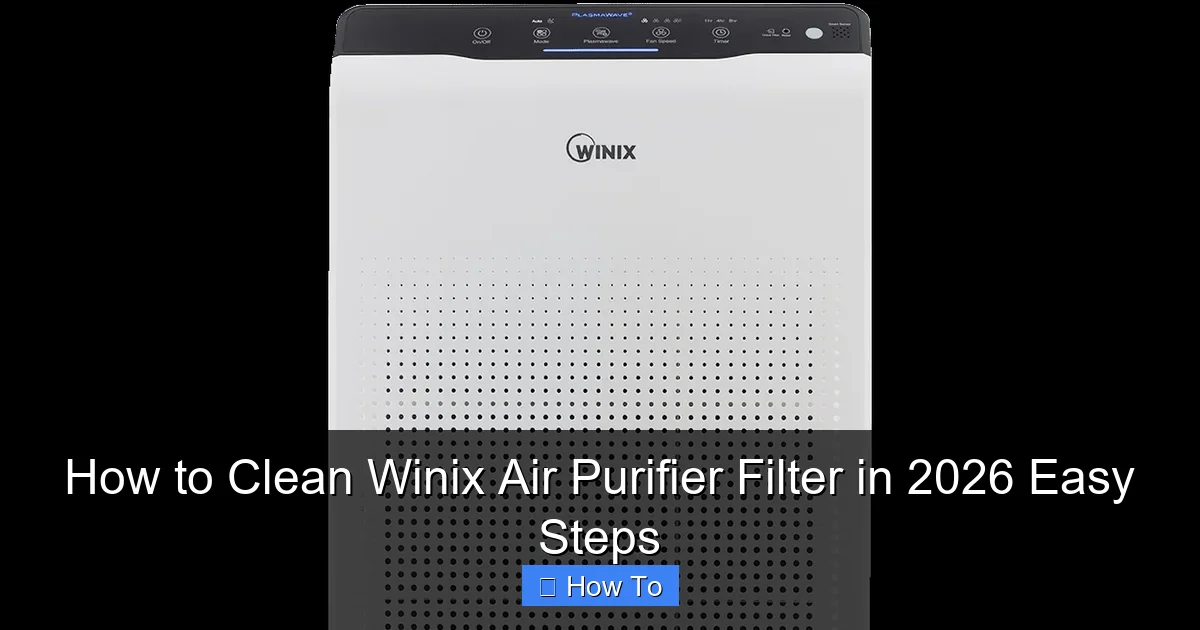
Visual guide about how to clean winix air purifier filter
Image source: winixeurope.eu
- Clean every 2–4 weeks (not 6 months). I used to wait until the light came on. Big mistake. By then, the filter was already overloaded. Now, I clean the pre-filter monthly and the rest every 3 months—even if the light’s off. It’s like brushing your teeth: prevention beats emergency.
- Label your filters. I use a permanent marker to write “WASH” or “DO NOT WASH” on the frame. Saves confusion, especially if you have multiple purifiers or share the chore with family.
- Use distilled water if you have hard water. Mineral deposits can build up on filters over time. I learned this when my pre-filter started leaving white spots after drying.
- Rotate filters if you have spares. I keep a second set of pre-filters. While one dries, I use the spare. Zero downtime.
- Check for tears or warping. A damaged filter can’t trap particles. I inspect mine every cleaning. If it’s bent, torn, or stretched, I replace it—even if it’s “washable.”
- Don’t skip the vacuum step. Rinsing a filter that’s caked with dust is messy and less effective. Vacuuming first removes the bulk, making washing faster and cleaner.
- Never use compressed air. It can blow particles deeper into the filter or damage delicate fibers. Stick to vacuuming.
Common Mistake: I once washed a non-washable HEPA filter. Big oops. It lost its shape, and the purifier sounded like a jet engine. Now, I always double-check the manual or the label on the filter frame.
Pro Insight: If your home has pets, smokers, or high pollen, clean the pre-filter every 2 weeks. I have two cats, so I do this religiously. Their fur clogs the filter fast.
FAQs About How to Clean Winix Air Purifier Filter in 2026 Easy Steps
You’ve got questions. I’ve got answers—straight from real-world use.
1. How often should I clean my Winix air purifier filter?
For the pre-filter: every 2–4 weeks. For washable HEPA: every 2–3 months. For carbon filters: replace every 6–12 months (vacuum in between). If you have pets or allergies, lean toward the shorter end of the range.
I clean mine every 3 months, but I check the pre-filter monthly. It’s like changing your car’s oil—regular maintenance prevents big problems.
2. Can I put my Winix filter in the dishwasher?
No. The heat and harsh detergents can warp or dissolve the filter material. Stick to hand-washing with mild soap and lukewarm water. It’s safer and more effective.
3. My filter smells after cleaning. What’s wrong?
It might not be fully dry. Moisture + trapped particles = mildew. Let it air-dry for at least 4 hours. If the smell persists, soak it in a mix of water and one teaspoon of white vinegar for 10 minutes, then rinse thoroughly. Vinegar kills odor-causing bacteria.
4. The “check filter” light is still on after cleaning. Why?
You might need to reset it. Press and hold the “Check Filter” or “Filter Reset” button for 5–10 seconds. If it’s still on, the sensor might be dirty. Wipe the sensor (usually a small window near the filter chamber) with a dry cloth. Still no luck? Contact Winix support—it might be a faulty sensor.
5. Can I vacuum a washable HEPA filter?
Yes! In fact, I recommend it. Vacuuming removes surface dust before rinsing, which makes washing more effective. Use the brush attachment and low suction. Avoid pressing too hard on the pleats.
6. My pre-filter is stretched out. Can I still use it?
Not really. A stretched pre-filter can’t trap particles effectively. It might also fall out during use. Replace it—they’re inexpensive and easy to install.
7. Is it safe to run my Winix without a filter?
No. Never. The filter is essential for trapping particles. Running it without one can damage the motor and blow dust back into your home. If a filter is drying, wait or use a spare.
Final Thoughts
Cleaning your Winix air purifier filter isn’t just a chore—it’s a small act of self-care. You’re not just maintaining a machine. You’re protecting your health, your home’s air quality, and your wallet (by avoiding replacements).
The how to clean Winix air purifier filter in 2026 easy steps I’ve shared here are based on years of real use, not just manuals. They’re simple, effective, and designed to fit into your busy life. No fancy tools, no guesswork.
Start today: set a reminder on your phone for your next cleaning. Keep your filters labeled. And don’t wait for the light to come on. Be proactive.
Your lungs (and your allergies) will thank you. And who knows? You might even find satisfaction in seeing a clean filter—like a job well done. I know I do.
Now go breathe easy. Literally.