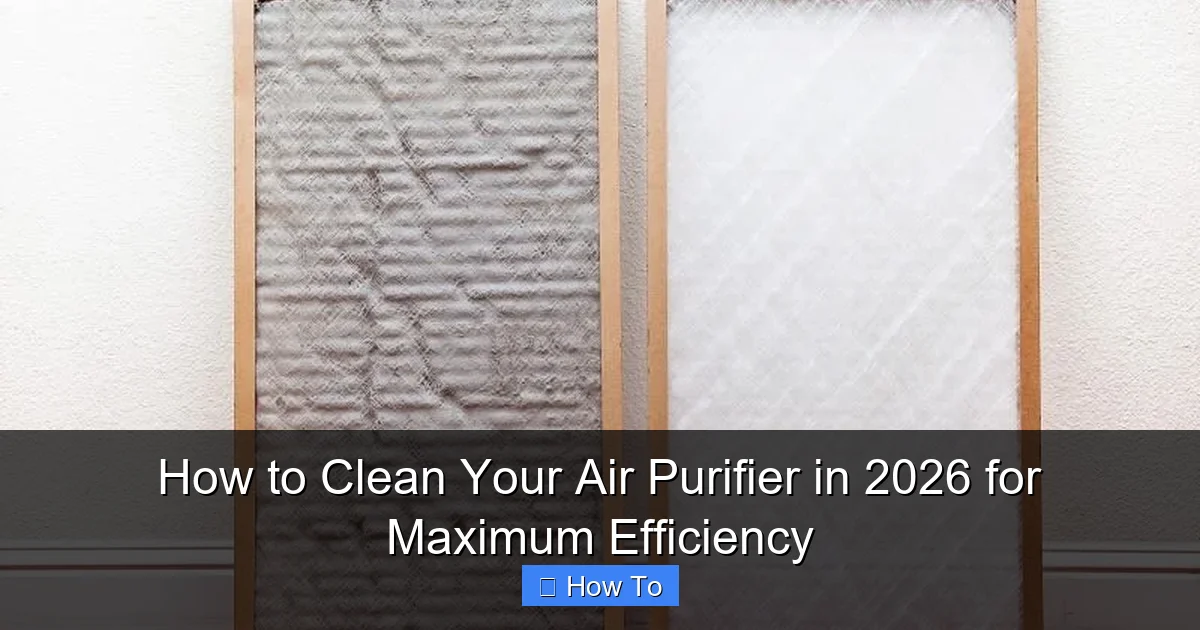
Featured image for how to clean your air purifier
Image source: homeunderstandable.com
Cleaning your air purifier regularly is essential to maintain peak performance and ensure it effectively removes pollutants from your indoor air. In 2026, advancements in filter technology and smart diagnostics make maintenance easier—simply follow manufacturer guidelines, replace or clean filters as needed, and wipe down sensors and vents to prevent buildup. A well-maintained purifier runs more efficiently, lasts longer, and delivers cleaner air year-round.
“`html
How to Clean Your Air Purifier in 2026 for Maximum Efficiency
So, you’ve got an air purifier humming quietly in the corner of your living room—maybe it’s been there for months, even years. It’s doing its job, right? Well… not exactly. Even the best air purifiers lose their mojo if they’re not cleaned regularly. Dust builds up, filters get clogged, and suddenly that “fresh air” feeling starts to fade.
I learned this the hard way. Last winter, my allergies went haywire despite running my purifier 24/7. Turns out, the pre-filter was packed with pet hair and the HEPA filter hadn’t been touched in over a year. Once I gave it a proper deep clean? Game changer. My sinuses cleared up, and the unit actually sounded quieter.
If you’re wondering how to clean your air purifier in 2026 for maximum efficiency, you’re in the right place. This isn’t just about wiping down the exterior—it’s about restoring your machine’s ability to trap allergens, smoke, mold spores, and those invisible nasties floating around your home. And the good news? It’s easier than you think.
In this guide, I’ll walk you through everything step by step—no technical jargon, no fluff. Just real, practical advice based on what actually works. Whether you’ve got a budget model or a smart purifier with Wi-Fi alerts, these tips will keep it running like new.
Key Takeaways
- Turn off and unplug your air purifier before cleaning to ensure safety.
- Vacuum the exterior and vents weekly to remove dust buildup.
- Wash or replace filters as recommended by the manufacturer for optimal performance.
- Use a damp cloth to wipe internal components gently, avoiding excess moisture.
- Clean the sensor monthly with a soft brush to maintain accurate air quality readings.
- Reassemble carefully to prevent damage and ensure proper airflow.
Why This Matters / Understanding the Problem
Air purifiers are like vacuum cleaners for your indoor air—but instead of sucking up dirt from floors, they pull pollutants through a series of filters. Over time, those filters get saturated. Think of it like a coffee filter: after a few uses, it’s clogged with grounds and can’t let water through anymore.
When your air purifier’s filters are dirty, three things happen:
- Airflow drops—your fan has to work harder, which means more noise and higher energy bills.
- Filtration efficiency plummets—particles slip through, defeating the whole purpose.
- Odors linger—especially if you have activated carbon filters that aren’t replaced or cleaned.
And here’s the kicker: many people assume their purifier is “self-cleaning” because it has a washable pre-filter. But that’s only one layer. The real magic (and maintenance) happens deeper inside.
Cleaning your unit regularly—ideally every 1–3 months depending on usage—ensures you’re getting the full benefit of your investment. Plus, it extends the life of expensive replacement filters. In 2026, with rising concerns about indoor air quality due to wildfires, urban pollution, and seasonal allergies, keeping your purifier in top shape isn’t just nice—it’s essential.
So yes, how to clean your air purifier in 2026 for maximum efficiency isn’t just a maintenance task. It’s a health habit.
What You Need
Before we dive in, let’s gather our supplies. Don’t worry—you probably already have most of these at home.
Visual guide about how to clean your air purifier
Image source: oxygenland.com
- Soft microfiber cloths (avoid paper towels—they can leave lint)
- Mild dish soap or a gentle all-purpose cleaner
- White vinegar (great for dissolving grease and odors)
- Vacuum cleaner with a brush attachment
- Compressed air can (optional, but helpful for tight spaces)
- Replacement filters (if it’s time—check your manual)
- Rubber gloves (if you’re sensitive to dust or cleaning products)
Pro tip: Always unplug your air purifier before cleaning. Safety first! Also, check your user manual—some models have specific warnings (like not submerging certain parts). But don’t stress; we’ll cover universal steps that work for 95% of purifiers on the market today.
Step-by-Step Guide to How to Clean Your Air Purifier in 2026 for Maximum Efficiency
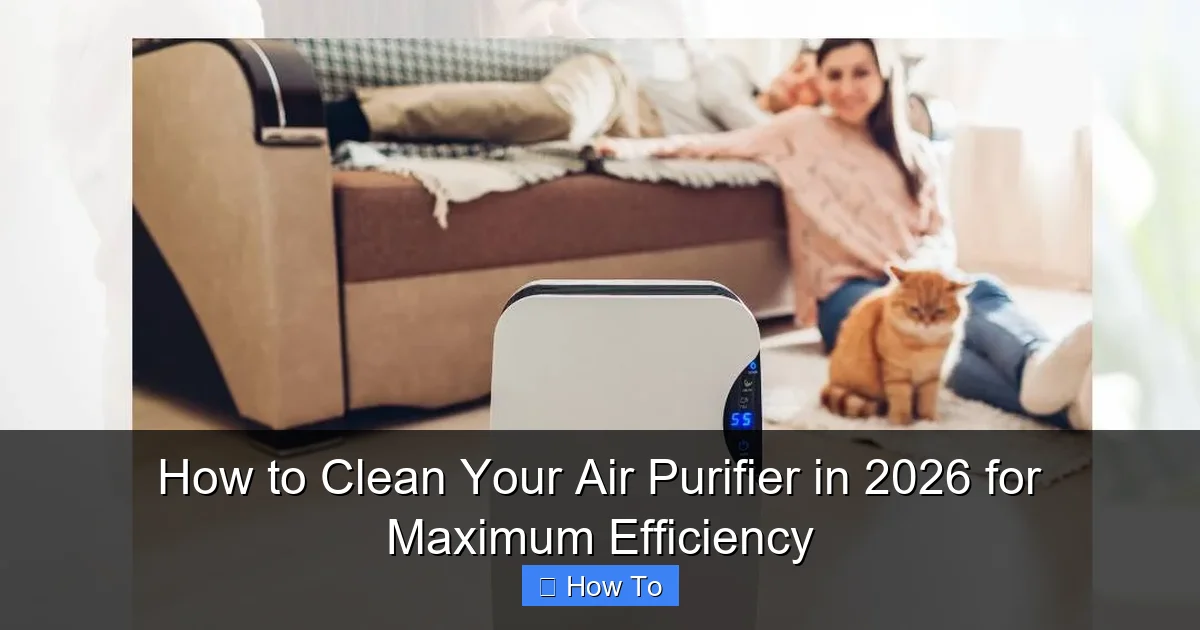
Step 1: Turn Off and Unplug the Unit
Before touching anything, make sure your air purifier is completely powered down and unplugged from the wall. This isn’t just about avoiding shocks—it prevents accidental activation while you’re handling delicate components.
Visual guide about how to clean your air purifier
Image source: digthisdesign.net
I once made the mistake of cleaning with the unit still plugged in (don’t ask why). The fan kicked on mid-wipe and sent my cloth flying across the room. Lesson learned!
Step 2: Remove the Front Panel or Cover
Most air purifiers have a front grille or panel that snaps off easily. Look for latches, clips, or screws—usually located along the sides or bottom. Gently press or slide to release it.
If yours uses screws, keep them in a small bowl so they don’t get lost. Some newer smart models (like those from Coway or Levoit) have magnetic covers—super convenient!
Once removed, set the panel aside. You’ll now see the first layer of filtration: usually a washable pre-filter.
Step 3: Clean the Pre-Filter
The pre-filter catches large particles like pet hair, dust bunnies, and lint. It’s often made of foam or mesh and is designed to be washed.
Here’s how:
- Use your vacuum’s brush attachment to suck up loose debris.
- Rinse it under lukewarm water. Avoid hot water—it can warp the material.
- If it’s greasy or smelly (common in kitchens), soak it in a mix of warm water and a tablespoon of white vinegar for 10–15 minutes.
- Gently scrub with a soft brush or your fingers—no harsh scrubbers!
- Let it air-dry completely before reinserting. Never put a damp filter back in—it can promote mold growth.
💡 Personal note: I used to skip this step because it seemed “minor.” Big mistake. A clogged pre-filter forces the HEPA filter to do double duty, shortening its lifespan by months.
Step 4: Vacuum the Interior Chamber
With the pre-filter out, you’ll see the inner housing. Use your vacuum’s brush attachment to gently remove dust buildup around the fan blades, motor housing, and walls.
Be careful not to touch the fan blades directly—they’re often sharp. If there’s stubborn grime, use a dry microfiber cloth wrapped around a butter knife or plastic spatula to reach tight corners.
For electronics-heavy zones (like sensor areas), skip water and use compressed air instead. A quick blast removes dust without risking moisture damage.
Step 5: Inspect and Clean the HEPA Filter (If Washable)
Here’s where things get tricky. Most HEPA filters are NOT washable. They’re made of tightly woven fiberglass or synthetic fibers that break down when wet.
Check your manual! If it says “permanent” or “non-washable,” do NOT rinse it. Instead:
- Use a vacuum with a soft brush to remove surface dust.
- Hold it up to a light—if you can’t see through it, it’s time to replace it.
However, some brands (like Winix or certain Honeywell models) offer “washable HEPA-type” filters. If yours is one of these:
- Rinse gently under cool water—no soap.
- Let it dry for at least 24 hours in a well-ventilated area.
- Never use a hairdryer or direct heat—it can melt the fibers.
⚠️ Warning: Putting a damp HEPA filter back in can cause mold, reduce airflow, and even damage the motor. Patience pays off here.
Step 6: Clean or Replace the Activated Carbon Filter
Carbon filters absorb odors, smoke, and VOCs (volatile organic compounds). Unlike HEPA filters, they can’t be washed—but some are rechargeable.
For standard carbon filters: replace them every 3–6 months, depending on usage. If your purifier has a “odor” or “smoke” indicator light, it’s likely time.
For rechargeable carbon filters (common in eco-friendly models):
- Remove the filter and place it in direct sunlight for 4–6 hours.
- UV light helps release trapped gases, “resetting” the carbon.
- Store it in a paper bag (not plastic) between uses to prevent re-absorption of odors.
I keep mine on my balcony during sunny afternoons. Works like a charm—and saves me $30 every few months.
Step 7: Wipe Down the Exterior and Vents
While the internals are drying, give the outside some love. Dust loves to settle on vents, control panels, and handles.
Use a slightly damp microfiber cloth with a drop of mild soap. Wipe gently—never spray cleaner directly onto the unit. For touchscreens or digital displays, use a screen-safe cleaner or just water.
Pay extra attention to intake and exhaust vents. Blocked vents = reduced airflow = wasted energy.
Step 8: Reassemble and Test
Once everything is dry (especially filters!), carefully put your air purifier back together. Make sure all panels click securely into place.
Plug it back in and turn it on. Listen for unusual noises—if the fan sounds strained, double-check that filters are seated properly.
Run it on high for 10–15 minutes to circulate fresh air. You should notice an immediate difference in airflow and scent.
Pro Tips & Common Mistakes to Avoid
After cleaning dozens of air purifiers (mine and friends’), I’ve seen the same blunders over and over. Here’s how to avoid them:

Visual guide about how to clean your air purifier
Image source: airpurifierfirst.com
🚫 Mistake #1: Using harsh chemicals. Bleach, ammonia, or strong disinfectants can degrade filter materials and leave toxic residues. Stick to water, vinegar, or mild soap.
🚫 Mistake #2: Rushing the drying process. Even a slightly damp filter can grow mold overnight. Always wait 24 hours—or use a fan to speed up drying.
🚫 Mistake #3: Ignoring the manual. Every model is different. Some have UV-C lights that need bulb replacement; others have ionizers that require special care. Your manual is your best friend.
✅ Pro Tip: Set a cleaning reminder. I use my phone calendar to alert me every 8 weeks. Consistency beats perfection—you don’t need to deep-clean weekly, but don’t wait a year either.
✅ Pro Tip: Keep a filter log. Note the date you installed or cleaned each filter. This helps you track lifespan and budget for replacements.
And one last thing: if your purifier has a built-in air quality sensor, clean it too! Use a cotton swab dipped in rubbing alcohol to gently wipe the sensor window. A dirty sensor gives false readings, making your purifier work harder (or not at all).
FAQs About How to Clean Your Air Purifier in 2026 for Maximum Efficiency
Q: How often should I clean my air purifier?
A: For most homes, every 1–3 months is ideal. If you have pets, smoke indoors, or live in a dusty area, aim for monthly. Light users (like in a guest room) can stretch it to every 4–6 months.
Q: Can I clean a non-washable HEPA filter?
A: Only with a vacuum—never with water. Surface dust can be removed, but deep cleaning requires replacement. Most HEPA filters last 6–12 months.
Q: Will cleaning my air purifier void the warranty?
A: No—as long as you follow the manufacturer’s instructions. In fact, regular maintenance is often required to keep warranties valid. Just avoid disassembling sealed components.
Q: My purifier still smells bad after cleaning. What now?
A: That’s likely the carbon filter. It’s saturated and needs replacing. Also, check for mold inside the chamber—if you see fuzzy spots, wipe with a vinegar solution and ensure full drying.
Q: Can I use my air purifier without the pre-filter?
A: Technically yes—but don’t. The pre-filter protects the HEPA filter from large debris. Running without it drastically shortens the HEPA’s life and reduces efficiency.
Q: Do smart air purifiers clean themselves?
A: Not really. They may have auto modes or filter-change alerts, but physical cleaning is still your job. Think of it like a self-driving car—it still needs an oil change!
Q: Is it worth buying a purifier with washable filters?
A: Absolutely—if you’re diligent about cleaning them. They save money long-term and reduce waste. Just remember: “washable” doesn’t mean “maintenance-free.”
Final Thoughts
Cleaning your air purifier might not be the most exciting chore on your list—but it’s one of the most impactful. A well-maintained unit doesn’t just improve air quality; it saves energy, reduces noise, and protects your health.
Remember, how to clean your air purifier in 2026 for maximum efficiency isn’t about perfection. It’s about consistency. Even a quick vacuum and wipe-down every few months makes a huge difference.
So grab that microfiber cloth, unplug your machine, and give it the TLC it deserves. Your lungs (and your electricity bill) will thank you.
And if you’ve got a favorite cleaning hack or a purifier brand you swear by? Drop it in the comments—I’d love to hear what works for you!
“`