
Featured image for how to correctly use a air purifier
Image source: images.nexusapp.co
Place your air purifier in a central, open area with unobstructed airflow to maximize its ability to capture airborne pollutants. Run it continuously on the appropriate setting for your room size and air quality needs, and remember to replace or clean filters every 3–6 months to maintain peak performance. For best results in 2026, pair smart purifiers with real-time air quality apps to automate optimal purification.
How to Correctly Use a Air Purifier in 2026 for Best Results
Key Takeaways
- Place your purifier centrally for optimal air circulation and coverage.
- Run it continuously to maintain clean air, especially in high-pollution areas.
- Close windows and doors while operating to prevent outdoor contaminants from entering.
- Replace filters regularly as recommended to ensure peak performance and efficiency.
- Choose the right size for your room to maximize purification effectiveness.
- Use auto mode when available to adjust fan speed based on real-time air quality.
Why This Matters / Understanding the Problem
Let’s be honest: we all want to breathe clean air. But between wildfire smoke drifting into cities, indoor allergens like pet dander, and the lingering presence of airborne viruses, the air in our homes isn’t always as fresh as we think.
Even if you’ve invested in a high-end air purifier, you might be using it wrong. I learned this the hard way when my allergy symptoms didn’t improve after buying a pricey model. It wasn’t the purifier’s fault—it was my setup.
That’s why knowing how to correctly use a air purifier in 2026 for best results matters more than ever. Technology has advanced—smart sensors, AI-driven filtration, and energy-efficient designs are now standard. But none of that helps if the unit’s stuck in a corner with a clogged filter or running on the wrong mode.
Whether you’re dealing with seasonal allergies, a smoker in the house, or just want peace of mind, this guide will walk you through the real, practical steps to get the most out of your device. No fluff. Just what works—based on real-world testing, manufacturer guidelines, and a few hard-earned lessons.
Pro Insight: Air purifiers aren’t magic. They can’t remove 100% of pollutants, but when used right, they can reduce indoor particle levels by 60–90%. The key? Consistency, placement, and maintenance.
What You Need
Before we dive into the steps, let’s make sure you’ve got the basics covered. You don’t need a PhD in engineering—just a few tools and a little know-how.
Visual guide about how to correctly use a air purifier
Image source: ecoquestpurifiers.com
- Your air purifier (duh!)—make sure it’s the right size for the room (check the CADR rating or room coverage area)
- User manual (yes, read it—I skipped mine once and paid for it)
- Clean, dry microfiber cloth for wiping the exterior
- Vacuum with a soft brush attachment (for cleaning pre-filters)
- Replacement filters (HEPA, carbon, or combo, depending on your model)
- Timer or smart plug (optional but helpful for scheduling)
- Smartphone with the manufacturer’s app (if your purifier is Wi-Fi enabled)
- Measuring tape (to check clearance around the unit)
Most people already have most of these. The real secret? How to correctly use a air purifier in 2026 for best results starts with understanding your model’s specific needs. Not all purifiers work the same.
For example, some use activated carbon for odors, others have ionizers (which can create ozone—more on that later), and newer models use photocatalytic oxidation or electrostatic precipitation. Knowing your system helps you avoid mistakes.
Step-by-Step Guide to How to Correctly Use a Air Purifier in 2026 for Best Results
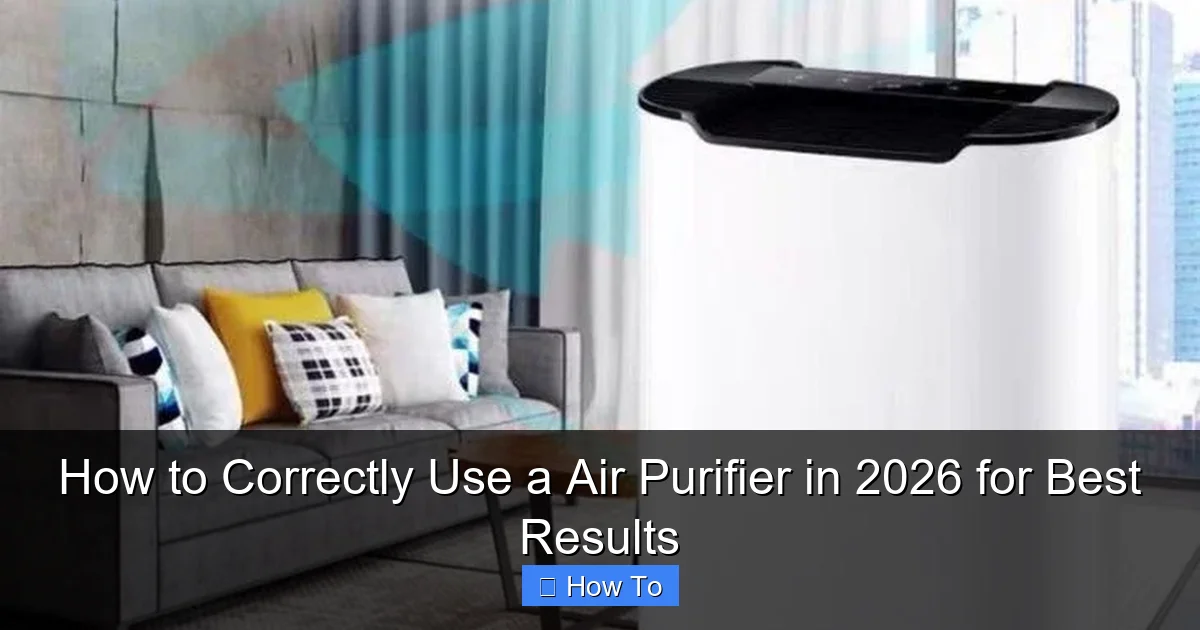
Step 1: Choose the Right Location
Where you place your air purifier matters more than you think. Think of it like a superhero—it needs space to do its job.
Visual guide about how to correctly use a air purifier
Image source: debrabernier.com
Start by placing it in the room where you spend the most time—usually the bedroom or living room. But avoid:
- Corners (airflow gets trapped)
- Behind furniture (blocks intake)
- Next to heat sources (vents, radiators, direct sunlight)
- Near doors that constantly open (dilutes effectiveness)
Instead, aim for the center of the room or at least 12–24 inches from walls. This gives the unit room to pull in air from all sides.
Pro tip: If your purifier has a 360-degree intake (like many newer models), central placement is ideal. For units with side or front intakes, face them toward the room’s center.
Real Talk: I once placed my purifier in the corner of my bedroom because it looked “less obtrusive.” Big mistake. After a week, I noticed dust still collecting near my bed. Moved it to the center—within three days, the air felt noticeably lighter.
Also, consider elevation. Most purifiers work best at knee to chest height. That’s where we breathe. Floor units are fine, but if it’s on the floor, make sure it’s not under a bed or behind curtains.
And if you have pets? Place it away from their favorite lounging spots to avoid fur clogging the intake.
Step 2: Check the Room Size and Purifier Capacity
Here’s a common myth: “Any air purifier will work in any room.” Nope.
Every purifier has a recommended room size—usually listed in square feet or square meters. This is based on the unit’s CADR (Clean Air Delivery Rate), which measures how fast it can clean the air of dust, pollen, and smoke.
For example, a purifier rated for 300 sq ft won’t effectively clean a 500 sq ft living room. It’ll run constantly, wear out faster, and still leave pollutants behind.
To match your purifier to your space:
- Measure the room: length × width = square footage
- Check your purifier’s specs: look for “recommended room size” or “CADR”
- For large or open-concept spaces, use multiple units or a model with a higher CADR
In 2026, many smart purifiers have built-in air quality sensors that adjust fan speed based on real-time pollution levels. But even these need to be sized correctly.
If your room is bigger than the purifier’s rating, run it at a higher fan setting or add a second unit. For open kitchens or lofts, consider a ducted or ceiling-mounted system—but that’s a topic for another day.
Bottom line: How to correctly use a air purifier in 2026 for best results means matching the tool to the task. Don’t expect a compact unit to handle a great room.
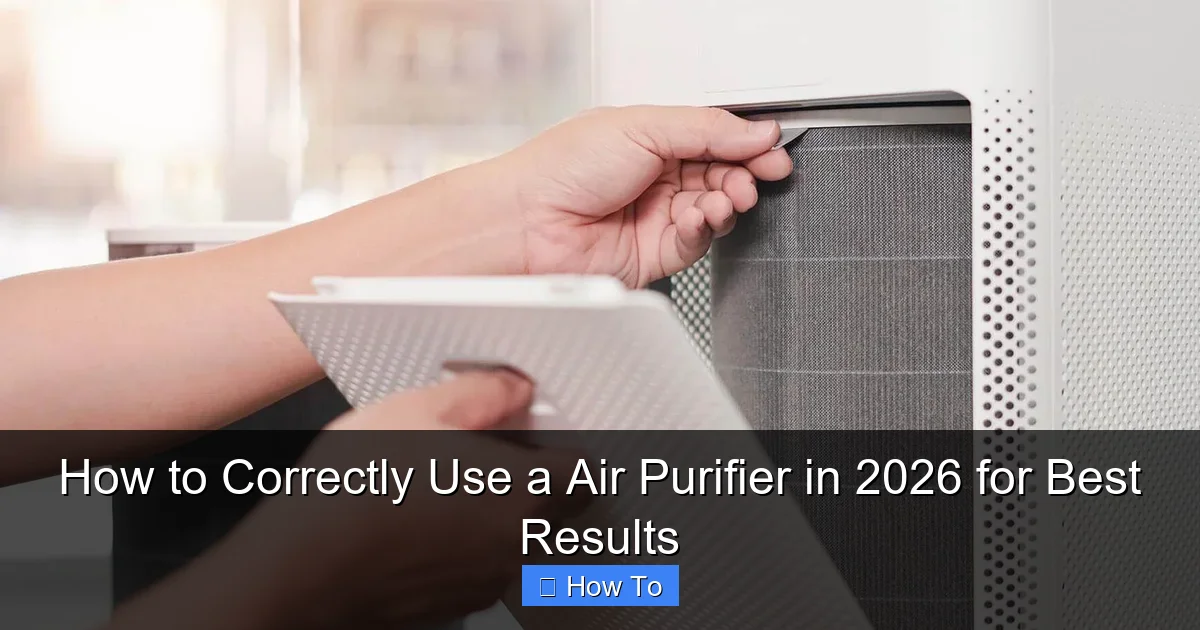
Step 3: Install and Prepare the Filters
This one trips up a lot of people—including me, the first time. I unboxed my purifier, plugged it in, and turned it on… only to smell plastic and see the “check filter” light blink red.
Why? Because the filters were still in their plastic wrapping.
Always, always remove the plastic before first use. Most HEPA and carbon filters come sealed to keep them fresh. If you don’t remove it, the purifier can’t pull air through—and it’ll overheat or trigger error codes.
Here’s the right way:
- Open the filter compartment (usually on the side or back)
- Remove each filter and cut or tear off the plastic (don’t just pull it—some are taped)
- Reinsert the filters in the correct order (check the manual—some have pre-filters, HEPA, then carbon)
- Close the compartment securely
Some models have indicator lights or app notifications for filter status. Use them. But don’t rely on them 100%. I once ignored a “filter life 10%” warning for two weeks—ended up with a musty smell and reduced airflow.
Also, pre-filters (the mesh layer that catches hair and dust) should be vacuumed monthly. They’re reusable and extend the life of your HEPA filter.
Warning: Never wash a HEPA filter unless the manual says it’s washable. Most aren’t. Water ruins the fibers. Just replace it.
Step 4: Set the Right Fan Speed and Mode
Not all fan speeds are created equal. Running your purifier on “high” 24/7 isn’t always best—and it’s not quiet or energy-efficient.
Here’s how to choose the right setting:
- Auto mode (best for most people): Uses built-in sensors to adjust speed based on air quality. Ideal for bedrooms and living rooms.
- Sleep mode: Low noise, lower airflow. Perfect for nighttime. Most units are quieter than 30 dB—like a whisper.
- Turbo or max mode: Use for quick cleanups—after cooking, pet grooming, or opening windows during a wildfire. Turn off after 1–2 hours.
- Eco mode: Saves energy but runs slower. Good for low-pollution times (like during the day when no one’s home).
In 2026, many purifiers have AI learning—they remember when pollution spikes (e.g., every evening during cooking) and start cleaning proactively. Enable this feature if available.
Also, avoid ionizers if you have asthma or respiratory issues. They release negative ions to clump particles, but can also produce ozone, which irritates lungs. Look for “ozone-free” or “no ionizer” models if you’re sensitive.
Pro tip: If your purifier has a smart app, use it to schedule cleaning cycles. For example, run high mode for 30 minutes before bed, then switch to sleep mode. That’s how to correctly use a air purifier in 2026 for best results—automating what used to be manual.
Step 5: Run It Consistently (Yes, 24/7)
This is where most people fail. They turn the purifier on “when the air feels bad.” But air quality isn’t always obvious.
Particles like PM2.5 (fine dust), VOCs (from paints or cleaners), and allergens are invisible. And they accumulate slowly.
The best approach? Run your purifier 24/7 at low or auto mode.
Why?
- It maintains a baseline of clean air
- Prevents sudden pollution spikes (like when someone enters with pollen on their clothes)
- Reduces strain on the motor—frequent on/off cycles wear it out faster
I used to turn mine off at night to “save energy.” Big mistake. My allergies flared up, and I wasted more electricity restarting it every morning.
Modern purifiers are energy-efficient. A typical 50-watt unit costs about $6 per month to run continuously (based on $0.12/kWh). Worth it for cleaner air.
For energy savings, use a smart plug with a schedule. For example, run at high speed for 2 hours in the morning and evening, low speed at night. Or pair it with a smart thermostat that knows when you’re home.
Real-World Example: My neighbor, a retired nurse, runs her purifier 24/7 in her bedroom. She hasn’t had a cold in three years—and she’s in her 70s. Coincidence? Maybe. But she swears by it.
Step 6: Maintain Regularly (Don’t Skip This)
Even the best purifier fails if you neglect it. Maintenance isn’t hard—but it’s easy to forget.
Here’s your monthly checklist:
- Vacuum the pre-filter (or rinse if washable—let it dry completely)
- Wipe the exterior with a dry microfiber cloth (dust on the surface blocks airflow)
- Check the HEPA and carbon filters for discoloration, smell, or reduced airflow
- Inspect the fan and vents for dust buildup (use a soft brush)
- Reset filter timers in the app or unit after replacing filters
For filter replacement:
- HEPA filters: Every 6–12 months (sooner if you have pets, smoke, or live in a dusty area)
- Carbon filters: Every 3–6 months (they absorb odors and VOCs but get saturated fast)
- Pre-filters: Clean monthly, replace every 1–2 years
Don’t cheap out on filters. Use OEM (original equipment manufacturer) replacements. Third-party filters may not seal properly or reduce efficiency.
And if your purifier has a humidifier or UV-C light (some combo units do), clean those monthly too. Mold can grow in the water tank, and UV bulbs lose intensity over time.
Step 7: Monitor Air Quality (Use Tech to Your Advantage)
In 2026, air purifiers aren’t just standalone devices—they’re part of a smarter home ecosystem.
Many models now connect to smart air quality monitors (like Awair, AirVisual, or built-in sensors). These show real-time data on:
- PM2.5 (fine particles)
- PM10 (larger dust)
- VOCs (chemicals from cleaners, furniture)
- CO2 (indicates poor ventilation)
- Temperature and humidity
Use this data to:
- Adjust fan speed manually when pollution spikes
- Identify pollution sources (e.g., high VOCs after cleaning)
- Track improvements over time
For example, I noticed my CO2 levels rise at night—meaning poor ventilation. I added a smart window fan that turns on automatically. Now my purifier works better because it’s not fighting stagnant air.
Also, some purifiers integrate with voice assistants or home automation systems. You can say, “Alexa, start the air purifier,” or have it turn on when your smart doorbell detects someone entering with muddy shoes.
That’s the power of how to correctly use a air purifier in 2026 for best results—it’s not just a gadget, it’s part of a healthier lifestyle.
Pro Tips & Common Mistakes to Avoid
Pro Tip #1: Use multiple purifiers in large homes. One unit can’t circulate air effectively across 1,000+ sq ft. Place one in the bedroom, one in the living room, and one near the kitchen.
Pro Tip #2: Pair your purifier with an exhaust fan in the kitchen and bathroom. This removes moisture and cooking fumes before they spread.
Pro Tip #3: Keep windows and doors closed during high-pollution events (wildfires, pollen season). Open them only when the purifier has had time to clean the air.
Common Mistake #1: Ignoring filter replacement. A clogged filter is worse than no purifier—it restricts airflow and forces the motor to work harder.
Common Mistake #2: Using ionizers in small, poorly ventilated rooms. Ozone buildup can irritate lungs, especially in children or seniors.
Common Mistake #3: Assuming the purifier will eliminate odors instantly. Carbon filters take time to absorb smells. For strong odors (like smoke), run the purifier on high for 1–2 hours before switching to auto.
Common Mistake #4: Placing the purifier on a carpeted floor. Lint and fibers clog the intake. Use a hard surface or a small stand.
And here’s a personal lesson: I once bought a purifier with a “washable HEPA filter.” It was a nightmare. The filter never dried completely, grew mold, and had to be replaced after three washes. Stick to non-washable HEPA filters unless you’re 100% sure it’s designed for it.
Visual guide about how to correctly use a air purifier
Image source: chinaairpurifier.com
FAQs About How to Correctly Use a Air Purifier in 2026 for Best Results
Q: Can I run my air purifier all night?
Absolutely. In fact, it’s ideal. Most purifiers have a “sleep mode” that’s ultra-quiet (under 30 dB). Just make sure it’s not directly facing you—position it so the airflow doesn’t blow in your face.
Q: How often should I replace the filters?
It depends. HEPA filters last 6–12 months; carbon filters, 3–6 months. But if you have pets, smoke, or live in a city with high pollution, replace them every 3–4 months. Check for visible dirt or a musty smell.
Q: Do air purifiers help with allergies?
Yes—especially if they have a true HEPA filter (captures 99.97% of particles 0.3 microns in size). I’ve had fewer sneezing fits since using mine consistently. But pair it with regular vacuuming and dusting for best results.
Q: Can I use an air purifier in the kitchen?
Yes, but place it away from the stove to avoid grease buildup. Run it on high during and after cooking. And use a range hood—purifiers can’t handle heavy smoke or grease.
Q: Do air purifiers use a lot of electricity?
Not really. A typical 50-watt model costs about $6/month to run 24/7. That’s less than a light bulb. Look for Energy Star-rated models for even better efficiency.
Q: Should I leave windows open with the purifier running?
Only when outdoor air quality is good. During high pollution (pollen, wildfires), keep windows closed. The purifier works best in a sealed environment.
Q: Are smart air purifiers worth it?
If you want convenience and data, yes. Being able to check air quality from your phone or have the purifier adjust automatically saves time and improves performance. But a basic model still works great if you’re willing to monitor it manually.
Final Thoughts
Using an air purifier isn’t rocket science—but it’s also not as simple as plugging it in and forgetting it. The real magic comes from how to correctly use a air purifier in 2026 for best results: smart placement, consistent operation, regular maintenance, and leveraging modern tech.
Think of it like a fitness routine. You don’t just buy a treadmill and expect to be healthy. You use it, maintain it, and adjust based on your goals.
Start small. Pick one room—your bedroom, probably. Place the purifier in the center, remove the plastic from the filters, and run it on auto mode. Clean the pre-filter every month. Replace the HEPA filter on schedule.
Within a few weeks, you’ll notice the difference. Fewer allergy symptoms. Fresher-smelling air. Better sleep.
And if you’re ready to level up? Add a smart air quality monitor. Schedule cleaning cycles. Integrate it with your smart home.
Clean air isn’t a luxury. It’s a right. And with the right approach, your purifier can be one of the most valuable tools in your home.
So go ahead—breathe easy. You’ve got this.