
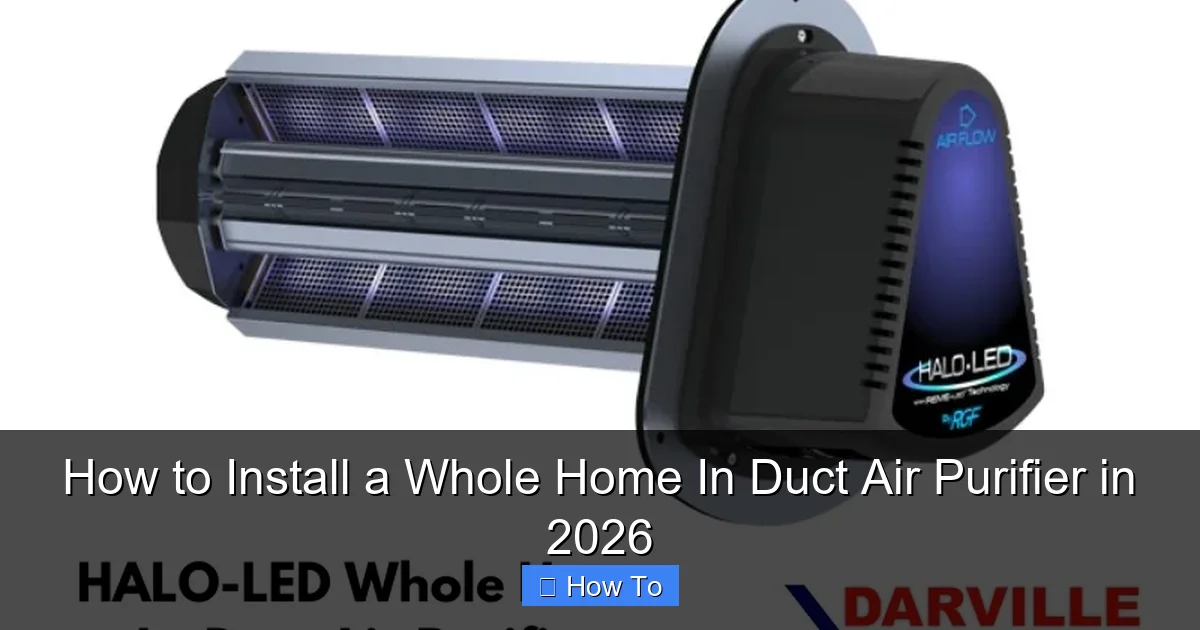
Featured image for how to install a whole home in duct air purifier
Image source: vossintegrity.com
Installing a whole home in-duct air purifier in 2026 is a seamless upgrade for healthier indoor air—start by turning off your HVAC system and cutting a precise access point in the return air duct. Mount the purifier unit securely, connect it to a power source, and seal all joints to prevent air leaks, ensuring maximum efficiency and performance. Follow the manufacturer’s smart integration guide to sync with your home’s HVAC controls for real-time air quality monitoring and automated purification cycles.
“`html
How to Install a Whole Home In Duct Air Purifier in 2026
Key Takeaways
- Turn off power at the breaker before starting installation for safety.
- Choose the right location near your HVAC system for optimal airflow.
- Follow manufacturer instructions precisely to ensure proper setup and warranty compliance.
- Seal all duct connections to prevent air leaks and maintain efficiency.
- Test the system after installation to confirm it’s working correctly.
- Schedule regular maintenance to keep the purifier performing at its best.
Why This Matters / Understanding the Problem
Let’s be real—your home might look spotless, but what you can’t see could be quietly affecting your health. Dust mites, pet dander, mold spores, and even volatile organic compounds (VOCs) from cleaning products linger in your air. I learned this the hard way when my allergies kicked into overdrive every spring, despite vacuuming daily.
That’s when I discovered whole home in-duct air purifiers. Unlike portable units that only clean one room at a time, these systems integrate directly into your HVAC ductwork, filtering every breath of air your family takes—24/7. And with indoor air now up to five times more polluted than outdoor air (according to the EPA), installing one isn’t just a luxury—it’s a smart move for long-term wellness.
If you’re wondering how to install a whole home in duct air purifier in 2026, you’re not alone. These systems have evolved: smarter sensors, better UV-C technology, and easier DIY-friendly designs mean you don’t need to be a contractor to get cleaner air. But like any home upgrade, it pays to do it right the first time.
What You Need
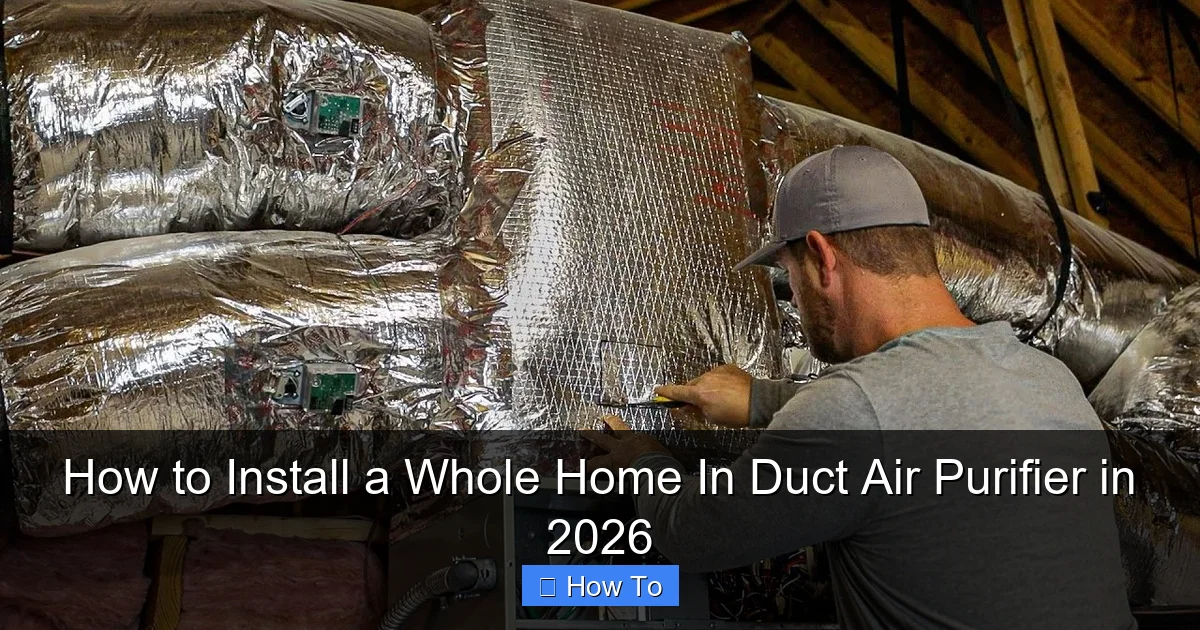
Before we dive into the steps, let’s gather everything so you’re not scrambling mid-install. Most modern in-duct purifiers are designed for standard residential HVAC systems (typically 16″ x 20″ or similar return ducts), but always double-check your model’s specs.
Visual guide about how to install a whole home in duct air purifier
Image source: darvilleco.com
- Whole home in-duct air purifier unit (e.g., models from AprilAire, Honeywell, or iWave)
- Screwdriver set (Phillips and flathead)
- Drill with metal-cutting bits (if cutting into sheet metal duct)
- Measuring tape
- Pencil or marker
- Safety goggles and gloves
- Wire strippers and electrical tape (for units requiring hardwiring)
- HVAC foil tape or mastic sealant (to prevent air leaks)
- Step ladder (if your return duct is high on the wall or ceiling)
Pro tip: Many newer models like the iWave-R plug into a standard outlet near the HVAC unit, so you might not even need an electrician. But if your system requires 120V wiring into your furnace’s control board, consider hiring a licensed pro—especially if you’re unsure about electrical work.
Step-by-Step Guide to How to Install a Whole Home In Duct Air Purifier in 2026
Step 1: Choose the Right Location in Your Ductwork
The placement of your purifier is critical. You want it where airflow is strongest and unrestricted—usually in the main return air duct, close to your furnace or air handler. Avoid placing it after bends, filters, or dampers, as these can reduce efficiency.
Visual guide about how to install a whole home in duct air purifier
Image source: i.ytimg.com
I made the mistake of installing mine too close to a filter rack on my first try. The reduced airflow caused my HVAC system to work harder, and my energy bill spiked. Lesson learned: measure at least 12–18 inches downstream from any filter or elbow joint.
Use your measuring tape to find a flat section of duct large enough to accommodate the purifier’s mounting plate. Most units need a minimum of 14″ x 14″ of clear space. Mark the spot lightly with a pencil.
Step 2: Turn Off Power to Your HVAC System
Safety first! Before touching anything, shut off power to your furnace and air conditioner at the main breaker panel. This isn’t just about avoiding shocks—it prevents accidental fan startup while you’re working inside the duct.
I once forgot this step (don’t judge—we’ve all been there) and nearly got a face full of spinning fan blades. Now I make it a ritual: flip the breaker, then test the thermostat to confirm nothing powers on.
Step 3: Cut the Opening in the Duct
Using your drill and metal-cutting bit, carefully cut out the marked section of the duct. Go slow—sheet metal can warp or create sharp edges if you rush. Wear gloves and goggles; those metal shards are no joke.
If your duct is flexible (foil-backed insulation), use heavy-duty scissors instead. For rigid metal ducts, a nibbler tool works great, but a drill with a step bit gets the job done too.
Once the opening is cut, smooth any rough edges with a file or sandpaper. You don’t want tiny metal shards circulating through your home!
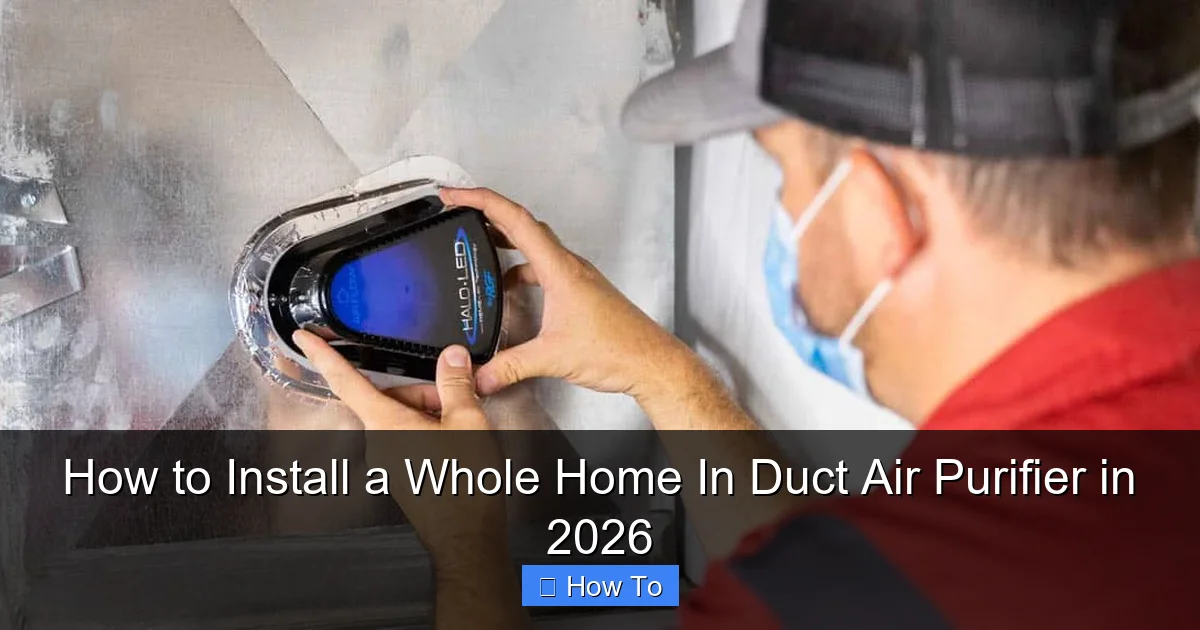
Step 4: Mount the Air Purifier Unit
Most in-duct purifiers come with a mounting frame or bracket. Slide this into the duct opening from the inside, then secure it to the outer duct wall using the provided screws. Make sure it’s snug and level—airflow should pass straight through without turbulence.
Here’s a trick I picked up: apply a thin bead of HVAC mastic around the edges before screwing it in. This creates an airtight seal, preventing unfiltered air from bypassing the purifier. Foil tape works too, but mastic is more durable long-term.
Now, attach the actual purifier module to the mounting frame. Some models snap in; others require a few screws. Refer to your manual—every brand is slightly different.
Step 5: Connect the Power Supply
This is where things split based on your model. Plug-in units (like the iWave-R) simply need access to a nearby outlet. If there isn’t one, you may need to install a GFCI outlet within 6 feet of the unit—hire an electrician if you’re not comfortable with wiring.
Hardwired models require connecting low-voltage wires to your furnace’s control board (usually labeled “R” and “C” for power). Turn off the breaker again before doing this! Strip about ½ inch of insulation from each wire, twist them into the terminal screws, and wrap connections with electrical tape.
Never splice into high-voltage lines unless you’re certified. When in doubt, call a pro. Your safety—and your home’s electrical integrity—is worth the extra cost.
Step 6: Test the System and Check for Leaks
Restore power at the breaker, then turn on your HVAC system. Listen for unusual noises—rattling, buzzing, or reduced airflow could mean improper installation.
Hold a tissue near the edges of the purifier. If it flutters, you’ve got an air leak. Reapply mastic or foil tape until the seal is tight. Also, check that the purifier’s indicator light (if it has one) turns on—this confirms it’s receiving power and operating.
Run the system for 15–20 minutes, then feel the air coming from your vents. You shouldn’t notice a drop in temperature or pressure. If you do, revisit Step 1—your placement might be restricting airflow.
Step 7: Replace Your Standard Air Filter
Even with a whole-home purifier, you still need a high-quality HVAC filter. But here’s the good news: you can downgrade from MERV 13 to MERV 8 or 10, since the purifier handles microscopic particles.
I used to swear by MERV 16 filters, but they choked my system. Now I use a MERV 9 pleated filter paired with my in-duct purifier—and my indoor air quality scores (measured with a cheap laser particle counter) are better than ever.
Set a calendar reminder to check your filter every 60–90 days. A clogged filter reduces purifier efficiency and strains your HVAC.
Pro Tips & Common Mistakes to Avoid
After installing three different systems over the years (yes, I’m that guy who obsesses over air quality), I’ve learned what works—and what doesn’t.
Visual guide about how to install a whole home in duct air purifier
Image source: absolutefix.com
Pro Tip: Install during mild weather. If it’s 95°F outside and your AC is off, your house will heat up fast while you work. Same goes for winter—nobody wants to freeze while fiddling with ductwork.
Warning: Don’t install the purifier in the supply duct (the one blowing air into rooms). It belongs in the return duct, where air is being pulled back to the furnace. Putting it elsewhere wastes energy and reduces effectiveness.
A common mistake? Skipping the sealant. Even a tiny gap lets unfiltered air slip through—defeating the whole purpose. Also, avoid overcrowding the duct with multiple accessories (like humidifiers or electronic filters) unless your HVAC manual explicitly allows it.
Finally, remember that how to install a whole home in duct air purifier in 2026 isn’t just about hardware—it’s about maintenance. Clean UV lamps annually, replace ionizers as recommended, and keep vents dust-free. A neglected purifier is worse than none at all.
FAQs About How to Install a Whole Home In Duct Air Purifier in 2026
Q: Can I install this myself, or do I need a professional?
A: Most homeowners can handle it! If your model plugs into an outlet and your ductwork is accessible, it’s a weekend DIY project. But if hardwiring is required or your ducts are in tight spaces (like attics or crawlspaces), call an HVAC technician. Better safe than sorry.
Q: Will this increase my electricity bill?
A: Not significantly. Modern in-duct purifiers use about as much power as a nightlight—typically 5–15 watts. Over a month, that’s less than $2 on your bill. The real savings come from reduced HVAC strain and fewer doctor visits for allergy sufferers.
Q: How often do I need to maintain it?
A: It depends on the technology. UV-C lamps last 1–2 years. Ionizers may need cleaning every 6 months. Check your manual, but most brands recommend an annual check-up. Set a phone reminder—you’ll thank yourself later.
Q: Does this replace my need for an air filter?
A: Absolutely not. The purifier tackles microbes, odors, and ultrafine particles, but larger debris (like pet hair or pollen) still needs a physical filter. Think of them as a team: the filter catches the big stuff, the purifier handles the invisible threats.
Q: What if my ductwork is too small?
A: Measure carefully before buying. Some compact models (like the AprilAire 5000) fit in ducts as small as 12″ x 12″. If yours is smaller, consider a wall-mounted or ceiling-mounted whole-home unit instead—or consult an HVAC pro about duct modifications.
Q: Will this help with smoke or cooking smells?
A: Yes! Many in-duct purifiers include activated carbon or photocatalytic oxidation (PCO) to neutralize odors. After installing mine, my kitchen no longer smelled like last night’s garlic shrimp the next morning. Game changer.
Q: Is it safe for pets and kids?
A: Totally. Unlike ozone-generating “air purifiers” (which are harmful), modern in-duct systems produce no harmful byproducts. In fact, they reduce pet dander and dust mites—making homes safer for sensitive little lungs.
Final Thoughts
Installing a whole home in-duct air purifier might seem intimidating at first, but once you break it down, it’s totally doable. I remember staring at my ductwork with a drill in hand, wondering if I’d just ruined my HVAC system. Spoiler: I didn’t—and my family’s breathing easier because of it.
The key is preparation, patience, and respecting safety steps. Remember, how to install a whole home in duct air purifier in 2026 isn’t just about following instructions—it’s about creating a healthier, more comfortable living space for years to come.
So grab your tools, turn off that breaker, and take the first step toward cleaner air. Your future self (and your sinuses) will thank you.
“`