Featured image for how to install lennox hepa air purifier
Image source: serviceedgeair.com
Installing your Lennox HEPA Air Purifier in 2026 is a quick, DIY-friendly process that ensures cleaner indoor air in under an hour. Follow the step-by-step guide—mount the unit, connect to your HVAC system, and activate the filter—for optimal performance and long-term air quality benefits.
“`html
How to Install Lennox HEPA Air Purifier in 2026: Easy Guide
Key Takeaways
- Turn off HVAC power before starting installation for safety.
- Choose correct filter size to match your Lennox model specifications.
- Install pre-filter first to extend HEPA filter lifespan effectively.
- Seal all gaps tightly to prevent air bypass and maximize efficiency.
- Reset filter indicator after installation to track maintenance schedule.
- Test system airflow post-install to confirm proper operation.
Why This Matters / Understanding the Problem
Let’s be honest—indoor air quality isn’t something we think about until it’s too late. I remember sneezing nonstop last winter, even though I kept my windows closed and vacuumed regularly. Turns out, my HVAC system was circulating dust, pet dander, and who-knows-what through every room. That’s when I decided to install a Lennox HEPA air purifier. And honestly? It changed everything.
If you’re like me—someone who wants cleaner air without turning their home into a sterile lab—this guide is for you. Installing a how to install Lennox HEPA air purifier in 2026 easy guide might sound intimidating, but it’s actually one of the simplest upgrades you can make to your HVAC system. These units trap up to 99.97% of airborne particles as small as 0.3 microns, including pollen, mold spores, and even some bacteria.
But here’s the catch: if you don’t install it correctly, you won’t get those benefits. Poor placement, loose connections, or skipping maintenance steps can turn your high-tech purifier into a fancy paperweight. That’s why taking the time to follow a proper how to install Lennox HEPA air purifier in 2026 easy guide matters—not just for performance, but for your health and peace of mind.
What You Need
Before we dive in, let’s make sure you have everything on hand. Trust me, nothing’s worse than getting halfway through and realizing you’re missing a key tool.
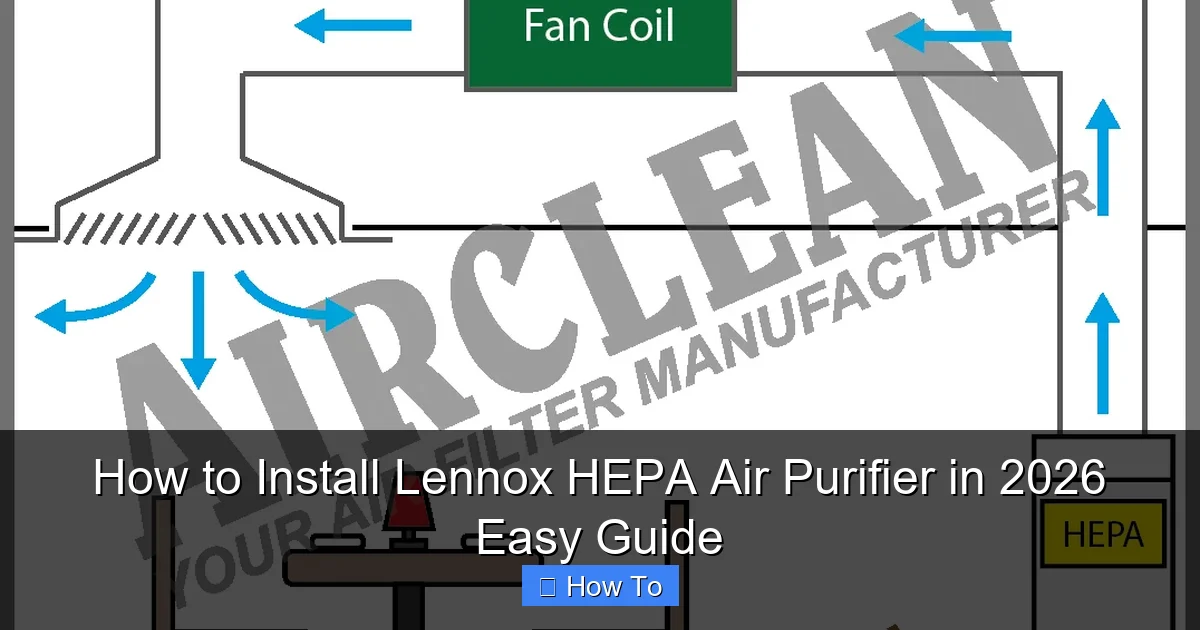
Visual guide about how to install lennox hepa air purifier
Image source: airclean.co.uk
- Lennox HEPA Air Purifier unit (models like the Lennox PureAir™ S or compatible HEPA systems)
- Screwdriver set (Phillips and flathead)
- Drill with 1/4-inch drill bit (for mounting brackets)
- Measuring tape
- Level (a small bubble level works fine)
- HVAC-compatible foil tape or mastic sealant
- Gloves and safety glasses (safety first!)
- Owner’s manual (yes, read it—it has model-specific tips)
- Optional: helper (some units are heavier than they look)
Most Lennox HEPA purifiers are designed to integrate directly into your existing ductwork, usually near the air handler or return duct. You don’t need to be an HVAC pro, but basic DIY skills help. If your system is older or you’re unsure about electrical connections, consider consulting a technician—but for most modern setups, this is totally doable yourself.
Step-by-Step Guide to How to Install Lennox HEPA Air Purifier in 2026 Easy Guide
Step 1: Turn Off Power and Locate the Installation Spot
First things first—safety. Head to your home’s main electrical panel and turn off power to your furnace or air handler. Even though the purifier itself doesn’t usually require separate wiring, you’ll be working near live components, so better safe than sorry.

Visual guide about how to install lennox hepa air purifier
Image source: blogs.cdc.gov
Next, find the best spot for your Lennox HEPA unit. The ideal location is on the return air duct, close to the air handler. Why? Because that’s where air gets pulled in before being filtered and circulated. Avoid placing it after the furnace or near supply vents—you want the purifier to catch contaminants before they spread.
Pro tip: Measure the duct size (most are 14″x20″ or similar) and check your purifier’s specs. Lennox units are typically built to fit standard ducts, but double-checking saves headaches later.
Step 2: Mark and Cut the Duct Opening
Now it’s time to make space. Using your measuring tape, mark where the purifier will sit. Most Lennox HEPA models come with a template in the box—use it! If not, trace the unit’s footprint directly onto the duct.
Put on your gloves and safety glasses. With a sharp utility knife or metal-cutting saw, carefully cut along the marked lines. Take your time—jagged edges can cause air leaks. Once the opening is cut, smooth any rough spots with a file or sandpaper.
⚠️ Warning: Don’t cut too big! A snug fit ensures proper sealing. If the hole is too large, unfiltered air can bypass the HEPA filter, reducing efficiency.
Step 3: Install the Mounting Bracket
Most Lennox HEPA purifiers include a metal mounting bracket that screws into the duct. Position it over the cut opening, making sure it’s level (use your bubble level here). Mark the screw holes with a pencil.
Drill pilot holes, then secure the bracket with screws. Make sure it’s tight—this bracket supports the entire unit, which can weigh 30–50 pounds depending on the model.
If your duct is flexible (like foil-backed insulation), reinforce the area with a piece of plywood or metal backing before drilling. Flexible ducts can tear under pressure.
Step 4: Insert the HEPA Filter and UV Lamp (If Applicable)
Before mounting the main unit, install the internal components. Open the purifier’s access panel (usually held by latches or screws) and slide in the HEPA filter. It should fit snugly—listen for a soft click or check the alignment arrows.
Some Lennox models also include a UV-C lamp for germicidal protection. If yours has one, gently insert it into the designated slot. Never touch the glass part of the UV lamp with bare hands—oils from your skin can reduce its lifespan.
Close the access panel securely. A loose panel can cause rattling noises or allow air to leak around the filter.
Step 5: Mount the Purifier Unit
With the bracket in place and filter installed, it’s time to mount the main housing. Carefully lift the unit (ask for help if needed) and slide it onto the bracket. Most models use a hook-and-slot system—align the hooks, then lower the unit until it locks in.
Double-check that it’s level and flush against the duct. Gaps mean air leaks, which defeat the purpose of a HEPA system.
Step 6: Seal All Connections
This step is critical—and often overlooked. Even tiny gaps can let unfiltered air slip through. Use HVAC foil tape or mastic sealant to cover every seam: between the duct and bracket, around the access panel, and along any joints.
Press the tape firmly with your fingers or a putty knife to ensure adhesion. Don’t skimp here! I learned this the hard way—my first install had a small gap, and my energy bills went up because the system worked harder to maintain pressure.
Step 7: Restore Power and Test the System
Once everything is sealed, turn the power back on at the breaker. Set your thermostat to “Fan On” (not just “Auto”) so air flows continuously through the purifier.
Listen for unusual noises—rattling, whistling, or grinding. If you hear anything odd, shut off the power and recheck your installation. Most issues at this stage are due to loose panels or misaligned filters.
Let it run for 15–20 minutes. You should feel a noticeable difference in air freshness, especially if you have allergies or pets.
Pro Tips & Common Mistakes to Avoid
After installing three different air purifiers over the years (including two Lennox units), I’ve picked up a few golden rules:
Visual guide about how to install lennox hepa air purifier
Image source: i02.hsncdn.com
Pro Tip: Replace the HEPA filter every 6–12 months, even if it looks clean. Over time, trapped particles reduce airflow and strain your HVAC system. Set a calendar reminder—you’ll thank yourself later.
Common Mistake: Installing too far from the air handler. The farther the purifier is from the source of airflow, the less effective it becomes. Keep it within 3–5 feet of the return duct if possible.
Pro Tip: Use a smart thermostat or air quality monitor to track performance. Some Lennox models integrate with apps that alert you when it’s time to change the filter.
Common Mistake: Skipping the sealant. I used to think tape was enough—until I saw dust buildup around the edges. Mastic sealant creates an airtight bond that tape alone can’t match.
Pro Tip: If you’re unsure about electrical compatibility (some older homes have 110V vs. 220V systems), call Lennox support or a local HVAC pro. Better to ask than risk damaging the unit.
FAQs About How to Install Lennox HEPA Air Purifier in 2026 Easy Guide
Q: Can I install a Lennox HEPA purifier myself, or do I need a professional?
A: Absolutely! Most homeowners can handle this with basic tools. The how to install Lennox HEPA air purifier in 2026 easy guide is designed for DIYers. Just follow the steps carefully and don’t rush. If you hit a snag—like incompatible duct size—call a technician.
Q: Will this work with my existing furnace?
A: Yes, as long as your system has a standard return duct (which 95% of homes do). Lennox HEPA units are compatible with most forced-air HVAC systems, including gas, electric, and heat pumps.
Q: How often do I need to replace the filter?
A: Every 6–12 months, depending on usage. Homes with pets, smokers, or allergy sufferers may need replacements closer to every 6 months. Check the filter monthly—if it’s gray or clogged, swap it out.
Q: Does the UV lamp need replacement?
A: Yes, typically every 1–2 years. UV-C lamps lose effectiveness over time, even if they still glow. Your unit may have a indicator light—replace it when prompted.
Q: Can I install it in a basement or attic?
A: Only if that’s where your air handler is located. The purifier must be installed in the main airflow path. Avoid garages or unconditioned spaces—moisture and extreme temps can damage the unit.
Q: Will this increase my energy bill?
A: Slightly—HEPA filters create more resistance than standard filters, so your fan works a bit harder. But modern Lennox units are engineered for minimal energy impact. Plus, cleaner air means your system runs more efficiently long-term.
Q: What if my duct is too small?
A: Lennox offers adapter kits for non-standard ducts. Check their website or contact customer service. Never force the unit—it can crack or warp.
Final Thoughts
Installing a Lennox HEPA air purifier isn’t just about ticking a box on your home improvement list—it’s about breathing easier, sleeping better, and protecting your family from invisible pollutants. And thanks to this how to install Lennox HEPA air purifier in 2026 easy guide, you don’t need a degree in engineering to get it right.
Take your time, follow each step, and don’t skip the sealing part (I can’t stress that enough!). Within an hour, you’ll have a system that quietly works behind the scenes to keep your air fresh and your lungs happy.
Ready to start? Grab your tools, turn off the power, and give your home the upgrade it deserves. Your future self—and your sinuses—will thank you.
“`